Open-Source Classroom Management With iTALC On Ubuntu 7.10
Version 1.0
Author: Oliver Meyer <o [dot] meyer [at] projektfarm [dot] de>
This document describes how to set up iTALC on Ubuntu 7.10. iTALC is an open-source classroom management solution that lets you view and control other computers in your network. It lets you remote-control other computers, show the teacher's screen on all students' computers, lock workstations, send text-messages to students, power on/off and reboot remote computers, etc.
Taken from the manual: "iTALC is a didactic software program, which was developed especially for computerwork at schools.
Nevertheless it can be used in other learning environments. iTALC provides the opportunity to monitor and influence trainee activities and consequently supports the work with modern technique in the classroom. For example you are able to see the content of the trainee's screens on your own screen. If one of the trainees needs assistance, you can access the trainee's desktop and engage supportively. The trainee sees all of your actions and is so able to learn new procedures.
If you have to make a new circumstance understandable for the trainee, you can change to the demo-mode. The trainee has also the possibility to demonstrate something. For this action it is necessary to click on his desktop screen to bypass his screen to the screens of other trainees. iTALC has other functions, too. Like locking the trainee screens, so that they are not able to work any further and are constrained to give you attention."
This howto is a practical guide without any warranty - it doesn't cover the theoretical backgrounds. There are many ways to set up such a system - this is the way I chose.
1 Preliminary Note
I used two Ubuntu 7.10 systems for this howto. The first system is the iTALC master which can observe and control the second system, the iTALC client. Of course you can use more than one master system and much more clients. Both systems were configured as follows.
1.1 System 1 (Master)
Hostname: [email protected]
IP: 192.168.0.14
1.2 System 2 (Client)
Hostname: [email protected]
IP: 192.168.0.15
2 Install iTALC
2.1 Prepare Both Systems
Install the following packages with the synaptic package manager.
- gcc
- g++
- libqt4-dev
- xorg-dev
The following package is only needed on System 2 (client).
- ssh
2.2 Get And Install iTALC On Both Systems
Take a look at http://sourceforge.net/project/showfiles.php?group_id=132465&package_id=145556 to find out which is the latest version. When I was writing this howto it was version 1.07.
cd /tmp/
wget http://switch.dl.sourceforge.net/sourceforge/italc/italc-1.0.7.tar.bz2
tar xvfj italc-1.0.7.tar.bz2
cd italc-1.0.7/
./configure
make
sudo make install
3 GDM Configuration On Both Systems
In order to make sure that iTALC is already running when the login screen appears we have to adjust the GDM configuration.
sudo gedit /etc/gdm/Init/Default /etc/gdm/PreSession/Default
Add the following to lines at the top of both files (below the block of comments!):
killall ica
/usr/local/bin/ica &
4 Authentication Keys
4.1 System 1 (Master)
Now we need to create a set of authentication keys on system 1 (master).
sudo mkdir -p /etc/italc/keys/public/teacher/ /etc/italc/keys/private/teacher/
sudo ica -role teacher -createkeypair
The command above has created a private key and a public key. For security reasons the private key should only be readable for users that shall have access to iTALC - so we create a group for the trusted users and add them to this group.
sudo addgroup italc
sudo adduser %trusted_user% italc
sudo chgrp -R italc /etc/italc/keys/private/
Now we can copy the public key to the client - I chose scp for this.
sudo scp -p /etc/italc/keys/public/teacher/key %user%@192.168.0.15:/tmp/
Note: The root account on Ubuntu is disabled by default - so we have to use another user on the client.
4.2 System 2 (Client)
On the client side we have to create the path for the public key ...
sudo mkdir -p /etc/italc/keys/public/teacher/
... before we move it to this directory.
sudo mv /tmp/key /etc/italc/keys/public/teacher/
After that, to make sure that the user that we used to copy the key is not able to modify it, we have to change the ownership back to root.
sudo chown root:root /etc/italc/keys/public/teacher/key
Afterwards log out and in again on the master and the client. After you logged in again you'll see the iTALC icon in the upper Gnome panel.
![]()
5 Gnome Menu On System 1 (Master)
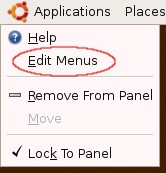
We create a launcher for iTALK - so you don't need to open a terminal to start it. Right click on the Gnome menu and select "Edit Menus".
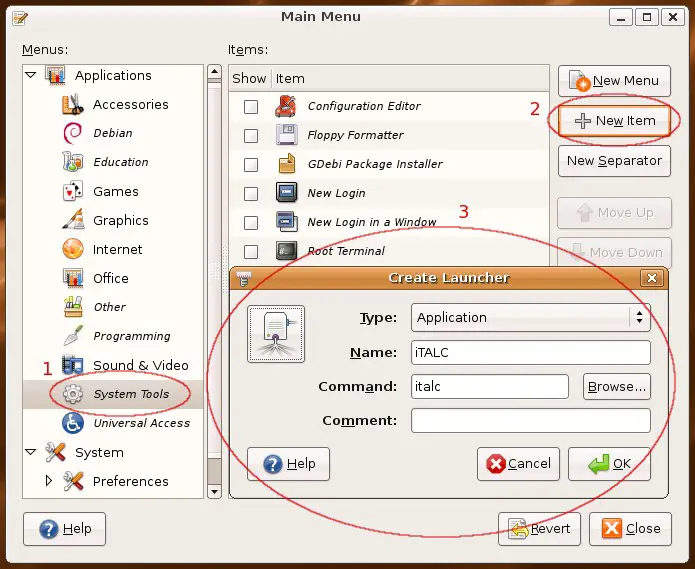
Click on a desired menu on the left side where you want to create the launcher (I chose "System Tools"). Afterwards click on "New Item" on the right side to create a new launcher. Set the launcher properties as follows:
Type: Application
Name: iTALC
Command: italc
The proper icon will be selected automatically - additionally insert a comment if you want.