How To Install Django On Mandriva 2008.1 (Apache2/mod_python)
Version 1.0
Author: Falko Timme
This tutorial explains how to install Django on a Mandriva 2008.1 server. Django is a web framework that allows to develop Python web applications quickly with as much automation as possible. I will use it with Apache2 and mod_python in this guide.
This howto is meant as a practical guide; it does not cover the theoretical backgrounds. They are treated in a lot of other documents in the web.
This document comes without warranty of any kind! I want to say that this is not the only way of setting up such a system. There are many ways of achieving this goal but this is the way I take. I do not issue any guarantee that this will work for you!
1 Install MySQL
Before we install any packages, we must enable the main, main_updates, contrib, and contrib_updates repositories. Go to http://easyurpmi.zarb.org/ - it should give you the commands you need to run to enable these repositories. In my case, I ran
urpmi.addmedia contrib ftp://distrib-coffee.ipsl.jussieu.fr/pub/linux/MandrivaLinux/official/2008.1/i586/media/contrib/release with media_info/hdlist.cz
urpmi.addmedia --update contrib_updates ftp://distrib-coffee.ipsl.jussieu.fr/pub/linux/MandrivaLinux/official/2008.1/i586/media/contrib/updates with media_info/hdlist.cz
urpmi.addmedia main ftp://distrib-coffee.ipsl.jussieu.fr/pub/linux/MandrivaLinux/official/2008.1/i586/media/main/release with media_info/hdlist.cz
urpmi.addmedia --update main_updates ftp://distrib-coffee.ipsl.jussieu.fr/pub/linux/MandrivaLinux/official/2008.1/i586/media/main/updates with media_info/hdlist.cz
Django can use multiple database backends, e.g. PostgreSQL, MySQL, SQLite, etc. If you want to use MySQL, you can install it as follows:
urpmi MySQL MySQL-client
By default, networking is not enabled in Mandriva 2008.1's MySQL package. We can change this by commenting out the line skip-networking in /etc/my.cnf:
vi /etc/my.cnf
[...] # Don't listen on a TCP/IP port at all. This can be a security enhancement, # if all processes that need to connect to mysqld run on the same host. # All interaction with mysqld must be made via Unix sockets or named pipes. # Note that using this option without enabling named pipes on Windows # (via the "enable-named-pipe" option) will render mysqld useless! # #skip-networking [...] |
Afterwards, we create the system startup links for MySQL...
chkconfig mysqld on
... and start it:
/etc/init.d/mysqld start
Now check that networking is enabled. Run
netstat -tap | grep mysql
The output should look like this:
[root@server1 ~]# netstat -tap | grep mysql
tcp        0      0 *:mysql-im                  *:*                         LISTEN      3746/mysqlmanager
tcp        0      0 *:mysql                     *:*                         LISTEN      3754/mysqld
[root@server1 ~]#
Run
mysqladmin -u root password yourrootsqlpassword
mysqladmin -h server1.example.com -u root password yourrootsqlpassword
to set a password for the user root (otherwise anybody can access your MySQL database!).
2 Install Apache And mod_python
If Apache2 and mod_python aren't already installed on your system, you can install them as follows:
urpmi apache-mod_python
(This will also install Apache2 if it isn't already installed.)
3 Install Django
In order to install Django and the Python MySQL bindings, we run:
urpmi python-django python-mysql
4 Configure Apache
Before we configure Apache, we must create a Django project (e.g. called mysite) (see http://www.djangoproject.com/documentation/tutorial01/). For security reasons I create that project outside my document root (I'm using the default Mandriva document root /var/www/html here) (e.g. in /home/mycode):
mkdir /home/mycode
cd /home/mycode
/usr/bin/django-admin.py startproject mysite
This will create the directory /home/mycode/mysite with some Python files in it.
Now with the project mysite created, we can configure Apache. I create a backup copy of the original /etc/httpd/modules.d/16_mod_python.conf file and create a new one as follows:
cp /etc/httpd/modules.d/16_mod_python.conf /etc/httpd/modules.d/16_mod_python.conf_orig
cat /dev/null > /etc/httpd/modules.d/16_mod_python.conf
vi /etc/httpd/modules.d/16_mod_python.conf
LoadModule python_module        extramodules/mod_python.so

<Location "/mysite">
    SetHandler python-program
    PythonHandler django.core.handlers.modpython
    SetEnv DJANGO_SETTINGS_MODULE mysite.settings
    PythonDebug On
    PythonPath "['/home/mycode'] + sys.path"
</Location>
|
(This configuration is valid for the default Mandriva vhost in /var/www/html - if you have already defined other vhosts where you'd like to use Django, please place the <Location ...>...</Location> section in the appropriate vhost configuration, but leave the LoadModule line in /etc/httpd/modules.d/16_mod_python.conf.)
The path in the first line (<Location "/mysite">) refers to the URL - meaning this configuration will be used if you use /mysite in the URL (e.g. http://www.example.com/mysite). You can change this to your likings. Please adjust the other values (SetEnv DJANGO_SETTINGS_MODULE mysite.settings and PythonPath "['/home/mycode'] + sys.path") to the name of your project and the path where it is located.
Restart Apache afterwards:
/etc/init.d/httpd restart
Now you can access http://www.example.com/mysite in a browser. If everything went well, you should see something like this:
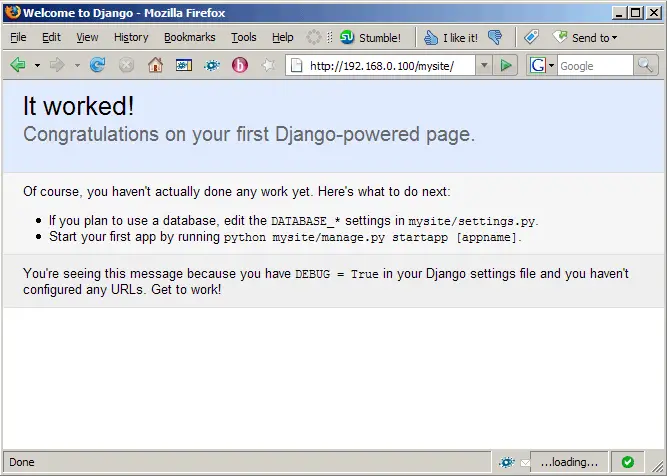
This means Django has been successfully installed, and you can now use it to develop your Python web applications (please refer to http://www.djangoproject.com/documentation/ to learn how to develop web applications with Django).
5 Connect To A MySQL Database From A Django Project
If you want to use a MySQL database in your Django project, you should first create that database (e.g. mysite) and a database user (e.g. mysiteadmin) for that database:
mysql -u root -p
CREATE DATABASE mysite;
GRANT ALL ON mysite.* TO 'mysiteadmin'@'localhost' IDENTIFIED BY 'mysiteadmin_password';
GRANT ALL ON mysite.* TO 'mysiteadmin'@'localhost.localdomain' IDENTIFIED BY 'mysiteadmin_password';
FLUSH PRIVILEGES;
quit;
Then open the settings.py file in the project folder (e.g. /home/mycode/mysite) and modify the database settings, e.g. as follows:
vi /home/mycode/mysite/settings.py
[...] DATABASE_ENGINE = 'mysql' # 'postgresql_psycopg2', 'postgresql', 'mysql', 'sqlite3' or 'ado_mssql'. DATABASE_NAME = 'mysite' # Or path to database file if using sqlite3. DATABASE_USER = 'mysiteadmin' # Not used with sqlite3. DATABASE_PASSWORD = 'mysiteadmin_password' # Not used with sqlite3. DATABASE_HOST = '' # Set to empty string for localhost. Not used with sqlite3. DATABASE_PORT = '' # Set to empty string for default. Not used with sqlite3. [...] |
6 Links
- Django: http://www.djangoproject.com
- Python: http://www.python.org
- Mandriva: http://www.mandriva.com

