This tutorial exists for these OS versions
- Ubuntu 16.04 (Xenial Xerus)
- Ubuntu 15.10 (Wily Werewolf)
- Ubuntu 15.04 (Vivid Vervet)
- Ubuntu 12.10 (Quantal Quetzal)
- Ubuntu 11.10 (Oneiric Ocelot)
- Ubuntu 11.04 (Natty Narwhal)
On this page
Setting Up ProFTPd + TLS On Ubuntu 9.10 (Karmic Koala)
Version 1.0
Author: Falko Timme  Follow me on Twitter
FTP is a very insecure protocol because all passwords and all data are transferred in clear text. By using TLS, the whole communication can be encrypted, thus making FTP much more secure. This article explains how to set up ProFTPd with TLS on an Ubuntu 9.10 server.
I do not issue any guarantee that this will work for you!
1 Preliminary Note
In this tutorial I use the hostname server1.example.com with the IP address 192.168.0.100. These settings might differ for you, so you have to replace them where appropriate.
Because we must run all the steps from this tutorial with root privileges, we can either prepend all commands in this tutorial with the string sudo, or we become root right now by typing
sudo su
2 Installing ProFTPd And OpenSSL
OpenSSL is needed by TLS; to install ProFTPd and OpenSSL, we simply run:
aptitude install proftpd openssl
You will be asked a question:
Run proftpd: <-- standalone
For security reasons you can add the following lines to /etc/proftpd/proftpd.conf (thanks to Reinaldo Carvalho; more information can be found here: http://proftpd.org/localsite/Userguide/linked/userguide.html):
vi /etc/proftpd/proftpd.conf
[...] DefaultRoot ~ IdentLookups off ServerIdent on "FTP Server ready." [...] |
3 Creating The SSL Certificate For TLS
In order to use TLS, we must create an SSL certificate. I create it in /etc/proftpd/ssl, therefore I create that directory first:
mkdir /etc/proftpd/ssl
Afterwards, we can generate the SSL certificate as follows:
openssl req -new -x509 -days 365 -nodes -out /etc/proftpd/ssl/proftpd.cert.pem -keyout /etc/proftpd/ssl/proftpd.key.pem
Country Name (2 letter code) [AU]: <-- Enter your Country Name (e.g., "DE").
State or Province Name (full name) [Some-State]: <-- Enter your State or Province Name.
Locality Name (eg, city) []: <-- Enter your City.
Organization Name (eg, company) [Internet Widgits Pty Ltd]: <-- Enter your Organization Name (e.g., the name of your company).
Organizational Unit Name (eg, section) []: <-- Enter your Organizational Unit Name (e.g. "IT Department").
Common Name (eg, YOUR name) []: <-- Enter the Fully Qualified Domain Name of the system (e.g. "server1.example.com").
Email Address []: <-- Enter your Email Address.
4 Enabling TLS In ProFTPd
In order to enable TLS in ProFTPd, open /etc/proftpd/proftpd.conf...
vi /etc/proftpd/proftpd.conf
... and uncomment the Include /etc/proftpd/tls.conf line:
[...] # # This is used for FTPS connections # Include /etc/proftpd/tls.conf [...] |
Then open /etc/proftpd/tls.conf and make it look as follows:
vi /etc/proftpd/tls.conf
<IfModule mod_tls.c> TLSEngine on TLSLog /var/log/proftpd/tls.log TLSProtocol SSLv23 TLSOptions NoCertRequest TLSRSACertificateFile /etc/proftpd/ssl/proftpd.cert.pem TLSRSACertificateKeyFile /etc/proftpd/ssl/proftpd.key.pem TLSVerifyClient off TLSRequired on </IfModule> |
If you use TLSRequired on, then only TLS connections are allowed (this locks out any users with old FTP clients that don't have TLS support); by commenting out that line or using TLSRequired off both TLS and non-TLS connections are allowed, depending on what the FTP client supports.
Restart ProFTPd afterwards:
/etc/init.d/proftpd restart
That's it. You can now try to connect using your FTP client; however, you should configure your FTP client to use TLS (this is a must if you use TLSRequired on) - see the next chapter how to do this with FileZilla.
If you're having problems with TLS, you can take a look at the TLS log file /var/log/proftpd/tls.log.
5 Configuring FileZilla For TLS
In order to use FTP with TLS, you need an FTP client that supports TLS, such as FileZilla.
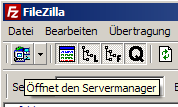
In FileZilla, open the Server Manager:
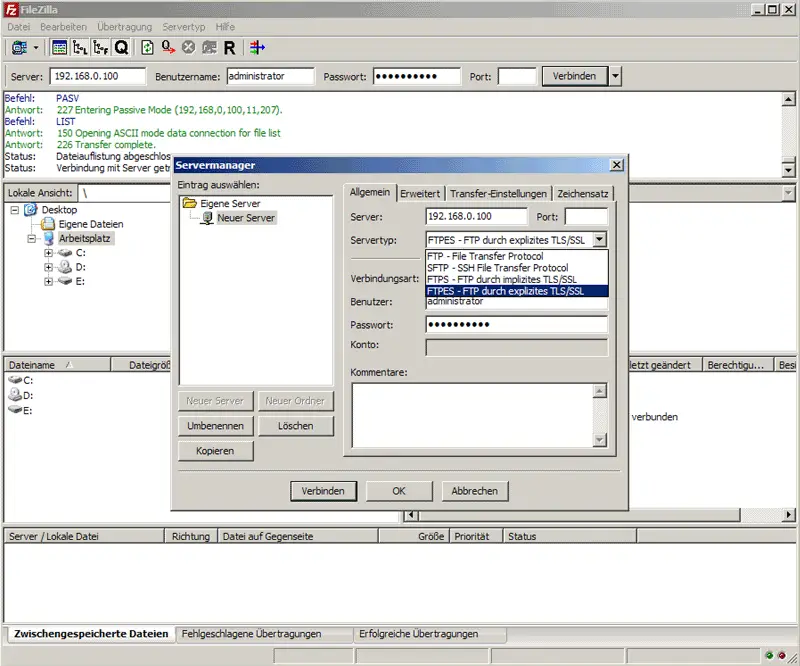
Select the server that uses ProFTPd with TLS; in the Server Type drop-down menu, select FTPES instead of normal FTP:
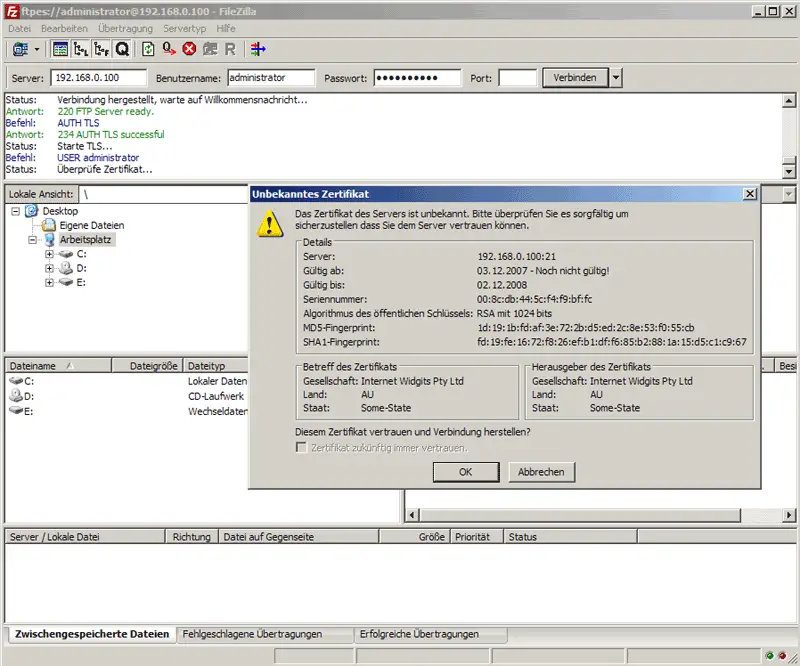
Now you can connect to the server. If you do this for the first time, you must accept the server's new SSL certificate:
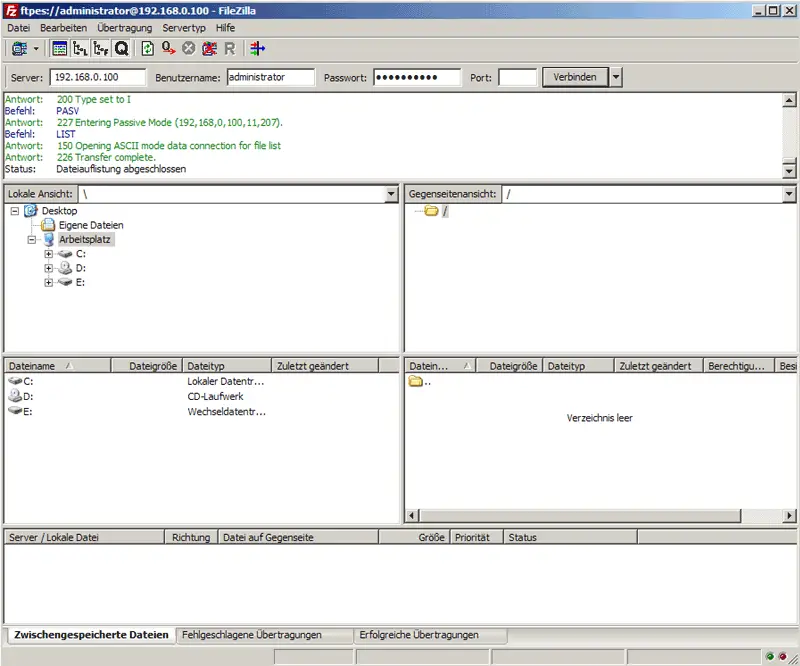
If everything goes well, you should now be logged in on the server:
6 Links
- ProFTPd: http://www.proftpd.org/
- FileZilla: http://filezilla-project.org/
- Ubuntu: http://www.ubuntu.com/

