This tutorial exists for these OS versions
On this page
OpenSUSE 12.1 Samba Standalone Server With tdbsam Backend
Version 1.0
Author: Falko Timme  Follow me on Twitter
This tutorial explains the installation of a Samba fileserver on OpenSUSE 12.1 and how to configure it to share files over the SMB protocol as well as how to add users. Samba is configured as a standalone server, not as a domain controller. In the resulting setup, every user has his own home directory accessible via the SMB protocol and all users have a shared directory with read-/write access.
I do not issue any guarantee that this will work for you!
1 Preliminary Note
I'm using an OpenSUSE 12.1 system here with the hostname server1.example.com and the IP address 192.168.0.100.
2 Installing Samba
We need to install Samba in this chapter, but it conflicts with the package patterns-openSUSE-minimal_base-conflicts. Therefore we must uninstall that package first. To do so, start YaST:
yast2
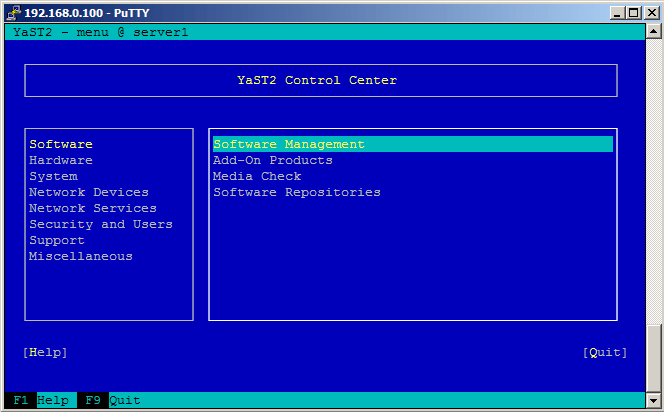
In YaST, go to Software > Software Management:
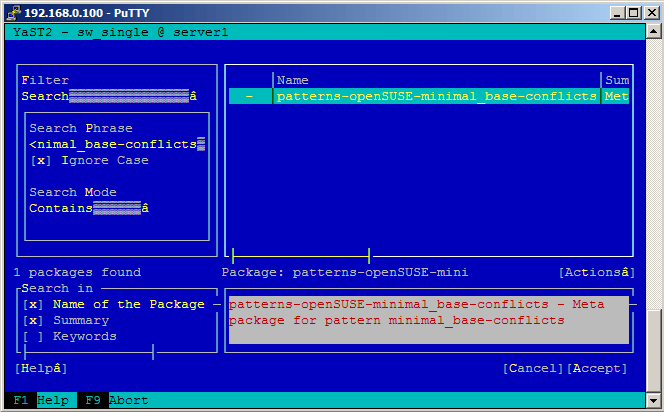
Type patterns-openSUSE-minimal_base-conflicts in the Search field and press ENTER. The package should be listed as installed (i) in the main window. Mark the package and press the ENTER key until there's a minus (-) sign in front of the package (the minus stands for uninstall), then hit [Accept]:
Leave YaST afterwards.
Now install the Samba packages:
yast -i cups-libs samba
Edit the smb.conf file:
vi /etc/samba/smb.conf
Make sure you have the following lines in the [global] section:
[...]
        security = user
        passdb backend = tdbsam
[...]
|
This enables Linux system users to log in to the Samba server.
(If you get the message You do not have a valid vim binary package installed. Please install either "vim", "vim-enhanced" or "gvim"., please run
yast2 -i vim
to install vi and try again. )
Then create the system startup links for Samba and start it:
systemctl enable smb.service
systemctl start smb.service
3 Adding Samba Shares
Now I will add a share that is accessible by all users.
Create the directory for sharing the files and change the group to the users group:
mkdir -p /home/shares/allusers
chown -R root:users /home/shares/allusers/
chmod -R ug+rwx,o+rx-w /home/shares/allusers/
At the end of the file /etc/samba/smb.conf add the following lines:
vi /etc/samba/smb.conf
[...] [allusers] comment = All Users path = /home/shares/allusers valid users = @users force group = users create mask = 0660 directory mask = 0771 writable = yes |
If you want all users to be able to read and write to their home directories via Samba, add the following lines to /etc/samba/smb.conf (make sure you comment out or remove the other [homes] section in the smb.conf file!):
[...] [homes] comment = Home Directories browseable = no valid users = %S writable = yes create mask = 0700 directory mask = 0700 |
Now we restart Samba:
systemctl restart smb.service
4 Adding And Managing Users
In this example, I will add a user named tom. You can add as many users as you need in the same way, just replace the username tom with the desired username in the commands.
useradd tom -m -G users
Set a password for tom in the Linux system user database. If the user tom should not be able to log in to the Linux system, skip this step.
passwd tom
-> Enter the password for the new user.
Now add the user to the Samba user database:
smbpasswd -a tom
-> Enter the password for the new user.
Now you should be able to log in from your Windows workstation with the file explorer (address is \\192.168.0.100 or \\192.168.0.100\tom for tom's home directory) using the username tom and the chosen password and store files on the Linux server either in tom's home directory or in the public shared directory.
5 Links
- Samba: http://www.samba.org/
- OpenSUSE: http://www.opensuse.org/

