
Fedora 18 is a great GNU/Linux distribution, that initially needs some special configuration to fully cover the everyday needs of a desktop user with success. For legal and ideological reasons, people behind Fedora decide that their creation should not support the out of the box playback of mp3, movies etc. Moreover, Fedora doesn’t officially offer an easy to use tool for the user to download the needed packages like other distributions like Ubuntu and Linux Mint do. In this article we will see how to download and install all the “extras”, easily and fast.
Applications and Codecs
What you will need first of all, is to download an application called Autoplus. You won’t find it in the official repositories, but you can download and install Autoplus by using the following command:
su -c 'yum -y --nogpgcheck install http://dnmouse.org/autoplus-1.4-5.noarch.rpm'
This should install Autoplus in your system. If not, you can build it from source.
Now run Autoplus (Activities/Applications/System Tools) and you will see that everything you need is just two clicks away!
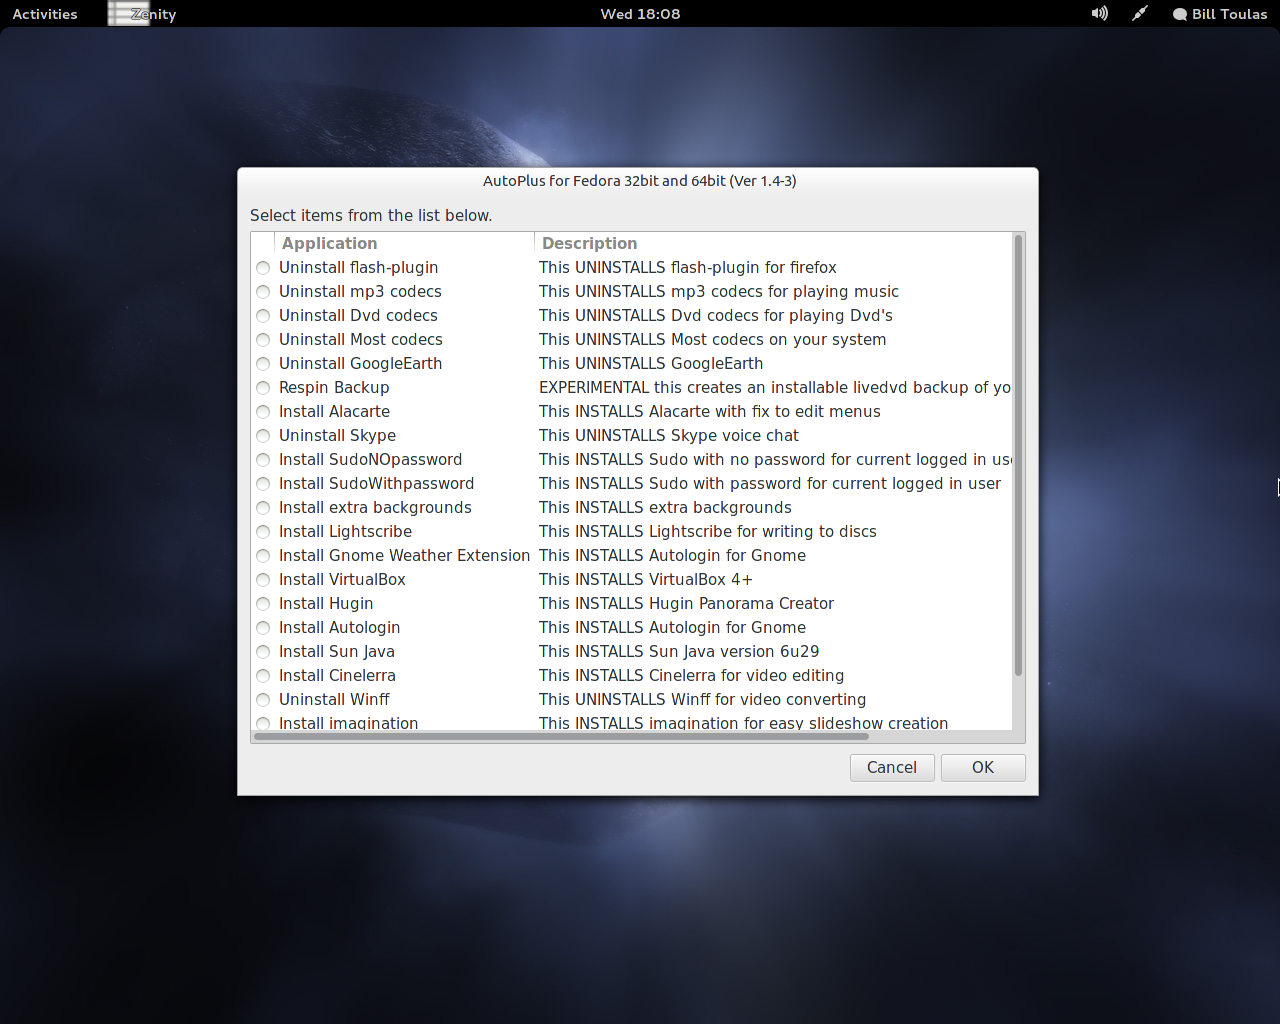
Autoplus offers to automatically download and install the codecs needed to playback multimedia files like mp3, plugins needed for optimum internet experience like Adobe Flash, applications that are not present on the default repos like Google Earth and even configure sudo usage for current user.
Graphics Driver
After you successfully installed everything using Autoplus, you can proceed with installing the proprietary closed source driver for your graphics card. Autoplus has already added rpm-fusion repositories in your system, so to install the graphics driver run Fedora’s “Add/Remove Software” and search for “nvidia” if you use an Nvidia card, or Catalyst if you’re using an AMD card. Choose the driver and press “apply”.
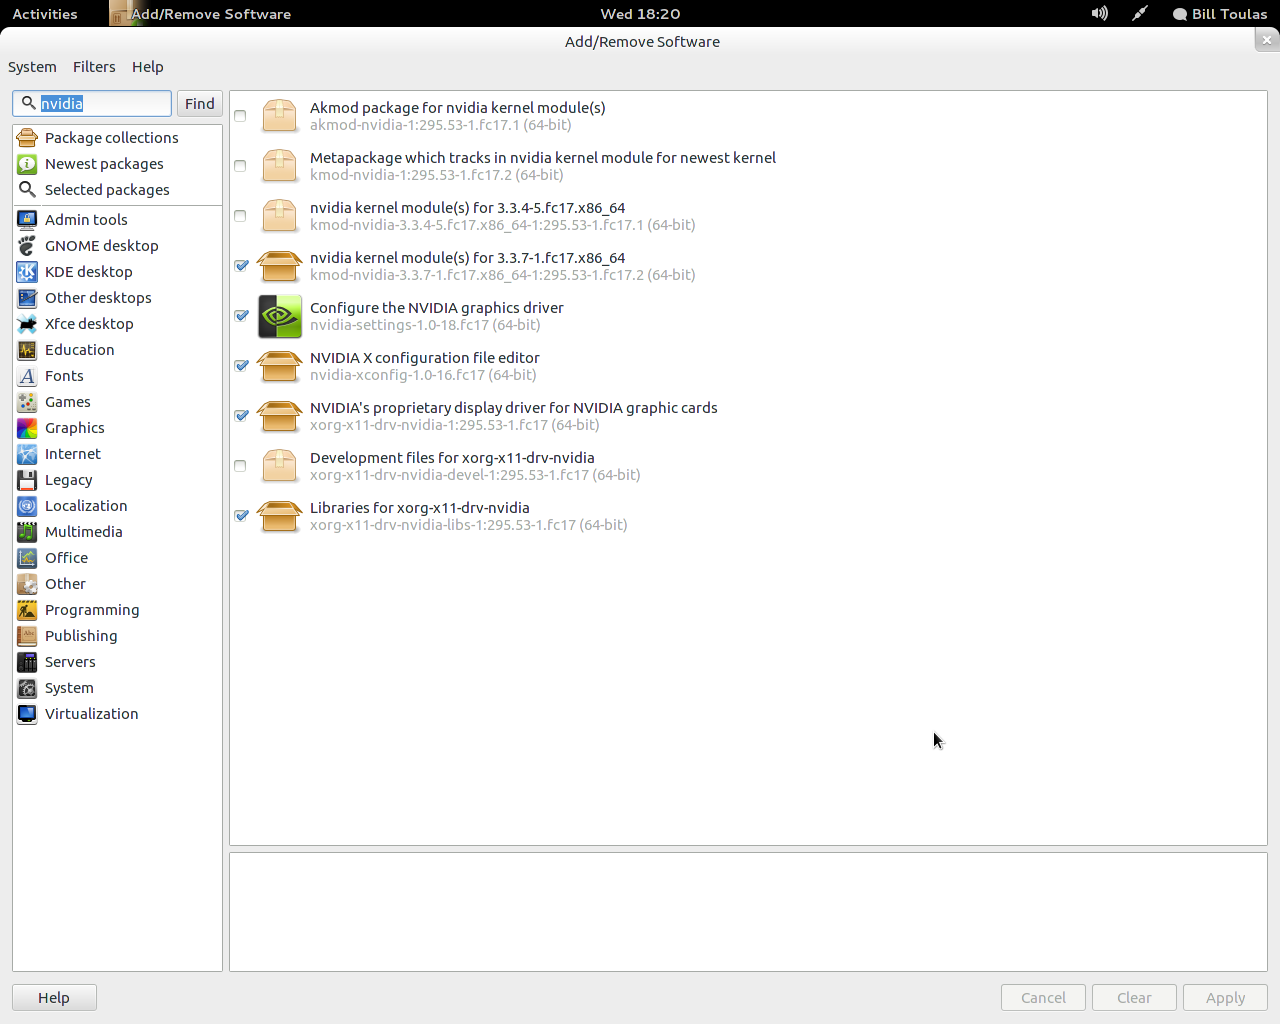
After the procedure finishes, you must open a terminal and run:
sudo nvidia-xconfig
Fonts
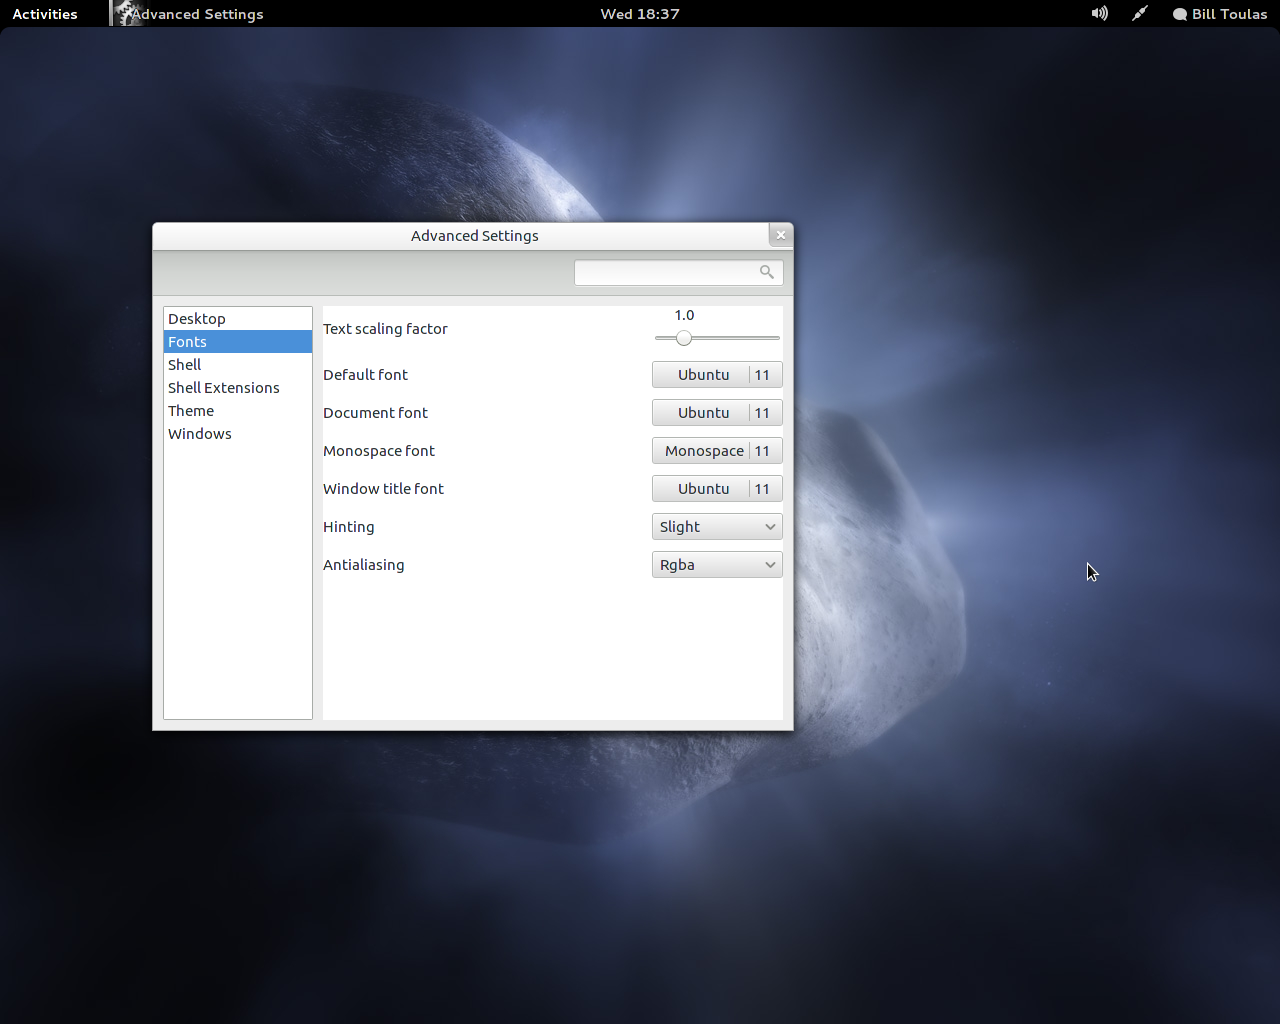
Now from the same application (Add/Remove Software) search and install “gnome-tweak-tool”. You will need this tool to configure the system font options. The default Cantarell font is very improved, but still not as good as the Ubuntu font. Download the Ubuntu font family, and extract the zip on a folder you will create under your home directory and name “.fonts”. Be aware that this folder will be hidden so make sure you will setup nautilus to show hidden files (view/show hidden files) before you create the folder.
Now open the “Advanced Settings” application (that is the gnome-tweak-tool), and choose Ubuntu fonts, slight Hinting and Rgba antialiasing
This should make your fonts look clearer and generally much better. Have a great time tweaking your new Fedora system!
PS: If you want to start theming your desktop after all this, I suggest you install the gnome user themes extension using yum and NOT the extensions website because in that case, a python bug renders the Advanced System Settings unable to start.

