14 DAY TRIAL //
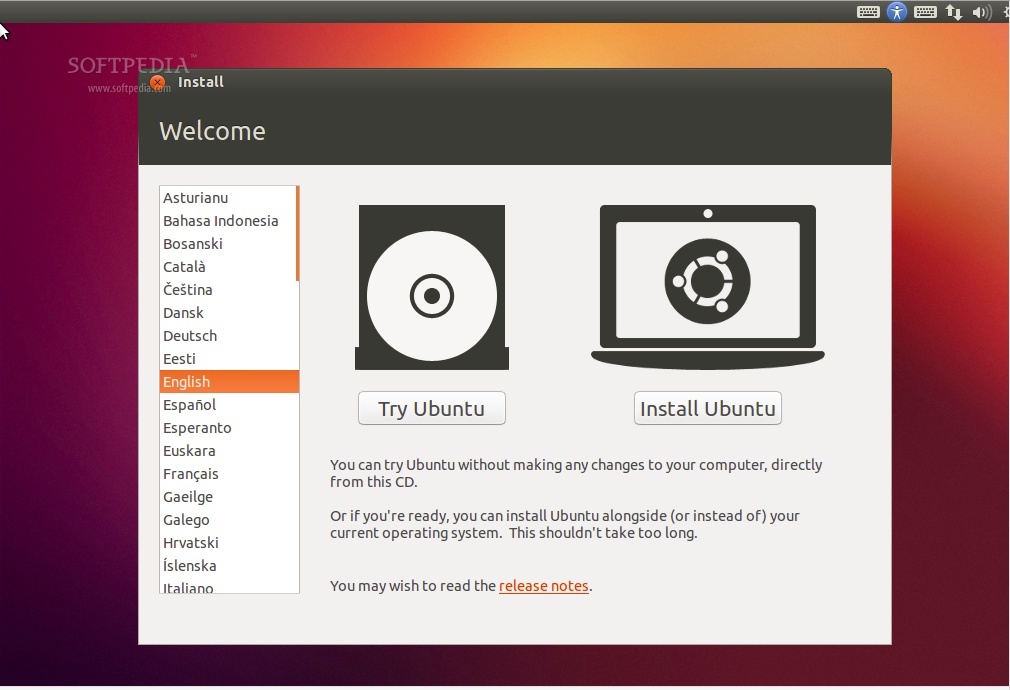
 The following tutorial will teach you how to install the Ubuntu 12.10 (Quantal Quetzal) operating system.
Also known as the Quantal Quetzal, Ubuntu 12.10 arrived on October 18th, 2012 and is the 17th release of the Ubuntu operating system.
Even if the installer included in the Ubuntu 12.10 operating system is extremely easy to use by anyone, we've created the following tutorial to teach both Linux newcomers and existing Ubuntu users how to install the Ubuntu 12.10 operating system on their personal computer or laptop.
Among the features of Ubuntu 12.10, we can mention that the installer now supports LVM and full disk encryption, which will be detailed in this tutorial.
We’ll let you now get to work, but if you get stuck somewhere in the middle of the installation and you need help, do not hesitate to use our commenting system at the end of the article!
Requirements:
You will need the Ubuntu 12.10 DVD ISO image that corresponds to your hardware architecture (i386 or amd64), and that can be downloaded from here.
When the download is over, burn the ISO image with your favorite DVD burning application (Nero, CDBurnerXP, Roxio) on a blank DVD at 4x speed. Or, you can write it to a USB stick using our tutorial about how to run a Linux distribution from a USB flash drive.
Reinsert or leave the DVD in your DVD-ROM device, or the USB stick in the USB port, and reboot the computer in order to boot from it. Hit the F8, F11 or F12 key (depending on your BIOS) to select the DVD-ROM or the USB flash drive as the boot device.
Wait for the DVD/USB to load...
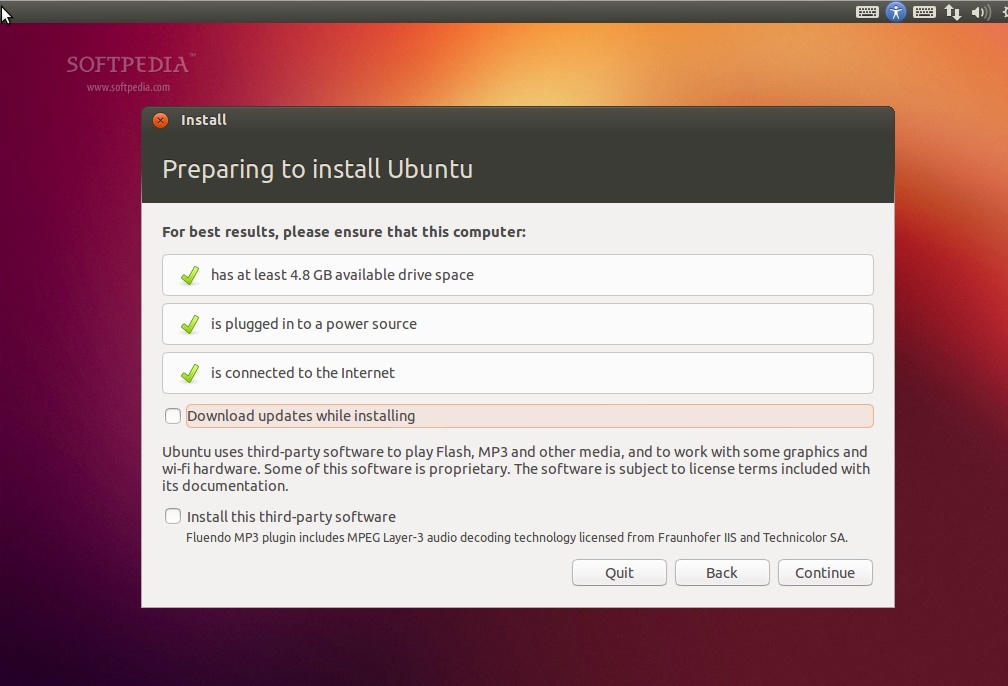
Preparing to install Ubuntu
Make sure you have all the listed requirements. Optionally, you can choose to download updates while installing and/or install third-party software, such as MP3 support. Be aware, though, that if you select those options, the entire installation process will be longer!
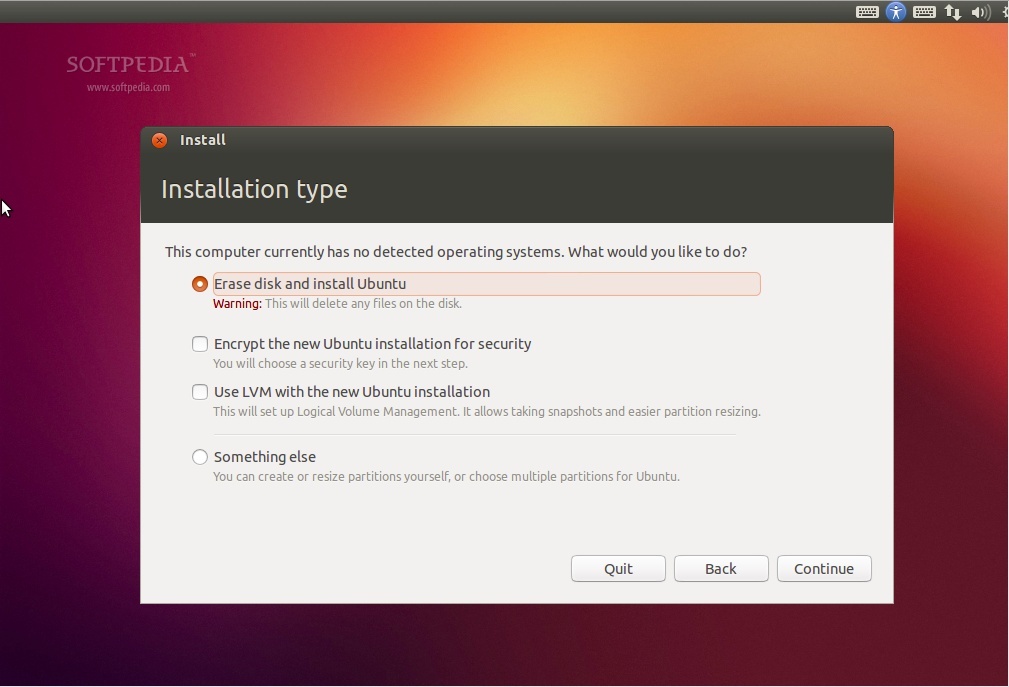
Installation type
At this screen you have various options:

- Choose this option ONLY if you have a previous Ubuntu 12.10 (for example a Beta version of it) installed and you want to reinstall it.
2. Erase Ubuntu 12.04 and reinstall
- Choose this option ONLY if you have another Ubuntu OS (e.g. Ubuntu 12.04) and you want to upgrade it to Ubuntu 12.10. Your personal files will be saved, but you will have to reinstall most of your packages. The general system settings will be erased!
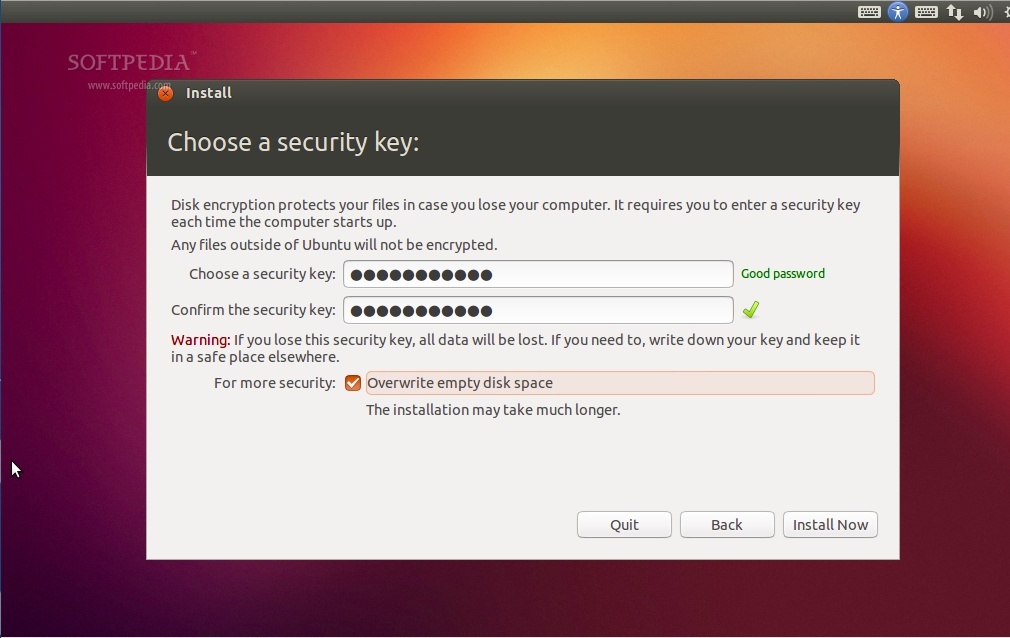
3. Encrypt the new Ubuntu installation for security
- Choose this option to fully encrypt your entire Ubuntu installation with a strong passphrase that you will have to input in the next step of the installation.
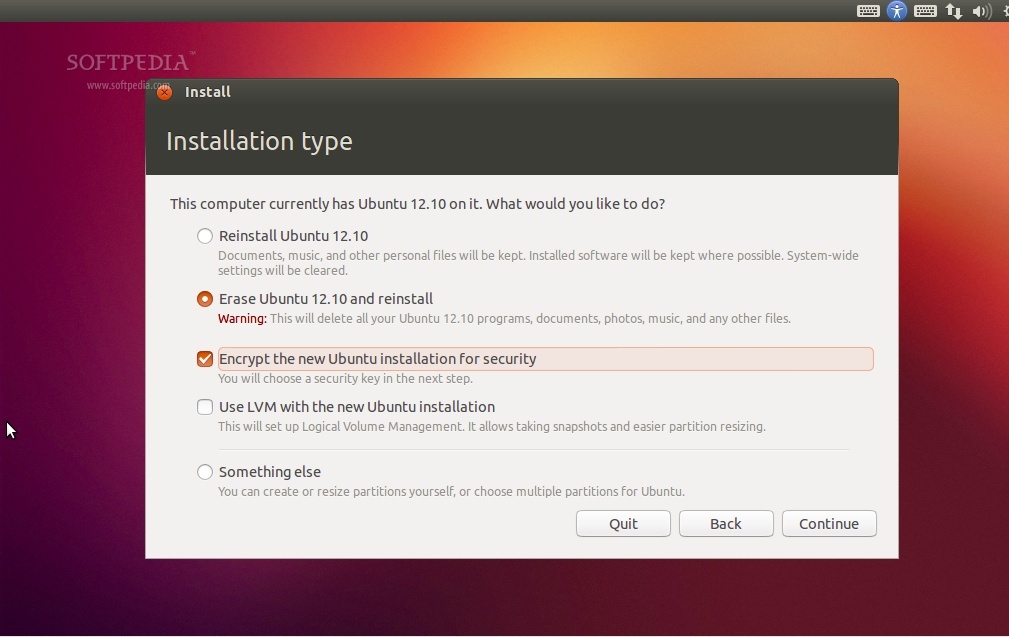
4. Something else (advanced)
- This option is recommended ONLY for advanced users, to create special partitions or format the hard drive with other filesystems than the default one. But it can also be used to create a /home partition, which is very useful in case you reinstall the whole system.
Here's how you do a manual partitioning with /home:
- Select the "Specify partitions manually (advanced) and click the "Forward" button;
- Make sure that the selected hard drive is the right one. /dev/sda is the first physical hard drive. /dev/sdb is the second hard drive in your machine. So, make sure that you know which is the one you want to format! Otherwise, you will lose ALL YOUR DATA on that hard drive;
- Let's say that the selected drive is empty (no other operating system or important data on it), but it has some partitions on it. Select each one of those partitions and click the "Delete" button. After a few seconds, it will say "free space." Do this with the other partitions from the selected hard drive, until they're all deleted and you have a single "free space" entry;
- With the "free space" entry selected, click on the "Add" button. In the new window, type 2048 in the "New partition size in megabytes" field and select the "swap area" option from the "Use as:" drop down list. Click the OK button and, in a few seconds, you'll notice a "swap" line with the specified size;
- With the "free space" line selected, click on the "Add" button. In the new window, select the "Primary" option, type a value between 30,000 and 50,000 (or whatever space you have left on the drive) in the "New partition size in megabytes" field and select /home as the "Mount point." Click the OK button and, in a few seconds, you'll notice an "ext4 /home" line with the specified size;
- With the "free space" entry selected, click on the "Add" button. In the new window, select the "Primary" option, type a value between 10,000 and 50,000 in the "New partition size in megabytes" field and select / as the "Mount point." Click the OK button and, in a few seconds, you'll notice an "ext4 /" line with the specified size.
This is how your partition table should look like...
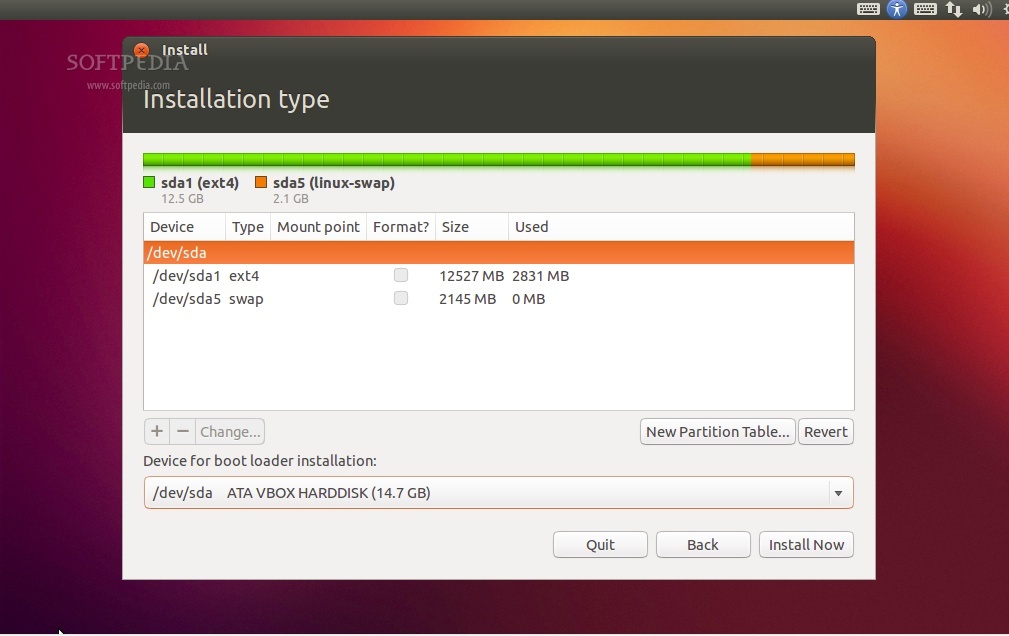
EXTREMLY IMPORTANT: Don't forget to choose where GRUB will be installed, from the "Device for boot loader installation" drop-down box, before you hit the "Install Now" button.
Click the "Continue" button to start the installation process...
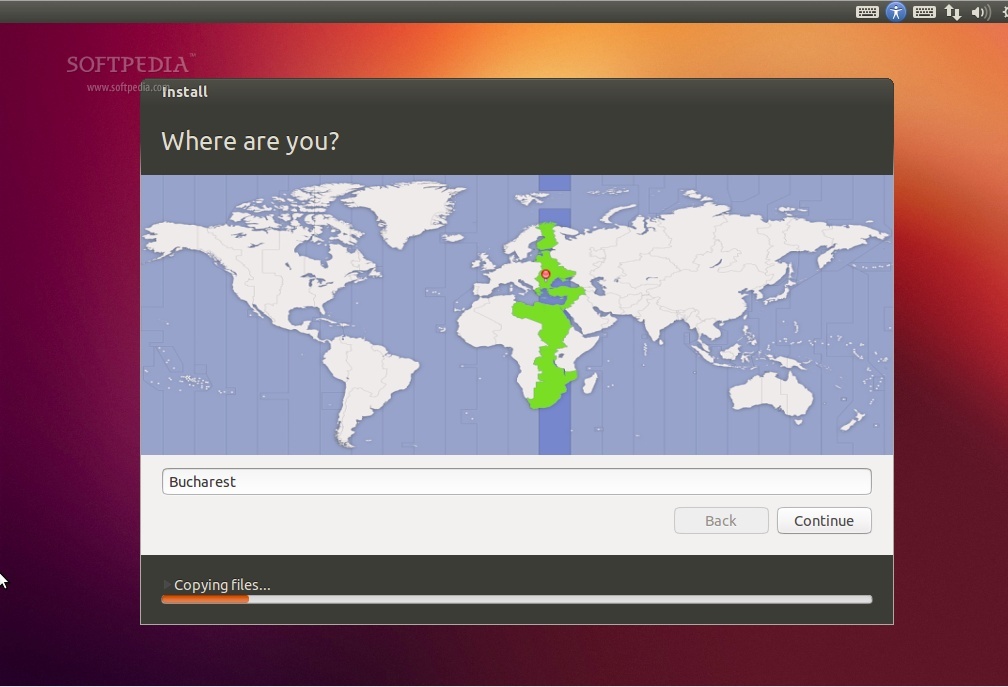
Where are you?
This screen will feature a map of the Earth. Upon the selection of your current location, the time for the final system will adjust accordingly. You can try to guess your exact location with the mouse on the map, or just type the town in the designated field. Click the "Continue" button after you have selected your desired location...
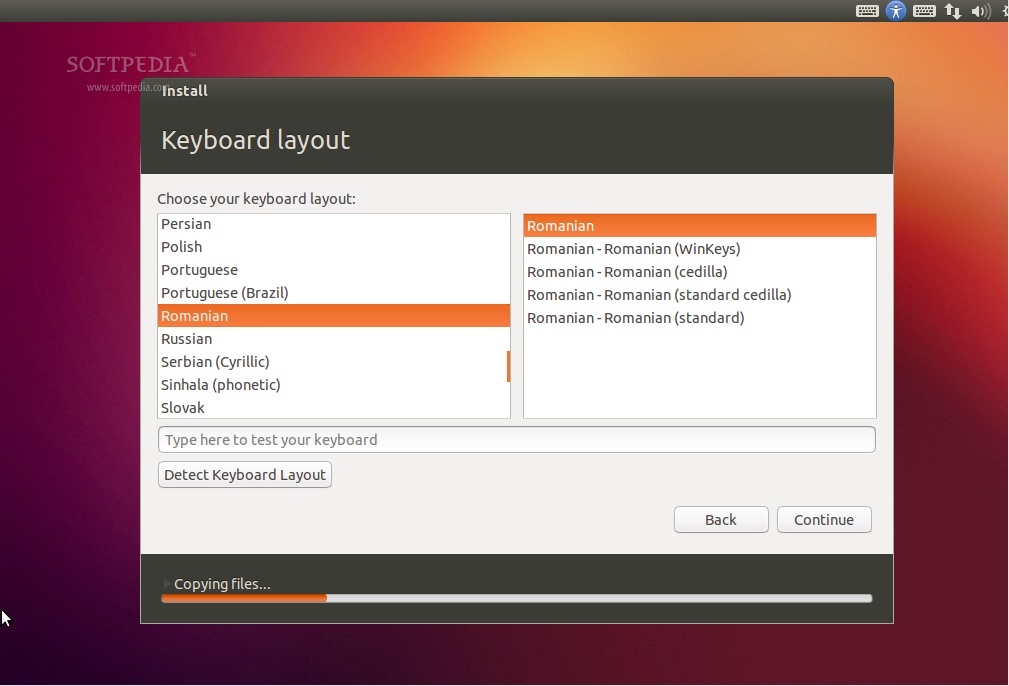
Keyboard layout
On this screen, you will be able to choose a desired keyboard layout. But the default automatic selection should work for most of you. You can also click the "Figure Out Keyboard Layout" button for better recognition of your keyboard's layout. Click the "Continue" button when you have finished with the keyboard configuration...
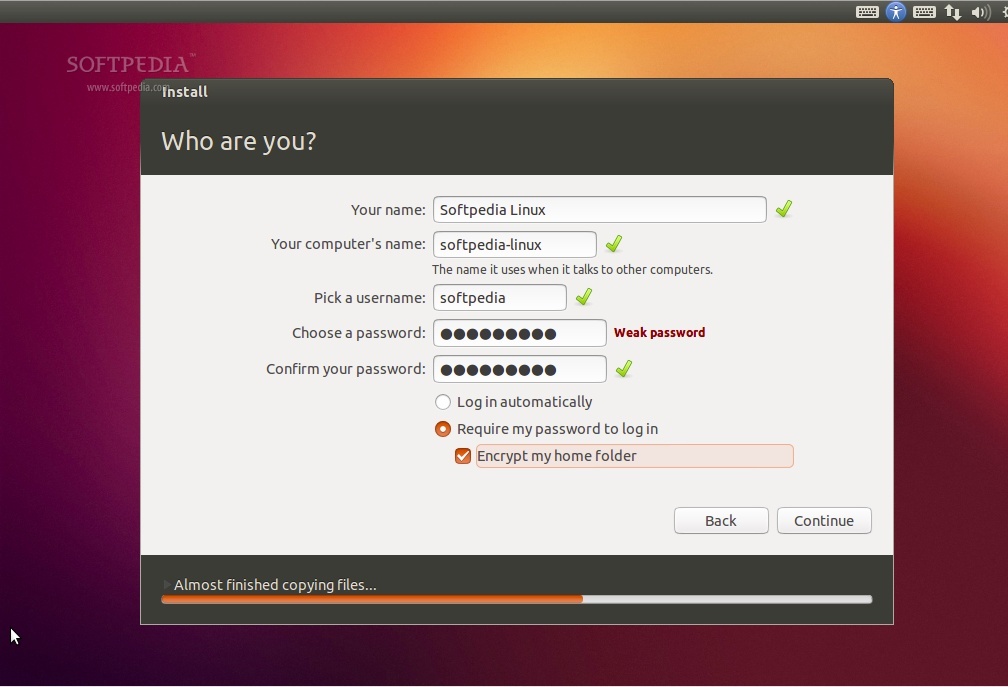
On this screen, you must do exactly what the title says. Fill in the fields with your real name, the name of the computer (automatically generated, but can be overwritten), the name you want to use to log in on your Ubuntu OS (also known as the "username," which will be required to log in to the system), and the password.
Also at this step, there's an option called "Log in automatically." If you check it, you will automatically be logged in to the Ubuntu desktop.
Other option, called "Encrypt my home folder," will encrypt your Ubuntu installation. Click the "Continue" button to continue...