Using Solr With TYPO3 On Debian Wheezy
Version 1.0
Author: Falko Timme <ft [at] falkotimme [dot] com>![]() Follow me on Twitter
Follow me on Twitter
TYPO3's default search extension called "Indexed Search" is fine for small web sites, but if your web site is bigger (> 500 pages), it is getting very slow. Fortunately, you can replace it with a search extension that uses the ultra-fast Apache Solr search server. This tutorial explains how to use Apache Solr with TYPO3 on Debian Wheezy.
I do not issue any guarantee that this will work for you!
1 Preliminary Note
In this tutorial I'm using two servers:
- server1.example.com (IP: 192.168.0.100): web server where the TYPO3 4.7 Introduction package is installed (in the www.example.com vhost).
- server2.example.com (IP: 192.168.0.101): separate server where I will install Apache Solr.
Of course, it's possible to install Solr on the same system as the web server; however, I'd like to split up both services so that they do not impact each other's performance.
2 Installing Solr
server2.example.com:
First install Java:
apt-get install openjdk-6-jdk openjdk-6-jre unzip
update-alternatives --config java
update-alternatives --config javac
The TYPO3 project provides a Solr installation script which we download as follows:
wget http://forge.typo3.org/projects/extension-solr/repository/revisions/master/raw/resources/shell/install-solr.sh
chmod 755 install-solr.sh
Next check what the current Apache Tomcat 6 version is by visiting http://tomcat.apache.org/download-60.cgi. At the time of this writing it was 6.0.37. Now open install-solr.sh...
vi install-solr.sh
... and make sure that the TOMCAT_VER variable holds the correct version number - if necessary, change it:
[...] TOMCAT_VER=6.0.37 [...] |
Now we install Solr. By default (if you don't provide any languages as parameters), Solr is installed with support for the English language only; if you need support for more languages, just append them to the command, e.g. like this:
./install-solr.sh german english french
This installs a Tomcat server (where Solr is run on) and Solr. By default, Tomcat listens on 127.0.0.1 only; because we want to access Solr from a remote host, we must configure Tomcat to listen on all interfaces, therefore we replace 127.0.0.1 with 0.0.0.0 in /opt/solr-tomcat/tomcat/conf/server.xml:
vi /opt/solr-tomcat/tomcat/conf/server.xml
[...]
    <Connector port="8080" protocol="HTTP/1.1"
               maxHttpHeaderSize="65536"
               connectionTimeout="20000"
               redirectPort="8443"
               address="0.0.0.0"
               URIEncoding="UTF-8" />
[...]
|
Restart Tomcat:
/opt/solr-tomcat/tomcat/bin/shutdown.sh
/opt/solr-tomcat/tomcat/bin/startup.sh
Next we can configure cores in Solr. By default, an English core is already configured; if you need more languages, you can add them to /opt/solr-tomcat/solr/solr.xml, e.g. like this:
vi /opt/solr-tomcat/solr/solr.xml
<?xml version="1.0" encoding="UTF-8" ?>
<solr persistent="true">
        <cores adminPath="/admin/cores" shareSchema="true">
                <core name="core_en" instanceDir="typo3cores" schema="english/schema.xml" dataDir="data/core_en" />
                <core name="core_de" instanceDir="typo3cores" schema="german/schema.xml" dataDir="data/core_de" />
                <core name="core_fr" instanceDir="typo3cores" schema="french/schema.xml" dataDir="data/core_fr" />
        </cores>
</solr>
|
Restart Solr afterwards:
/opt/solr-tomcat/tomcat/bin/shutdown.sh
/opt/solr-tomcat/tomcat/bin/startup.sh
Because we don't want to start Tomcat manually each time the server is booted, we can add the Tomcat startup command to /etc/rc.local:
vi /etc/rc.local
[...] /opt/solr-tomcat/tomcat/bin/startup.sh [...] |
2.1 Adding Authentication To Solr
Because Solr is listening on all interfaces, it is a good idea to add authentication to it. I will now configure the user user1 with the password secret for the English core.
Open /opt/solr-tomcat/tomcat/conf/web.xml...
vi /opt/solr-tomcat/tomcat/conf/web.xml
... and add the following section somewhere inside the <web-app> container:
[...]
  <security-constraint>
    <web-resource-collection>
      <web-resource-name>Solr authenticated application</web-resource-name>
      <url-pattern>/core_en/*</url-pattern>
    </web-resource-collection>
    <auth-constraint>
      <role-name>role1</role-name>
    </auth-constraint>
  </security-constraint>

  <login-config>
    <auth-method>BASIC</auth-method>
    <realm-name>Admin and Update protection</realm-name>
  </login-config>
[...]
|
As you see, this is valid for the English core only (<url-pattern>/core_en/*</url-pattern>), and I've configured this for the role role1, so valid users must belong to that role. To add the user user1 with his password to that role, open /opt/solr-tomcat/tomcat/conf/tomcat-users.xml...
vi /opt/solr-tomcat/tomcat/conf/tomcat-users.xml
... and add the following section inside the <tomcat-users> container:
[...] <role rolename="role1"/> <user username="user1" password="secret" roles="role1"/> [...] |
Restart Tomcat afterwards:
/opt/solr-tomcat/tomcat/bin/shutdown.sh
/opt/solr-tomcat/tomcat/bin/startup.sh
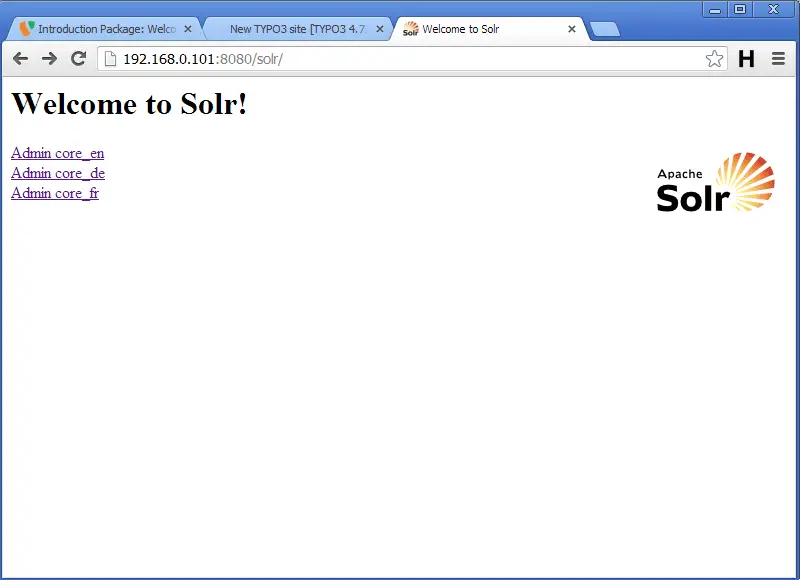
You can now open a browser and visit Solr under http://192.168.0.101:8080/solr where you should see all configured cores:
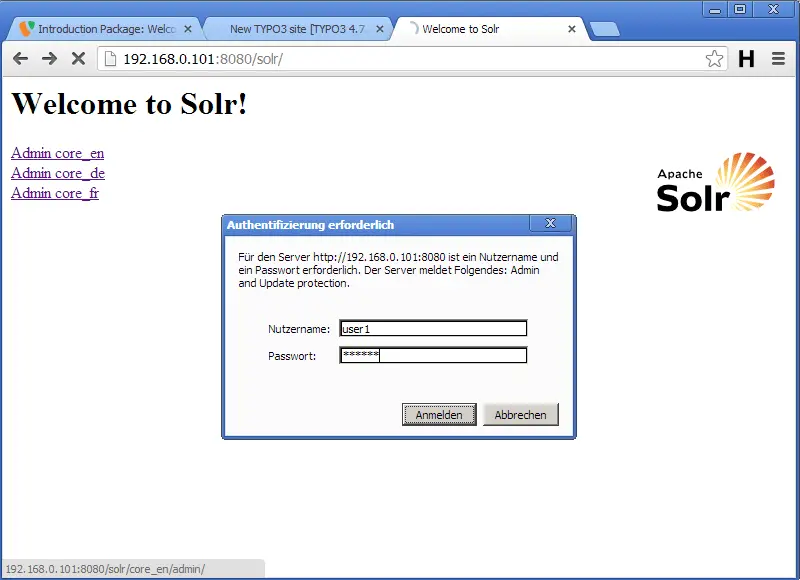
When you visit the English core (for which we have just configured authentication), you should be asked for a username and a password:
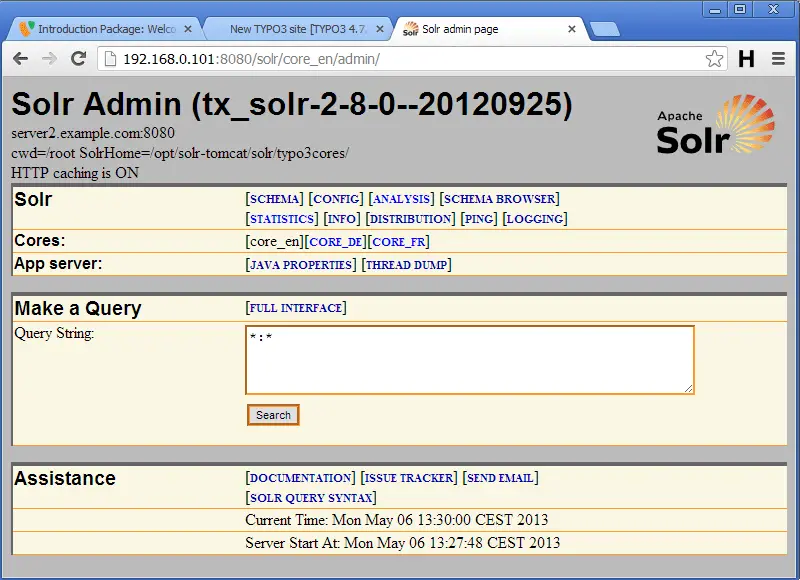
After successful authentication, you should see the following page which means Solr is running successfully: