Although people have been toying with USB webcams on the Raspberry Pi for some time now, the release of the official camera module has reinvigorated interest in video related projects.
The official Raspberry Pi camera module is a Full HD camera that plugs into the Raspberry Pi via the Camera Serial Interface (next to the Ethernet port) on the device. The sensor on the camera is a 5MP with fixed focus lens. It can shoot still images with a maximum resolution of 2592×1944 as well as Full HD 1080p video @ 30 FPS and 720p video @ 60 FPS.
And you get all this in a module that’s only 25x20x9mm in size and weighs just 9 grams! This makes it ideal for projects that require a small steady camera, like surveillance.
Enable camera support
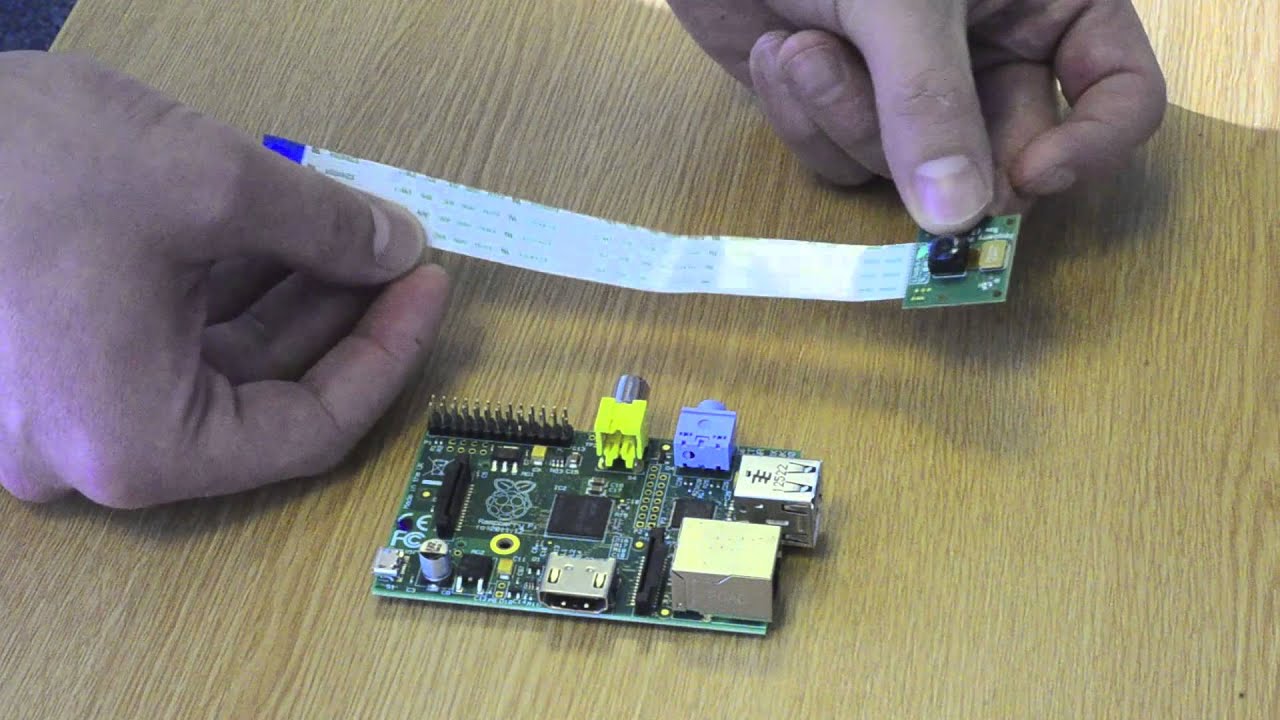
Before you attach the camera, locate the CSI and then pull the tab gently up. Now push the camera module’s ribbon cable into the slot, with the silver contacts on the cable facing away from the Ethernet port. Remember not to push the cable in very deep. Now hold it in place with one hand and push the CSI tab back down with the other hand to lock the camera’s ribbon. Checkout the video below for visual instructions
With the hardware in place, it’s now time to setup the software. Assuming you are using the Raspbian distro on the Raspberry Pi, boot the distro and log in.
Before enabling the camera, make sure you are running the latest version of the Raspberry Pi firmware with these commands:
sudo apt-get update
sudo apt-get upgrade
Depending on how outdated your Rasbian installation is, and the speed of your Internet connection, these commands could take over half an hour to complete.
Once it’s completed, launch the “raspi-config” script helps you to configure your Pi:
sudo raspi-config
Scroll down the list to the item that reads “Enable Camera” and press the Enter key. In the next screen, you’ll be asked to confirm your choice by selecting the “Enable” option. You’ll then be returned to main screen of the configuration utility. You can now select the “Finish” option and restart the Raspberry Pi.
Once you’ve restarted the Raspberry Pi, you can now use the two command-line utilities, raspistill and raspivid to capture still images and videos respectively. Both tools have extensive options and are well documented.
Capture motion
You can use the popular command-line Motion software to detect motion and capture video. Another option is to use the light-weight motion detection Python script written by Raspberry Pi community members.
The script relies on the Python Imaging Library which is a library for analyzing and manipulating images, so make sure you have it installed:
sudo apt-get install python-imaging-tk
Now grab the script and make it executable:
wget -c http://pastebin.com/raw.php?i=yH7JHz9w -O picam.py
chmod +x picam.py
The script is designed to store images in a directory named “picam” under your home directory, so make sure to create it before executing the script:
mkdir ~/picam
You’re now all set. Now run the script:
./picam.pyThe script will turn on the red LED on the camera and start taking low-resolution images. It’ll then compare them and look for movement by comparing the pixels in the images. If it detects changes, the script will capture a higher-resolution image.
The script is very efficient and will automatically remove the low-res images it captures for comparison and only store the high-res images that have captured the motion. These images are saved in the ~/picam folder.
You’ll need to adjust some aspects of the script to make sure it works for you. For example, as per the default configuration, the script will even detect minute changes caused by wind.
To edit the script, open it in a text editor. The script is well documented so you shouldn’t have any issues in editing it. If you are using the camera to detect change in a windy area, set the “threshold” variable to a higher value than the default.
Start at boot
To run the script at boot, you’ll need to an init script that runs the “picam.py” script and kills it before shutting down the Raspberry Pi.
Again, the community has done all the leg work for you. Just grab their script:
wget http://pastebin.com/AfqbjQrb -O picam_init
Now move the script into the correct location, and make it executable:
sudo mv ~/picam_init /etc/init.d/picam
sudo chmod +x /etc/init.d/picam
Lastly, make the boot system aware of this script:
sudo update-rc.d picam defaultsThat’s it! The script will now start and shutdown along with the Raspberry Pi. You can also manually control it like any other daemon. For example /etc/init.d/picam stop will stop the script and /etc/init.d/picam start will start it.
Use Motion
We are big fans of Motion here at MTE and have previously featured an extensive tutorial on the utility. Motion offers several features over the Python script, such as the ability to monitor it from the local network.
If you decide to use the motion app instead of the Python script, remember that the standard motion packages doesn’t yet work with the Raspberry Pi camera. You’ll instead have to use a special binary, called “motion-mmal”, specially created for the Raspberry Pi by a community member.
To begin with, you’ll have to fetch a lot of dependencies:
sudo apt-get install -y libjpeg62 libjpeg62-dev libavformat53 libavformat-dev libavcodec53 libavcodec-dev libavutil51 libavutil-dev libc6-dev zlib1g-dev libmysqlclient18 libmysqlclient-dev libpq5 libpq-dev
Once they are all installed, download the modified version of motion and extract it:
wget https://www.dropbox.com/s/xdfcxm5hu71s97d/motion-mmal.tar.gz
tar -zxvf motion-mmal.tar.gz
This will extract the motion app as well as a configuration file. You can now run the extracted motion app along with its configuration file using:
./motion -n -c motion-mmalcam.conf
While motion is running, you can watch the streaming video on another computer in the network over the 8081 port. So assuming the IP address of your Raspberry Pi running motion is 192.168.3.100, you can watch the video stream by entering the address 192.168.3.100:8081 on another computer in your network.

Again, just like the Python script, it’ll do you a lot of good to spend some time reading through the “motion-mmalcam.conf” configuration file and tweak it as per your environment. Also remember to take a look at our Motion guide to understand the various configuration parameters in this file.
Image credit: zigazou76
Our latest tutorials delivered straight to your inbox