How to install X2Goserver on CentOS 7 as an alternative for VNC
Version 1.0
Author: Srijan Kishore <s [dot] kishore [at] ispconfig [dot] org>
Follow howtoforge on Twitter
This document describes how to use X2Goserver as an alternative of VNC. I will install and configure X2Goserver on CentOS 7. X2Go enables us to access a graphical desktop of a computer over a low bandwidth (or high bandwidth) connection. X2Go is a Remote Desktop solution, which some vendors vaguely call Remote Control. This is not to be confused with Microsoft Remote Desktop Connection, which is a competing Remote Desktop solution and protocol. With X2Go, we can access Linux computers. The Linux computer we are accessing is the X2Go Server. The best part is that it supports sound transmission over remote connections.
We can connect from a computer running Linux, Windows or Mac OS X. This computer is the X2Go Client. Multiple users/clients can access a single X2Go Server at the same time, with each user/client having an individual Desktop session by default - however, Desktop sharing (Remote Assistance) is also possible.
I do not issue any guarantee that this will work for you!
1 Preliminary Note
This tutorial is based on CentOS 7.0 server, so you should set up a basic CentOS 7 server installation before you continue with this tutorial. The system should have a static IP address. I use 192.168.0.100 as my IP address in this tutorial and server1.example.com as the hostname with user root and administrator having password howtoforge for both. Additionally I will be connecting to the CentOS Server through an Ubuntu 14.04 Desktop and a Windows-7 machine. So both desktops are also required.
2 X2Goserver Installation
For this we need to ad EPEL repo, add it as follows:
rpm -ivh http://dl.fedoraproject.org/pub/epel/7/x86_64/e/epel-release-7-1.noarch.rpm
I will be installing X2Goserver in my CentOS 7.0 Server as follows:
yum -y install x2goserver-xsession
Now we need to install the graphical Desktop environment in the CentOS Server, for that install:
yum -y groupinstall "Xfce"
reboot
After reboot we are ready for the connection.
Note: Here I am using XFCE as the desktop environment, as I checked that it doesn't support Gnome. XFCE environment is working fine with X2Go server.
Additionally we need to allow the firewall-cmd of CentOS as follows:
firewall-cmd --permanent --zone=public --add-service=ssh
firewall-cmd --reload
3 X2Go connection with Ubuntu Desktop
Now we are going to connect with the CentOS 7.0 server with the X2Goclient from my Ubuntu 14.04 desktop. We will install the X2Goclient in the Ubuntu Desktop as follows:
sudo apt-get install x2goclient
It will install the X2Goclient in my machine, if you are using any distribution older than Ubuntu 12.04 then you need to add the repository of X2Go as follows:
sudo apt-get install python-software-properties
sudo add-apt-repository ppa:x2go/stable
sudo apt-get update
sudo apt-get install x2goclient
After successful installation of the client, open the X2Goclient in the desktop as:

Give details as follows:-
Session name : New session (any name)
Host : 192.168.0.100 (Your IP)
Login : administrator (or any user on your CentOS Server)
SSH port : 22 ( if not altered at CentOS Server)
Session type : XFCE

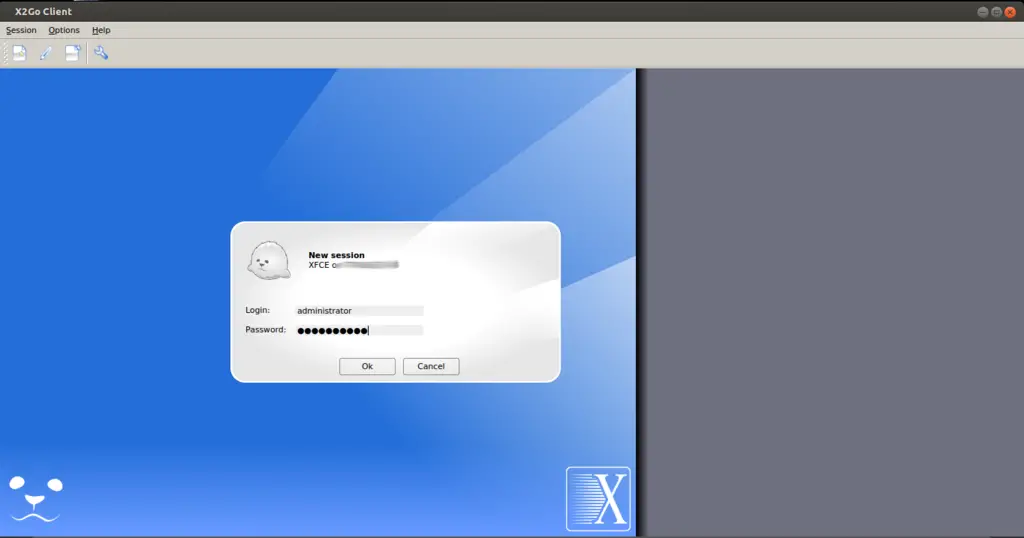
Now put the user's credential as in my case it was user=administrator and password=howtoforge :
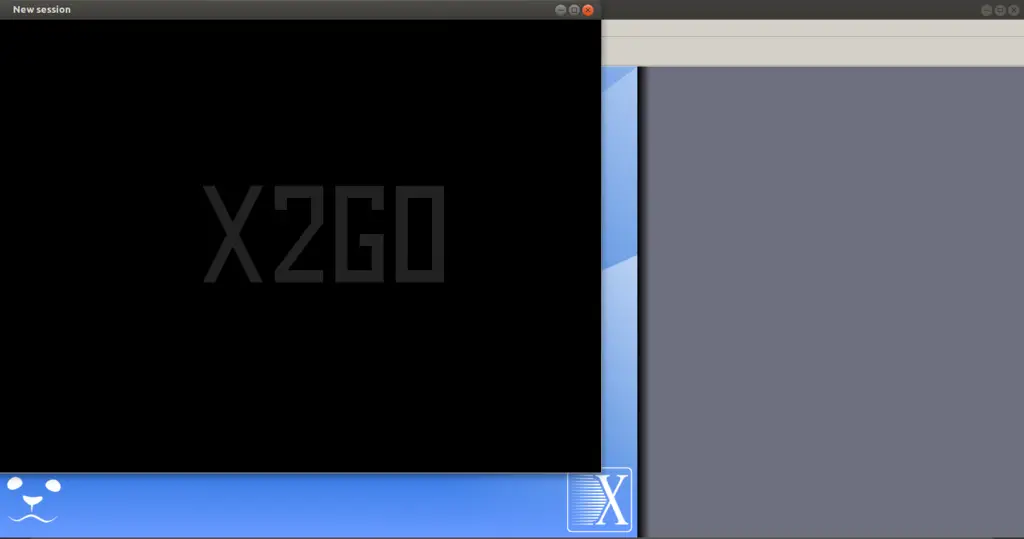
It will initiate the process of the connection.

It will ask for authenticate the ssh key just press Yes


Press Use default config:


It will provide us the graphical connection with the CentOS Server.
4 Connection through Windows machine
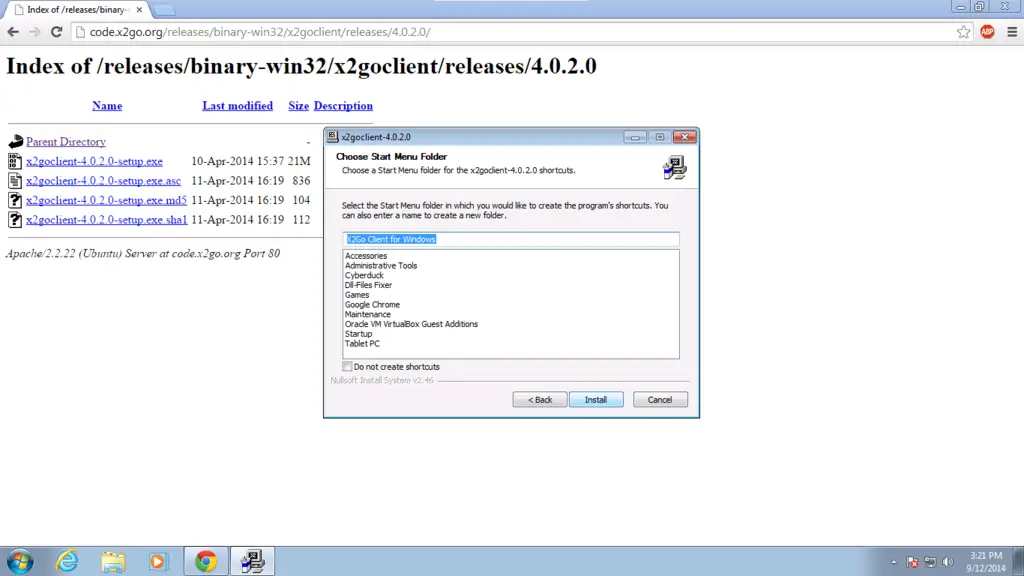
Now I will connect my Windows- 7 machine with the help of X2Goclient to the CentOS 7.0 Server. First we need to install the X2Goclient in windows machine. I will install it from link. I will install x2goclient-4.0.2.0-setup.exe
Just download the package and install simply with administrative rights.


Next

Next
Next

Now we will connect to the CentOS Server by giving the same details as:
Host : 192.168.0.100
Login : administrator
SSH port : 22
Session type : XFCE

Put the credentials as user=administrator and password=howtoforge as in my case.


We are connected the CentOS Server graphically.
Congratulations! We are connected to the CentOS Server graphically with both Ubuntu and Windows desktop. Now we can perform administrative task graphically also :)
5 Links
- X2Goserver : http://wiki.x2go.org/doku.php
- CentOS : http://www.ubuntu.com/

