How to install owncloud 7 on OpenSUSE 13.2
Version 1.0
Author: Md. Mohib Billah
1 Preliminary Note
This tutorial is based on OpenSuse 13.2 server, so you should set up a basic OpenSuse 13.2 server installation before you continue with this tutorial. The system should have a static IP address. I use 192.168.0.20 as my IP address in this tutorial and server1.example.com as the hostname. Again I have 192.168.0.99 as IP address of OpenSuse Desktop and desktop1.example.com as the hostname. I will be using the user= Mohib for the installation and configuration in both OpenSuse Desktop.
2 Installation of ownCloud 7
ownCloud is a web application that can store and serve content from a centralized location, much like Dropbox. The difference is that ownCloud 7 allows you to host the serving software on your own machines, taking the trust issues out of putting your personal data someone else's server.
We will first download the release key associated with the ownCloud software:
2 Installation of owncloud 7
OwnCloud is a web application that can store and serve content from a centralized location, much like Dropbox. The difference is that ownCloud 7 allows you to host the serving software on your own machines, taking the trust issues out of putting your personal data someone else's server.
We will first download the release key associated with the ownCloud software:
zypper addrepo http://download.opensuse.org/repositories/isv:ownCloud:community/openSUSE_13.2/isv:ownCloud:community.repo
zypper refresh
Finally, update the package database and install ownCloud:
zypper install owncloud
server1:~ # zypper install owncloud
Loading repository data...
Reading installed packages...
Resolving package dependencies...
Problem: owncloud-7.0.3-14.1.noarch requires php5 >= 5.3.3, but this requirement cannot be provided
uninstallable providers: php5-5.6.1-1.1.x86_64[openSUSE-13.2-0]
php5-5.6.1-1.1.i586[repo-oss]
php5-5.6.1-1.1.x86_64[repo-oss]
php5-5.6.1-1.1.x86_64[repo-oss]
php5-5.6.1-4.1.x86_64[repo-update]
Solution 1: deinstallation of patterns-openSUSE-minimal_base-conflicts-20141007-2.1.x86_64
Solution 2: do not install owncloud-7.0.3-14.1.noarch
Solution 3: do not install owncloud-7.0.3-14.1.noarch
Solution 4: break owncloud-7.0.3-14.1.noarch by ignoring some of its dependencies
Choose from above solutions by number or cancel [1/2/3/4/c] (c): <--1
ownCloud will install Apache2 with its dependency, if it doesn't get installed automatically manually install apache2:
zypper install apache2
Apache must restart at every boot so we will add it as:
systemctl enable apache2.service
systemctl start apache2.service
Further we need to allow SELINUX with apache at http , https and secure shell server as follows:
yast2
Goto Security and Users --> Firewall Settings and there goto Allowed Services: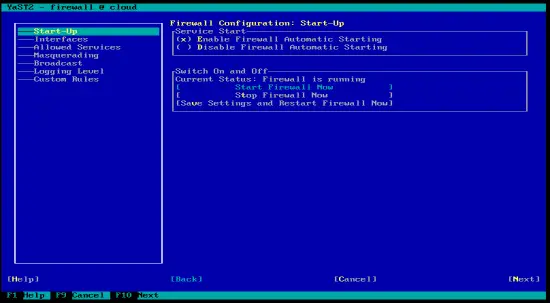
Add three services of apache2 in External Zone i.e. HTTP Server , HTTPS Server and Secure Shell Server in the allowed services for firewall: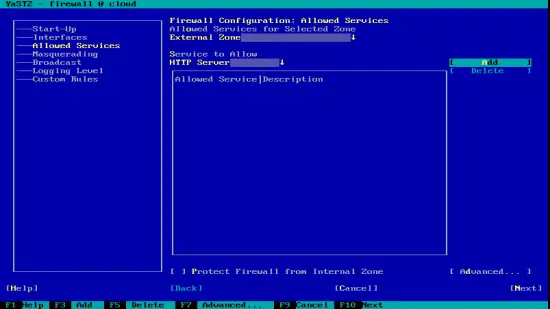
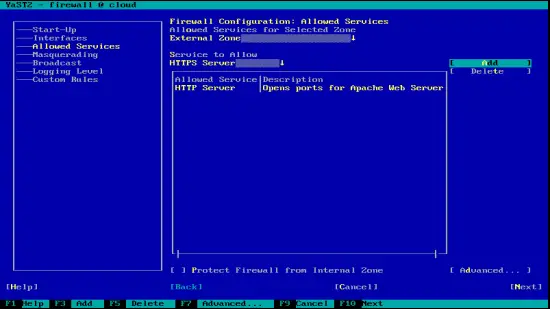

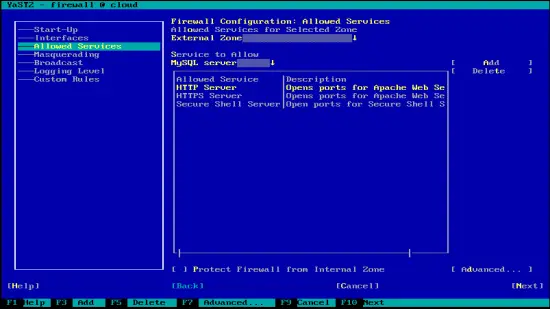
After adding the services exit yast2.
3 ownCloud 7 configuration on OpenSuse 13.2
Further we need to install Mariadb to get ownCloud in functionality, usually it gets installed as a dependency of ownCloud. But if it is not installed, then we need to install it as follows:
zypper install mariadb
systemctl enable mysql.service
systemctl start mysql.service
We will be configuring our ownCloud server to take advantage of the more robust MySQL database instead of the SQLite default implementation. To do so, we must configure MySQL first as:
mysql_secure_installation
[
server1:~ # mysql_secure_installation
/usr/bin/mysql_secure_installation: line 379: find_mysql_client: command not found
NOTE: RUNNING ALL PARTS OF THIS SCRIPT IS RECOMMENDED FOR ALL MariaDB
SERVERS IN PRODUCTION USE! PLEASE READ EACH STEP CAREFULLY!
In order to log into MariaDB to secure it, we'll need the current
password for the root user. If you've just installed MariaDB, and
you haven't set the root password yet, the password will be blank,
so you should just press enter here.
Enter current password for root (enter for none): <--ENTER
OK, successfully used password, moving on...
Setting the root password ensures that nobody can log into the MariaDB
root user without the proper authorisation.
Set root password? [Y/n] <--ENTER
New password: <--mariadbpassword
Re-enter new password: <--mariadbpassword
Password updated successfully!
Reloading privilege tables..
... Success!
By default, a MariaDB installation has an anonymous user, allowing anyone
to log into MariaDB without having to have a user account created for
them. This is intended only for testing, and to make the installation
go a bit smoother. You should remove them before moving into a
production environment.
Remove anonymous users? [Y/n] <--ENTER
... Success!
Normally, root should only be allowed to connect from 'localhost'. This
ensures that someone cannot guess at the root password from the network.
Disallow root login remotely? [Y/n] <--ENTER
... Success!
By default, MariaDB comes with a database named 'test' that anyone can
access. This is also intended only for testing, and should be removed
before moving into a production environment.
Remove test database and access to it? [Y/n] <--ENTER
- Dropping test database...
... Success!
- Removing privileges on test database...
... Success!
Reloading the privilege tables will ensure that all changes made so far
will take effect immediately.
Reload privilege tables now? [Y/n] <--ENTER
... Success!
Cleaning up...
All done! If you've completed all of the above steps, your MariaDB
installation should now be secure.
Thanks for using MariaDB!
server1:~ #
Now moving towards the Mysql prompt:
mysql -u root -p
Put the Mysql password which you selected before, & create a database for ownCloud in Mysql prompt:
CREATE DATABASE owncloud;
Assign privileges to a new MySQL user to handle database operations for ownCloud:
GRANT ALL ON owncloud.* to 'root'@'localhost' IDENTIFIED BY 'database_password';
exit
Now we need to enable php5 for apache2 and following settings as follows:
a2enmod php5
vi /srv/www/htdocs/owncloud/.htaccess
Options +FollowSymLinks
[...]
Now, if you go to your IP address or domain name followed by "/owncloud" in your browser, you will see a page that looks like this:
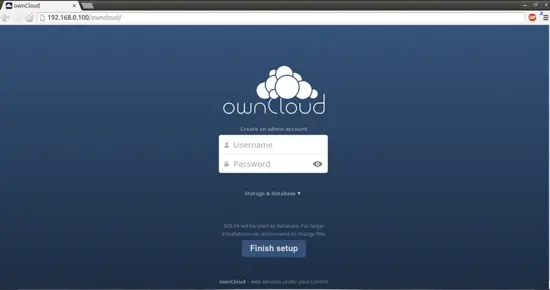
Click on Storage & database:

Now select MySQL/MariaDB and create an admin account as in my case I have chosen owncloud as my admin account and a desired password for that user:
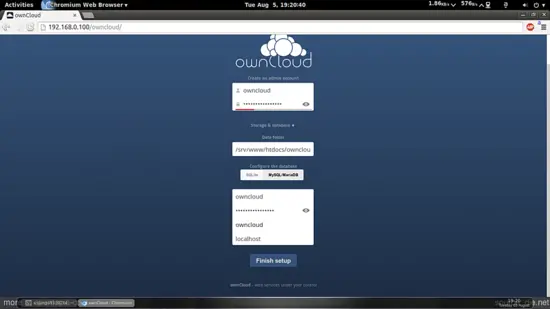
In the lower tab below the MySQL/MariaDB give the entry of the username=root password=database_password databasename=owncloud.
Then press Finish setup.
4 Mounting the ownCloud 7 share with OpenSuse 13.2 Desktop
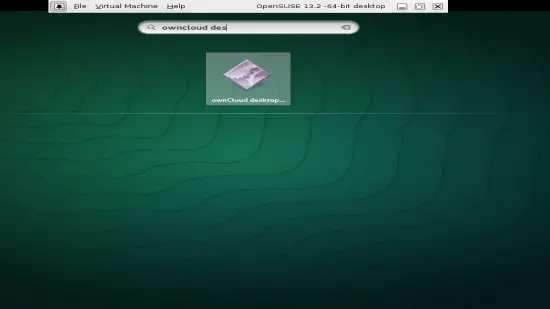
We can mount ownCloud-7 share with the OpenSuse 13.2 Desktop through owncloud-client installation. For this run I am running all the commands with the user=Qmail in my OpenSuse desktop with desktop1.example.com:
sudo zypper addrepo http://download.opensuse.org/repositories/isv:ownCloud:desktop/openSUSE_13.2/isv:ownCloud:desktop.repo
zypper refresh
sudo zypper install owncloud-client
Check this link if your OpenSuse Desktop version differs and add your appropriate repository.
Next we need to configure the ownCloud-client as per our OpenSuse ownCloud-server share. Open the ownclient-client:
Put the Server Address as 192.168.0.20/owncloud:

Put the credentials as in my case it was Username=owncloud and password=database_password:
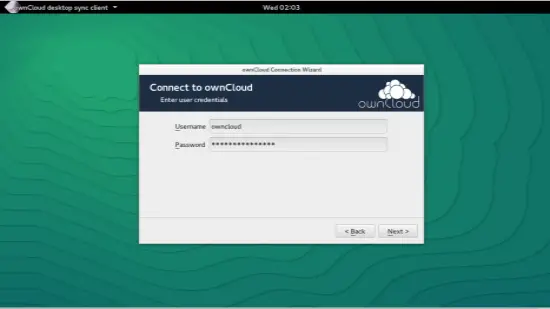
Press Connect:
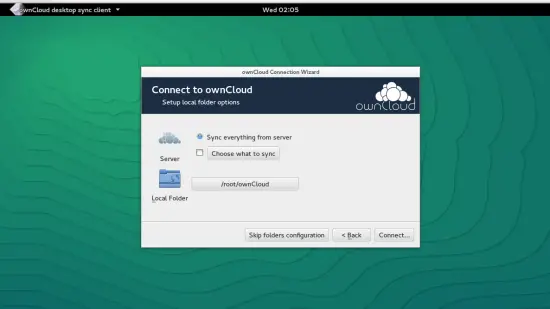
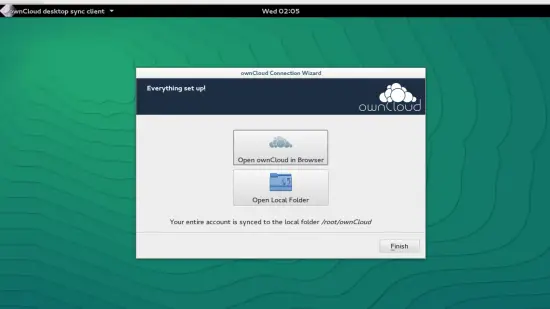
It will connect your system with the OpneSuse server share and the shared data will get synced.
7 Links
- ownCloud 7 : https://owncloud.com/
- OpenSuse : http://www.opensuse.org/en/

