How to Install ONLYOFFICE on Red Hat Linux (RHEL) and CentOS
Introduction
ONLYOFFICE is a free, open source software that enables teams to manage projects, customer relations and documents in one place. Though Ubuntu is the most well-known Linux distribution, we don't want other distributions users to feel left out in the cold. This guide will show what steps to take to install ONLYOFFICE collaborative system on Red Hat/CentOS.
System requirements
For ONLYOFFICE correct work your machine should meet some system requirements and have some additional components installed:
- RAM: 2 GB or more
- Swap file: at least 2 GB
- HDD: at least 2 GB of free space
- mono: version 3.2 or later
- MySQL: version 5.6 or later
- nginx
Install some prerequisites and enable additional repositories for (For CentOS 7):
yum -y install nano yum-utils
yum -y install epel-release
yum install http://dev.mysql.com/get/mysql-community-release-el7-5.noarch.rpm
The components found in the system repository will be installed automatically at ONLYOFFICE installation using the yum install command.
If some of these components are missing, follow the instructions from their official websites.
Enable the MySQL service and start mysql:
systemctl enable mysqld.service
systemctl start mysqld.service
Set a MySQL password (the initial password is empty) and remove the test database:
mysql_secure_installation
The command will guide you interactively trough the mysql securing process as described below:
[root@static ~]# mysql_secure_installation
NOTE: RUNNING ALL PARTS OF THIS SCRIPT IS RECOMMENDED FOR ALL MySQL
 SERVERS IN PRODUCTION USE! PLEASE READ EACH STEP CAREFULLY!
In order to log into MySQL to secure it, we'll need the current
password for the root user. If you've just installed MySQL, and
you haven't set the root password yet, the password will be blank,
so you should just press enter here.
Enter current password for root (enter for none):
OK, successfully used password, moving on...
Setting the root password ensures that nobody can log into the MySQL
root user without the proper authorisation.
Set root password? [Y/n] Y
New password:
Re-enter new password:
Password updated successfully!
Reloading privilege tables..
 ... Success!
By default, a MySQL installation has an anonymous user, allowing anyone
to log into MySQL without having to have a user account created for
them. This is intended only for testing, and to make the installation
go a bit smoother. You should remove them before moving into a
production environment.
Remove anonymous users? [Y/n] y
 ... Success!
Normally, root should only be allowed to connect from 'localhost'. This
ensures that someone cannot guess at the root password from the network.
Disallow root login remotely? [Y/n] y
 ... Success!
By default, MySQL comes with a database named 'test' that anyone can
access. This is also intended only for testing, and should be removed
before moving into a production environment.
Remove test database and access to it? [Y/n] y
 - Dropping test database...
ERROR 1008 (HY000) at line 1: Can't drop database 'test'; database doesn't exist
 ... Failed! Not critical, keep moving...
 - Removing privileges on test database...
 ... Success!
Reloading the privilege tables will ensure that all changes made so far
will take effect immediately.
Reload privilege tables now? [Y/n] y
 ... Success!
All done! If you've completed all of the above steps, your MySQL
installation should now be secure.
Thanks for using MySQL!
Cleaning up...
Installing ONLYOFFICE
Step 1. Open Terminal using Ctrl+Alt+T
Step 2. Add the yum ONLYOFFICE repository.
To do that, create the /etc/yum.repos.d/onlyoffice.repo file with the following contents:
nano /etc/yum.repos.d/onlyoffice.repo
[onlyoffice]
name=onlyoffice repo
baseurl=http://download.onlyoffice.com/repo/centos/noarch/
gpgcheck=0
enabled=1
Step 3. Install ONLYOFFICE from the repository
Just execute the following command:
sudo yum install onlyoffice
Configuring ONLYOFFICE
Before you start ONLYOFFICE for the first time it is necessary to create the database and configure connection to it.
To do that, run the configuration script:
chmod +x /var/www/onlyoffice/configure.sh
/var/www/onlyoffice/configure.sh
It will interactively ask you to enter the MySQL connection parameters, create the database, update configuration files and run all services.
Please, note: the script does not create users for the database and does not change passwords for existing users.
[root@static ~]# /var/www/onlyoffice/configure.sh
-bash: /var/www/onlyoffice/configure.sh: Permission denied
[root@static ~]# chmod +x /var/www/onlyoffice/configure.sh
[root@static ~]# /var/www/onlyoffice/configure.sh
Configuring MySQL access...
Host: localhost
Database name: onlyoffice
User: root
Password: <- enter the mysql root password here
Trying to establish MySQL connection... OK
Installing MySQL database... Warning: Using a password on the command line interface can be insecure.
Warning: Using a password on the command line interface can be insecure.
Warning: Using a password on the command line interface can be insecure.
Warning: Using a password on the command line interface can be insecure.
OK
Restarting services... OK
Then change the line
listen 80 default_server;
to
listen 81 default_server;
in the file /etc/nginx/nginx.conf as ONLYOFFICE defines its own default vhost on port 80 and enable and start nginx:
nano /etc/nginx/nginx.conf
Then enable and start nginx:
systemctl enable nginx.service
systemctl start nginx.service
Running ONLYOFFICE
To open your office in the web browser, enter localhost (http://127.0.0.1) or the external IP of your server if you dont have a Desktop installed in the address bar of your browser. The Welcome page will open:
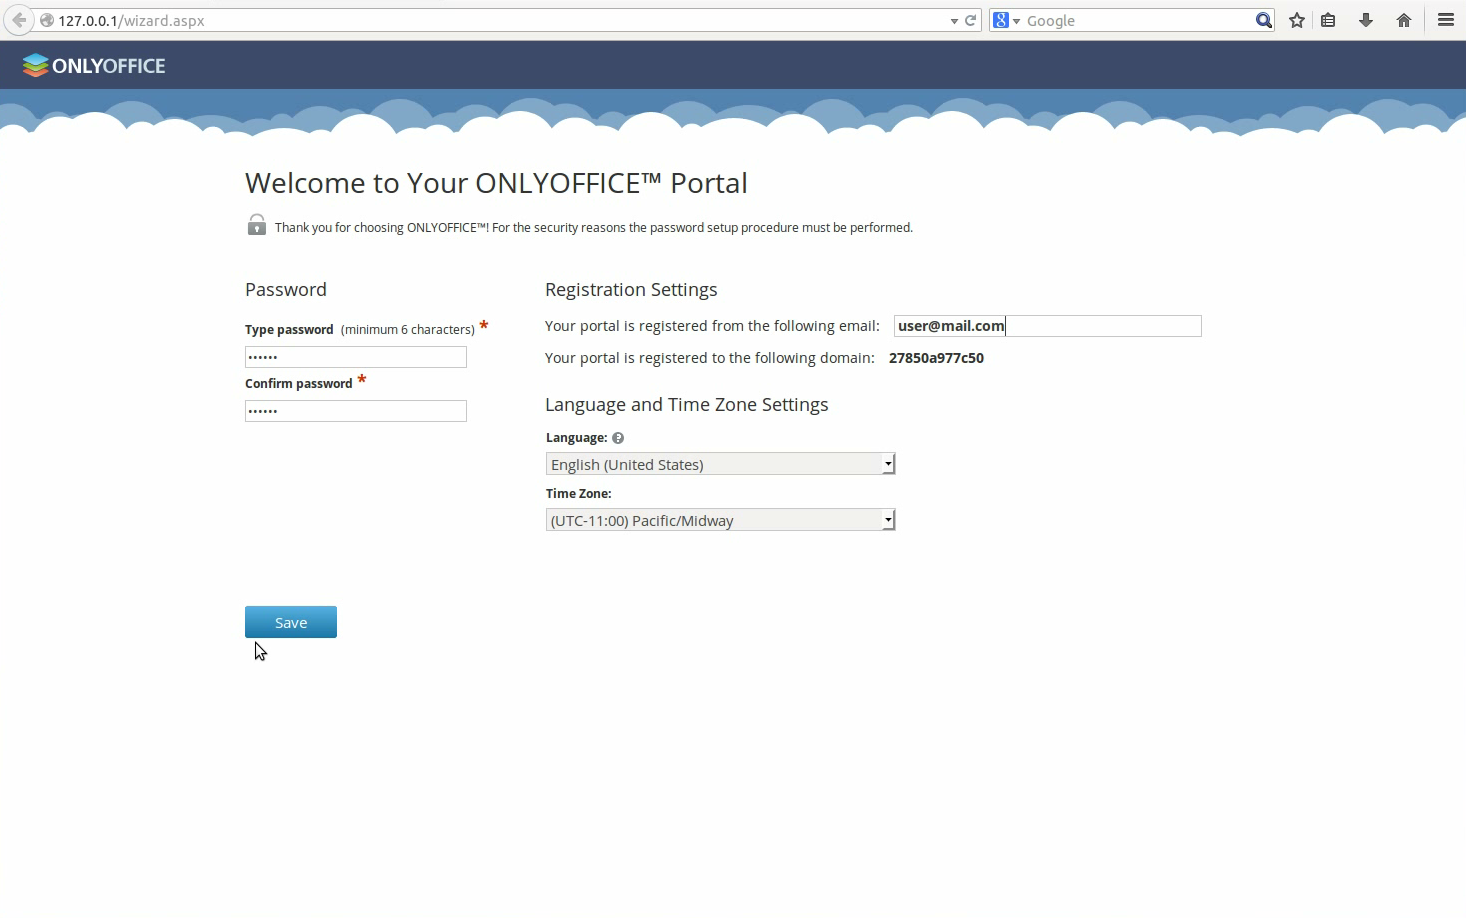
Enter a password and specify the email address you will use to access your ONLYOFFICE the next time.
Done! You can start working!
Tips and Tricks
- Tip 1. ONLYOFFICE uses Mono v. 3.2 or later, to install it checkout the official instructions. If it is installed to find out your current version, execute the following command: mono --version.
- Tip 2. To install the latest version of nginx, follow the official instructions.
- Tip 3. ONLYOFFICE requires MySQL version 5.6 or later. To install it on your machine, refer to the official instructions.
- Tip 4. Once ONLYOFFICE is installed, you may need to customize and manage it so that it fitted your needs. All the necessary instructions can be found on the ONLYOFFICE official website.
- Tip 5. To install ONLYOFFICE using the graphical user interface, download the installation file from SourceForge.
- Tip 6. If you are looking for simplest and more secure way to install ONLYOFFICE, use the Docker service.

