In this tutorial, we will show you how to install LAMP Stack on a Debian 9 VPS.
 A LAMP (Linux, Apache, MySQL, PHP) stack is a combination of open-source software, typically installed on a server used for hosting dynamic websites and web applications. It includes the Linux operating system, the Apache web server, MySQL or MariaDB for data storage and management, and PHP for handling any dynamic content.
Installing LAMP on Debian 9 is a straightforward task and should not take more than 10 minutes. Let’s start with the installation.
Table of Contents
Prerequisites:
- A Debian 9 VPS
- Access to a system user with sudo privileges, or to the root account.
Step 1: Update the system
Before continuing with the next steps, update your Debian system by issuing the following commands:
sudo apt-get update
sudo apt-get upgrade
Always keep your system updated. You can also set up automatic updates.
Step 2: Install Apache
Apache is the most widely used web server in the world. It is fast, secure, reliable, easy-to-use, and can be easily customized depending on your needs.
To install Apache on your Debian 9 server, type the following command:
sudo apt-get install apache2
Once the installation is complete, enable the Apache service to start automatically upon system boot. You can do that with the following command:
sudo systemctl enable apache2
To verify that Apache is successfully installed, open your web browser, enter your server IP address, (e.g. http://12.12.12.12) and you should see a message saying “It works!”.
Step 3: Install MariaDB
The next step is to install MariaDB. It is one of the most popular database management systems.
To install MariaDB on your system, type the following command and enter ‘Y’ when prompted:
sudo apt-get install mariadb-server
Once the installation is complete, it is recommended to run the following command to improve the security of your MariaDB server:
sudo mysql_secure_installation
First, you will be asked to set the root password:
NOTE: RUNNING ALL PARTS OF THIS SCRIPT IS RECOMMENDED FOR ALL MariaDB
      SERVERS IN PRODUCTION USE!  PLEASE READ EACH STEP CAREFULLY!

In order to log into MariaDB to secure it, we'll need the current
password for the root user.  If you've just installed MariaDB, and
you haven't set the root password yet, the password will be blank,
so you should just press enter here.

Enter current password for root (enter for none):
OK, successfully used password, moving on...

Setting the root password ensures that nobody can log into the MariaDB
root user without the proper authorisation.

Set root password? [Y/n]
Type Y and enter the new MariaDB root password:
New password:
Re-enter new password:
Password updated successfully!
Reloading privilege tables..
 ... Success!
Next, you will be asked to change the root password, but since we already created it during the MariaDB installation, we can skip this step by pressing [Enter].
After this, you will get asked a couple of more questions and it is recommended that you answer ‘Y’ to all of them to confirm:
Remove anonymous users? (Press y|Y for Yes, any other key for No) : Y

Disallow root login remotely? (Press y|Y for Yes, any other key for No) : Y

Remove test database and access to it? (Press y|Y for Yes, any other key for No) : Y

Reload privilege tables now? (Press y|Y for Yes, any other key for No) : Y
Once that is done, make sure to set the MariaDB service to start on boot with the following command:
sudo systemctl enable mysql
That’s it – MySQL has been installed and secured.
Step 4: Install PHP
The last step in this tutorial is to install PHP.
PHP is a programming language mostly used for developing dynamic websites. Debian 9 comes with PHP 7.0 by default.
At the time of writing this article the latest PHP version is PHP 7.3 which is available in the DEB.SURY.ORG repository.
To enable the repository, run these commands:
sudo apt-get install ca-certificates apt-transport-https lsb-release
sudo wget -O /etc/apt/trusted.gpg.d/php.gpg https://packages.sury.org/php/apt.gpg
echo "deb https://packages.sury.org/php/ $(lsb_release -sc) main" | sudo tee /etc/apt/sources.list.d/php7.3.list
You can now install PHP 7.3 along with some of the most common PHP modules by running the following command:
sudo apt-get install php7.3 libapache2-mod-php7.3 php7.3-mysql php7.3-opcache php7.3-gd php7.3-curl php7.3-cli php7.3-imap
To test whether the PHP is working correctly we will create a file called info.php. Place this file inside the web server root directory.
Open your text editor and create a new file like this:
sudo nano /var/www/html/info.php
Enter the following lines and save the file:
<?php
phpinfo();
?>
After that, restart the Apache server by typing:
sudo systemctl restart apache2
Now, if you navigate to this page: http://your_server_ip_address/info.php in your web browser, you will see the following page showing your current PHP configuration:
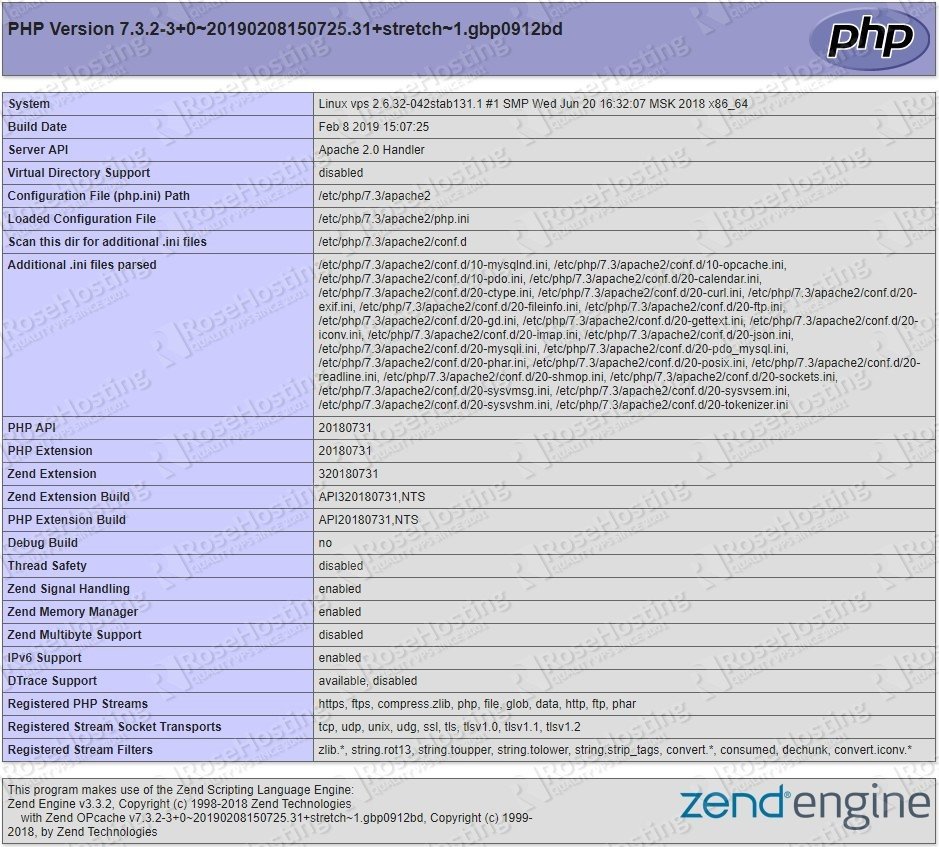
This means PHP is working properly.
With this, you have completed the LAMP installation on Debian 9. Congratulations!
 Of course, if you are one of our Lamp Stack Hosting customers, you don’t have to install LAMP on Debian 9, or to know how to install a LAMP stack on Debian 9, simply ask our admins, sit back and relax. Our admins will install LAMP on Debian 9 for you immediately.
PS. If you liked this post, on how to install a LAMP stack on Debian 9, please share it with your friends on the social networks using the buttons below, or simply leave a comment in the comments section. Thanks.