How to Install Piwik with Nginx on Ubuntu 15.10
Piwik is the leading open source web analytics application, it has been developed to provide an alternative to google-analytics. Piwik gives you full control over your data with it's user privacy protection features and provides nice customizable report formats. Piwik allows you to monitor different websites from one Piwik installation and displays the reports for the visitor geo-location, visitor access, page views, visitor operating-system, browser etc.
In this tutorial, I will show you how to install Piwik on ubuntu 15.10 with Nginx web server and PHP 5.6 in php-fpm mode. We will use MariaDB as the database system.
Prerequisites
- Ubuntu 15.10 - 64bit.
- Root privileges.
Step 1 - Install Nginx and PHP-FPM
Become root User and update the Ubuntu package list before we begin with the installation:
sudo su
apt-get update
Now install Nginx with the following apt command, we will use Nginx 1.9 for this installation (which is the default version in Ubuntu 15.10).
apt-get install nginx
Nginx is installed and running on port 80. We can check it by checking the open ports of this server:
netstat -plntu | grep 80
The command should show you a Nginx process listening on port 80.Next let's install php5-fpm.
Next let's install php5-fpm. We need the php5-mysql, php5-cli, php5-gd and php5-geoip modules for Piwik, so we install all with one command.
apt-get install php5-fpm php5-mysql php5-curl php5-gd php5-cli php5-geoip
Nginx and php5-fpm are installed, you can check the PHP version with the following php5-cli command:
php5 --version
Start Nginx and php-fpm:
systemctl start php5-fpm
systemctl start nginx
Step 2 - Configure Nginx and PHP-FPM
In this step, I will configure Nginx and php-fpm for Piwik. We will add a Nginx virtual host and configure the php-fpm pool.
A. Configure PHP-FPM
We can use the standard php-fpm php.ini file as the basis, go to the /etc/php5/fpm directory and edit the php.ini file with the vim or nano editor.
cd /etc/php5/fpm/
vim php.ini
Uncomment the line 773 and change the value to zero.
cgi.fix_pathinfo=0
Now uncomment the line 704 below and keep the value -1 :
always_populate_raw_post_data = -1
Save the file and exit the editor.
B. Configure Nginx
Now I will configure Nginx. I will use the custom Nginx configuration from the Piwik github repository. Backup the default Nginx configuration in the etc directory and clone the Nginx configuration from the Piwik github repo into to /etc/nginx directory.
mv /etc/nginx/ /etc/nginx-old/
git clone https://github.com/perusio/piwik-nginx.git /etc/nginx
Got to the sites-available directory and rename the default piwik configuration:
cd /etc/nginx/sites-available/
mv stats.example.com.conf stats.piwik.me.conf
Edit the file that "stats.piwik.me.conf" with vim:
vim stats.piwik.me.conf
Disable IPv6 support by comment the line of it:
#listen [fe80::202:b3ff:fe1e:8329]:80 ipv6only=on;
Change the the server name to our domain, I'll use "stats.piwik.me" here:
server_name www.stats.piwik.me;
return 301 $scheme://stats.piwik.me$request_uri;
Now go to the second directive and just comment out the IPv6 line, change your domain in the server name line, change the log file and configure the web root directory, I'll use "/var/www/piwik/" for this installation.
#listen [fe80::202:b3ff:fe1e:8329]:80 ipv6only=on;
......
server_name stats.piwik.me;
......
access_log /var/log/nginx/stats.piwik.me_access.log;
error_log /var/log/nginx/stats.example.com_error.log;
......
root /var/www/piwik;
Save the file and exit.
Then go to the Piwik apps directory and edit the file piwik.conf:
cd /etc/nginx/apps/piwik/
vim piwik.conf
On line 9 we have to define the valid referrers for our site. I'll just add our current domain here for now:
valid_referers none blocked *.piwik.me piwik.me;
Comment line 62 because we do not need a Piwik proxy cache:
#include apps/piwik/proxy_piwik_cache.conf;
Save the file and exit.
Now, go back to the Nginx directory and configure the php-fpm upstream. We use the php5 socket mode for php-fpm as it is a bit faster than network connections. Edit the file "upstream_phpcgi.conf" with vim:
cd /etc/nginx/
vim upstream_phpcgi.conf
On the server line, change the unix value to your php5-fpm sock. We use the default sock:
server unix:/var/run/php5-fpm.sock;
Save the file and exit the editor.
Note: You can check all sockets on your server with the command below:
netstat --unix -l
The next step is is to configure the FastCGI Piwik cache directory. Create a new cache directory in "/var/cache/" and set the owner to "www-data" (because we use that user to run Nginx).
mkdir -p /var/cache/nginx/fcgicache
chown -R www-data:www-data /var/cache/nginx/
chown -R www-data:www-data /var/cache/nginx/fcgicache
Finally, create a new directory "sites-enabled" and activate the virtual host that we've created:
cd /etc/nginx/
mkdir sites-enabled/
ln -s /etc/nginx/sites-available/stats.piwik.me.conf /etc/nginx/sites-enabled/
Now the Nginx configuration is finished. In the next part I will set up the MariaDB database for Piwik.
Step 3 - Install and Configure MariaDB
Install MariaDB from the Ubuntu repository and set a password for the database root user:
apt-get install mariadb-server mariadb-client
When the installation of the packages is finished, configure the MariaDB root password with this command:
mysql_secure_installation
Setup your password:
Set root password? [Y/n] Y
Give Your Password

Remove anonymous users? [Y/n] Y
Disallow root login remotely? [Y/n] Y
Remove test database and access to it? [Y/n] Y
Reload privilege tables now? [Y/n] Y
Next, log into the MySQL shell with username root and with your password:
mysql -u root -p
Type Your Password
Now create a new database for the Piwik installation. We will create a database named "piwikdb", a new database user "piwikuser" with the password "piwikuser@". (Please choose a more secure password for your installation!
Run the MySQL commands below:
create database piwikdb;
create user piwikuser@localhost identified by 'piwikuser@';
grant all privileges on piwikdb.* to piwikuser@localhost identified by 'piwikuser@';
flush privileges;
q\

The database has been created. Now we are ready to install Piwik.
Step 4 - Install Piwik
We will install Piwik in the "/var/www/" directory. Download Piwik and extract the .zip archive, then rename the Piwik default directory to "piwik" and change the owner of the Piwik directory to "www-data".
Let's download Piwik with the wget command and extract it:
wget https://github.com/piwik/piwik/archive/master.zip
unzip master.zip
Now rename the piwik-master directory to piwik and change the owner of the directory to www-data:
mv piwik-master/ piwik/
chown -R www-data:www-data piwik/
Go to the piwik directory and install the php-composer and other dependencies required by Piwik:
cd /var/www/piwik/
curl -sS https://getcomposer.org/installer | php
php composer.phar install --no-dev
Restart nginx and php-fpm, then visit your Piwik domain name with a browser:
systemctl restart nginx
systemctl restart php5-fpm
Next make sure the tmp/ and config/ directory are writable by the www-data user, this simple command we will change the permissions:
chown -R www-data:www-data tmp/ config/
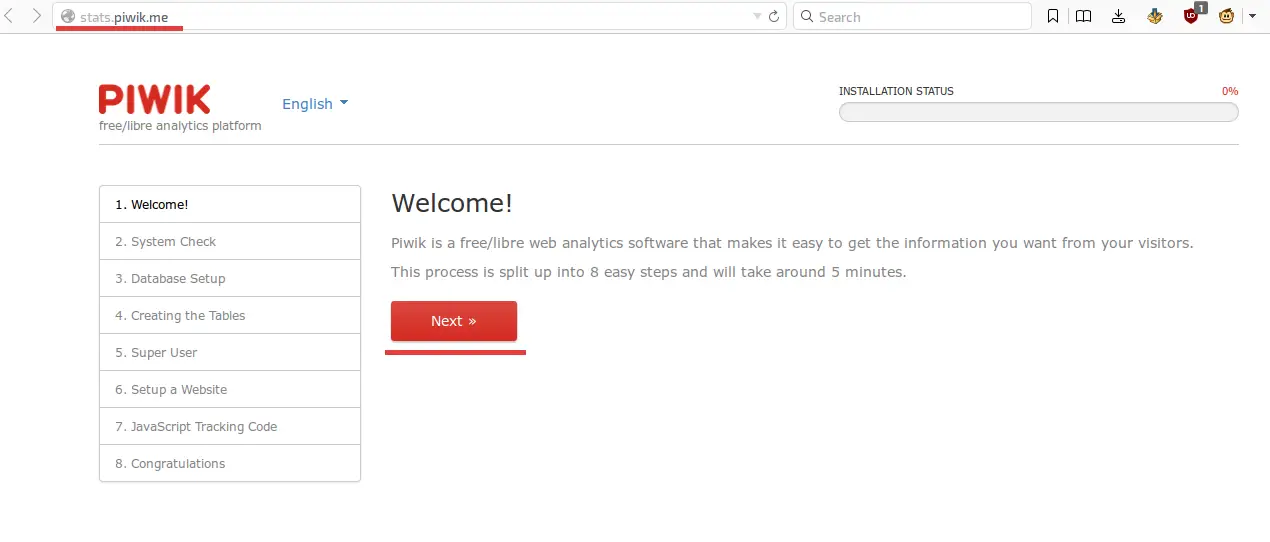
Now visit the Piwik domain name, mine is stats.piwik.me.
You should see "Welcome" from Piwik. Click on the "Next" button.
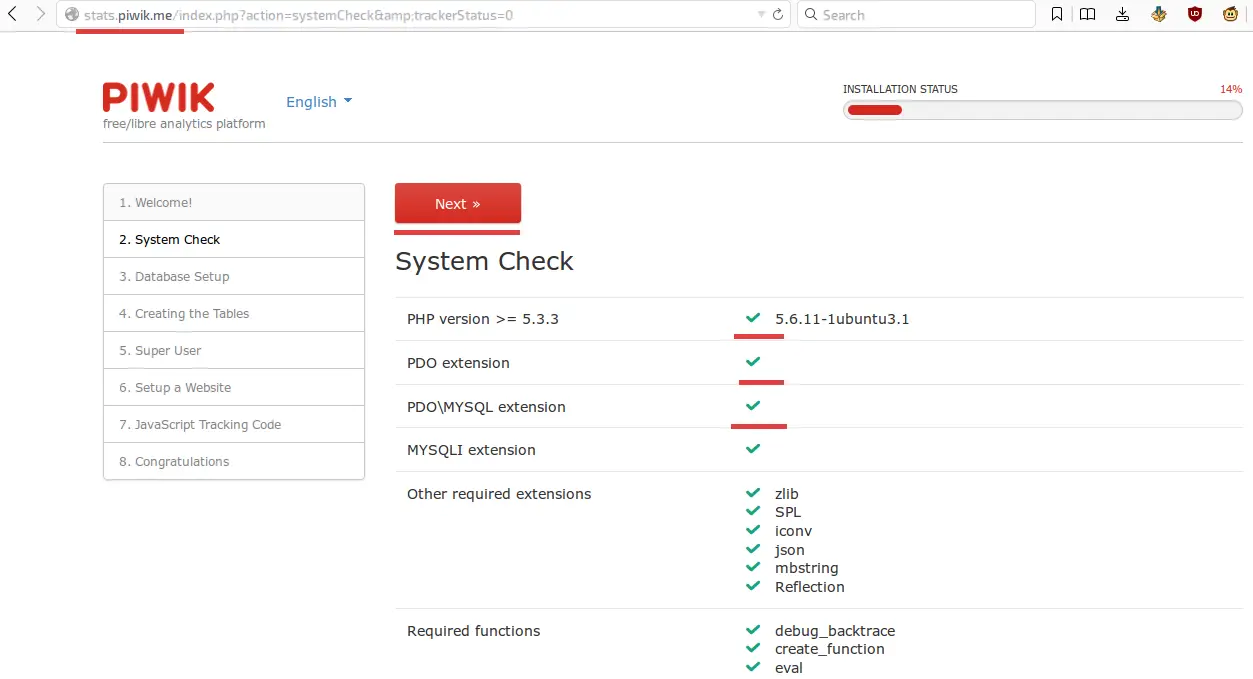
On the "System Check" page, make sure all checks are green, then Click "Next".
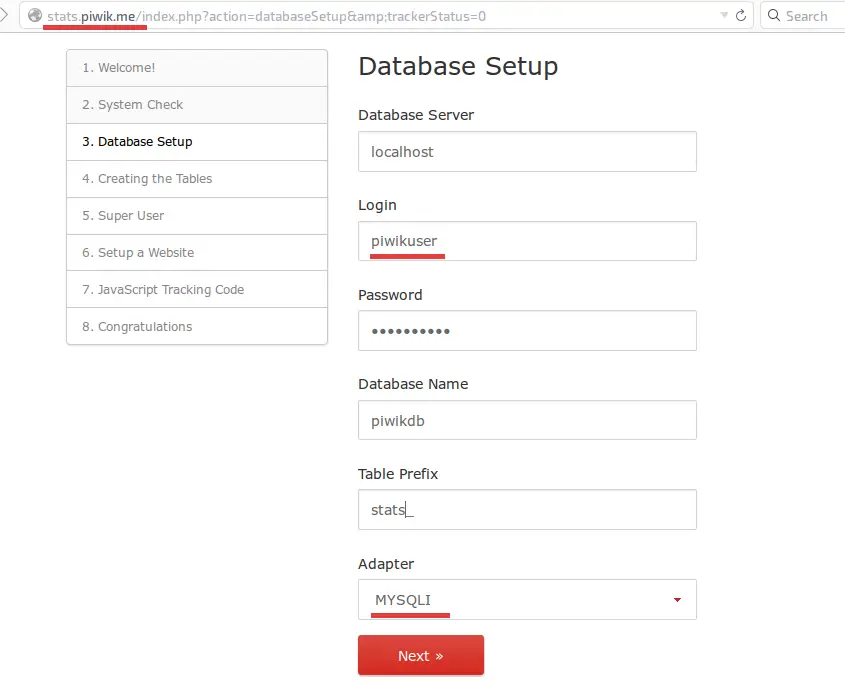
The next step is the database setup. Fill in the database name, user and password that we created earlier. In the "Adapter" section, chose "MYSQLI", then click "Next".
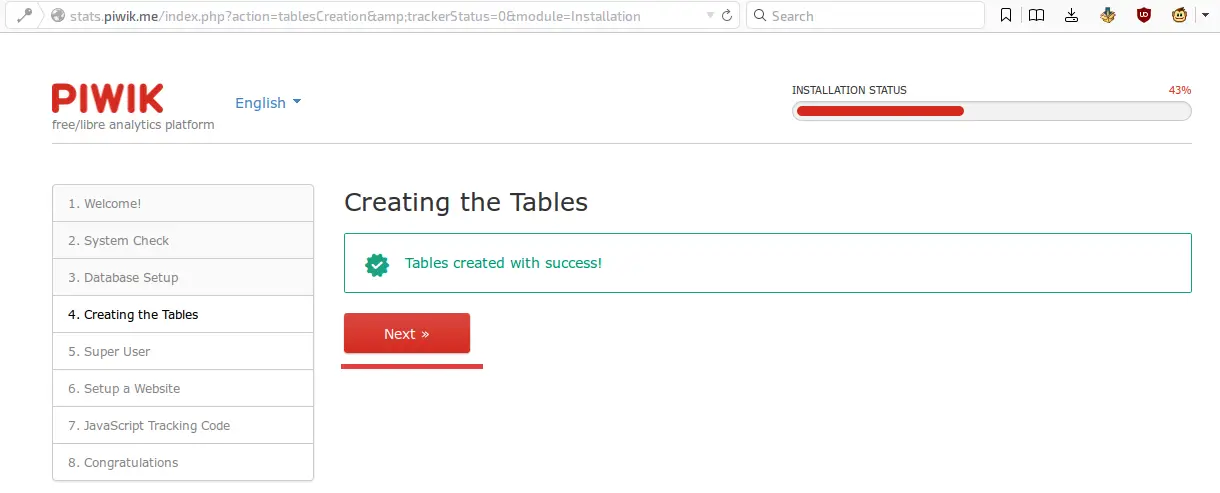
You can see that the tables for Piwik have been created successfully. Then click on "Next".
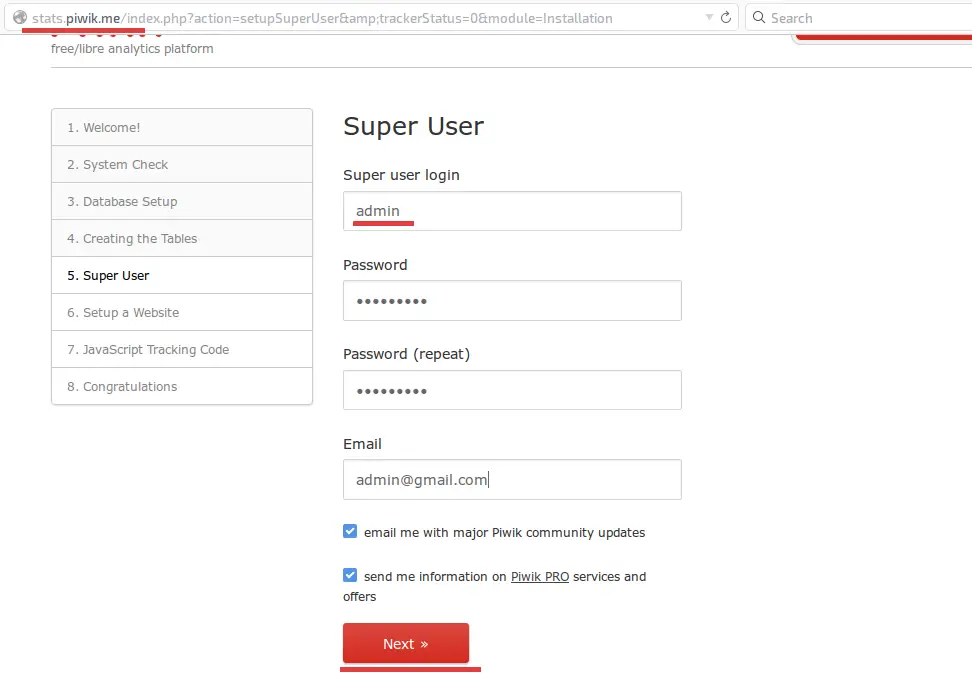
Now create an admin user for the Piwik login. Fill in your desired username and password, then "Next".
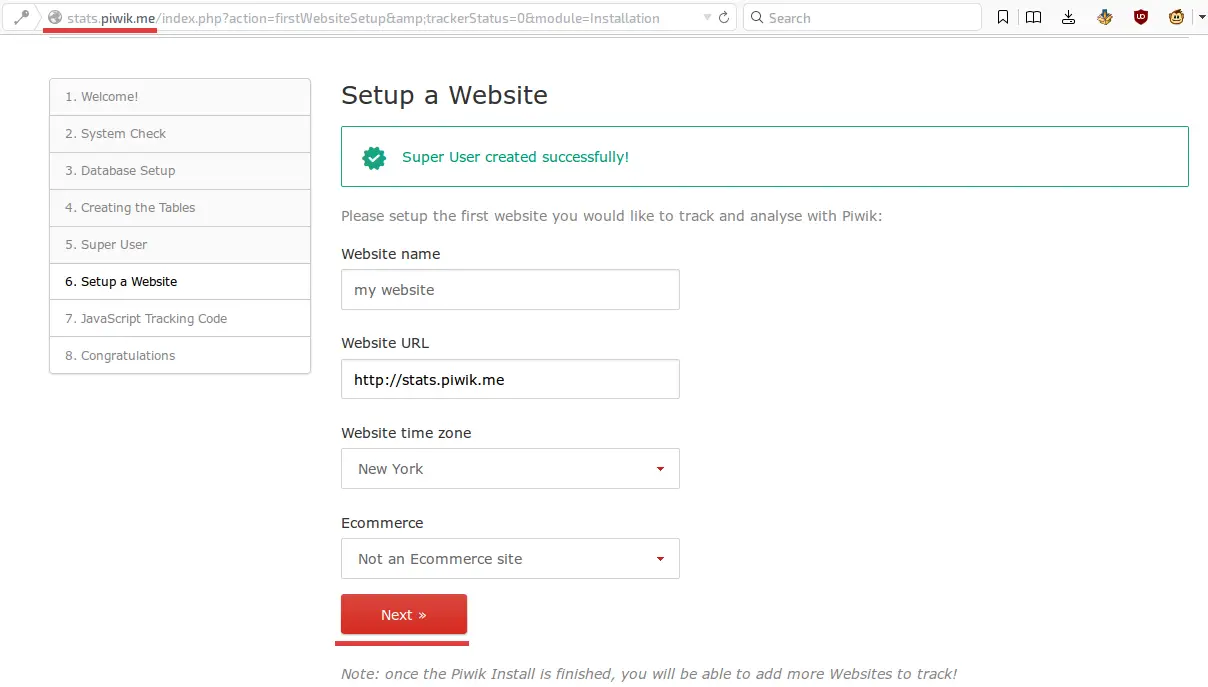
Setup your first website in Piwik and click "Next".
Copy the javascript tracking code and insert it into the HTMl of the website that you like to monitor with Piwik. Then click "Next".
![]()
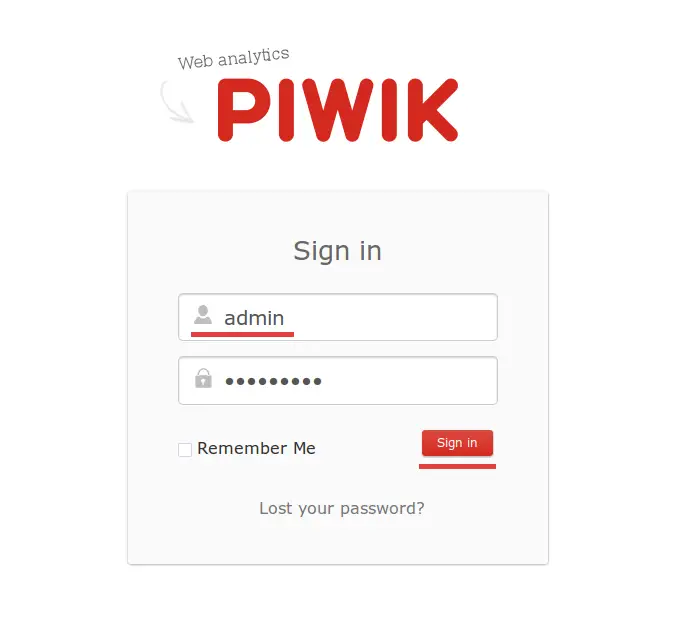
Congratulation, Piwik with Nginx and php-fpm is installed. You can log into the Piwik admin dashboard with your username and password now.
Then you can see the Piwik admin dashboard.
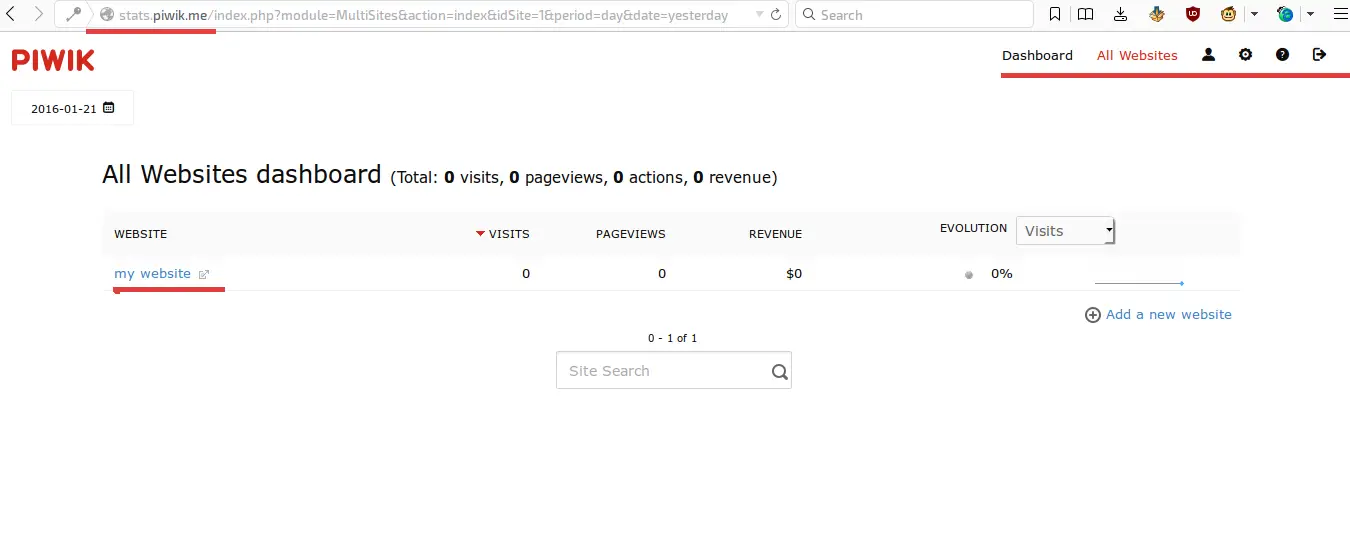
The Piwik installation is finished.
Conclusion
Piwik is web application based on PHP and MySQL (MariaDB) to create website statistics, it is an alternative to Google Analytics. Piwik is a free (open source) tracking app that gives you full access to your data with a better user privacy protection. Piwik can be installed with Apache or Nginx web server. Piwik has a beautiful dashboard and well-designed reports, it is customizable and easy to install and configure.

