How to speed up apache with mod_pagespeed and Memcached on Ubuntu 15.10
This tutorial exists for these OS versions
- Ubuntu 20.04 (Focal Fossa)
- Ubuntu 16.04 (Xenial Xerus)
- Ubuntu 15.10 (Wily Werewolf)
- Ubuntu 15.04 (Vivid Vervet)
On this page
This tutorial will show you how to improve the page load times of your website by using the Google mod_pagespeed module for Apache in conjunction with the fast in-memory cache Memcached on Ubuntu 15.10 (Wiley Werewolf). The page load time is an important factor to get good rankings in search engines, you can test the current load time e.g. with the Google PageSpeed Insights tool or with the developer tools in the Firefox web browser. Pagespeed is an Apache 2 module that optimizes and caches the content of a website before it gets delivered to the browser, the result is that the page loads, the system load on your server decreases and the server will be able to deliver more pages per second. Mod_pagespeed uses a filesystem cache by default, in this tutorial, we will replace the filesystem cache with Memcached, a fast in-memory caching daemon which will further improve the load time. This tutorial is compatible with all kind of apache setups, I will use a Ubuntu LAMP server as basis but you may also use on of the ISPConfig 3 Perfect Server tutorials.
Installation of mod_pagespeed
Google provides mod_pagespeed .deb packages for 32 and 64-bit Ubuntu installations.
How to find out if you need the 32bit or 64Bit package? Run the command:
uname -a
The result of the command should be similar to the screenshot below.
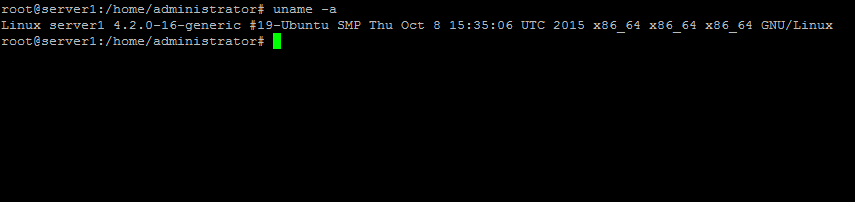
When the command contains the string "x86_64" then your system runs a 64Bit Linux kernel. In this case, use the commands provided below for 64Bit Ubuntu.
Ubuntu 64 bit (Default for most current servers)
cd /tmp
wget https://dl-ssl.google.com/dl/linux/direct/mod-pagespeed-stable_current_amd64.deb
dpkg -i mod-pagespeed-stable_current_amd64.deb
Ubuntu 32 bit
cd /tmp
wget https://dl-ssl.google.com/dl/linux/direct/mod-pagespeed-stable_current_i386.deb
dpkg -i mod-pagespeed-stable_current_i386.deb
Then restart Apache 2 to load the mod_pagespeed configuration.
service apache2 restart
Installation of Memcached
The Memcached daemon is available in the Ubuntu repositories as .deb package an can be installed with apt:
apt-get -y install memcached
Run the command "netstat -tap | grep memcached" to see if Memcached is started:
netstat -tap | grep memcached
The result of the netstat command shall look like this:
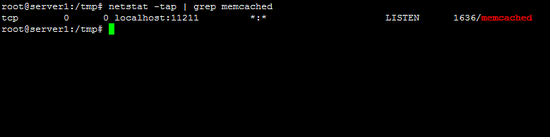
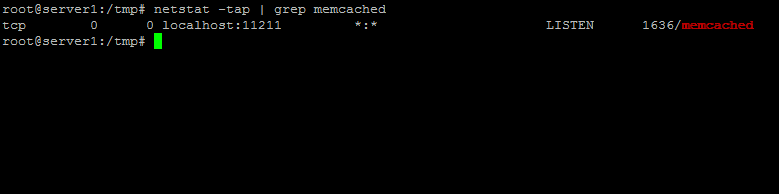
The Port is shown right after the word localhost, in this case the port is 11211 which is the default port of memcached. We need to know that port number for the mod_pagespeed configuration.
If you like to use Memcache from your PHP based applications and not just for mod_pagespeed, then install the PHP Memcached extension:
apt-get install php5-memcached
Configure mod_pagespeed to use Memcached
Open the pagespeed.conf file in an editor, I will use the nano editor here:
nano /etc/apache2/mods-available/pagespeed.conf
and search for the line "ModPagespeedMemcachedServers":
[....]
# ModPagespeedMemcachedServers localhost:11211
[....]
Remove the # in front of the line so that the resulting line looks like the one below:
[....]
ModPagespeedMemcachedServers localhost:11211
[....]
If you have plenty of memory in your server, then you can get a further speedup by removing the # in front of this line:
[....]
ModPagespeedCreateSharedMemoryMetadataCache "/var/cache/mod_pagespeed/" 51200
[....]
Then restart the Apache 2 server to activate the new configuration.
service apache2 restart
Now mod_pagespeed will use Memcached as storage backend. You can get usage statistics from Memcached with the nc command:
echo stats | nc 127.0.0.1 11211
root@server1:/tmp# echo stats | nc 127.0.0.1 11211
STAT pid 1636
STAT uptime 254
STAT time 1460561250
STAT version 1.4.24 Ubuntu
STAT libevent 2.0.21-stable
STAT pointer_size 64
STAT rusage_user 0.000000
STAT rusage_system 0.020000
STAT curr_connections 6
STAT total_connections 8
STAT connection_structures 7
STAT reserved_fds 20
STAT cmd_get 34
STAT cmd_set 15
STAT cmd_flush 0
STAT cmd_touch 0
STAT get_hits 14
STAT get_misses 20
STAT delete_misses 0
STAT delete_hits 0
STAT incr_misses 0
STAT incr_hits 0
STAT decr_misses 0
STAT decr_hits 0
STAT cas_misses 0
STAT cas_hits 0
STAT cas_badval 0
STAT touch_hits 0
STAT touch_misses 0
STAT auth_cmds 0
STAT auth_errors 0
STAT bytes_read 8573
STAT bytes_written 22539
STAT limit_maxbytes 67108864
STAT accepting_conns 1
STAT listen_disabled_num 0
STAT threads 4
STAT conn_yields 0
STAT hash_power_level 16
STAT hash_bytes 524288
STAT hash_is_expanding 0
STAT malloc_fails 0
STAT bytes 6856
STAT curr_items 9
STAT total_items 15
STAT expired_unfetched 0
STAT evicted_unfetched 0
STAT evictions 0
STAT reclaimed 0
STAT crawler_reclaimed 0
STAT crawler_items_checked 0
STAT lrutail_reflocked 0
END
Press [ctrl] + c to get back to the command prompt.
Now test the speed of your website again, e.g. with PageSpeed Insights. When your website has not much traffic yet then it might be that you have to reload the web page a few times to fill the caches before you get proper results.

