
The year of Linux is here. According to reports, Google sold more Chromebooks in the first quarter of 2016 than Apple sold Macbooks. And, Chromebooks are about to get even more exciting. During the Google I/O Summit, the company announced that the Google Play store for Android is coming to Chromebooks in mid June, which will allow users to run Android apps on their Chrome OS devices.
But, you don’t have to buy a brand new laptop to use Chrome OS; you can now easily convert your old laptop or PC into a powerful Chromebook. I did this for a Dell Mini and a Dell laptop that I bought in 2009. Those two devices were collecting dust and were destined for freecycling, because modern operating systems and desktop environments like Unity, Plasma, and Gnome won’t run on them.
If you have an old system lying around, you can easily convert it into a Chromebook. You can also dual-boot your laptop with Chrome OS, so you get the best of both worlds.
Thanks to the open source base of Chrome OS, many solutions out there enable you to install the operating system on your device. I have tried several, but the solution I like most is CloudReady by Neverware. The company offers a free, community-supported version of the OS along with a commercially supported version for $49 per year, per device. The good part is that all licenses are transferable, so if you sell or donate the device, you can also transfer the Neverware license to the new user.
What You’ll Need
Before you can get started installing CloudReady on your laptop, you will need some preparation:
-
A USB drive with 4GB or more storage
-
Open Chrome browser, go to Google Chrome Store and install Chromebook Recovery Utility.
-
Change BIOS settings of your target PC so it can boot from the USB
Get Started
Neverware offers two images for CloudReady: 32 bit and 64 bit. Download the appropriate OS for your hardware from the download page.
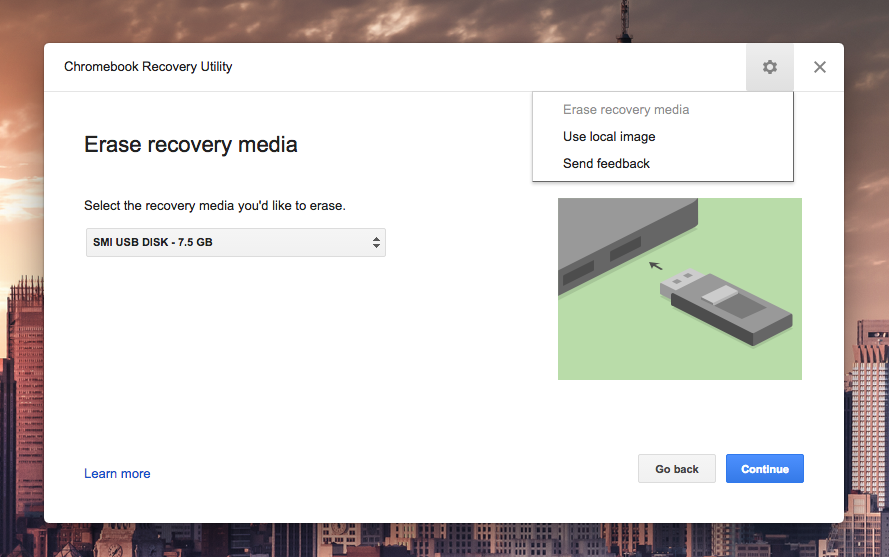
Extract the content of the downloaded zip file, and you will get a chromiumos_image.bin file. Now plug in the USB device and open the Chromebook recovery utility. Click on the gear at the top right corner of the tool and select erase recovery media (Figure 1).
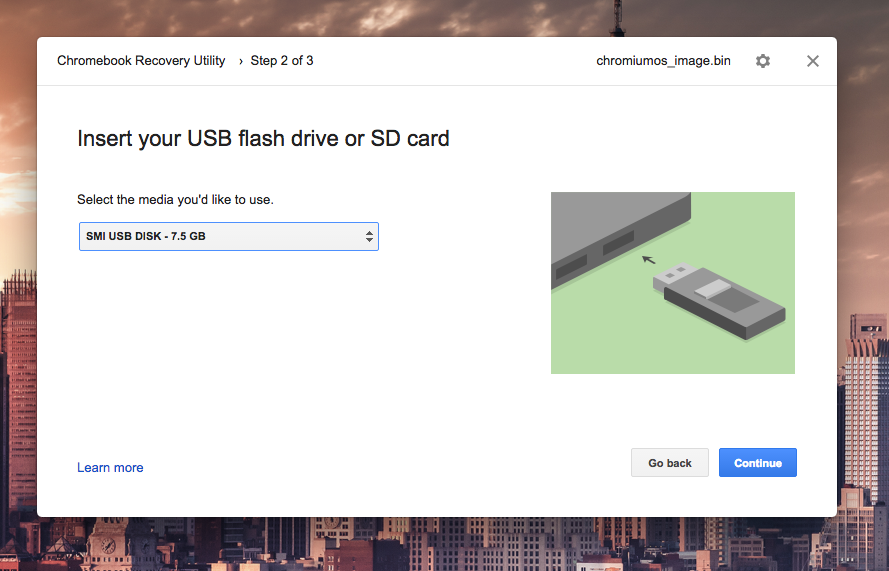
Next, choose the target USB drive and format it. Once formatted, go to the gear again, and this time select the use local image option. Now browse the extracted bin file, select the USB drive, click on continue, and then on the create button (Figure 2). It will start writing the image to the drive.
Once the drive is ready with bootable CloudReady, plug it into the target PC and boot the system. It may take a while for the system to boot into Chromium OS. Once booted, you will see the screen shown in Figure 3.

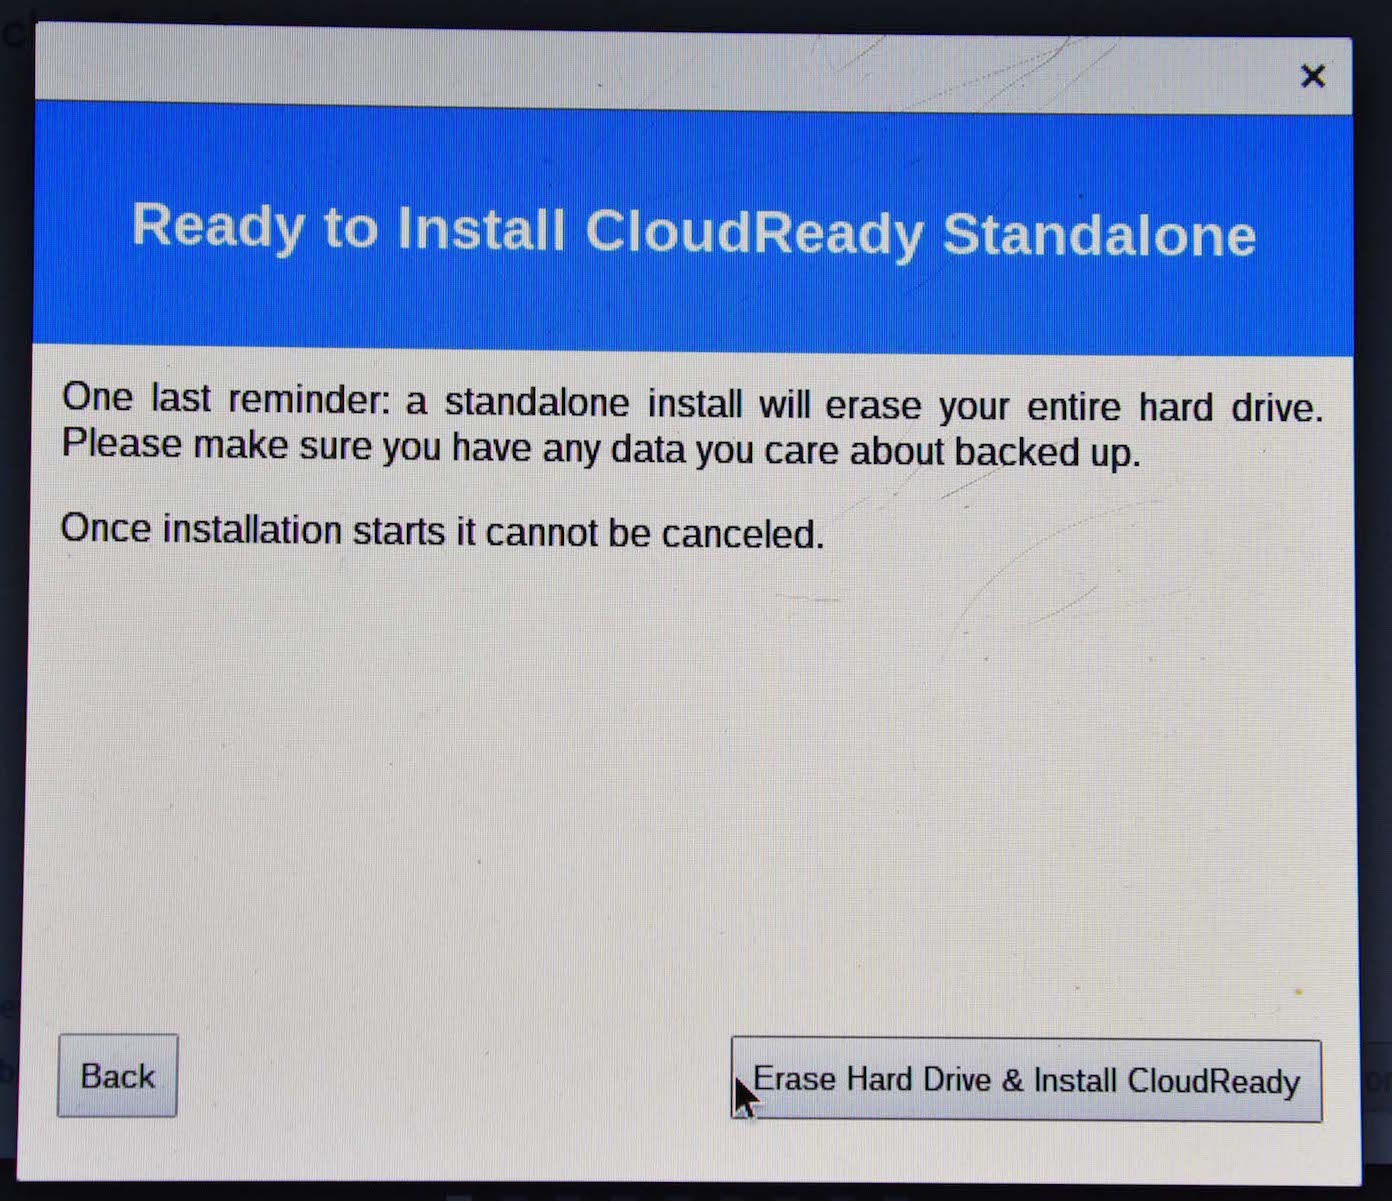
Go to the taskbar and click on Install CloudReady.
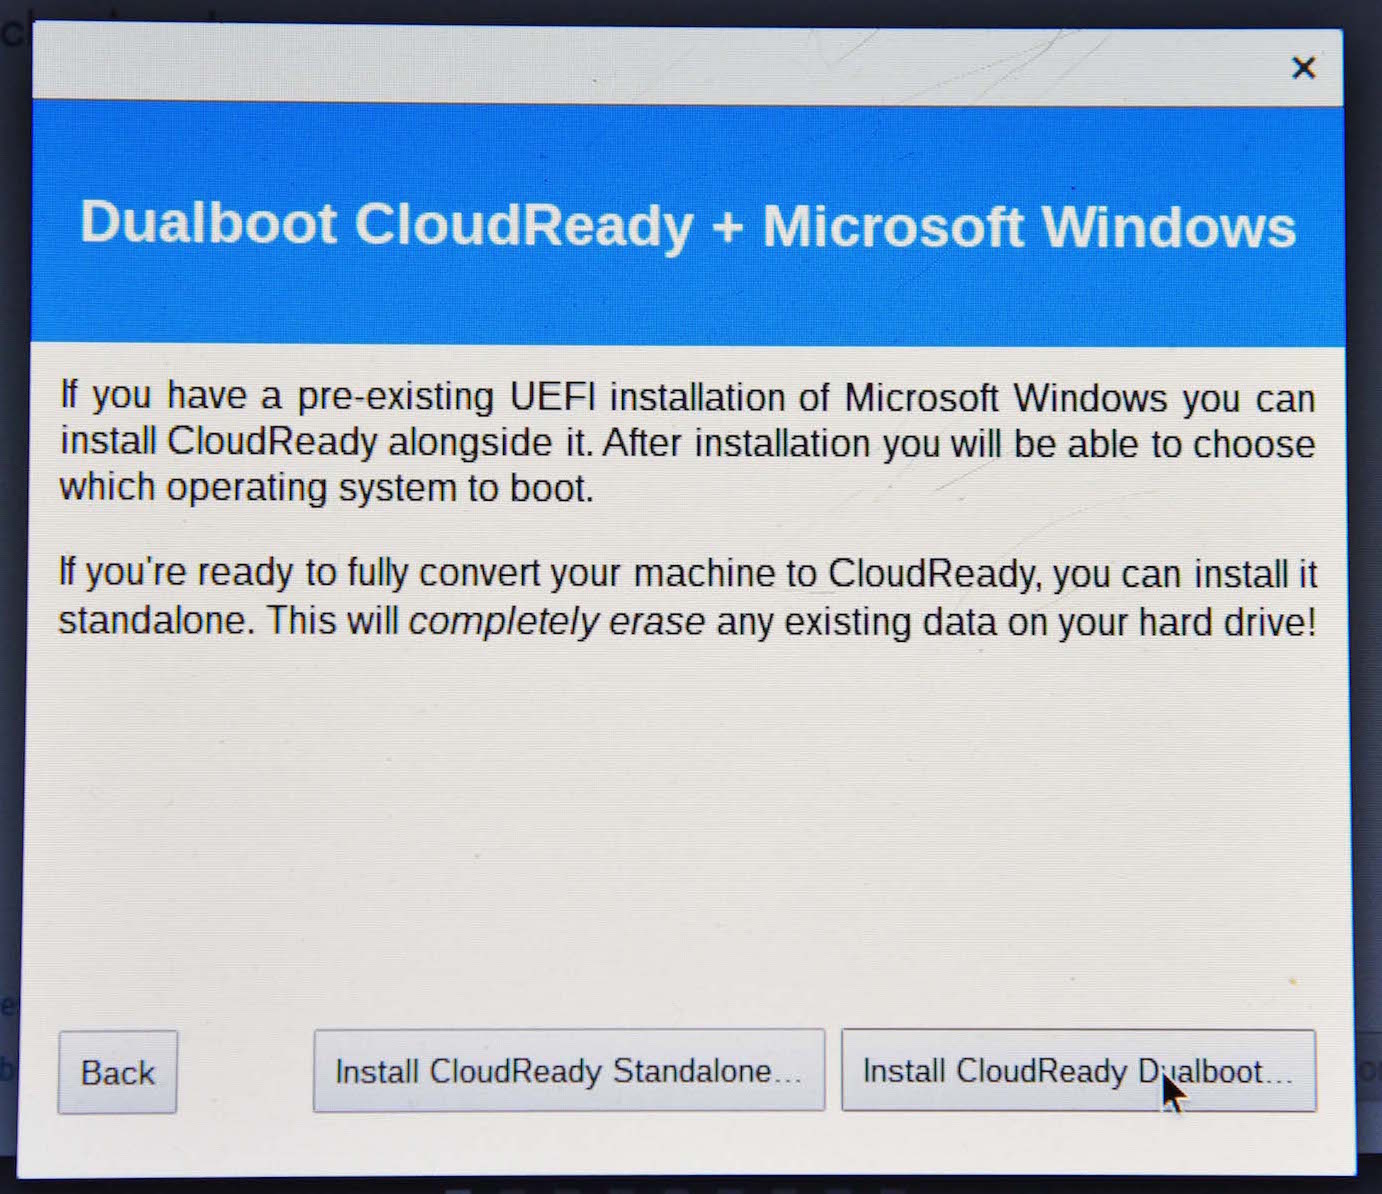
You can dual boot your system between Chromium OS and another operating system, but the other OS should already be installed.
To single boot (Figure 4) or dual boot (Figure 5) your system, choose the option in the next window.
Just follow the click-next instructions.
The entire process will take up to 20 minutes, depending on the storage media and the processing power. Once installed, the PC will shut down and reboot.
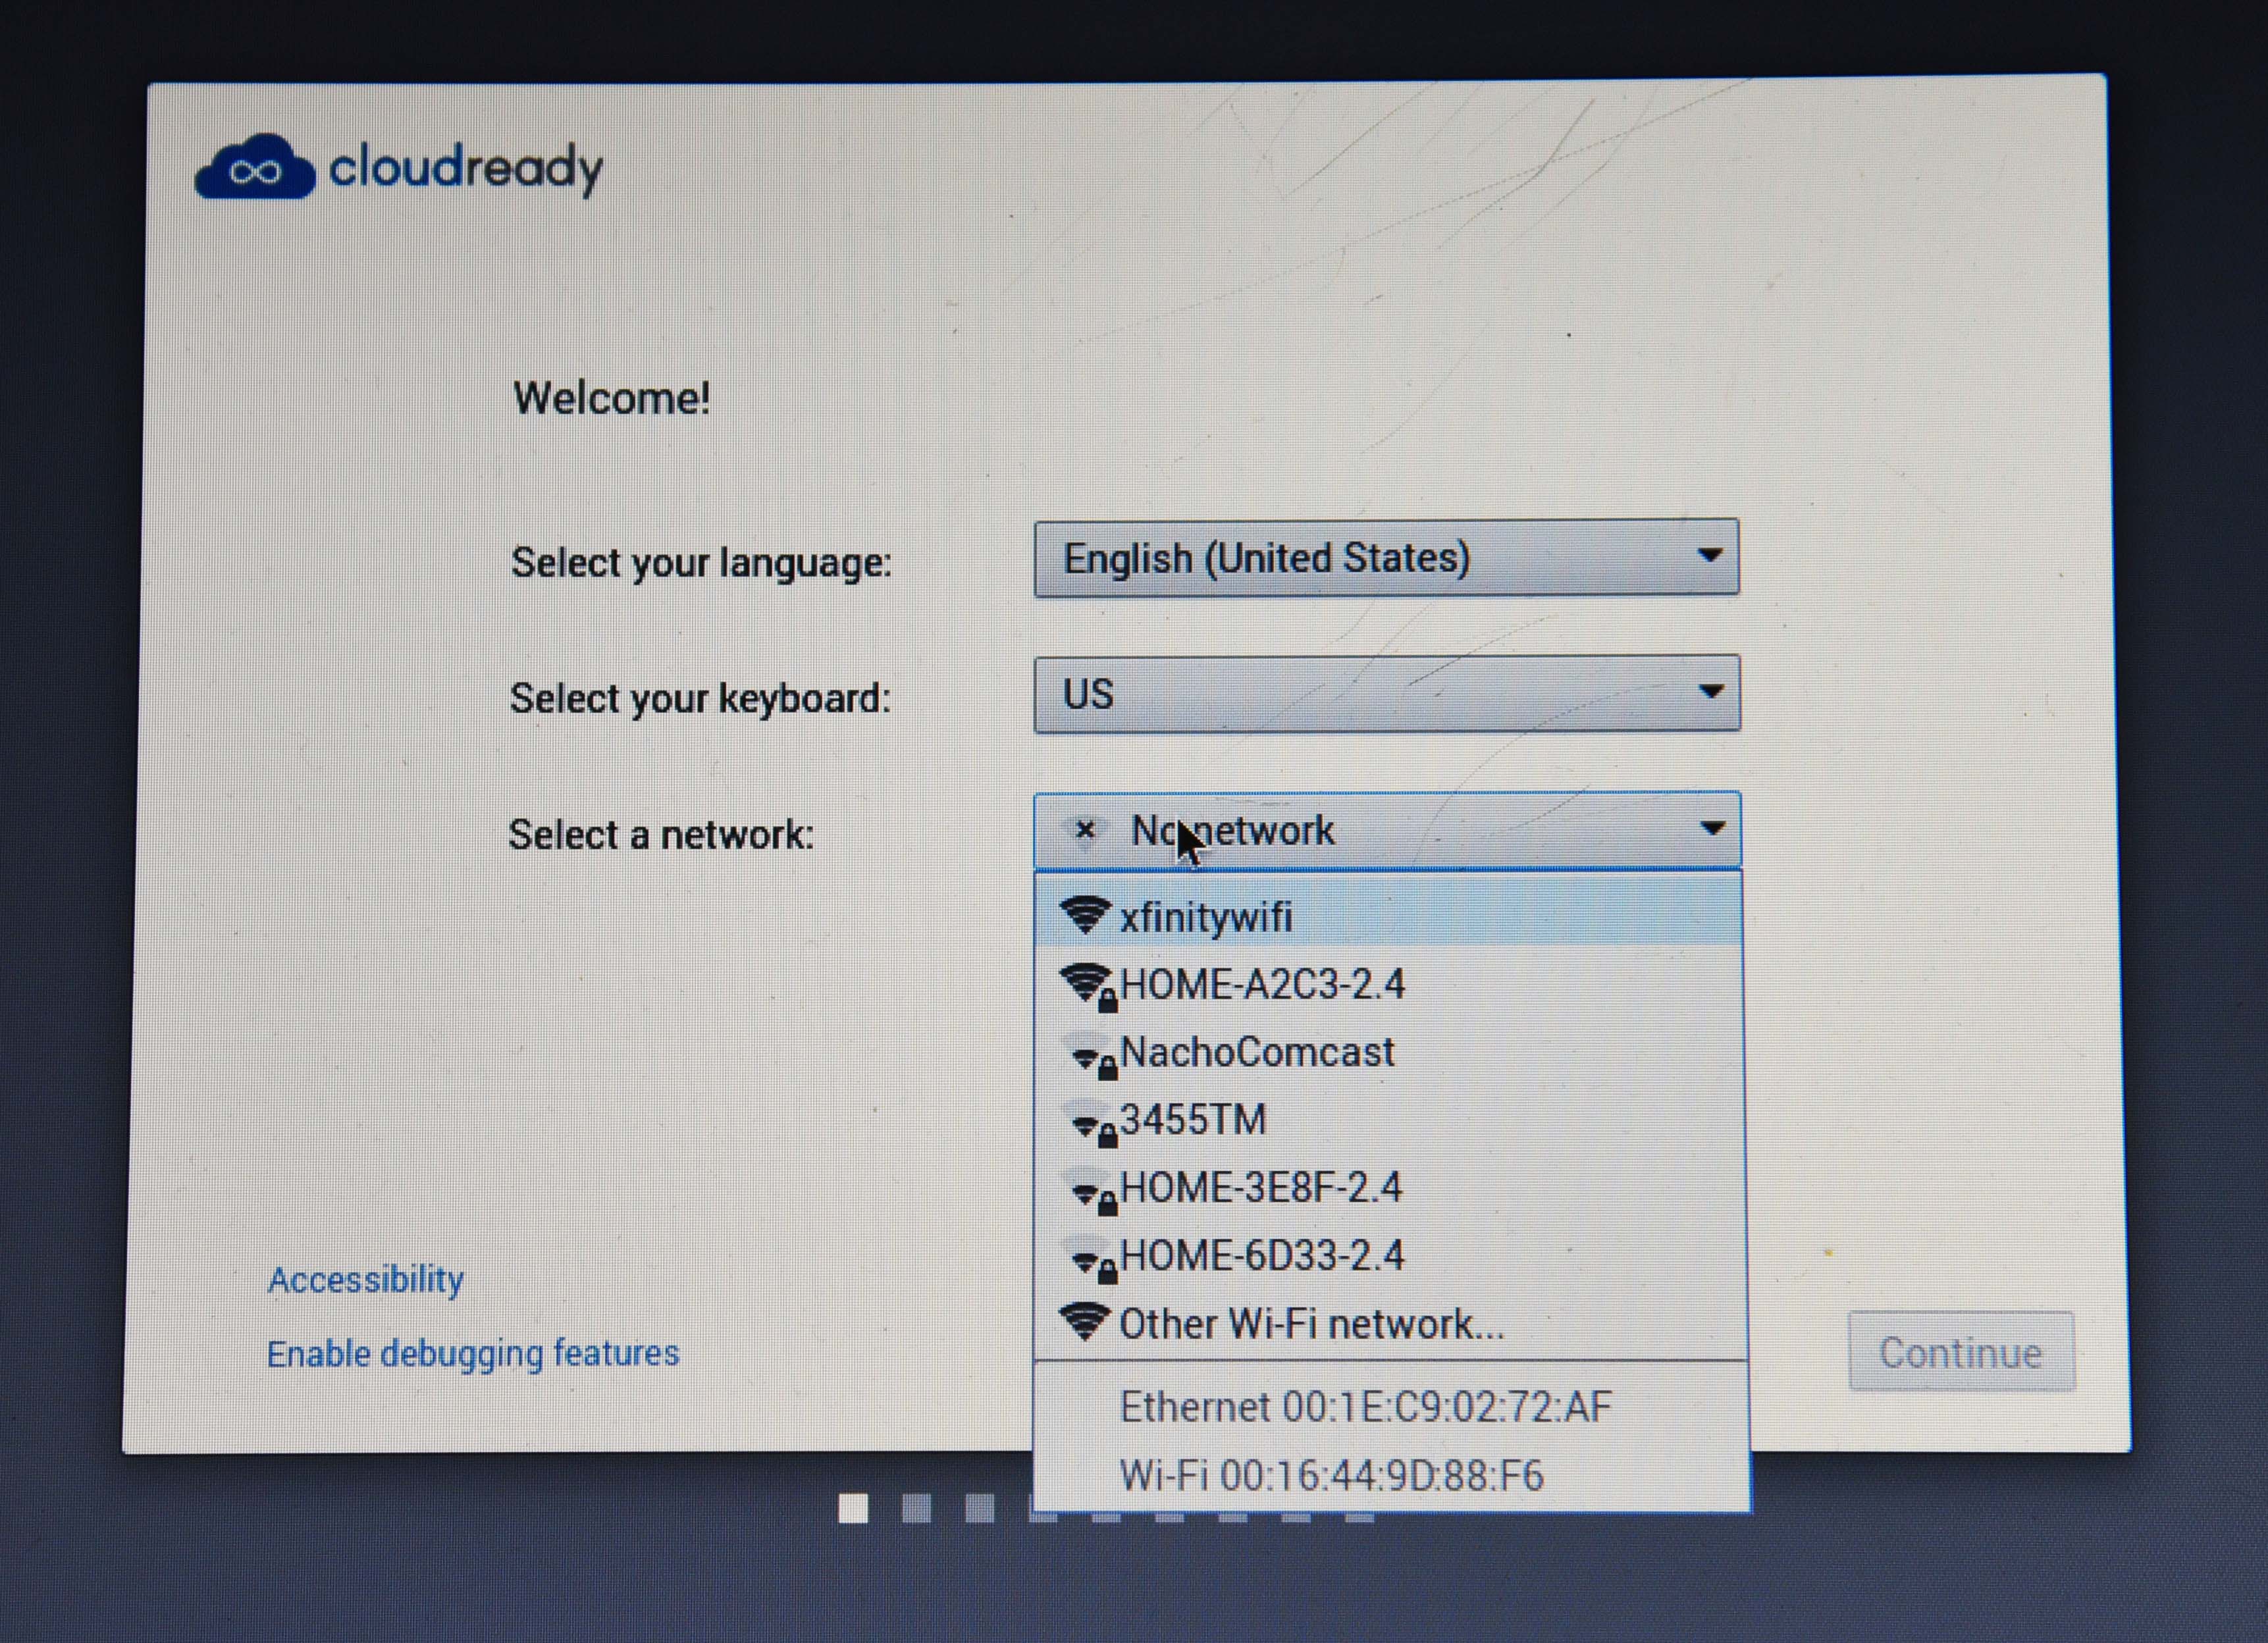
After you reboot, you will be greeted with the network settings page (Figure 6). The exciting thing is that, although I had to install wireless drivers for Linux distributions on the same hardware, everything worked out of the box with Chromium OS.
Once you connect to the wireless network, the system will look for updates and also offer to install Adobe Flash. Once the installation is finished, you will see the Chromium OS login screen. Now you can just log into your Gmail account and start using your “Chromebook” right away.
Get Netflix to Work
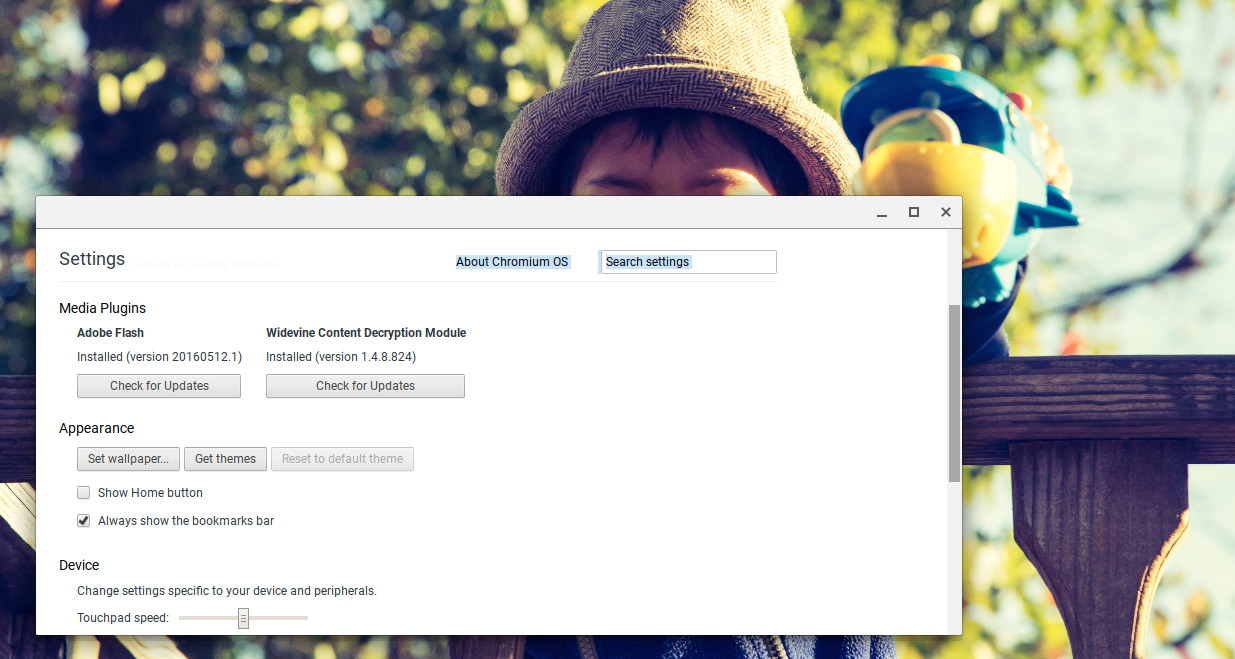
If you want to play Netflix and other DRM protection-streaming sites, you do need to do some extra work. Go to settings and click on the Install Widevine plugin (Figure 7).
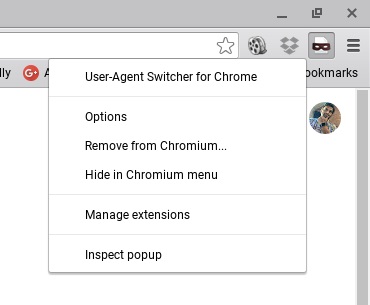
Now you need the good old trick of using a user agent switcher (Figure 8).
Go to Chrome Webstore and install User Agent Switcher. Once the plugin is installed, it will be added to the bookmark bar of the browser.
Right-click on the agent switcher icon and create a new entry (Figure 9):
Name: “CloudReady Widevine”
String: “Mozilla/5.0 (X11; Linux x86_64) AppleWebKit/535.11 (KHTML, like Gecko) Ubuntu/16.10 Chrome/49.0.1453.93”
Group: “Chrome” (should be filled automatically)
Append: “Replace”
Indicator Flag: “IE”
Click “Add”
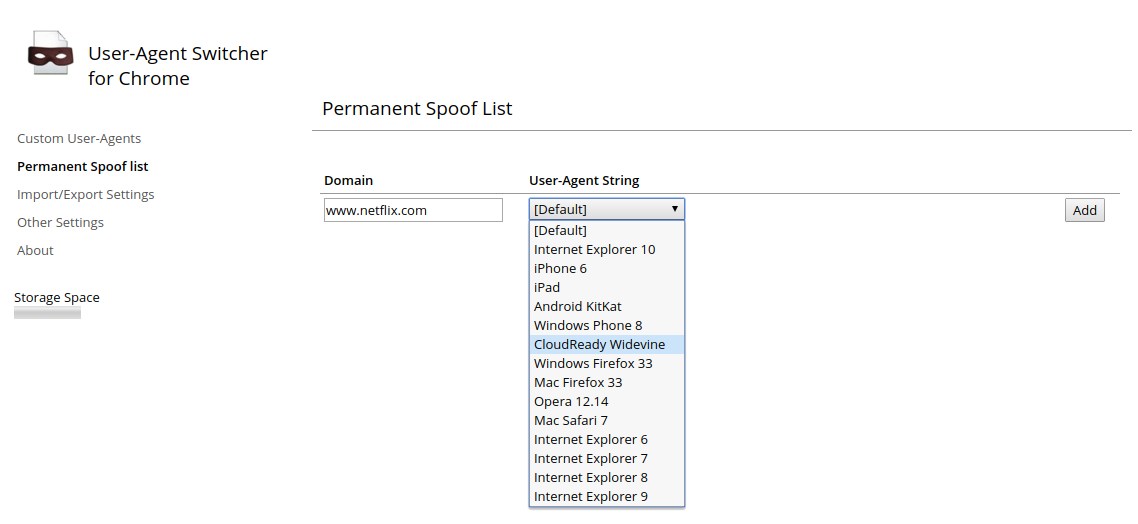
Then, go to the “permanent spoof list” option and add CloudReady Widevine as the permanent string for www.netflix.com.
Now, reboot your system, and you can watch Netflix and many other services.


