How to Install Nginx, PHP and MySQL (LEMP Stack) on OpenSUSE Leap 42.1
LEMP or Linux, Engine-x, MySQL, and PHP is a collection of software installed on the Linux operating system to get your PHP based web applications up and running on the fast Nginx web server. The LEMP stack provides a fast and reliable basis for hosting web applications. LEMP is a collection of open source software which has a complete documentation set so you can easily learn more about the different applications and the way they fit together.
In this tutorial, I will show you how to install Nginx, MariaDB, and PHP-FPM on openSUSE leap 42.1. Then I will configure the OpenSUSE firewall with SuSEfirewall2 to allow access to the Nginx web server and show you how you can add a new virtual host configuration on the Nginx web server.
Finally, we will install phpMyAdmin as an easy to use database administration tool and secure it by changing the web directory and enabling HTTP authentication for the phpMyAdmin directory.
Prerequisite
- OpenSUSE Leap 42.1.
- Root privileges.
- Understanding zypper command.
Step 1 - Install and Configure SuSEfirewall2
SuSEfirewall2 is a script which generates iptables rules based on the configuration file "/etc/sysconfig/SuSEfirewall2". We will install and configure it to prevent network attacks on the server port.
Install SuSEfirewall2 with zypper:
zypper in SuSEfirewall2
When the installation is finished, we have to open some ports for the web applications and SSH. We will open port 22 for ssh service and port 80 and 443 for http and https. Go to the "/etc/sysconfig/" directory and edit the "SuSEfirewall2" file:
cd /etc/sysconfig/
vim SuSEfirewall2
In line 253, add the port numbers of the services, separated by a white space:
FW_SERVICES_EXT_TCP="22 80 443"
Save the file and exit.
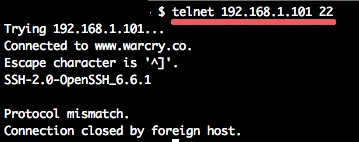
Restart the SuSEfirewall2 and the SSH service, then test the port configuration by connecting with telnet to the server.
Restart SuSEfirewall2 and SSH service:
/sbin/rcSuSEfirewall2 restart
systemctl restart sshd
Testing ssh connection with telnet on port 22:
telnet 192.168.1.101 22
Step 2 - Install and Configure Nginx
Nginx or engine x is a high-performance HTTP- and proxy server with low memory consumption. It is used by large scale websites like Netflix, Pinterest, CloudFlare, Github etc. Nginx has an easy to learn configuration syntax and can act also as a load balancer with health checks and reverse proxy with caching features.
In this step, we will install nginx and add it to start at boot time. Install it with the "zypper in" command:
zypper in nginx
Start nginx and enable it to be started at boot time:
systemctl start nginx
systemctl enable nginx
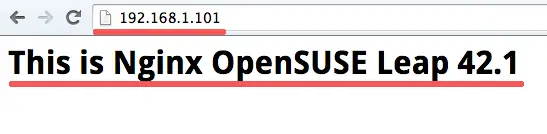
Nginx is started now, but if you try to access it through the web browser, you will get a 403 forbidden error. This error occurs because there is no standard index document in the web root folder. To solve this problem, create a new index html in the root web directory "/srv/www/htdocs". Go to the directory and create the index.html file:
cd /srv/www/htdocs/
echo "<h1>This is Nginx OpenSUSE Leap 42.1</h1>" > index.html
Open your web browser and type your server IP and you will get the index page:
Step 3 - Install and Configure MariaDB
MariaDB is open source RDBMS (Relational Database management System) forked from MySQL under the GNU GPL license. In this tutorial, we will install MariaDB and configure the root password for the MariaDB shell.
Install MariaDB with the zypper command:
zypper in mariadb mariadb-client
Start MariaDB/MySQL and add it to boot startup with the systemctl command below:
systemctl start mysql
systemctl enable mysql
Next, configure the admin password for MariaDBb/MySQL with the mysqladmin command. Another option that you can use for this purpose is the "mysql_secure_installation". In this step, I will use mysqladmin:
/usr/bin/mysqladmin -u root password 'aqwe123'
Note:
"aqwe123" is the new password for MariaDB/MySQL.
Then login to the mysql shell with user root and password aqwe123:
mysql -u root -p
TYPE PASSWORD 'aqwe123'
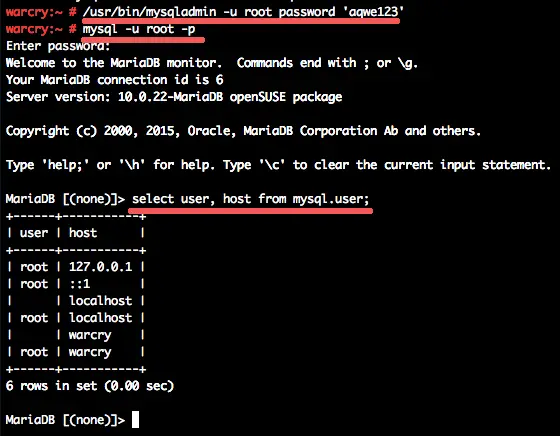
Now MariaDB/MySQL is installed and configured with our new password.
Step 4 - Install and Configure PHP-FPM
PHP-FPM or FastCGI Process Manager is an alternative for the older PHP FastCGI with provides additional features and speed improvements. PHP-FPM is well suited for small and large sites based on the PHP programming language.
In this step, we will install php5-fpm with some aditional extensions required by phpMyAdmin. Install php5-fom and the extensions with zypper:
zypper in php5 php5-mysql php5-fpm php5-gd php5-mbstring
When the installation has been completed, go to the php5-fpm directory and copy the configuration file:
cd /etc/php5/fpm/
cp php-fpm.conf.default php-fpm.conf
Edit the configuration with vim command:
vim php-fpm.conf
Uncomment the line 32 to enable php-fpm log, the default prefix is /var and if you have any problem with php5-fpm, you can check the log file "/var/log/php-fpm.log".
error_log = log/php-fpm.log
In line 148 we will configure the owner of the nginx process to the Nginx user. Change user and group of process to nginx:
user = nginx
group = nginx
Line 159: configure php-fpm to run under a socket file, not the port. Change that line like this:
listen = /var/run/php-fpm.sock
And on line 170, change the permissions for the unix socket to the nginx user and group with mode 0660.
listen.owner = nginx
listen.group = nginx
listen.mode = 0660
Save the file and exit the editor.
Next, go the PHP cli directory and edit the php.ini file with vim:
cd /etc/php5/cli/
vim php.ini
Change the value of cgi.fix_pathinfo to zero for security reasons. line 178:
cgi.fix_pathinfo=0
save and exit.
Copy the php.ini to conf.d directory:
cp php.ini /etc/php5/conf.d/
The PHP-FPM Configuration is done at this stage, but we still need to configure Nginx. We have to setup Nginx to work with php-fpm.
Go to the nginx configuration directory and make a backup of the configuration file with the cp command:
cd /etc/nginx/
cp nginx.conf nginx.conf.backup
Edit nginx.conf with vim:
vim nginx.conf
Add index.php on line 48:
index index.php index.html index.htm;
Add the new php configuration section at line 68, this is the configuration for handling .php file requests.
       location ~ \.php$ {
                root /srv/www/htdocs;
                try_files $uri =404;
                include /etc/nginx/fastcgi_params;
                fastcgi_pass unix:/var/run/php-fpm.sock;
                fastcgi_param SCRIPT_FILENAME $document_root$fastcgi_script_name;
       }
Save the file and exit.
Next, test the nginx configuration file syntax to ensure that there are no errors. Then start the php-fpm daemon and restart Nginx:
nginx -t
systemctl start php-fpm
systemctl restart nginx
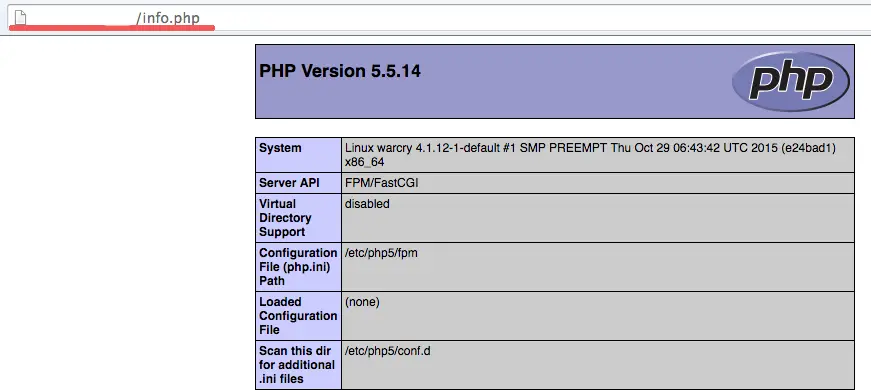
To make sure the php-fpm and nginx is working properly, we will add a new php test file. Go the DocumentRoot directory and create a phpinfo file with the name info.php:
cd /srv/www/htdocs/
echo "<?php phpinfo(); ?>" > info.php
Open your web browser type your server ipaddress:
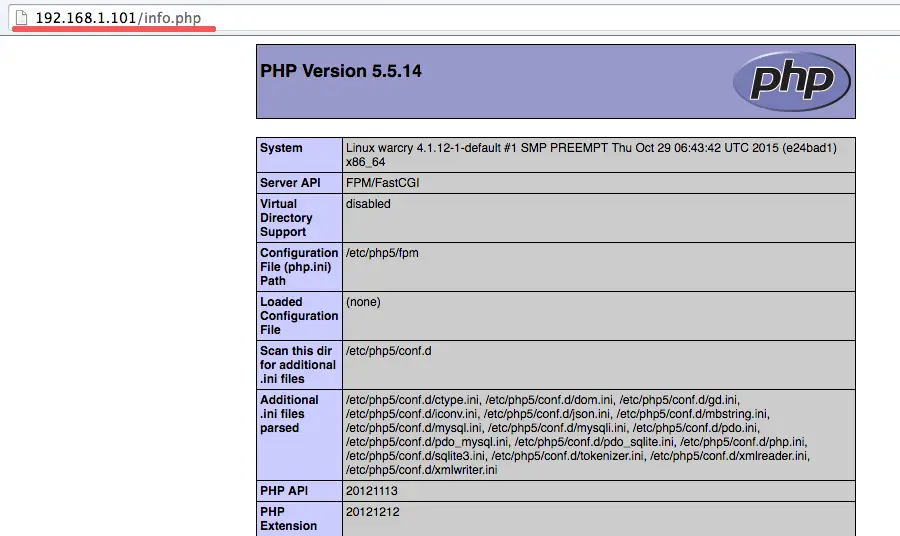
Nginx and php-fpm are working now.
Step 5 - Configure a Nginx Virtualhost
In this step, I will show you how to add a virtual host configuration for a website. We will configure a new domain "www.example.com" and the webroot directory in "/srv/www/example/". Please replace example and example.com with your own domain name.
GNginx nginx directory and create a new directory for the virtualhost configuration.
cd /etc/nginx/
mkdir vhosts.d/
cd vhosts.d/
Next, create new file example.conf for the domain name "example.com" virtualhost.
vim example.conf
paste virtualhost configuration below:
server {
    server_name example.com;
    return 301 $scheme://www.example.com$request_uri;
}

server {
    listen 80;

    root /srv/www/example;
    index index.php index.html index.htm;

    location / {
        try_files $uri $uri/ =404;
    }

          location ~ \.php$ {
                try_files $uri =404;
                include /etc/nginx/fastcgi_params;
                fastcgi_pass unix:/var/run/php-fpm.sock;
                fastcgi_param SCRIPT_FILENAME $document_root$fastcgi_script_name;
       }


}
Save the file and exit.
Now create the directory for the site "example.com" in the /srv/www/ directory, and create a new index file.
mkdir -p /srv/www/example/
cd /srv/www/example/
echo "<h1>This is www.example.com site.</h1>" > index.html
echo "<?php phpinfo(); ?>" > info.php
Now open your web browser and visit the domain:
You will be redirected to www domain, and now access the php file:
http://www.example.com/info.php
Step 6 - Install and Configure phpMyAdmin
PhpMyAdmin is a PHP based application to manage MySQL or MariaDB databases from a web browser. In this step, I will configure phpMyAdmin to run under php-fpm and then make PHPMyAdmin secure by restricting access the phpMyAdmin login page.
Install phpMyAdmin with the zypper command:
zypper in phpMyAdmin
The command will install all packages needed by phpMyAdmin, including apache2-utils that is required for creating the password file.
Now we have phpMyAdmin installed on the system. Next we will create a new htpasswd file with the htpasswd command.
create password file htpasswd:
htpasswd -c /etc/nginx/htpasswd megumi
TYPE YOUR PASSWORD for user megumi
Next, we have to configure Nginx to use HTTP basic authentication for the phpmyadmin directory. We will restrict access to the phpMyAdmin login page with auth_basic, and only users that are in the "htpasswd" file can log in to the phpMyAdmin.
Go to the Nginx configuration directory and edit the nginx.conf file:
cd /etc/nginx/
vim nginx.conf
Define the web root directory inside of the server section by adding a new line under line 40 (server_name):
        server_name  localhost;
        root /srv/www/htdocs;       #newline config
Then add the phpMyAdmin configuration for nginx at line 60:
    location ~ ^/phpMyAdmin/.*\.php$ {
        auth_basic "Restricted Access";
        auth_basic_user_file  /etc/nginx/htpasswd;
        fastcgi_pass unix:/var/run/php-fpm.sock;
        fastcgi_index index.php;
        fastcgi_param SCRIPT_FILENAME  $document_root$fastcgi_script_name;
        include   fastcgi_params;
    }
Save the file and exit the editor.
Test the nginx configuration and restart nginx:
nginx -t
systemctl restart nginx
Next, open your web browser and visit the phpMyAdmin URL, you will be asked for a username and password for the login page.
http://192.168.1.101/phpMyAdmin/
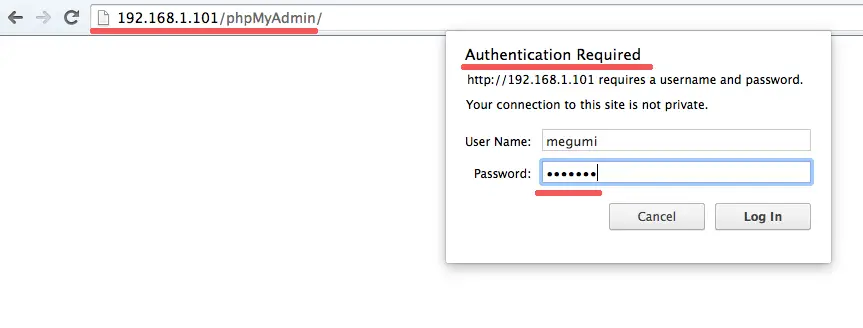
Then log in with your MySQL username and password.
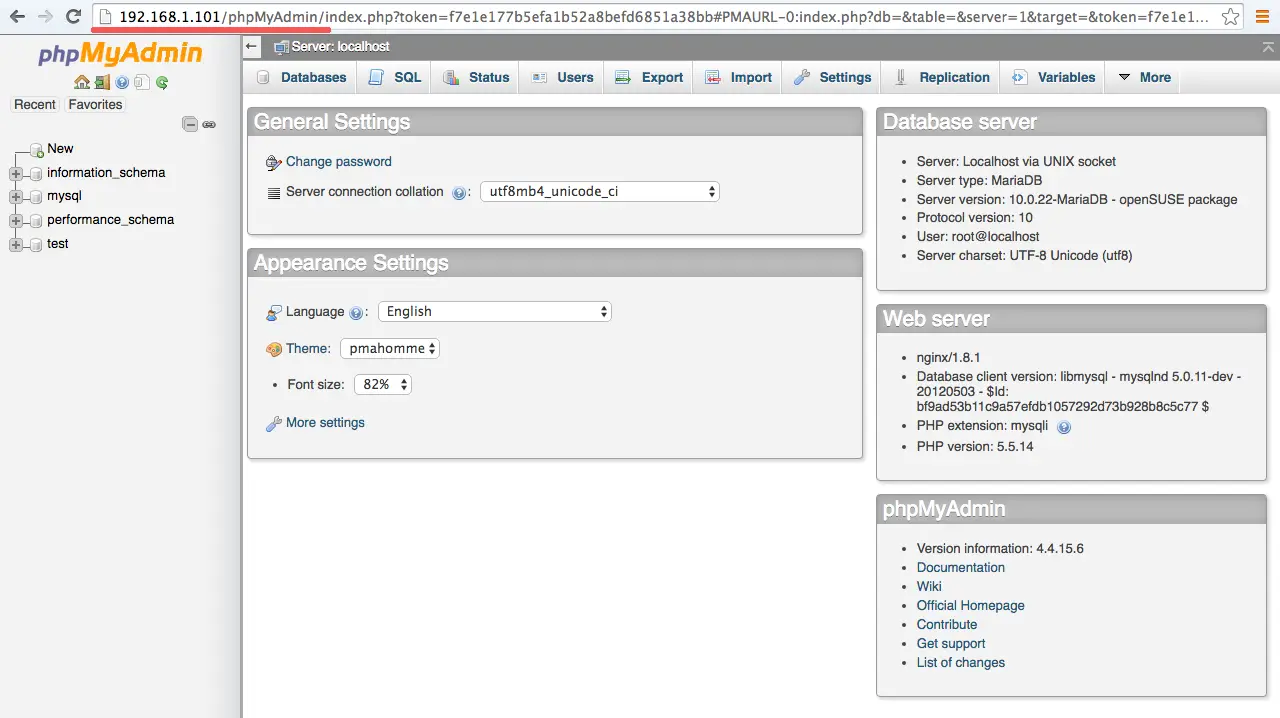
phpMyAdmin has been successfully installed and only the user in the htpasswd can log in.
Reference
http://nginx.org/en/docs/
https://www.howtoforge.com/basic-http-authentication-with-nginx
https://www.ruby-forum.com/topic/4411851

