Secure Wordpress Login with Two Factor Authentication using privacyIDEA
Disclaimer: This howto applies to privacyIDEA version 2.X. At the time of writing the current release is 2.12.1.
Wordpress is THE widely spread blogging system that is not only used for private blog sites but sometimes also as CMS for company web sites.
Wordpress is very good maintained and easy to update. But as it is so widely used, it is also an interesting goal for crackers (avoiding to say hackers).
This is why today I will tell you how to secure the WordPress accounts with a second factor for OTP authentication.
Wordpress
I assume, that you already have installed WordPress on your system following some guide like this one.
Create some users, your administrator and some editors. I created the users admin, fred and
Install privacyIDEA
Now you need to install privacyIDEA. You probably might have done this following some scenario in the online documentation.
To wrap it up, today on Ubuntu 14.04 LTS installing privacyIDEA is as easy as this:
add-apt-repository ppa:privacyidea/privacyidea
apt-get update
apt-get install privacyidea-apache2
Create your administrator calles "super":
pi-manage admin add super
Done. Login at https://yourserver with the administrator you just created.
Configure privacyIDEA
privacyIDEA can read the users from your WordPress installation. So each time you create a new user in WordPress, privacyIDEA will see this and you will be able to assign a new OTP token to this user.
For this to work right, we need to create a user id resolver, that tells privacyIDEA where to find the users and a realm. Go to privacyIDEA Config->Users and click "New SQL Resolver".
I installed privacyIDEA on the same machine as WordPress. And the MySQL database of WordPress is also on the same machine. If your SQL database is on another machine, you need to take care, that privacyIDEA must be able to access the SQL database across the network.
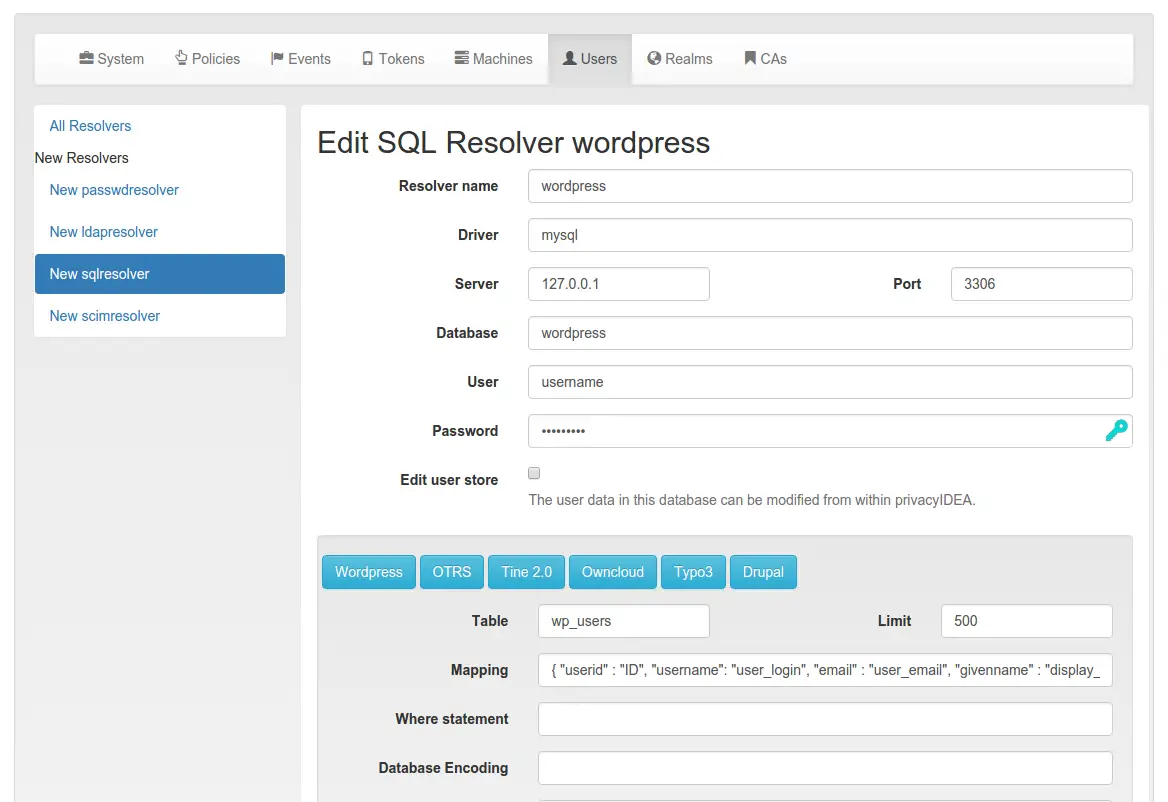
At the top you need to enter all information for the SQL connection. At the bottom within the SQL Attributes, you can simply click the button "Wordpress" and the correct table and column definitions will be entered. (privacyIDEA also knows the table presets for OTRS, Tine2.0 and OwnCloud!)
You can click the button "Test" and you will see, that privacyIDEA found the WordPress users.
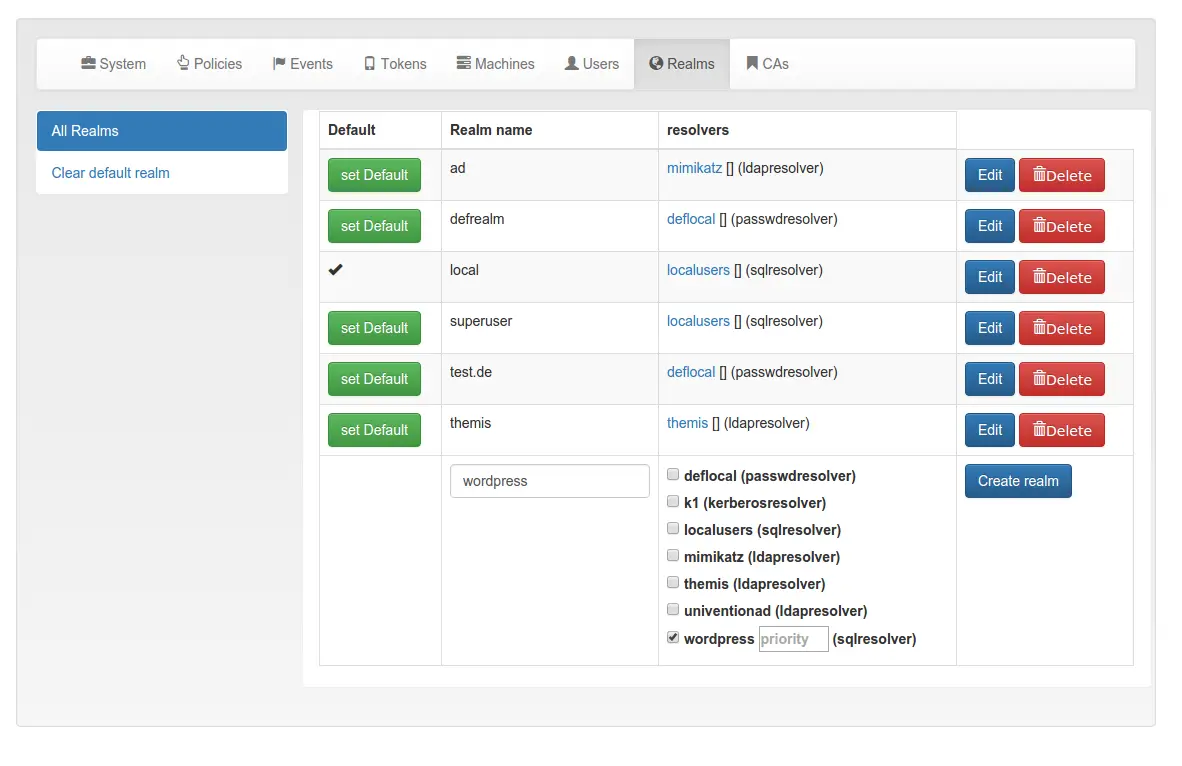
Now you need to create a realm, that contains the resolver we just created. Think of the resolvers as links to user stores and of realm as userstores combined to a group of users.
Read more about resolvers and realms.
Go to Config->Realms to create a new realm "wordpress", that contains the resolver wordpress. In my screenshot, you can see, that I configured a bunch of realms. You may want to set your realm "wordpress" the default realm.
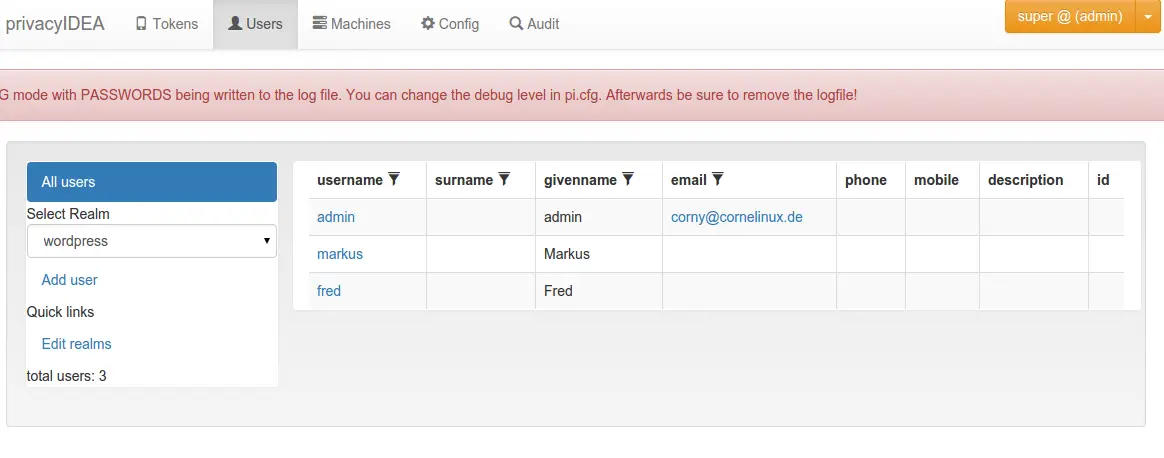
Now you can see the list of users at them menu Users.
Enroll tokens
Let's enroll a Google Authenticator token for the user fred. Please install the Google Authenticator App and select the user fred in the userview.
You can see, that Fred has not token at the moment.
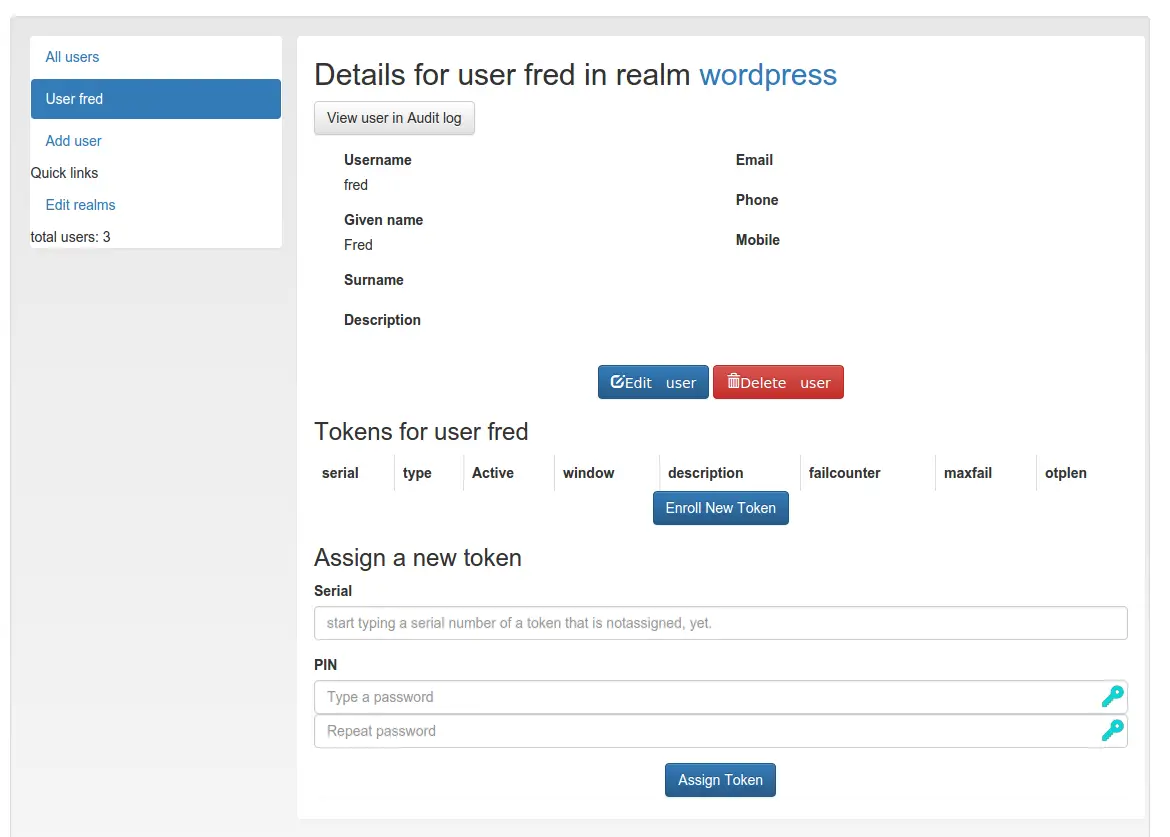
Now click the button "Enroll New Token".
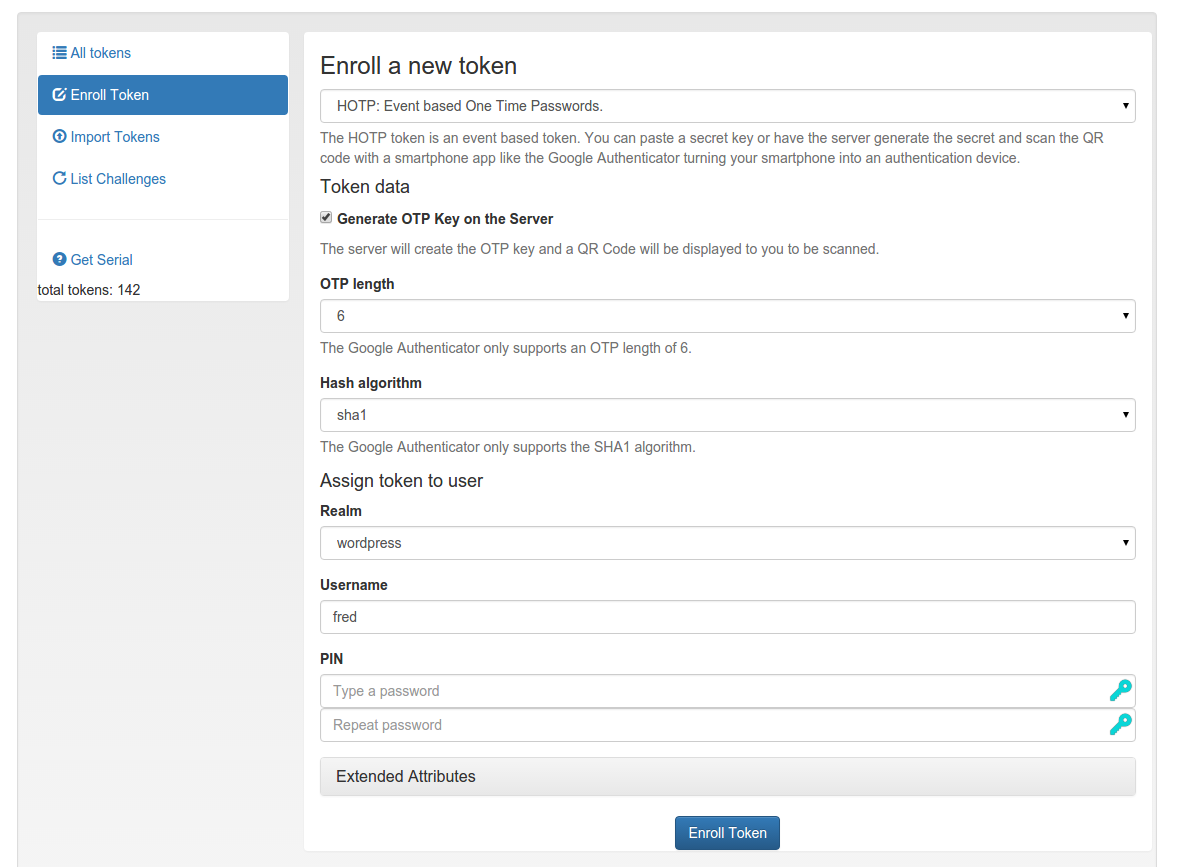
You can select the token type. We choose HOTP, which works with Google Authenticator. You can also choose TOTP and use FreeOTP or OTP Authenticator.
After hitting "Enroll Token", you can scan the QR code with the App:
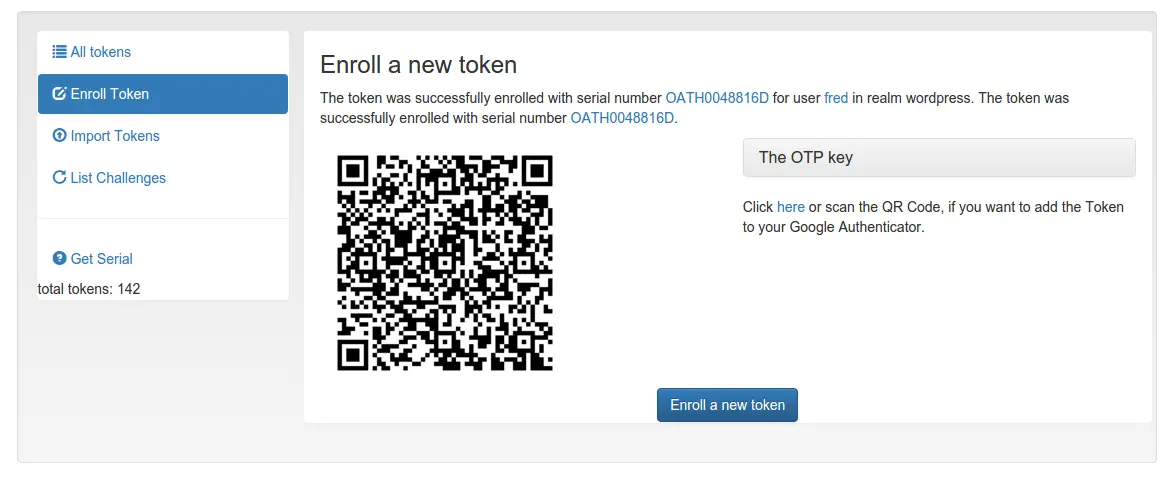
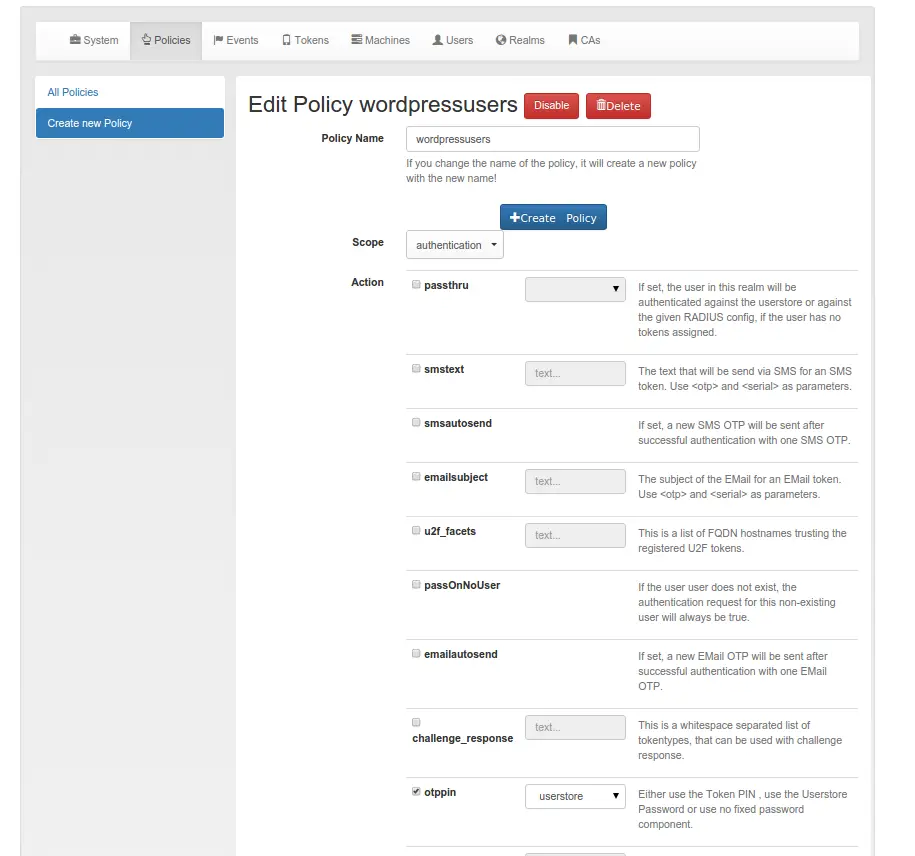
The App will then be able to create one-time passwords. The user will have to authenticate with a static password (1st factor) and the one-time password created by the app (2nd factor). If you want the user to authenticate with the static password from WordPress (in this case the user can change his static password in WordPress) you need to set the following policy in Config -> Policies.
Create a new policy in scope=authentication and with otppin=userstore.
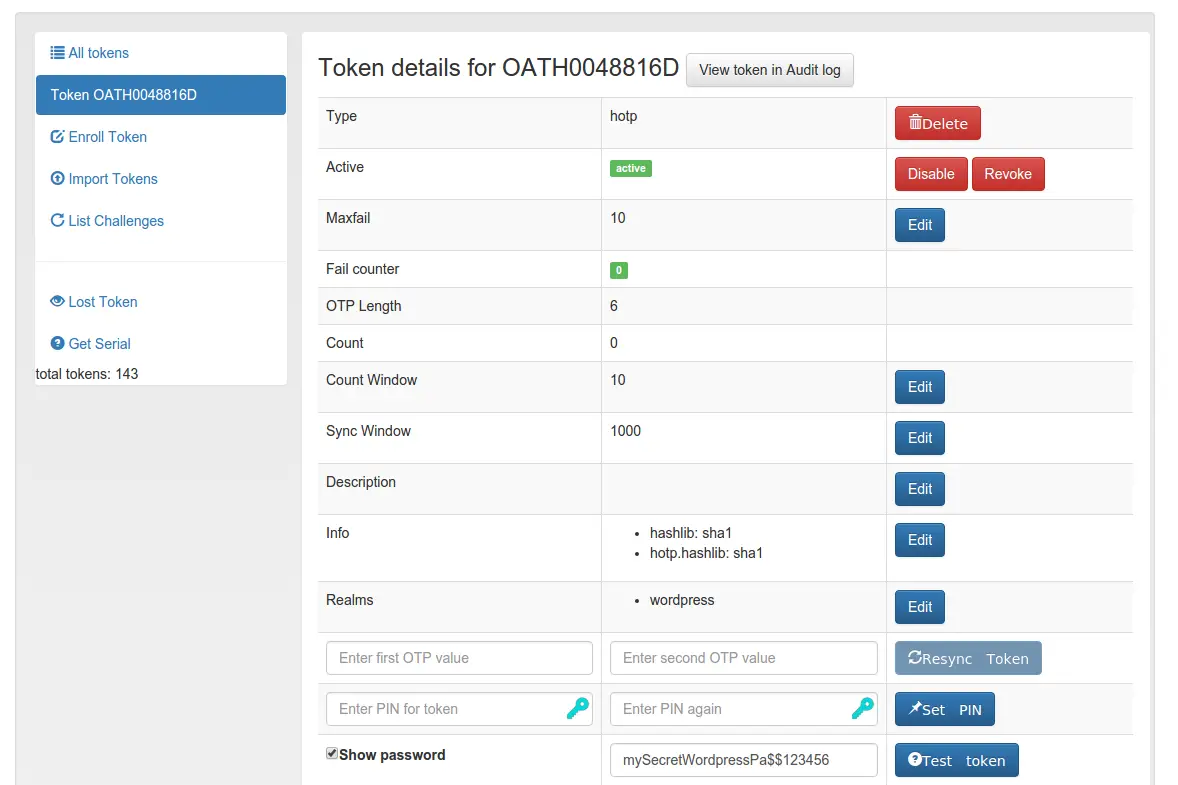
You can go to the token details and test the token authentication by concatenation of your WordPress password and the OTP value like "mySecretWordpressPa$$123456".
If you authenticated successfully you are ready to setup WordPress!
Wordpress Strong Authentication
Your privacyIDEA server is set up correctly and the user has a working OTP token.
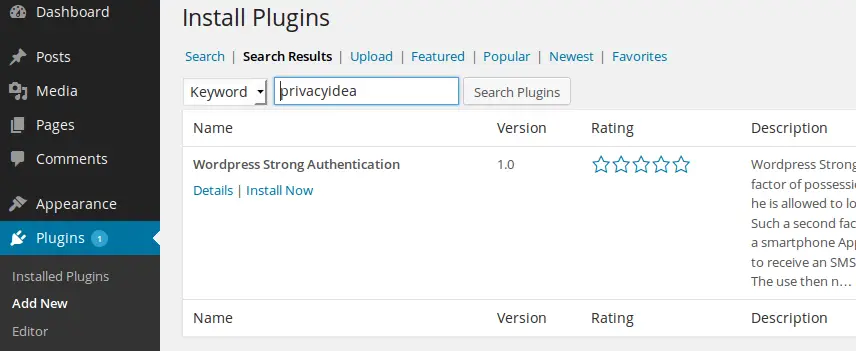
Now login to your WordPress installation and install and activate the strong authentication plugin.
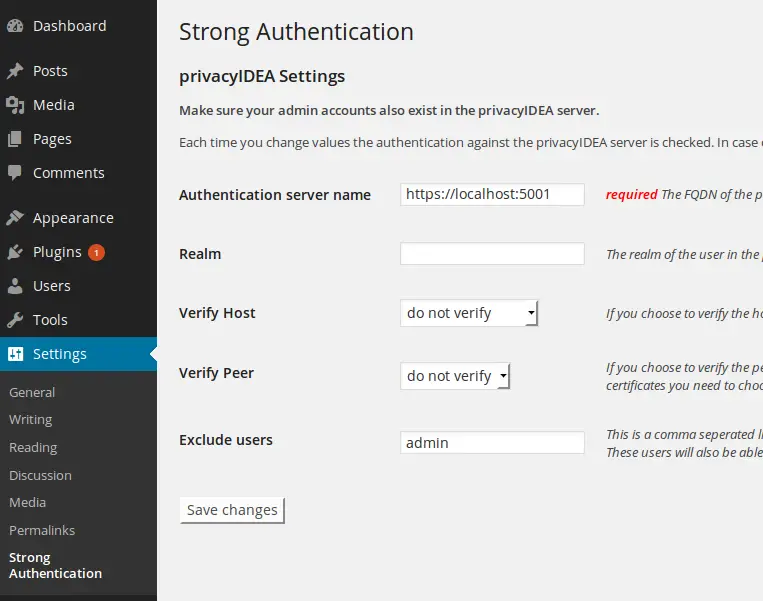
At settings, you can configure the strong authentication plugin to use the local installation of your privacyidea server. Remember to add https and the port. In the field exclude users you can define username, who should not be verified against privacyidea. This is a good possibility to have some kind of emergency account either if you misconfigured the plugin or your service went down.
If you did not set "wordpress" to be your default realm, you need to specify the name of the realm here.
Now you can authenticate with a second factor of your choice.
Happy blogging!
Conclusion
We enabled WordPress to be able to authenticate all users with a second factor. The second factor is managed by an external system. Thus, you can assign several devices to the users and you can assign different devices to the users. One user may login with a Google Authenticator another user with a yubikey - Giving you the better flexibilty over wordpress-integrated solutions.
In addition, you can use your privacyIDEA installation to authenticate users at other applications - be it other web applications or systems like OpenVPN or SSH.
You can also use a distinct realm in your WordPress configuration to use one privacyIDEA installation for several WordPress instances. Thus providing two factor authentication to a whole WordPress farm with managing all authentication devices in one privacyIDEA system.

