How to Install Seafile with Nginx on openSUSE Leap 42.1
Seafile is a free file hosting software with a functionally like Dropbox or Google Drive that can be installed on your own server. Seafile is released under an OpenSource license. You can build your own secure file sync and share server with seafile, it is a reliable file sharing software that enables users to encrypt their data on the server. Seafile is written in C and python.
In this tutorial, I will show you how to build your own file sync and share server with seafile on openSUSE Leap 42.1. We will guide you trough the installation of seafile and then configure the web GUI with https encryption behind a nginx reverse proxy server.
Prerequisite
- OpenSUSE Leap 42.1 - 64bit
- Root privileges
- Understand zypper command
Step 1 - Configure the Hostname
Login to your openSUSE server:
ssh [email protected]
after you logged in to the server, edit the hosts file with vim:
vim /etc/hosts
Paste configuration (replace the IP and hostname with your own values):
192.168.1.101 cloud.kuonseafile.co cloud
Save and exit.
Note:
192.168.1.101 = my server IP address.
Cloud = my server hostname.
kuonseafile.co = my domain name.
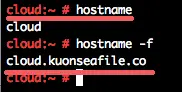
Verify hostname and FQDN (Fully Qualified Domain Name ):
hostname
hostname -f
Step 2 - Install Dependencies
Seafile is written in python, so we need several python libraries for the installation. For the database, seafile supports SQLite and MySQL, in this tutorial, I will use a MySQL database which provides a better performance than SQLite.
Install all packages including MySQL/MariaDB server with zypper command below:
zypper in python python-imaging python-MySQL-python python-setuptools mariadb mariadb-client
When the installation is finished, move on to the next step.
Step 3 - Configure Database
There is one thing you should know when you want to deploy seafile. Seafile needs 3 databases:
- ccnet database
- seafile database
- seahub database
On step 2 we have successfully installed the MySQL/MariaDB server, now start it with the command below:
rcmysql start
Set a new password for the mysql root user with mysqladmin command:
/usr/bin/mysqladmin -u root password 'aqwe123'
Next, login to the MySQL shell and create 3 databases for seafile and one new user for that 3 databases.
Login to the MySQL shell:
mysql -u root -p
TYPE PASSWORD "aqwe123"
Create the three databases for the seafile installation - ccnet_db, seafile_db and seahub_db:
create database ccnet_db character set = 'utf8';
create database seafile_db character set = 'utf8';
create database seahub_db character set = 'utf8';
And create a new user seafilecloud with password 'seafilecloud@':
create user seafilecloud@localhost identified by 'seafilecloud@';
Now grant access for the seafilecloud user to all databases:
grant all privileges on ccnet_db.* to seafilecloud@localhost identified by 'seafilecloud@';
grant all privileges on seafile_db.* to seafilecloud@localhost identified by 'seafilecloud@';
grant all privileges on seahub_db.* to seafilecloud@localhost identified by 'seafilecloud@';
flush privileges;
All databases are ready for the seafile installation.

Step 4 - Install and Configure Seafile
In this step, we will install and configure seafile. We will install seafile under the seafile user and home directory, so we need to create a new Linux user with the name "seafile".
Create the New User
Create a new user with the name seafile for the installation:
useradd -m -s /bin/bash seafile
Note:
-m = Create new home directory for the user under "/home/".
-s /bin/bash = Define the shell for the user.
Download Seafile
Switch to the seafile user with the su command below:
su - seafile
Now you are in the seafile home directory, download seafile server 5 with the wget command:
wget https://bintray.com/artifact/download/seafile-org/seafile/seafile-server_5.1.3_x86-64.tar.gz
Extract the seafile archive and rename it:
tar -xzvf seafile-server_5.1.3_x86-64.tar.gz
mv seafile-server-5.1.3/ seafile-server
Install Seafile 5
Go to the seafile-server directory and run the setup file to install seafile:
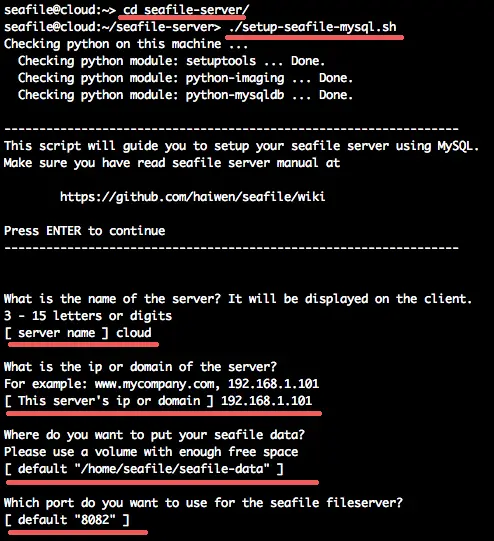
cd seafile-server/
We will install seafile with MySQL database, so run the setup file MySQL:
./setup-seafile-mysql.sh
Now you will be asked for the server details.
server name = use the server hostname.
Server ip or Domain = use my server ip address.
Seafile Data direcoty = just press Enter.
Port for seafile file server = just press Enter.
Next, configure the database. We've created our own database for the installation, so choose the number "2".
Now you will be asked about the database profile:
Host of the mysql = Default is localhost.
Default port = 3306.
MySQL User for seafile = Uses the user we've created in step 3 - "seafilecloud".
MySQL password = password for seafilecloud user.
ccnet database = We've created the databsae - ccnet_db.
seafile database = seafile_db.
seahub database = seahub_db.
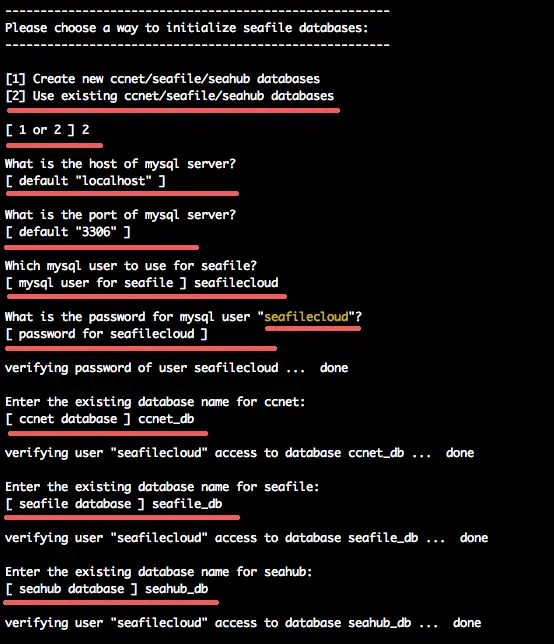
If no errors occurred, you can confirm the installation by pressing "Enter".
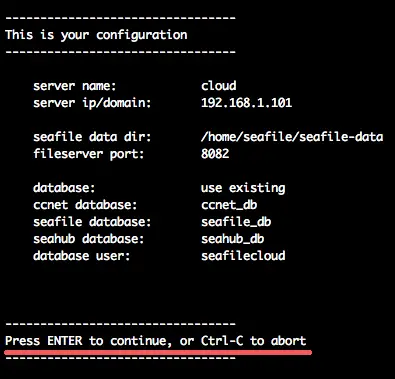
wait for the script to generate the configuration and the database.
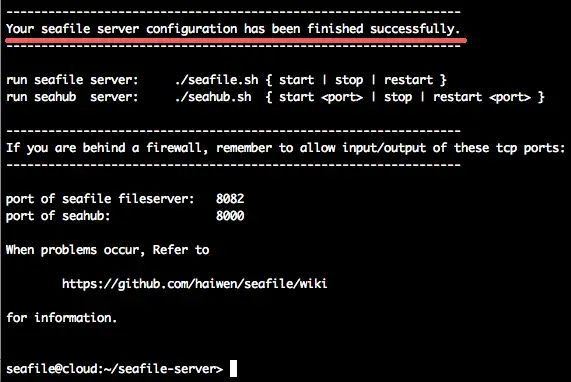
Start Seafile and Seahub
Seafile is installed, now you can start it with the command below:
./seafile.sh start
./seahub.sh start
You will be asked to create an admin user for seafile, just enter your admin email and password.
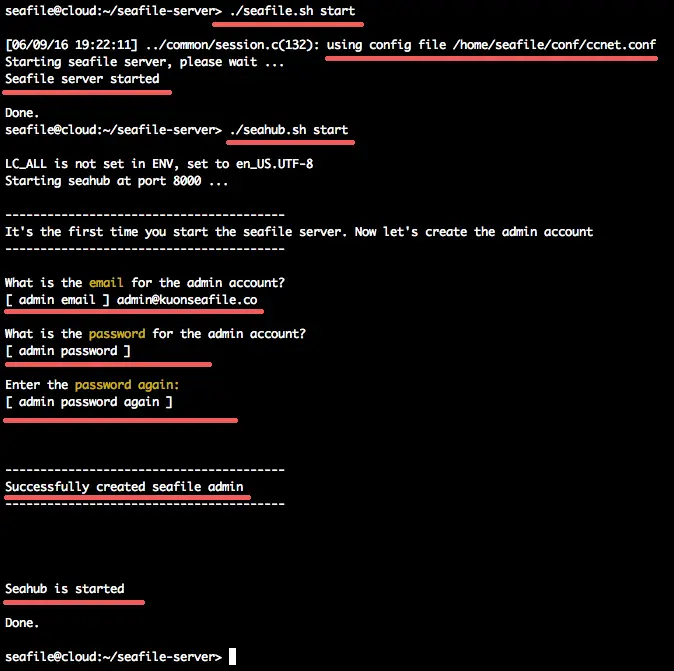
At this stage, you can access the seafile web GUI on port 8000.
Step 5 - Install and Configure Nginx
Nginx is a lightweight web server with low memory usage and CPU consumption. In this step, we will install nginx, then create a new virtual host for the reverse proxy access to seafile. We are going to enable https for connections on the server.
Install Nginx
Install the nginx web server with the zypper command:
zypper in nginx
Generate the SSL Certificate
Next, go to the nginx directory and create a new directory for the SSL certificate. Then generate the certificate file with the OpenSSL command:
mkdir -p /etc/nginx/ssl/
cd /etc/nginx/ssl/
Now generate the certificate file:
openssl genrsa -out privkey.pem 4096
openssl req -new -x509 -key privkey.pem -out cacert.pem -days 1095
Configure Virtual Host
In the nginx directory, create a new directory called "vhosts.d" to store the virtual host file. Create that directory and then create a new virtual host file with vim:
mkdir -p /etc/nginx/vhosts.d/
cd /etc/nginx/vhosts.d/
vim cloud.kuonseafile.conf
Paste virtual host configuration below:
    server {
        listen       80;
        server_name  cloud.kuonseafile.co;    #Domain Name
        rewrite ^ https://$http_host$request_uri? permanent;    # force redirect http to https
    }
    server {
        listen 443;
        ssl on;
        ssl_certificate /etc/nginx/ssl/cacert.pem;        # path to your cacert.pem
        ssl_certificate_key /etc/nginx/ssl/privkey.pem;    # path to your privkey.pem
        server_name cloud.kuonseafile.co;                    #Domain Name
        proxy_set_header X-Forwarded-For $remote_addr;

        add_header Strict-Transport-Security "max-age=31536000; includeSubdomains";
        server_tokens off;

        location / {
            fastcgi_pass    127.0.0.1:8000;
            fastcgi_param   SCRIPT_FILENAME     $document_root$fastcgi_script_name;
            fastcgi_param   PATH_INFO           $fastcgi_script_name;

            fastcgi_param   SERVER_PROTOCOL        $server_protocol;
            fastcgi_param   QUERY_STRING        $query_string;
            fastcgi_param   REQUEST_METHOD      $request_method;
            fastcgi_param   CONTENT_TYPE        $content_type;
            fastcgi_param   CONTENT_LENGTH      $content_length;
            fastcgi_param   SERVER_ADDR         $server_addr;
            fastcgi_param   SERVER_PORT         $server_port;
            fastcgi_param   SERVER_NAME         $server_name;
            fastcgi_param   HTTPS               on;
            fastcgi_param   HTTP_SCHEME         https;

            access_log      /var/log/nginx/seahub.access.log;
            error_log       /var/log/nginx/seahub.error.log;
            fastcgi_read_timeout 36000;
        }
        location /seafhttp {
            rewrite ^/seafhttp(.*)$ $1 break;
            proxy_pass http://127.0.0.1:8082;
            client_max_body_size 0;
            proxy_connect_timeout  36000s;
            proxy_read_timeout  36000s;
            proxy_send_timeout  36000s;
            send_timeout  36000s;
        }
        location /media {
            root /home/seafile/seafile-server/seahub;
        }
    }
Replace the server_name with your own domain name - line 3 and 11.
For the media location line 47, replace to the path of the seafile installation - '/home/seafile/seafile-server/seahub'.
Save the file and exit the editor, then test the configuration with command:
nginx -t
make sure there is no problem or error on the configuration.
Configure Seafile to Use your own Domain and HTTPS
Switch to the user seafile and edit the configuration. Before editing the configuration, turn off the seafile and seahub service.
su - seafile
cd seafile-server/
./seafile.sh stop
./seahub.sh stop
Go back to the seafile user home directory, then go to the conf directory and edit the files ccnet.conf and seahub_settings.py.
cd ~/
cd conf/
Edit ccnet.conf file:
vim ccnet.conf
On line 5: 'SERVICE_URL' - replace the domain with your own domain name with https.
SERVICE_URL = https://cloud.kuonseafile.co/
Save and exit.
Now edit seahub_settings.py
vim seahub_settings.py
Add the new line below to define the file server root.
FILE_SERVER_ROOT = 'https://cloud.kuonseafile.co/seafhttp'
Save and exit.
Step 6 - Start seafile and testing
Nginx is installed - MariaDB/MySQL are installed and the seafile server is installed.
Make Nginx and MySQL to start on the boot:
systemctl enable nginx
systemctl enable mysql
Restart the services:
systemctl restart nginx
systemctl restart mysql
Next, start seafile and seahub from the seafile user:
su - seafile
cd seafile-server/
./seafile start
./seahub start-fastcgi
All services are started.
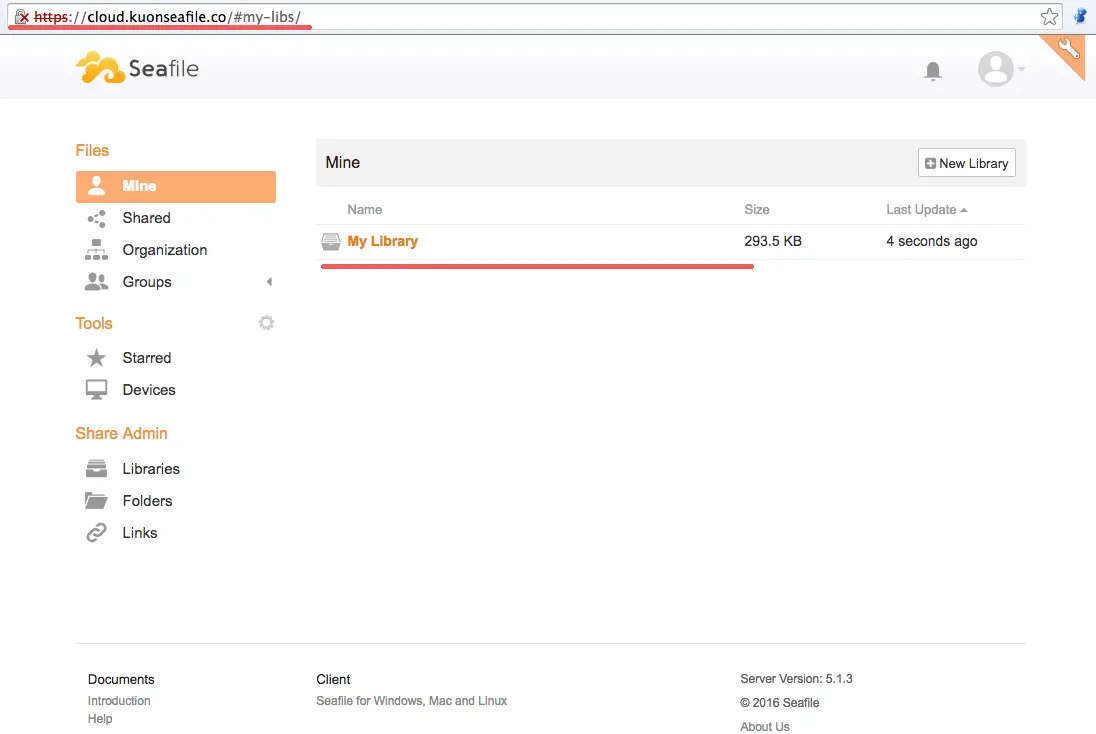
Now you can access the seafile server with the URL of your server. Mine is:
You will be redirected to the https connection login page of seafile.
Enter the admin user details that we've created in step 4.
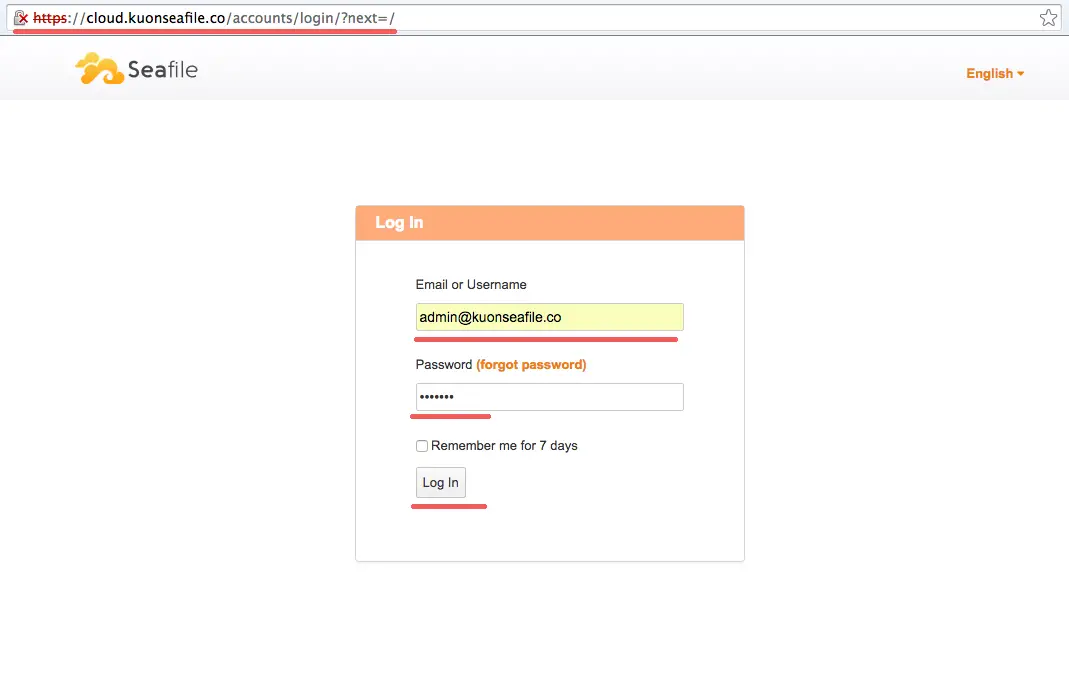
Now you can see the seafile file manager and start uploading files to your seafile server.