Hello Techies, Most awaited version of Fedora 24 workstation, Server and cloud image is officially released on 21st June 2016. Some of the improved features noticed in Fedora 24 workstation are listed below:
- GNOME 3.2 – Improved Desktop Gnome 3.20 which makes searching of files easier and also provide simple interface to manage printer jobs.
- Flatpak Tool Support – A flatpak is a tool that allows us to package Linux based application and distribute it on the linux systems which supports flatpak. Beauty of Flatpak is that it doesn’t depend what is currently installed on your system.
- Upgrade via Graphical Mode – Fedora 24 workstation provides a feature to upgrade your fedora OS(Operating System) version to the latest version graphically without any issues.
- Latest Version of Libre Office 5.1
- Introduction of Wayland – Wayland is the new X display Server
- QGnomePlatform Support
- Firefox 47
- Latest version Photo Editor Shotwell-0.23.1
In this article we will walk through the installation steps of Fedora 24 workstation with Screenshots.
Step:1 Download Fedora 24 Workstation
Let’s first download Fedora 24 workstation ISO file from their official website :
https://getfedora.org/en/workstation/download/
Once you have downloaded the ISO file, make a bootable media by burning the ISO file either into a USB drive or DVD and boot your system with bootable media.
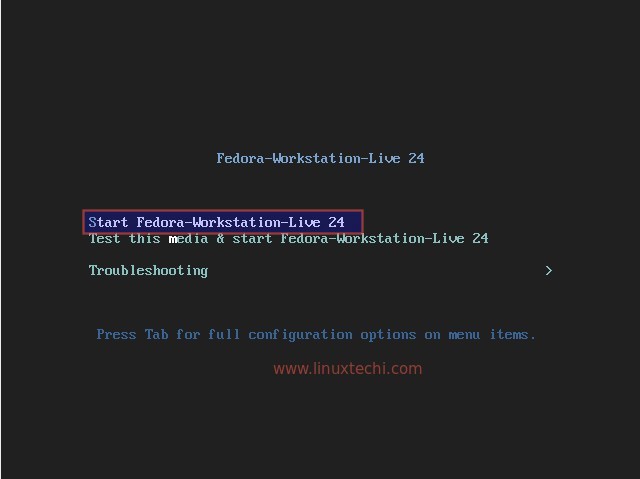
Step:2 Select the first option “Start Fedora-Workstation-Live 24”
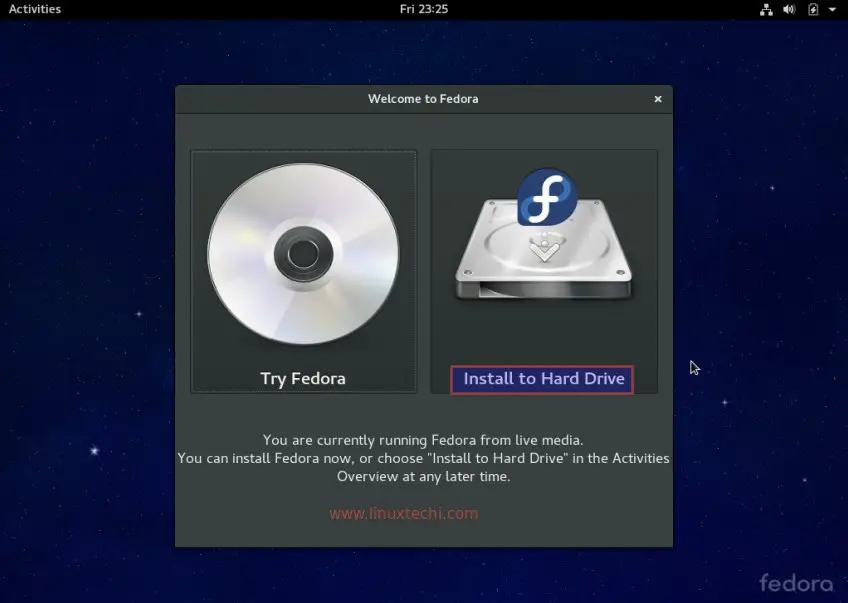
Step:3 Click on “Install to Hard Drive” option
we can use Fedora 24 without installing it by selecting “Try Fedora” option. But if you want to install on your disk then select the second option as shown below.
Step:4 Select the Language for Fedora 24 installation.
Select the Language that you want during fedora 24 workstation installation.
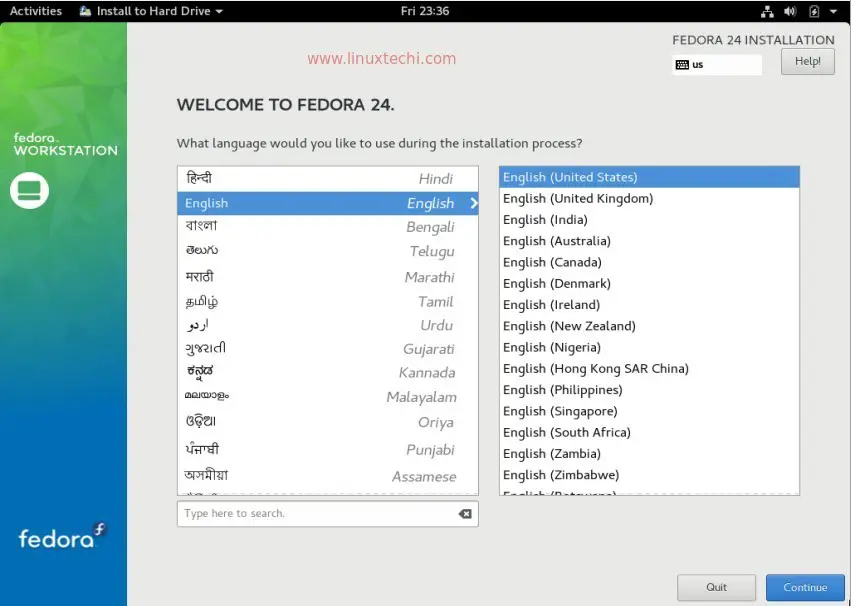
Click on Continue
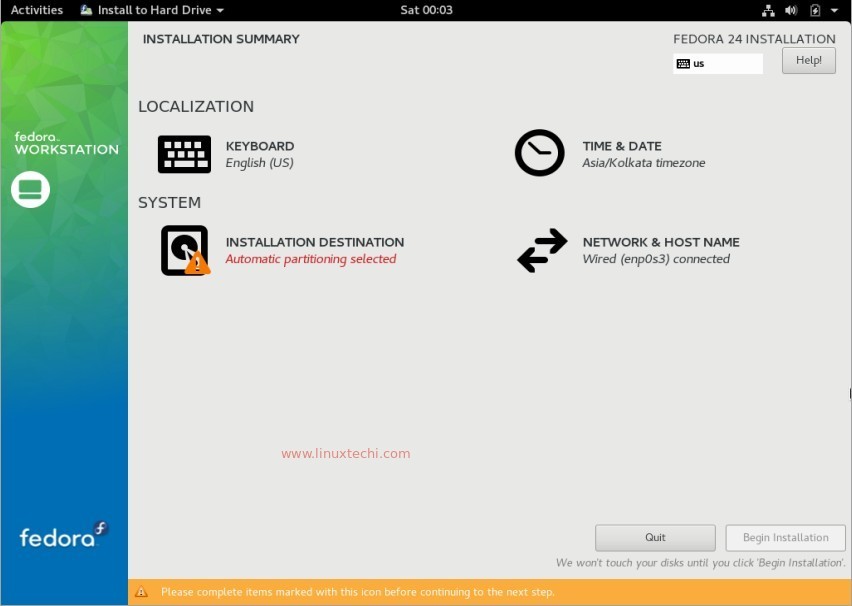
Step:5 Preparing for Fedora 24 workstation Installation
Click on Keyboard and Time Zone option to change Keyboard layout and timezone as per your location.
Set Keyboard Layout:
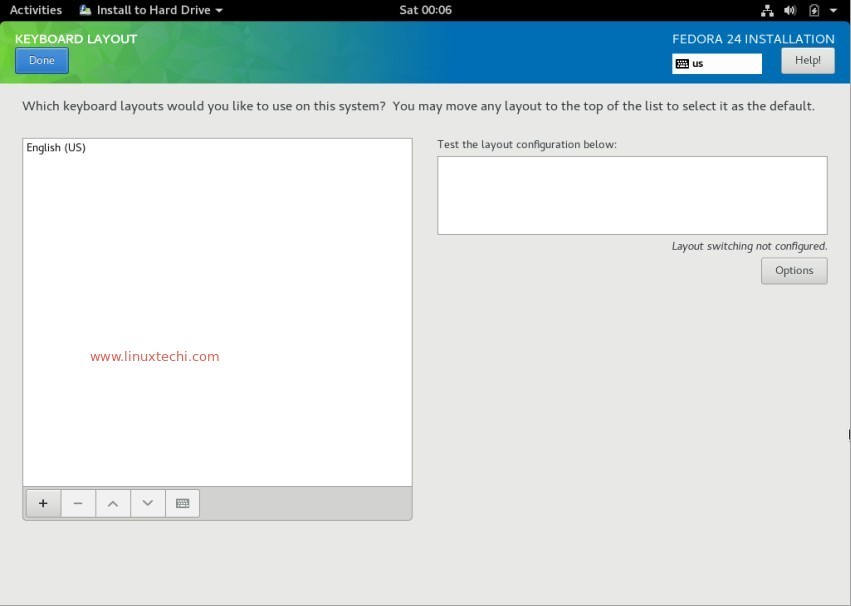
click on Done
Set Time Zone as per your location :
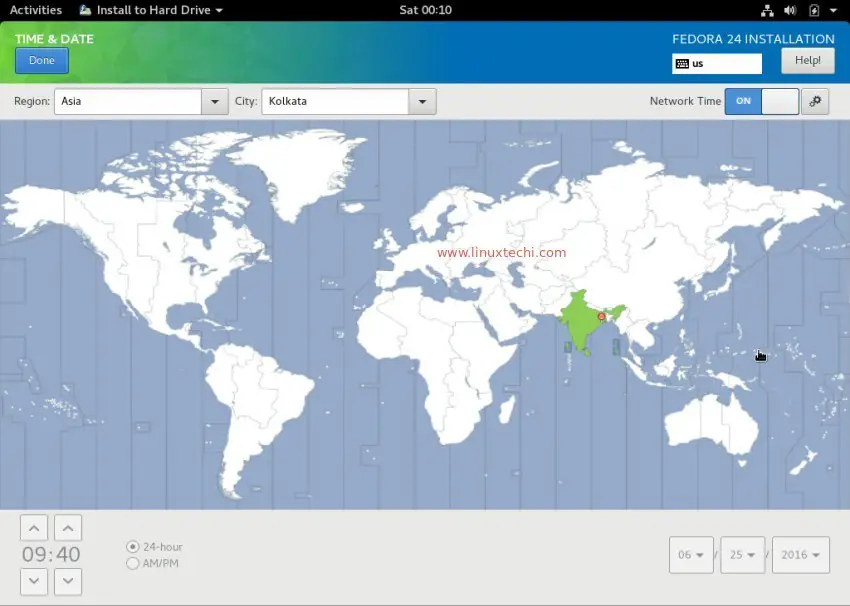
click on Done.
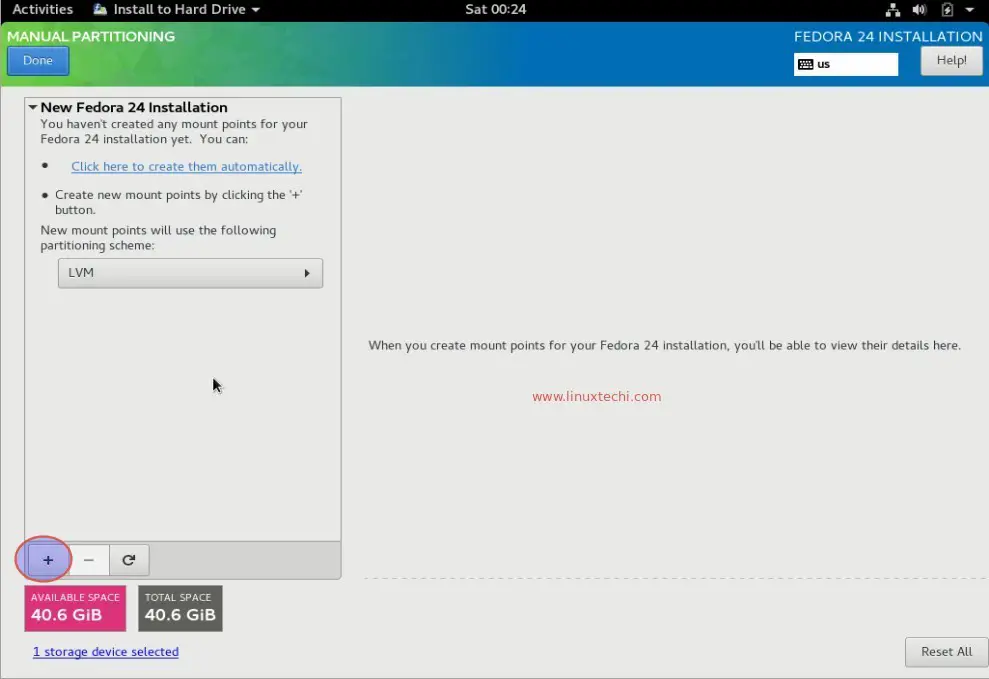
As we can see that automatic partitioning is selected, In Case you want to create your own customize partition table then click on “installation Destination” option.

Select “I will Configure partitioning” option and then click on Done.
In my case I have 40 GB space on which I will create following partitions :
- /boot – 500 MB ( file system type ext4 )
- /home – 10 GB ( file system type ext4 )
- /var – 10 GB ( file system type ext4 )
- /tmp – 5 GB ( file system type ext4 )
- swap – 2 GB
- / – 12 GB ( file system type ext4 )
Note : Please the partition size as per your setup
To create partitions click on plus (‘+’) symbol as shown below:
Create /boot Partition of 500 MB
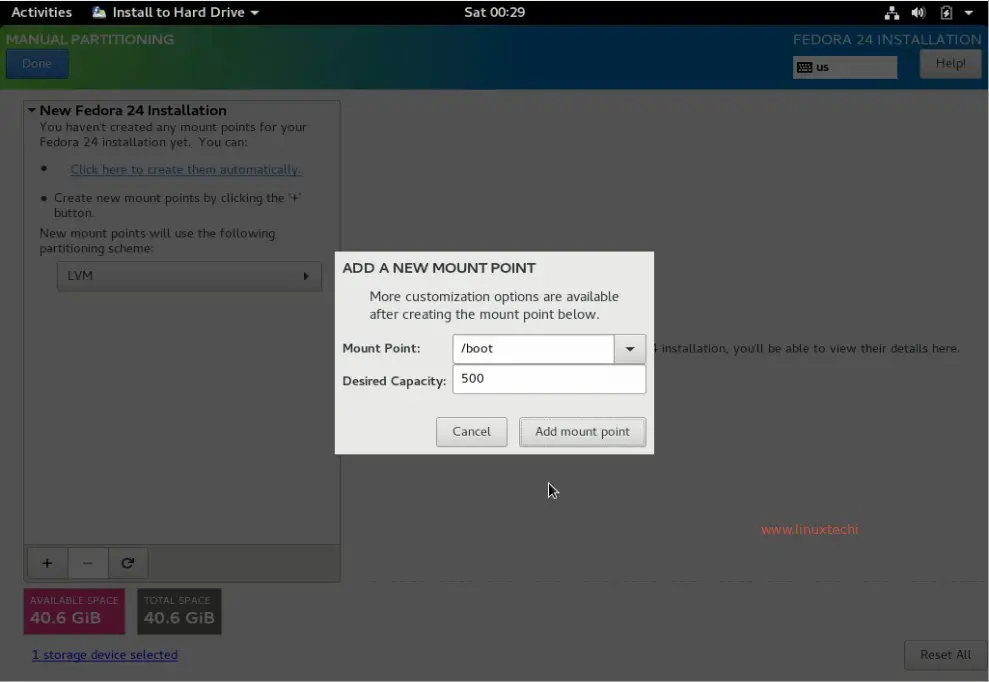
click on Add mount point
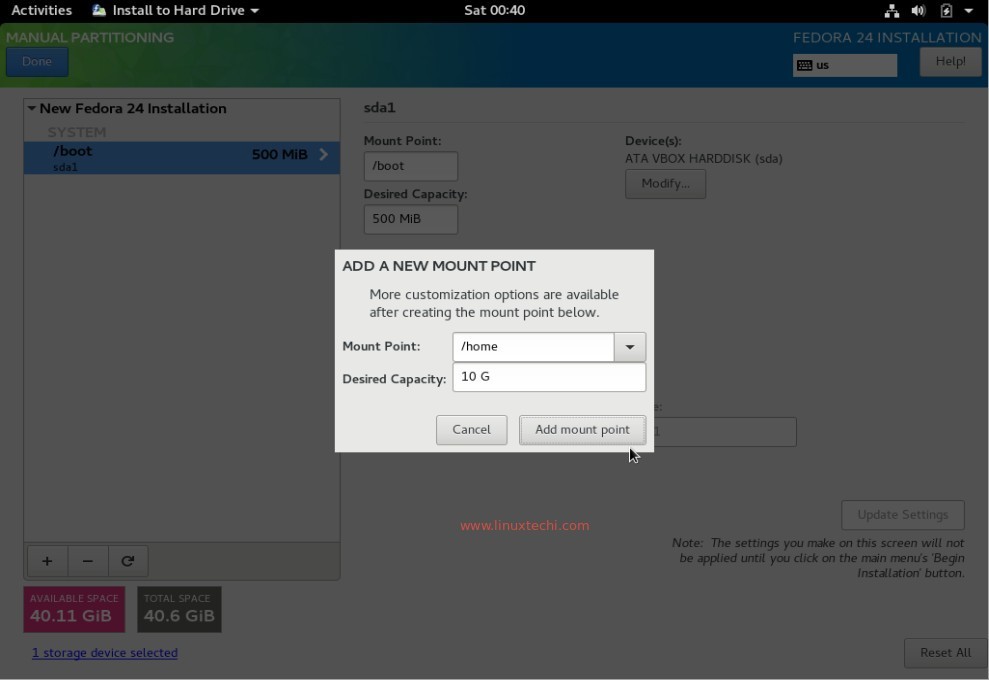
Create /home partition of 10 GB
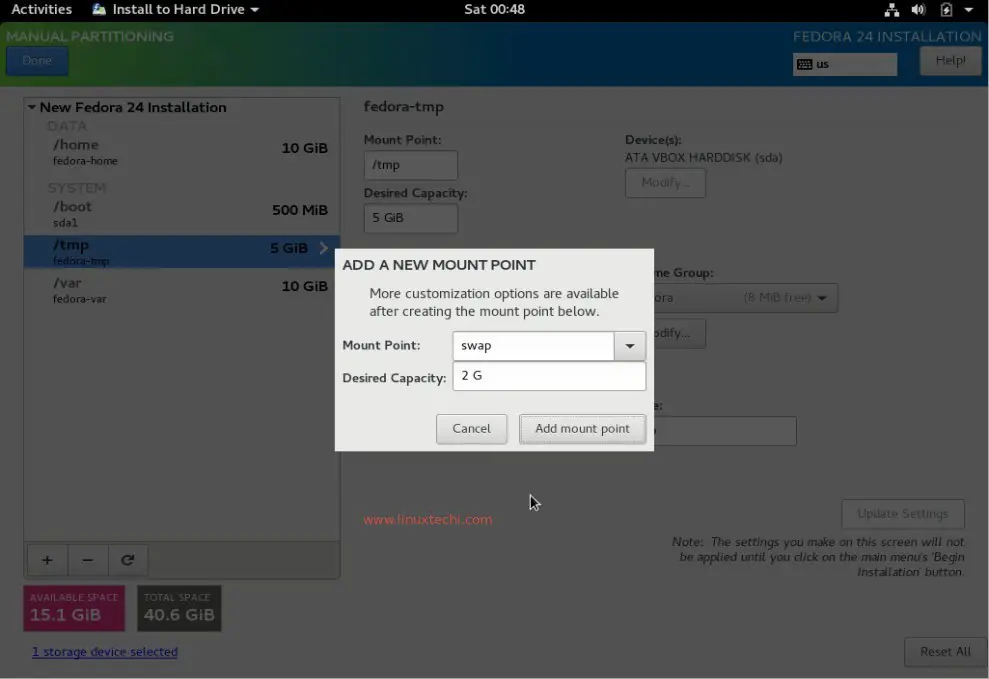
Similarly create /var and /tmp partition respectively of size 10 GB and 5 GB.
Create Swap Partition of size 2 GB
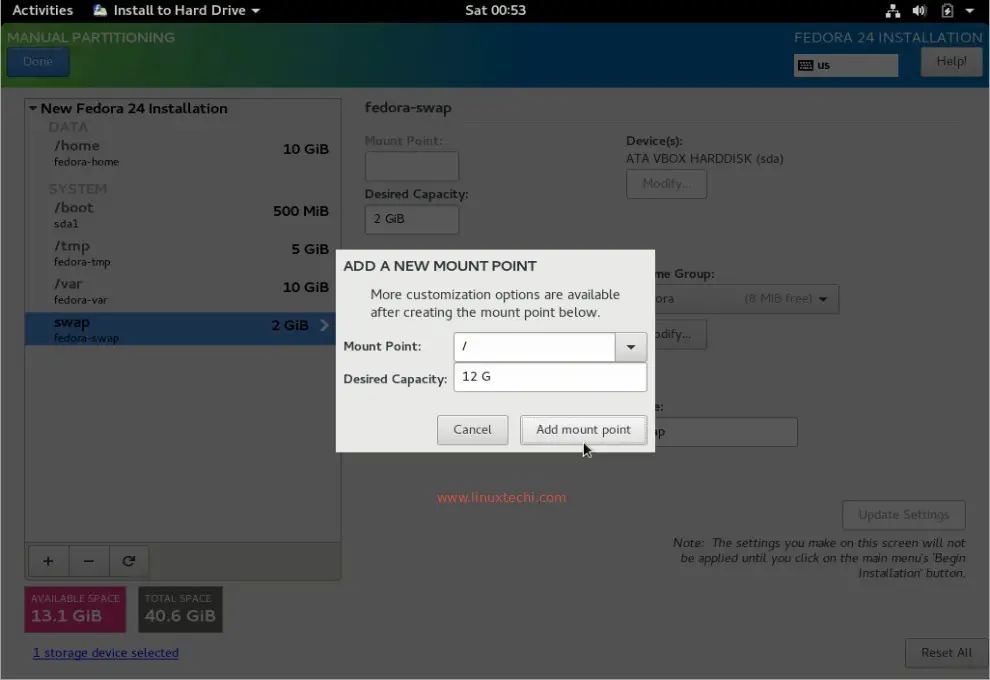
Finally Create / partition of 12 GB
Once we Click on ‘Add mount option’ then It will display our customize partition table.
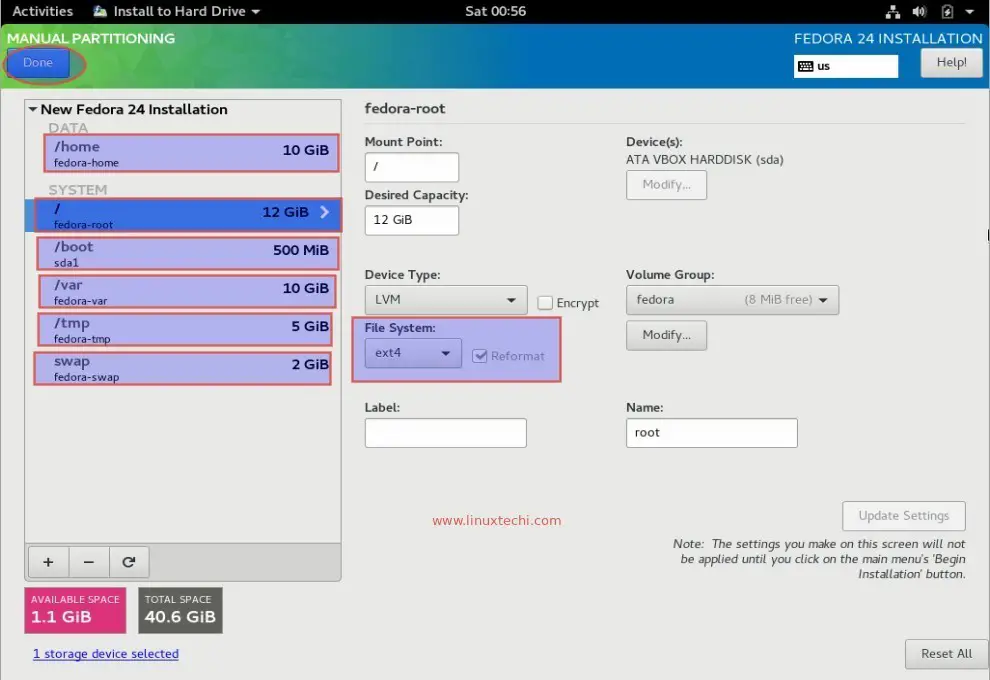
Click on Done to Proceed further
In the next window, Click on ‘Accept changes’

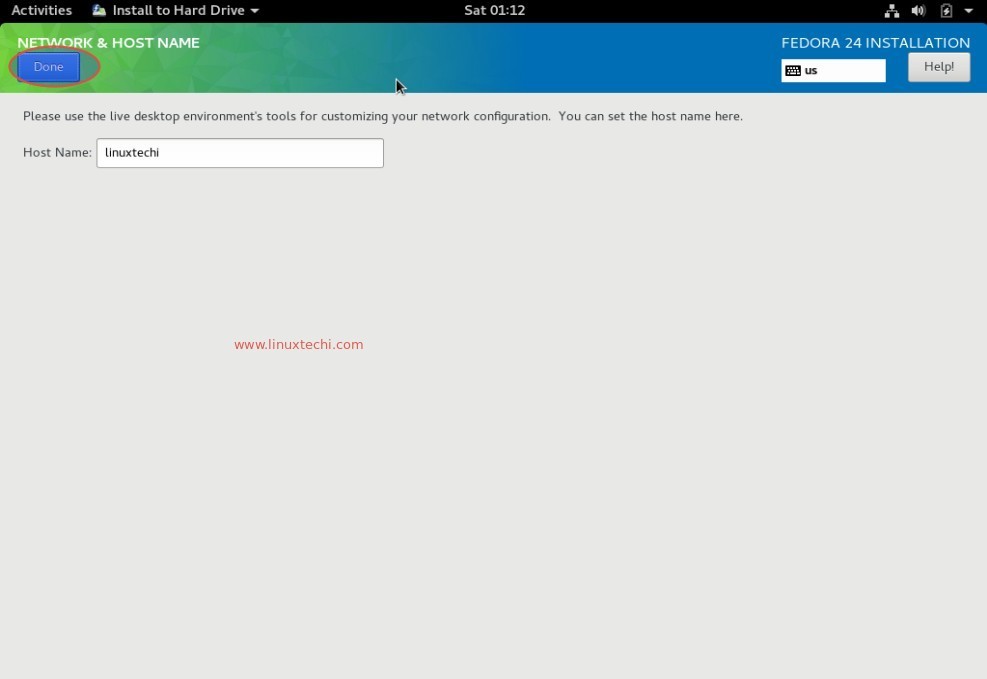
Now we are done with the partitioning, it’s time to set the Hostname and Network :
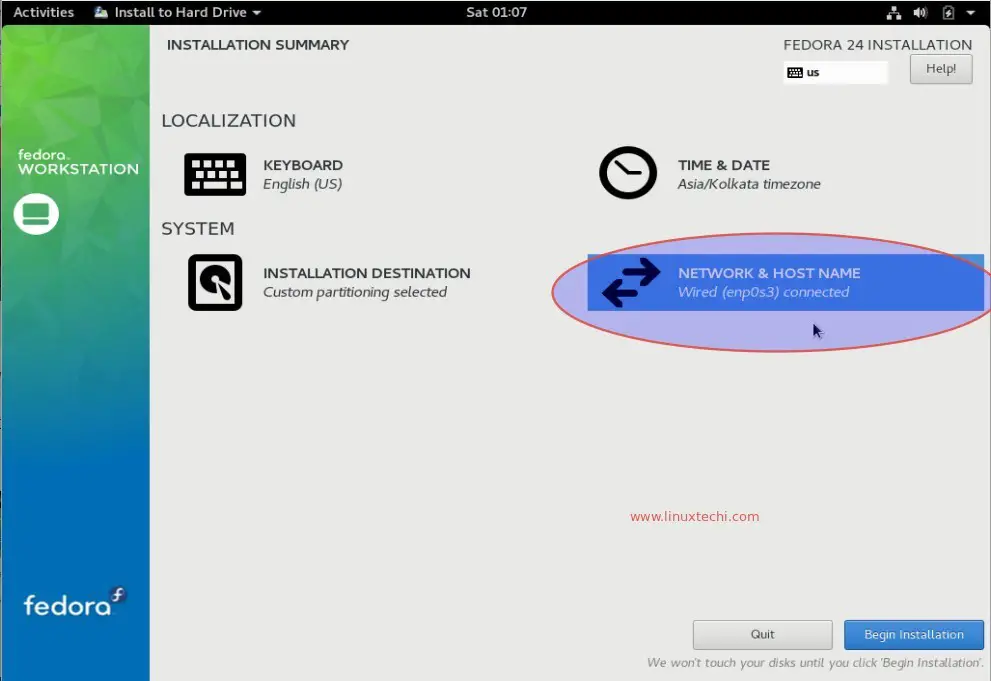
Specify the hostname that you want to set and then click on Done.
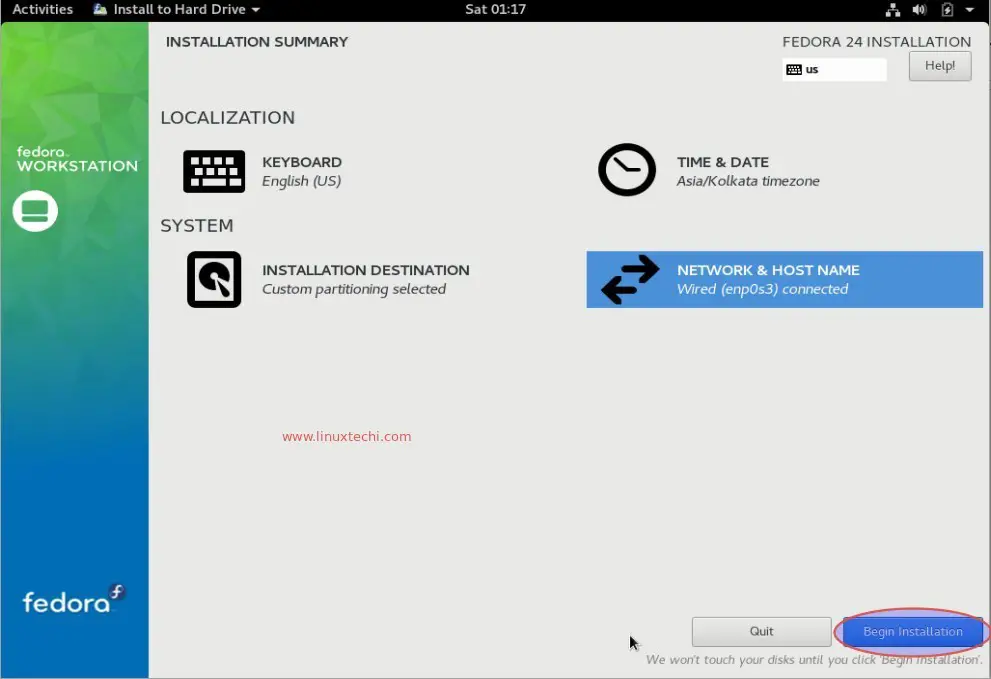
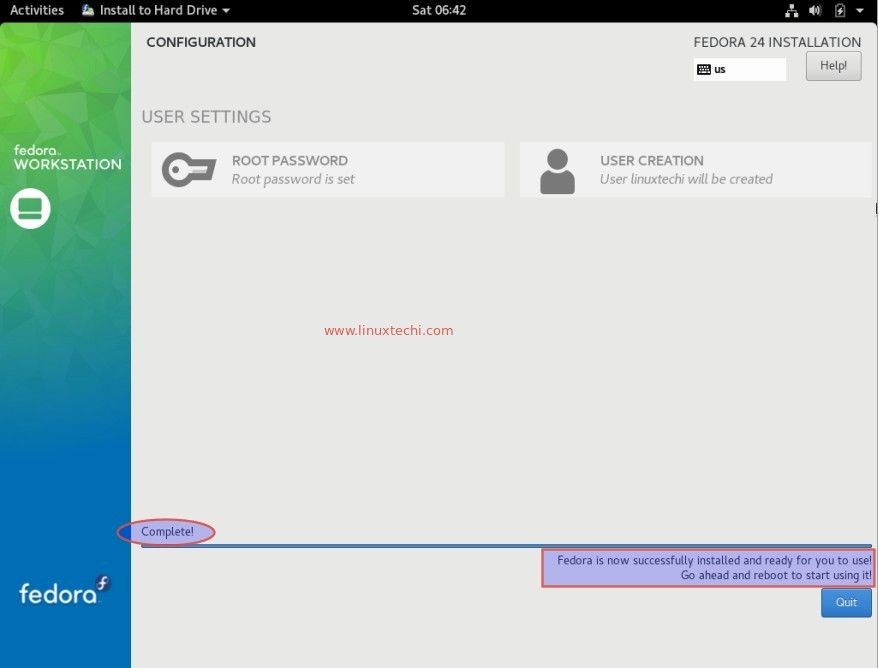
Now start the Fedora 24 workstation installation by Clicking on ‘Begin Installation’
Installer will give an option to set root password. Click on “ROOT PASSWORD” option and specify the root password that you want to set.
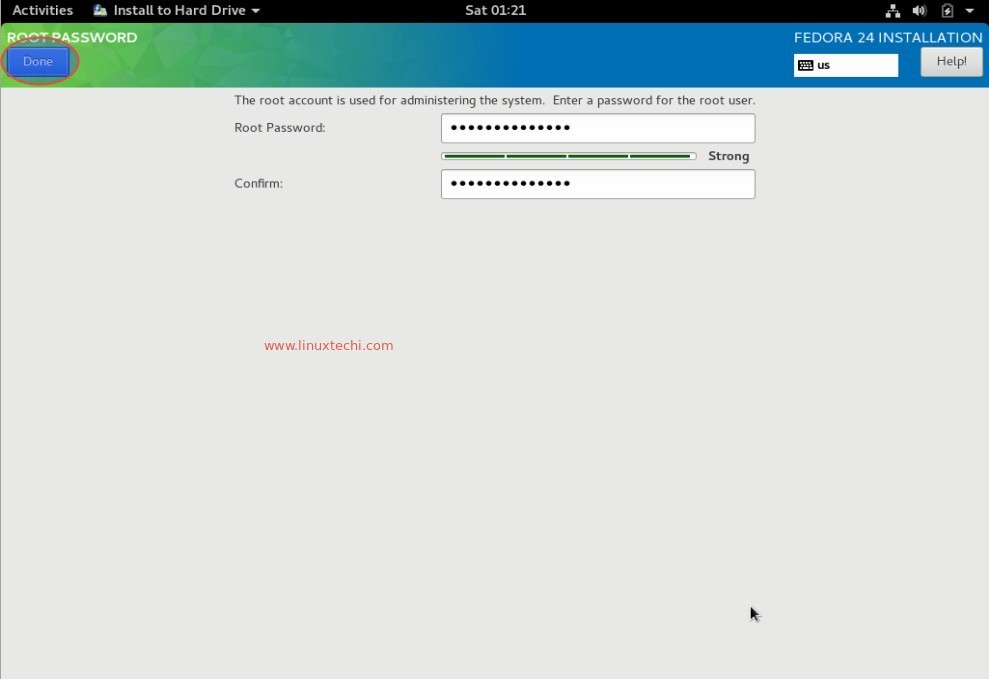
Click On Done.
Click on ‘CREATE USER’ and specify the User name and its password. We will be using this user name to login to the system after the installation.
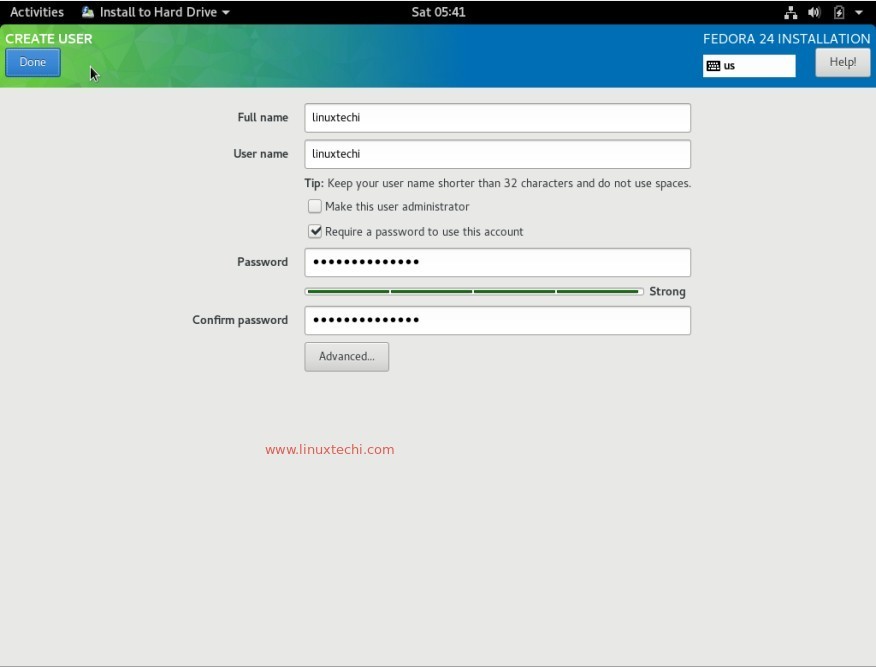
Click on Done.
Step:6 Fedora 24 workstation Installation in Progress
In this step we can see that Installation is in progress, once the installation is completed it will ask us to reboot the system.

Reboot the System as Fedora 24 workstation installation is completed successfully.
Step:7 Start using Fedora 24 workstation
After rebooting the system, follow the screen instructions and specify the Social Account details, though you skip this step.
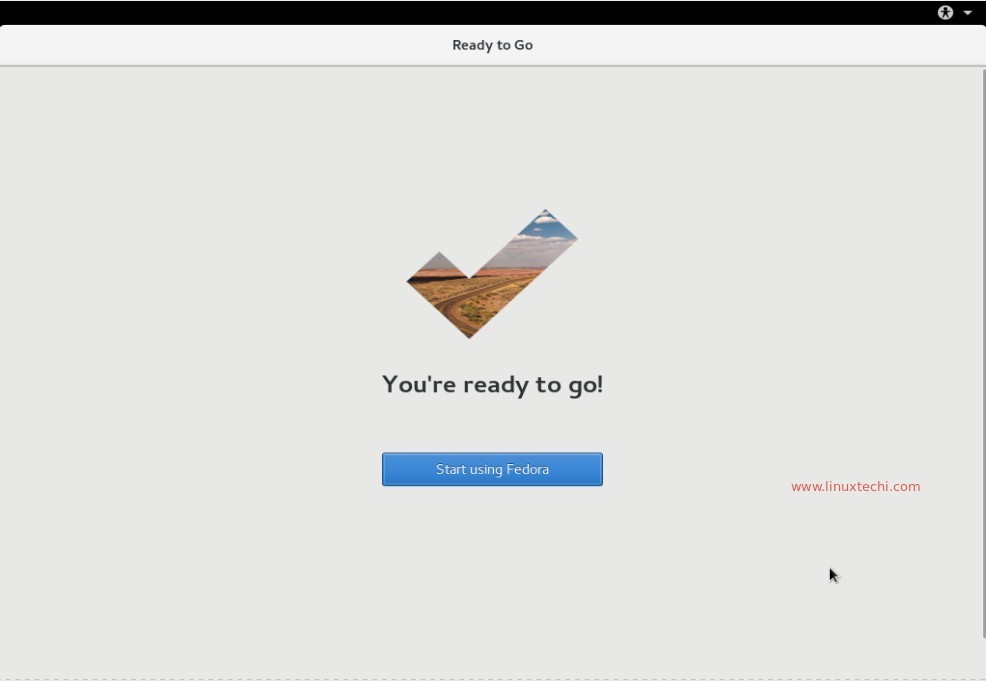
Click on start using Fedora.
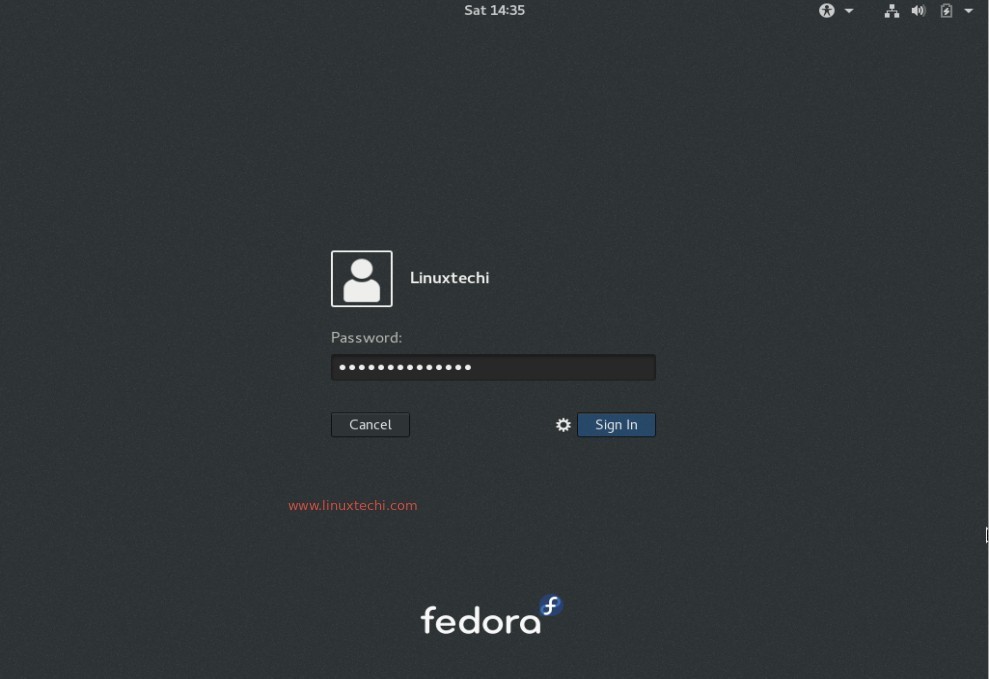
Login Screen of Fedora 24 Workstation
That’s all, now explore Fedora 24 workstation and have fun 🙂