How to Install WordPress with HHVM and Nginx on OpenSUSE Leap 42.1
HHVM (HipHop Virtual Machine) is an open source virtual machine developed by Facebook, it is a JIT (just-in-time) compiler to execute programs written in PHP 5 (and some features of PHP 7) and Hack language. If you want to run HHVM on your server, you can use the FastCGI-based web server on top of Nginx or apache web server, or you can use the inbuilt web server called "Proxygen".
In this tutorial, I will show you how to install WordPress (a well known CMS based on PHP) with HHVM and Nginx as our web server. I will use OpenSUSE Leap 42.1 as the operating system, so basic knowledge of OpenSUSE is required.
Prerequisite
- OpenSUSE Leap 42.1 - 64bit.
- Root privileges.
- Basic OpenSUSE Knowledge like Zypper, SuSE-firewall.
Step 1 - Install Nginx
Nginx or engine-x is a lightweight web server with high performance and low memory consumption. On our OpenSUSE server, we can use the zypper command to install the package.
Use "sudo su" to become the root user and install Nginx with the zypper command on openSUSE Leap 42.1:
sudo su
zypper in nginx
Then go to the web directory "/srv/www/htdocs" and create a new index.html file.
cd /srv/www/htdocs/
echo "<h1>Nginx OpenSUSE Leap 42.1</h1>" > index.html
Add Nginx to start at boot time and start Nginx with systemctl command:
systemctl enable nginx
systemctl start nginx
To ensure that Nginx is running on our server, we can visit the server IP address with a browser, or use the curl command below to see the results:
curl 192.168.43.29
Step 2 - Install and Configure MariaDB
MariaDB is an open source database developed by the original MySQL developer Monty Widenius, MariaDB is compatible with MySQL. In this step, we will install MariaDB and configure the root password for the MariaDB database. Then we will create a new database and user that we require for our WordPress installation.
Install MariaDB with zypper:
zypper in mariadb mariadb-client
Add MariaDB to the boot sequence and then start it:
systemctl enable mysql
systemctl start mysql
MariaDB has been started, now we have to configure the root password for MariaDB/mysql database. Run the command below to setup a MariaDB root password.
/usr/bin/mysqladmin -u root password 'toor123'
Note:
The MariaDB password is "toor123", please use a different and more secure password on your server.
The MariaDB root password has been configured. Now login to the MariaDB/MySQL shell and create a new database "wpdb" and new user "wpuser" with password "wpuser@" for our WordPress installation. Choose a secure password here as well on your system.
Login to the MariaDB/MySQL shell:
mysql -u root -p
TYPE PASSWORD toor123
Create a new database and new user:
create database wpdb;
create user wpuser@localhost identified by 'wpuser@';
grant all privileges on wpdb.* to wpuser@localhost identified by 'wpuser@';
flush privileges;
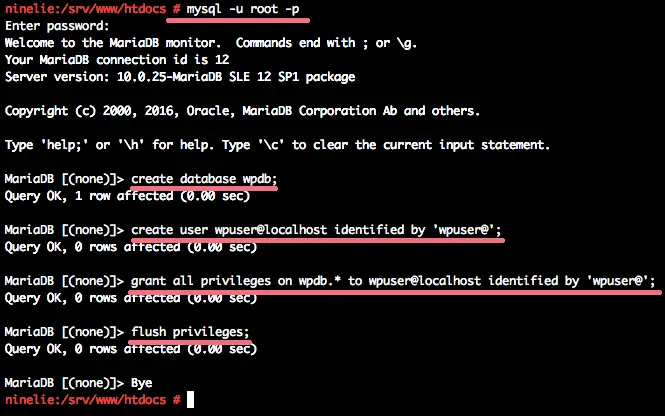
MariaDB is installed, and the new database for our WordPress installation has been created.
Step 3 - Install HHVM
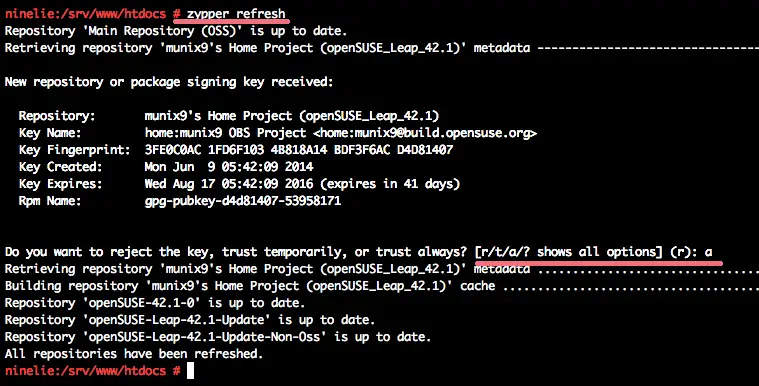
For the HHVM installation, we need to add a new hhvm repository. We can use the zypper command to add the new hhvm repository to the server. Then we must refresh the openSUSE repositories:
zypper addrepo http://download.opensuse.org/repositories/home:munix9/openSUSE_Leap_42.1/home:munix9.repo
zypper refresh
Type 'a' to always trust the key.
Now install the hhvm packages:
zypper in hhvm hhvm-nginx hhvm-fastcgi
hhvm-nginx provides a sample of the Nginx configuration.
hhvm-fastcgi provides the FastCGI meta files.
Step 4 - Configure HHVM and Nginx
In this step, we will configure HHVM to run with the Nginx web server. We will configure HHVM to use Unix-socket and run HHVM as Nginx user. Go to the HHVM configuration directory and edit the configuration file 'server.ini' with the vim editor:
cd /etc/hhvm/
vim server.ini
Uncomment line 3 to enable Unix-Sockets for HHVM.
hhvm.server.file_socket = /var/run/hhvm/server.sock
Save and exit.
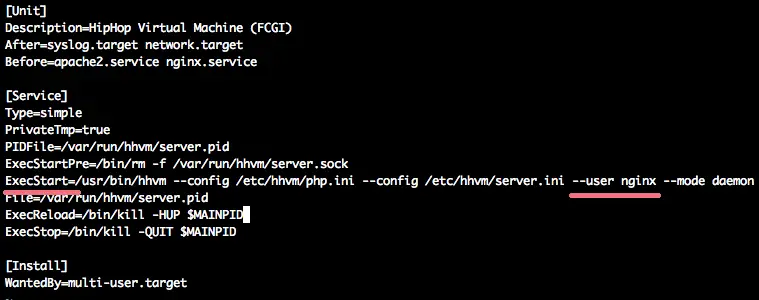
Next, we must edit the HHVM service script so that HHVM can runNginxginx user. It is important to configure HHVM to run as the same user than the web server. Go to the systemd directory and edit the 'hhvm.service' file with vim:
cd /usr/lib/systemd/system
vim hhvm.service
Change --user hhvm option on line 11 to the nginx user.
ExecStart=/usr/bin/hhvm --config /etc/hhvm/php.ini --config /etc/hhvm/server.ini --user nginx --mode daemon -vServer.Type=fastcgi -vServer.FileSocket=/var/run/hhvm/server.sock - vPidFile=/var/run/hhvm/server.pid
Save and exit.
Now change the owner of the "/var/run/hhvm" directory to the nginx user.
chown -R nginx:nginx /var/run/hhvm/
Note:
After the server rebooted, sometimes the default owner of the directory is back to the default user. To solve this problem, we can define the linux command to be executed after all scripts of the current runlevel have been executed.
Edit the after.local file in the "/etc/rc.d/" directory and add a new linux command at the end of the file:
vim /etc/rc.d/after.local
Paste the command below:
chown -R nginx:nginx /var/run/hhvm/
Save and exit.
Next, we must configure HHVM to work with Nginx. We've installed the new package "hhvm-nginx", it contains an example of HHVM configuration for the Nginx web server.
Go to the Nginx configuration directory and copy the HHVM configuration:
cd /etc/nginx/
cp hhvm.conf.example hhvm.conf
Edit hhvm.conf with vim:
vim hhvm.conf
On the second line, add a new configuration to define the web root directory:
root /srv/www/htdocs;
Save and exit.
Then we must edit the Nginx configuration to include the HHVM configuration.
vim nginx.conf
On line 59 - add the new configuration line below:
include /etc/nginx/hhvm.conf;
Save and exit.
Enable and start HHVM with systemctl command below:
systemctl enable hhvm
systemctl start hhvm
Then restart Nginx:
systemctl restart nginx
Nginx and HHVM have been installed and configured. To test if the configuration is working, we will create a new php file that contains phpinfo code and save it to the web root directory "/srv/www/htdocs", then we access it through the web browser.
cd /srv/www/htdocs/
echo "<?php phpinfo(); ?>" > info.php
Open your browser and type the server IP address:
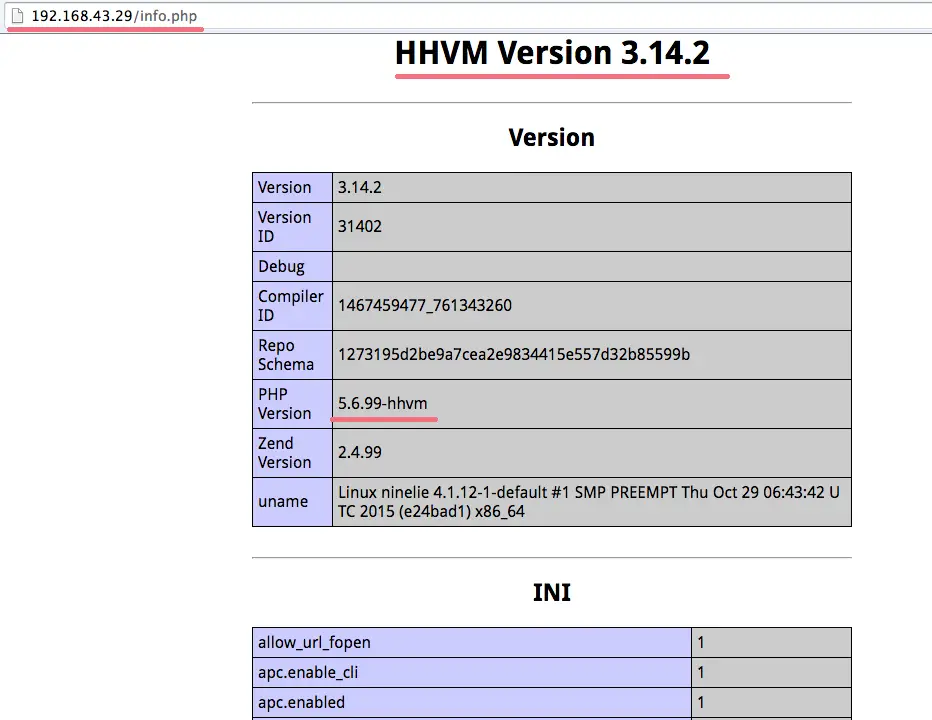
Nginx and HHVM are working without errors.
Step 5 - Create a Virtual Host with HHVM and Nginx
In this step, we will create a new virtual host configuration with Nginx and HHVM. I will use the domain name "hakasenano.co" for this example and use it as domain for our WordPress installation too. Please replace the domain name with your own domain name in all config files and commands.
Go to the Nginx directory and create new directory to store virtual host file:
cd /etc/nginx/
mkdir vhosts.d/
cd vhosts.d/
Create a new configuration file "nano.conf" with vim:
vim nano.conf
And paste the new virtual host configuration below:
server {
# This line for redirect non-www to www
server_name hakasenano.co;
rewrite ^(.*) http://www.hakasenano.co$1 permanent;
}
server {
listen 80;
server_name www.hakasenano.co;
root /srv/www/nano;
index index.php index.html index.htm;
location / {
try_files $uri $uri/ =404;
}
error_page 500 502 503 504 /50x.html;
location = /50x.html {
root /srv/www/htdocs;
}
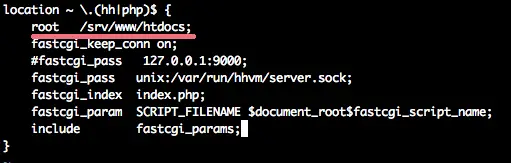
# HHVM running throught Unix-Socket
location ~ \.(hh|php)$ {
root /srv/www/nano;
fastcgi_keep_conn on;
#fastcgi_pass 127.0.0.1:9000;
fastcgi_pass unix:/var/run/hhvm/server.sock;
fastcgi_index index.php;
fastcgi_param SCRIPT_FILENAME $document_root$fastcgi_script_name;
include fastcgi_params;
}
}
Save and exit.
In our virtual host configuration, we've defined the web root directory for the domain name to be the "/srv/www/nano" directory. This directory does not exist for now, so we have to create that directory now.
mkdir -p /srv/www/nano/
Finally, test the Nginx configuration and restart it:
nginx -t
systemctl restart nginx
Ensure the nginx -t command does not display an error message.
Step 6 - Install WordPress
On step 5, we've created the virtual host configuration for our WordPress installation. So we just need to download WordPress now and then edit the database configuration that we've created in step 2.
Go to the web root directory "/srv/www/nano" and download the WordPress zip archive with the wget command:
cd /srv/www/nano
wget wordpress.org/latest.zip
Extract "latest.zip" and move all WordPress files and directories to nano directory:
unzip latest.zip
mv wordpress/* .
Next, copy "wp-config-sample.php" file to "wp-config.php" and edit with vim:
cp wp-config-sample.php wp-config.php
vim wp-config.php
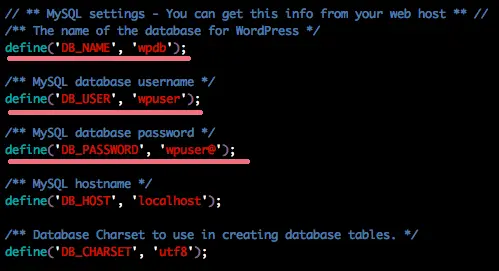
Change DB_NAME to our database "wpdb", DB_USER to "wpuser" and DB_PASSWORD to "wpuser@".
define('DB_NAME', 'wpdb');
define('DB_USER', 'wpuser');
define('DB_PASSWORD', 'wpuser@');
define('DB_HOST', 'localhost');
Save and exit.
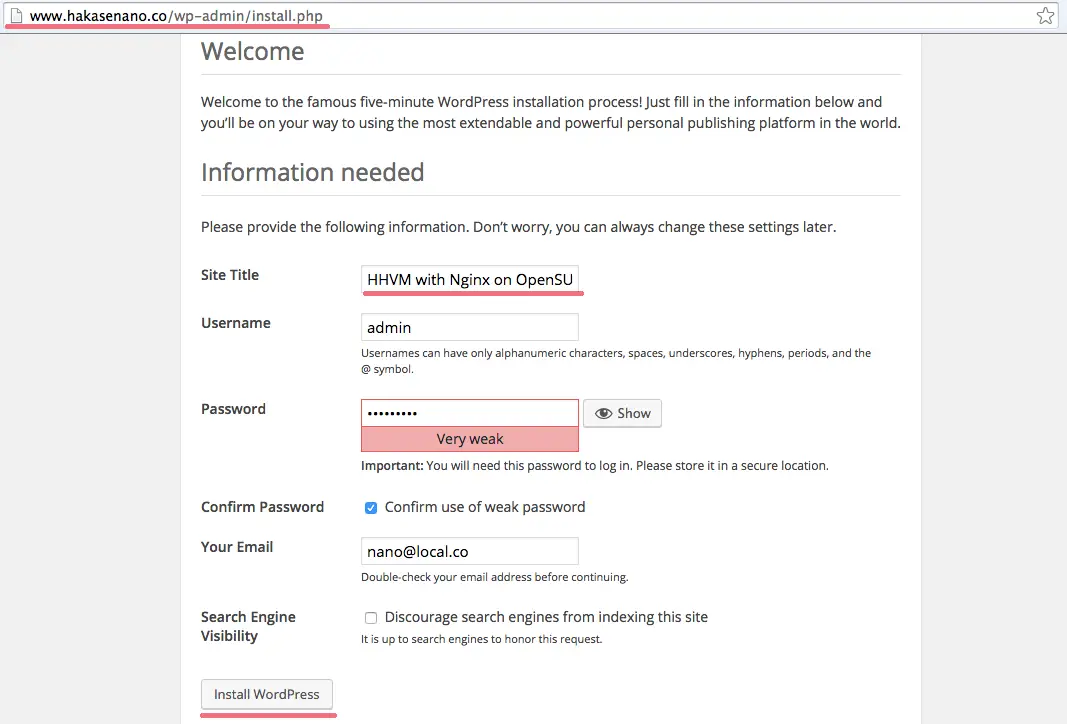
Now open the web browser and type the domain name into the address bar.
You will be redirected to the www.hakasenano.co and you will see the page of the installation.
And you can fill the site title and description with your info and click "Install Wordpress".
Wait until the installation is finished and you will see the login page below. Click "Log In" to log in to the WordPress admin dashboard:
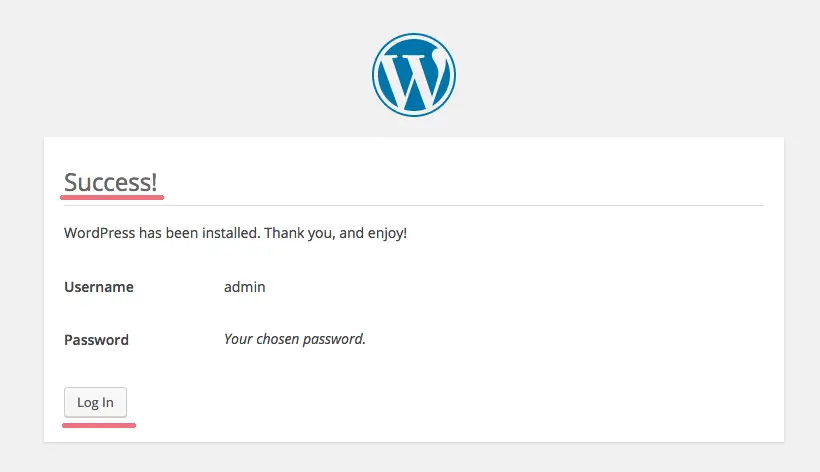
Type your admin user and password, then click "Log In" again.
Now you're in the WordPress admin dashboard.
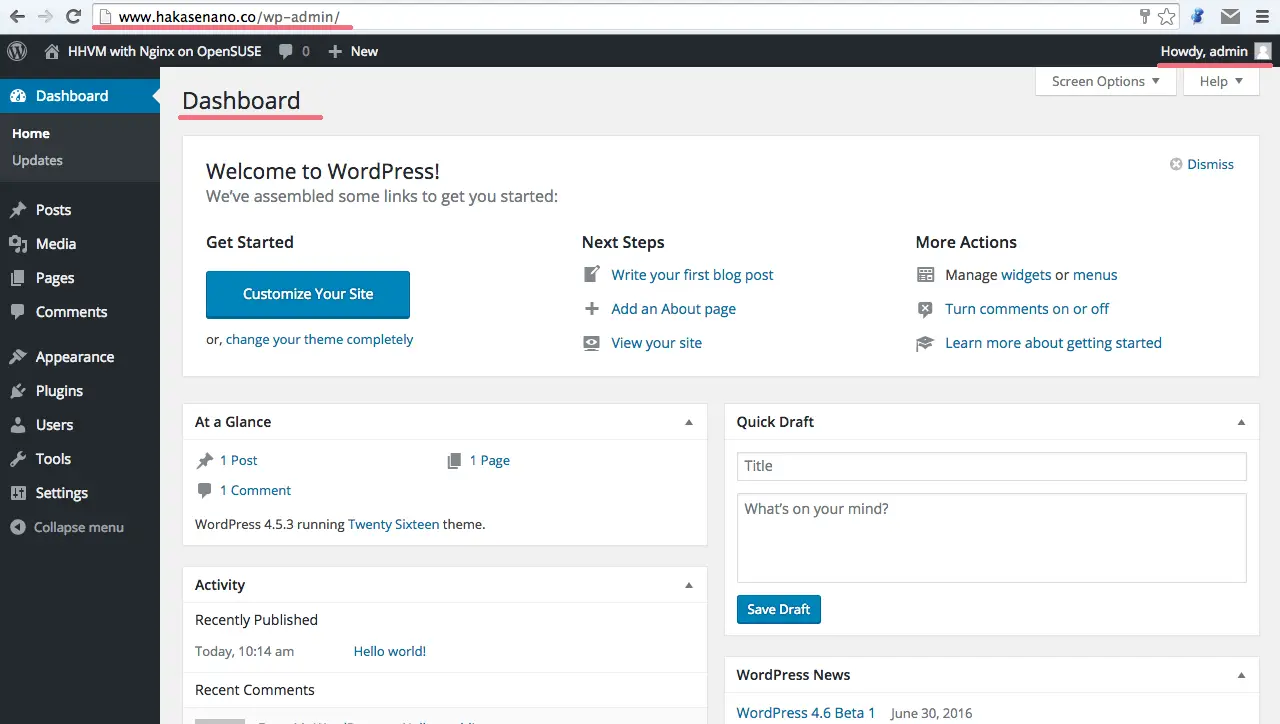
Wordpress with Nginx and HHVM on OpenSUSE Leap 42.1 is installed now.

