How to send sound through Bluetooth on Linux
On this page
Bluetooth headsets and speakers are now more popular than ever before, but getting them to work under Linux isn't always very clear. With all that is going on in the Linux sound systems world, it is easy to get lost and even give up. Most of the time, the problem with these devices is that your system can see them, but for some reason it can't establish a connection. Here is a quick and simple guide on how to get through this problem. I have tested the following on Arch, but it should work on every other distribution as well.
Prerequisites
In order to send sound through A2DP (Advanced Audio Distribution Profile), you will need to install the “bluez” bluetooth protocol stack, and another three packages namely the “bluez-firmware”, “bluez-utils” and the “bluez-tools”. You may install these by opening a terminal and entering “sudo yaourt” followed by the package name if you are using Arch, or with “sudo apt-get install” followed by the package name if you are using Ubuntu. If you prefer the packman utility, note that the “bluez-tools” package is to be found in the AUR repository. After these packages are installed in your system, you should be able to find the bluetooth speaker/headset, but you wouldn't be able to connect with it. You may get the bluetooth address of the device by opening GNOME's Bluetooth Settings, or by opening a terminal and typing “hcitool scan”.
Next, you need to install the “pulseaudio-bluetooth” package. In Ubuntu (and Debian), this package is named as “pulseaudio-module-bluetooth”.
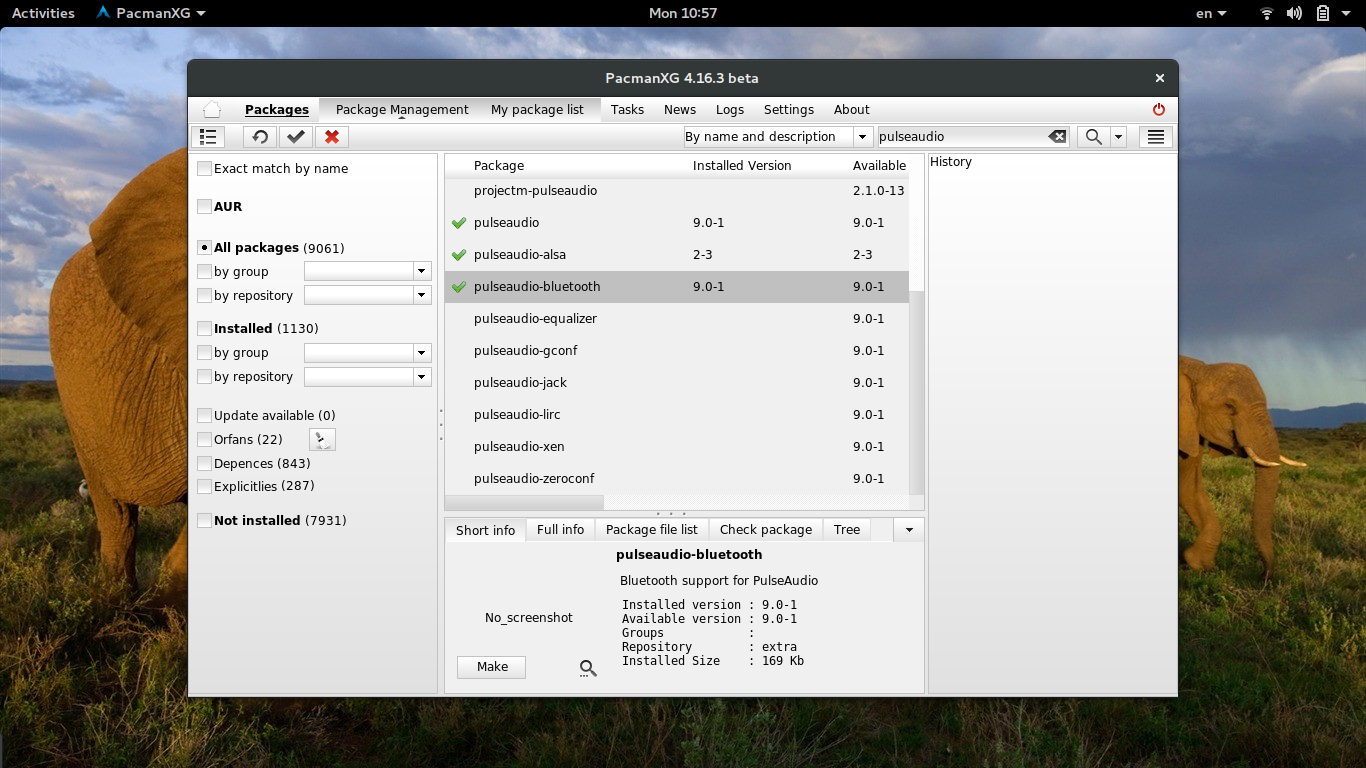
After this package is installed, open a new terminal and type:
killall pulseaudio
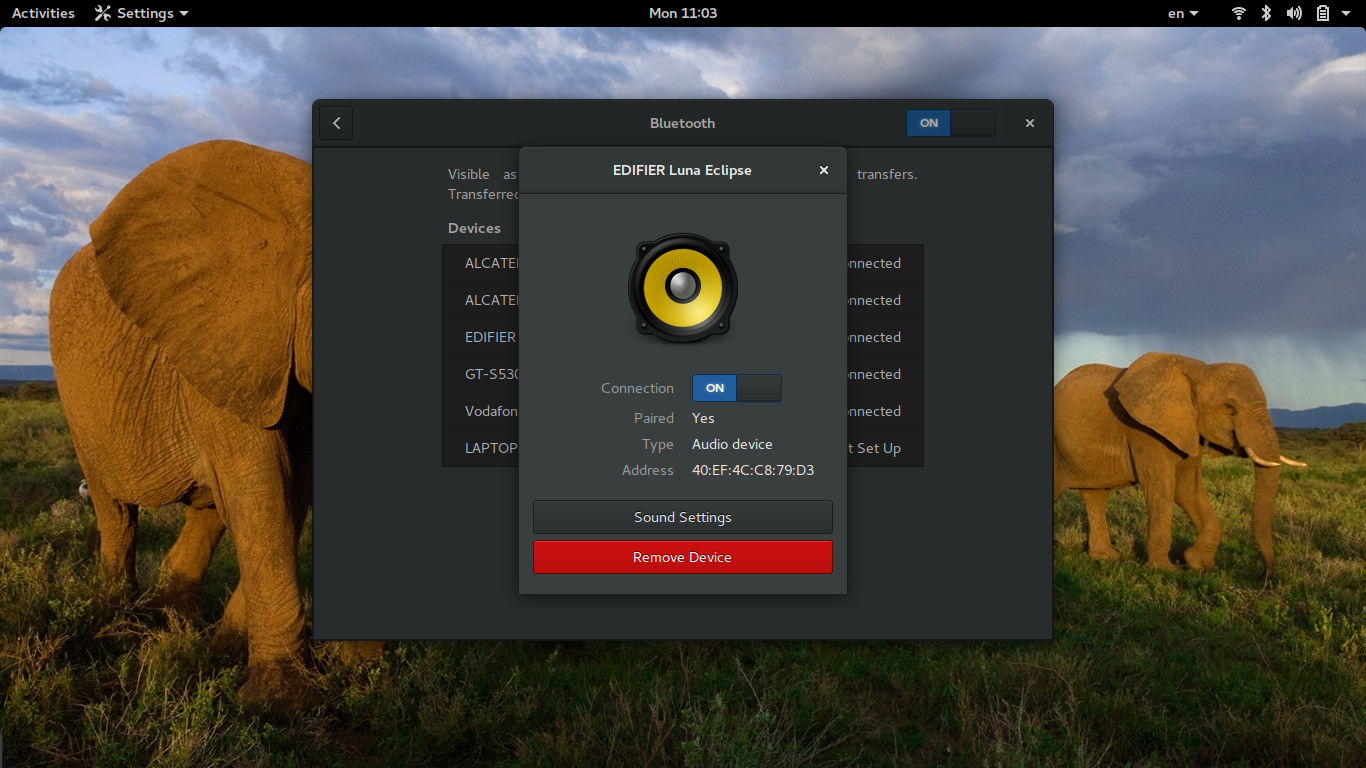
Then deactivate Bluetooth and activate it again and you should now be able to establish a connection with your bluetooth device.
Connect
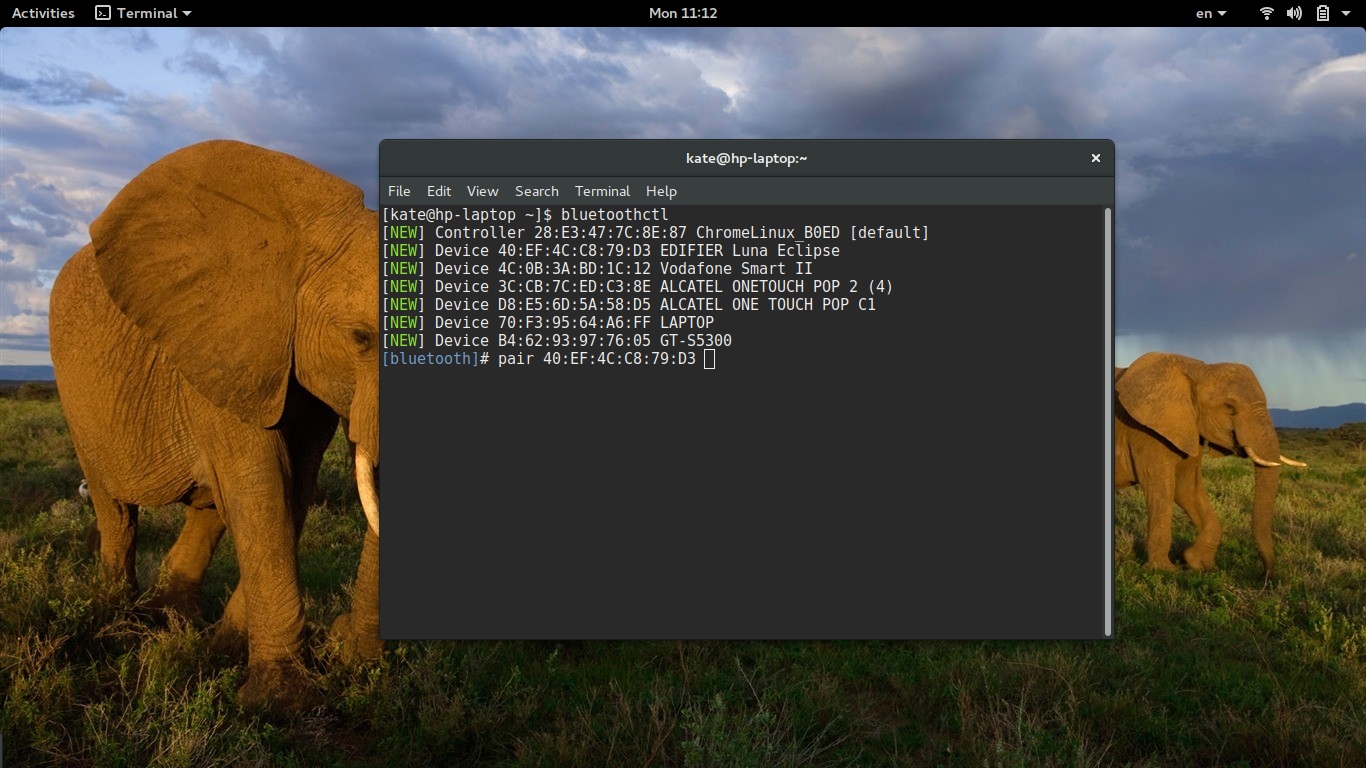
To connect with your Bluetooth device, you can either use GNOME's Bluetooth Settings, or do it through the terminal. If you prefer the latter, open a terminal and type “bluetoothctl” and hit Enter. This will activate your bluetooth module and display all of the previously paired devices with their MAC addresses. Locate the one that corresponds to your headset/speakers, and type “pair” followed by the address. If you are having trouble with this method, enter the command “rfkill unblock bluetooth” and retry. If the pairing problems persist, try the command “hciconfig hci0 sspmode 0” and then retry. When the pairing is finally done, continue with the command “connect” followed by the MAC address again.
Now, if you want a more convenient way to connect to your speakers every time you boot into your system, you may install the “Blueman” package that will put an applet on your tray area. This is not absolutely necessary, but it can come in handy. If you are using KDE, install the “Bluedevil” package which also comes with a handy widget which you can enable through the system tray options in Dolphin.
Take Control
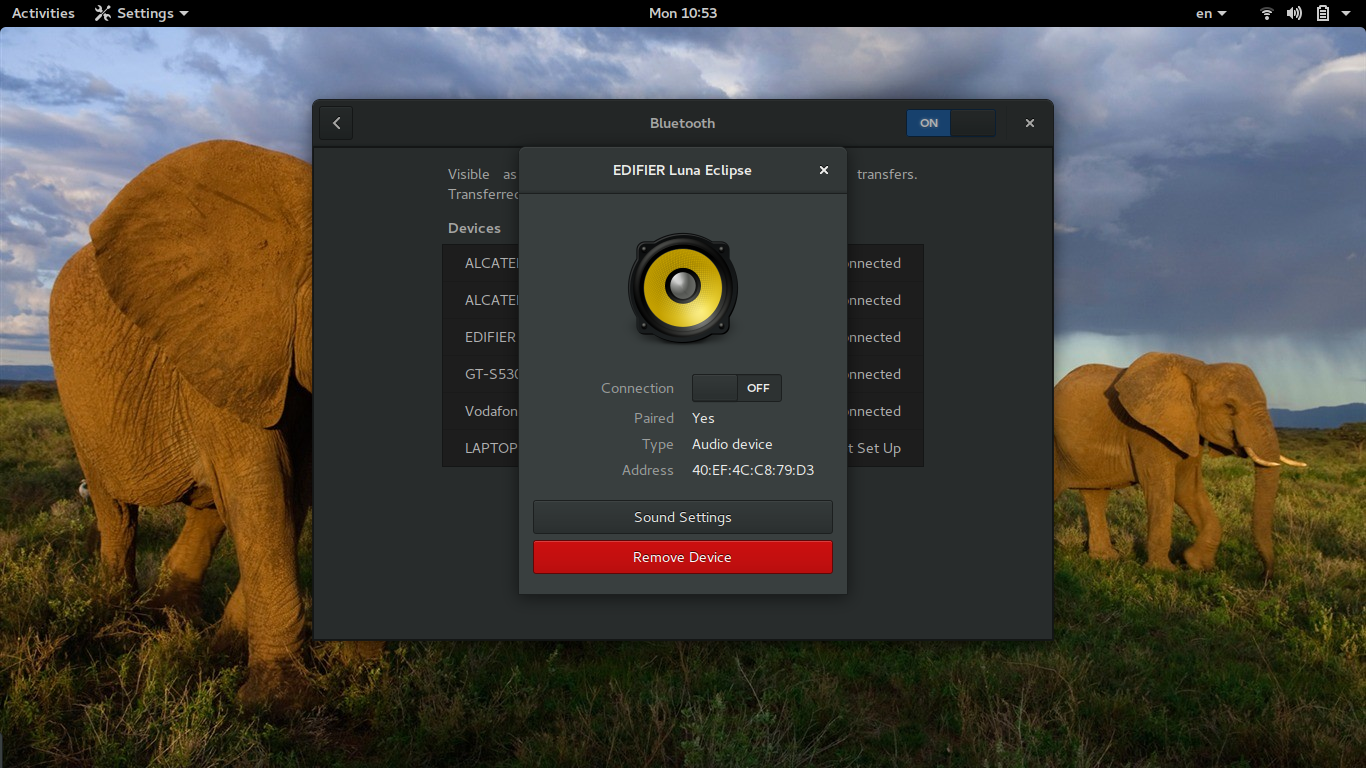
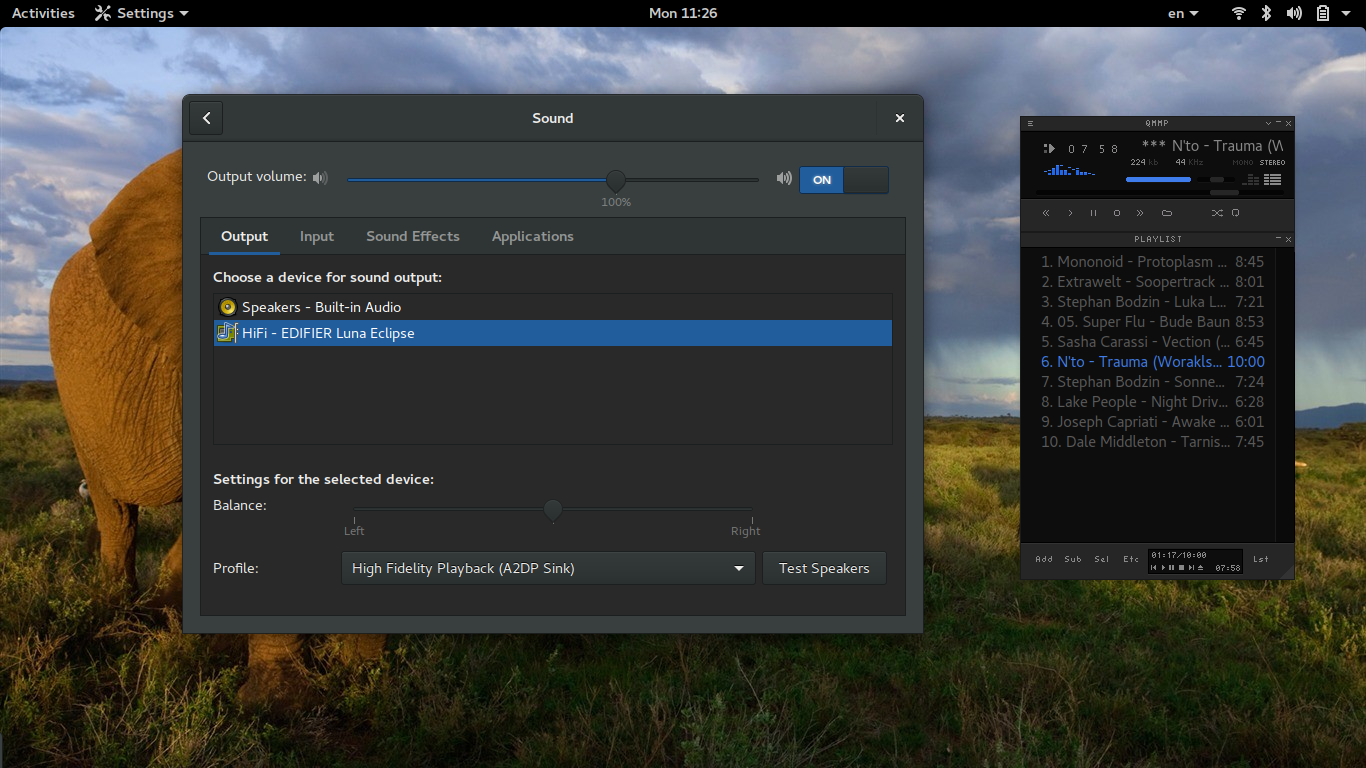
Once you have connected to the Bluetooth speakers, you should be able to see and select them in your sound settings.
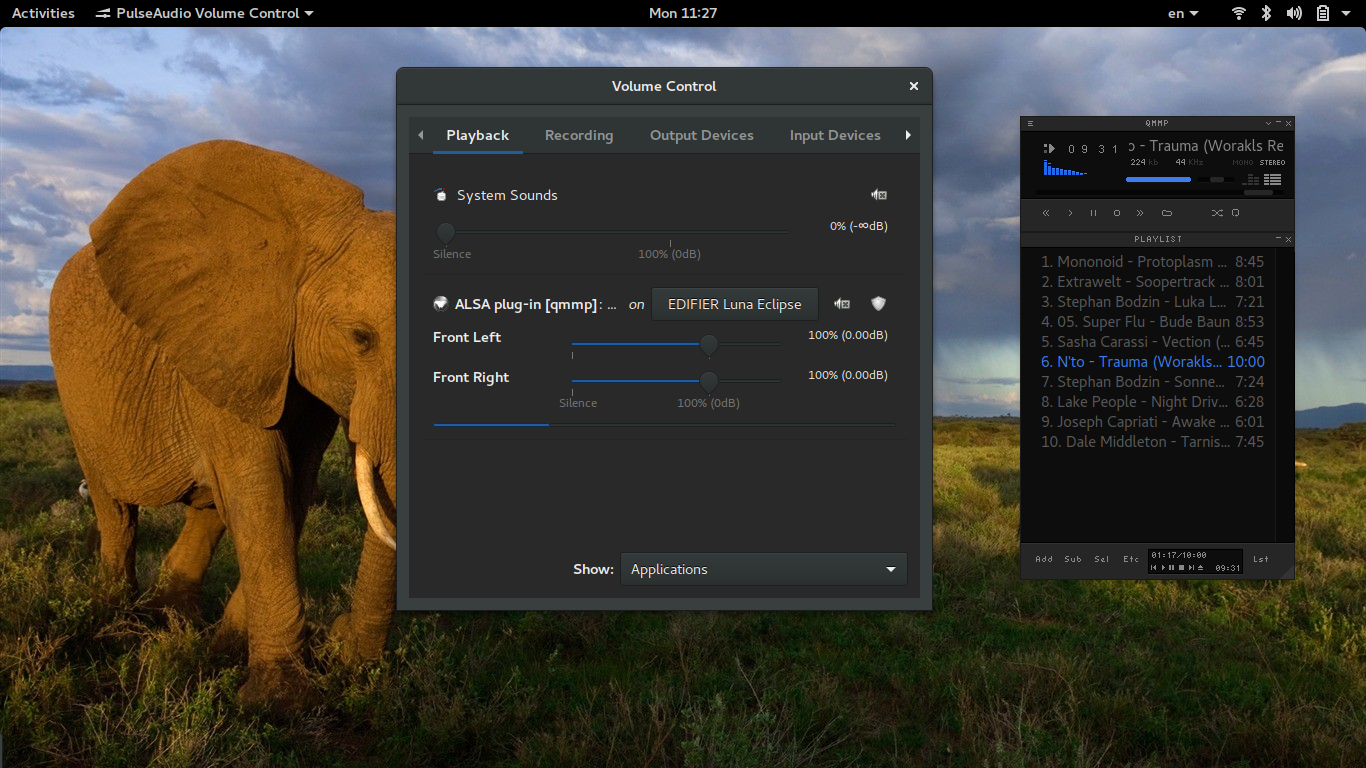
Alternatively, you may install the package “pavucontrol” which allows for advanced PulseAudio sound settings. Through this utility, you may set different volume levels for each channel, set a latency offset, and control volumes on an application level.
Since sending sound to your speakers is basically a data transfer task, it would be nice to know if the transfer rates are kept high enough for a quality result. One way to check this is to use the gkrellm utility that offers a plugin called “gkrellm-bluez”. The particular tool is old (GTK2) but it can still serve the purpose just fine.
Go Deeper
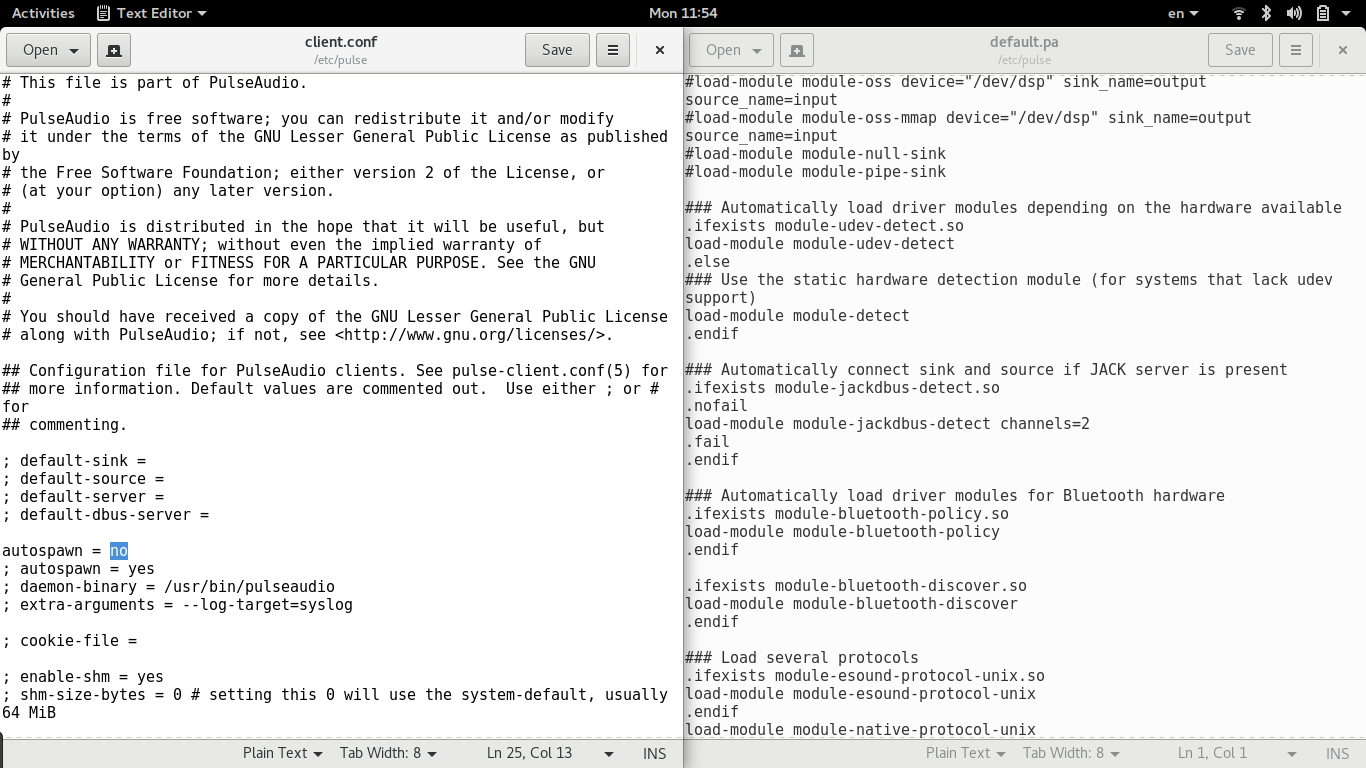
If you want to go deeper and set options that concern the pulseaudio system, you may do so by navigating to “/etc/pulse” and opening configurations files by typing “sudo gedit default.pa” and “sudo gedit client.conf” on a terminal. Of course, you can use a different text editor if you like.
On the first file, you may uncomment the corresponding segments that have to do with automatic bluetooth activation in order to activate your module and connect to the headset automatically after each boot, while on the second file you may change the autospawn from “no” to “yes” depending on whether you want the display manager to capture the A2DP upon the session start or not. Make sure to backup these configuration files first, as some changes may not have the effect that you wanted/expected.
Another way to set automatic detection and connection of your headset upon system startup is by navigating to “/etc/bluetooth” and opening the “audio.conf” text configuration file. There you may uncomment the corresponding parts and save and reboot. Again, make sure to backup the file first.
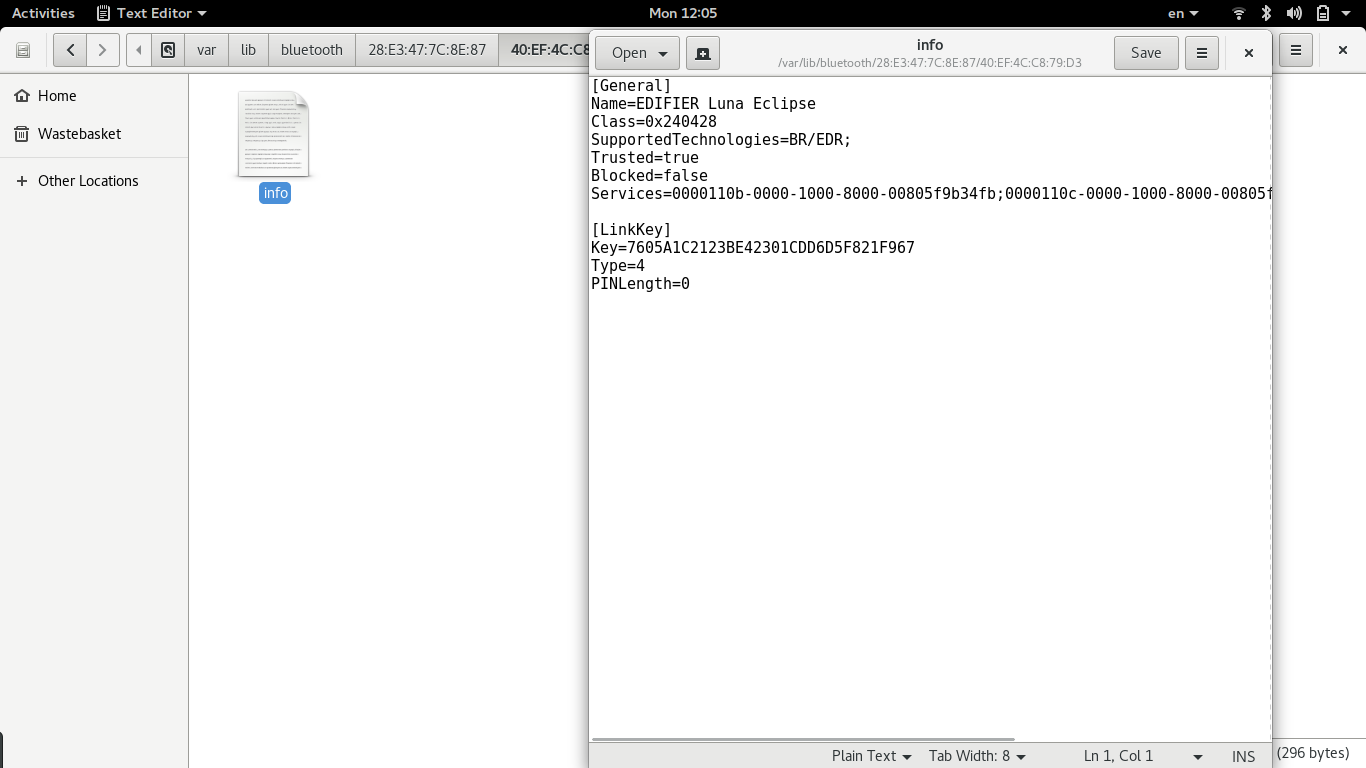
Finally, if you want to see and change some basic parameters of your bluetooth devices, open a file manager session as root by typing “sudo nautilus” on the terminal and navigate to “/var/lib/bluetooth”. There you will find a “settings” file that concerns your bluetooth module settings (name, discoverability, etc.), and folders named after the MAC address of the device. Open the “info” file inside a folder and set the display name of a device, change its “trust” and “block” states, and get the link key or change the PIN code.
Still Nothing?
If you still can't get your system to connect to your bluetooth set, try a Bluez version of the 4 branch. Version 5 brought a major API rewrite that broke compatibility with some devices and in many cases, this is still the situation. Also, there is a chance that your display manager is capturing the A2DP sink to serve the accessibility needs of the users on the login screen. Setting “autospawn” to “no” on the client.conf as we mentioned in the previous part will help with this issue.
If your bluetooth connection hangs/freezes and you can't reconnect to your speakers even after a reboot, go to “/etc/bluetooth/” open “main.conf” as root, and change the value of “RememberPowered” from “true” to “false”, save the file and reboot. Do this while also resetting your device and you should be free of any problems on your next boot. If the problems persist, visit our forums and ask for the help of our experts community.

