How to install nginx as a Reverse Proxy for Apache on Ubuntu 16.04
This tutorial exists for these OS versions
- Ubuntu 16.04 (Xenial Xerus)
- Ubuntu 15.10 (Wily Werewolf)
- Ubuntu 12.04 LTS (Precise Pangolin)
On this page
This tutorial shows how you can set up nginx as a reverse proxy in front of an Apache2 web server on Ubuntu 16.04. nginx (pronounced "engine x") is a free, open-source, high-performance HTTP server. nginx is known for its stability, rich feature set, simple configuration, and low resource consumption.
1 Preliminary Note
In this tutorial, I use the hostname server1.example.com with the IP address 192.168.1.100. These settings might differ for you, so you have to replace them where appropriate.
I'm assuming that you have an existing Apache vhost (I will use the apache default vhost in this tutorial) that is listening on port 80 on the IP address 192.168.1.100 that you want to proxy through nginx. I will use the Ubuntu LAMP tutorial as the basis. Please note that this tutorial covers http only, not https (SSL).
2 Configuring Apache
The first thing we have to do is configure our Apache vhost to listen on localhost (127.0.0.1) on an unused port other than 80 (e.g. 8000). Open /etc/apache2/ports.conf...
nano /etc/apache2/ports.conf
... and modify the NameVirtualHost and Listen lines for port 80 to use port 8000:
# If you just change the port or add more ports here, you will likely also
# have to change the VirtualHost statement in
# /etc/apache2/sites-enabled/000-default.conf

Listen 8000

<IfModule ssl_module>
 Listen 443
</IfModule>

<IfModule mod_gnutls.c>
 Listen 443
</IfModule>
Next open the vhost configuration file (e.g. /etc/apache2/sites-available/000-default.conf)...
nano /etc/apache2/sites-available/000-default.conf
... and change the <VirtualHost> line to use the IP address 127.0.0.1 and the port 8000:
<VirtualHost 127.0.0.1:8000>
[...]
We will configure nginx as a transparent proxy, i.e., it will pass on the original user's IP address in a field called X-Forwarded-For to the backend Apache. Of course, the backend Apache should log the original user's IP address in their access logs instead of the IP address of nginx (127.0.0.1). There are two ways to achieve this:
1) We can modify the LogFormat line in /etc/apache2/apache2.conf and replace %h with %{X-Forwarded-For}i:
nano /etc/apache2/apache2.conf
[...]
#LogFormat "%h %l %u %t \"%r\" %>s %O \"%{Referer}i\" \"%{User-Agent}i\"" combined
LogFormat "%{X-Forwarded-For}i %l %u %t \"%r\" %>s %b \"%{Referer}i\" \"%{User-Agent}i\"" combined
[...]
2) On Debian/Ubuntu, we can install the Apache module libapache2-mod-rpaf which takes care of logging the correct IP address:
apt-get -y install libapache2-mod-rpaf
After all these changes, restart Apache:
service apache2 restart
3 Configuring nginx
If nginx isn't already installed, install it as follows:
apt-get -y install nginx
Create its system startup links and make sure it is started:
systemctl enable nginx.service
service nginx restart
It should now be listening on port 80.
Some standard proxy parameters are in the file /etc/nginx/proxy_params:
nano /etc/nginx/proxy_params
proxy_set_header Host $http_host;
proxy_set_header X-Real-IP $remote_addr;
proxy_set_header X-Forwarded-For $proxy_add_x_forwarded_for;
proxy_set_header X-Forwarded-Proto $scheme;
As we will include that file later on in the proxy part of our nginx vhost for example.com, you might want to add further proxy directives to that file if you like, e.g. as follows:
proxy_set_header Host $http_host;
proxy_set_header X-Real-IP $remote_addr;
proxy_set_header X-Forwarded-For $proxy_add_x_forwarded_for;
proxy_set_header X-Forwarded-Proto $scheme;

client_max_body_size 100M;
client_body_buffer_size 1m;
proxy_intercept_errors on;
proxy_buffering on;
proxy_buffer_size 128k;
proxy_buffers 256 16k;
proxy_busy_buffers_size 256k;
proxy_temp_file_write_size 256k;
proxy_max_temp_file_size 0;
proxy_read_timeout 300;
Now modify the default vhost for nginx - make sure it uses the same document root as the Apache vhost for example.com (e.g. /var/www/html) so that nginx can deliver static files directly without passing the request to Apache:
nano /etc/nginx/sites-available/default
server {
     listen 80 default_server;
     listen [::]:80 default_server;

     root /var/www/html;

     # Add index.php to the list if you are using PHP
     index index.html index.htm index.nginx-debian.html;

     server_name _;

     location / {
       proxy_pass http://localhost:8000;
       include /etc/nginx/proxy_params;
     }
}
This is a very simple configuration which would proxy all requests to Apache.
Reload nginx for the changes to take effect:
service nginx reload
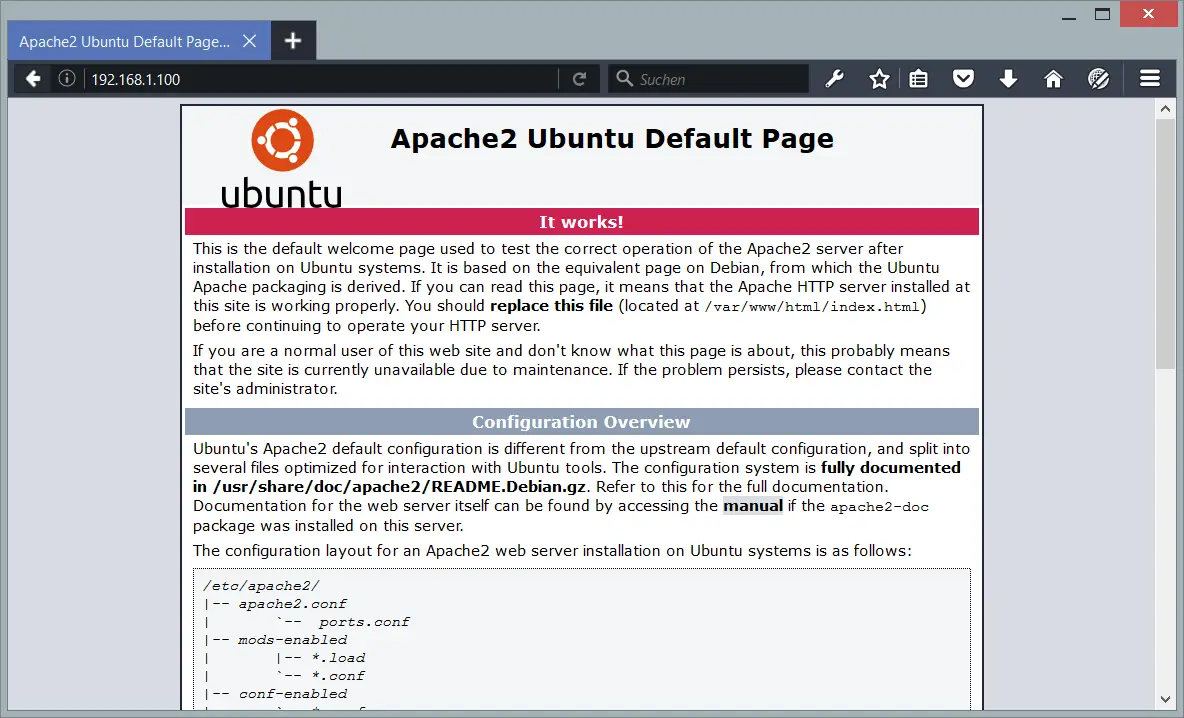
You can now type the server hostname or the IP 192.168.1.100 into your browser, and you should see the apache default web site, but this time delivered through nginx.
As I said before this is a very simple configuration which proxies all requests to Apache. But because nginx is much faster delivering static files (like JavaScript, CSS, images, PDF files, static HTML files, etc.) than Apache, it is a good idea to let nginx serve these files directly. This can be done by adding a new location for these files, e.g. as follows:
server {
       listen 80 default_server;
       listen [::]:80 default_server;

       root /var/www/html;

       # Add index.php to the list if you are using PHP
       index index.html index.htm index.nginx-debian.html;

       server_name _;

       location / {
         proxy_pass http://localhost:8000;
         include /etc/nginx/proxy_params;
       }
       location ~* \.(js|css|jpg|jpeg|gif|png|svg|ico|pdf|html|htm)$ {
       }
}
Reload nginx:
service nginx reload
You can even set an Expires HTTP header for these files so that browsers will cache these files (see Make Browsers Cache Static Files On nginx for more details):
server {
       listen 80 default_server;
       listen [::]:80 default_server;

       root /var/www/html;

       # Add index.php to the list if you are using PHP
       index index.html index.htm index.nginx-debian.html;

       server_name _;

       location / {
       proxy_pass http://localhost:8000;
       include /etc/nginx/proxy_params;
       }
       location ~* \.(js|css|jpg|jpeg|gif|png|svg|ico|pdf|html|htm)$ {
                expires      30d;
       }
}
We can now take this setup one step further by letting nginx serve as many requests as it can fulfill and only pass the remaining requests plus PHP files to Apache:
server {
       listen 80 default_server;
       listen [::]:80 default_server;

       root /var/www/html;

       # Add index.php to the list if you are using PHP
       index index.html index.htm index.nginx-debian.html;

       server_name _;

       location / {
                proxy_pass http://localhost:8000;
                include /etc/nginx/proxy_params;
       }
       location ~* \.(js|css|jpg|jpeg|gif|png|svg|ico|pdf|html|htm)$ {
                expires      30d;
       }
       location @proxy {
                proxy_pass http://127.0.0.1:8000;
                include /etc/nginx/proxy_params;
       }
       location ~* \.php$ {
                proxy_pass http://127.0.0.1:8000;
                include /etc/nginx/proxy_params;
       }
}
Reload nginx:
service nginx reload
Of course, you can fine-tune this setup even more, for example by using the nginx proxy_cache (if your application allows it - for example, you must make sure that captchas or shopping carts aren't cached, and that logged-in users always get a fresh copy of the page) or if your application has a full page cache - nginx could access the full page cache directly in such a case (you can find an example in this tutorial: How To Speed Up Drupal 7.7 With Boost And nginx (Debian Squeeze)).
4 Links
- nginx: http://nginx.net/
- Apache: http://httpd.apache.org/
- Ubuntu: http://www.ubuntu.com/

