How to create Docker Images with a Dockerfile on Ubuntu 22.04 LTS
This tutorial exists for these OS versions
- Ubuntu 22.04 (Jammy Jellyfish)
- Ubuntu 20.04 (Focal Fossa)
- Ubuntu 18.04 (Bionic Beaver)
- Ubuntu 16.04 (Xenial Xerus)
On this page
Docker is an operating system-level virtualization that is primarily aimed at developers and system administrators. Docker makes it easier to build and deploy applications in an isolated environment.
A Dockerfile is a script that contains collections of commands and instructions that are automatically executed one after another in the Docker environment to create a new Docker image.
This tutorial will show you how to create your own Docker image using a Dockerfile. We explain in detail how to create your own Docker image using a Dockerfile.
Prerequisites
For this guide, we will use Ubuntu 22.04 with 1GB of RAM, 25 GB of free disk space, and 2 CPUs. Also, we will use Ubuntu 22.04 as the base image to build the custom Docker image.
Introduction to the Dockerfile Command
A Dockerfile is a script that contains all commands for building a Docker image. The Dockerfile contains all instructions that will be used to create the Docker image with the 'docker build' command.
Before creating your first Dockerfile, you should be familiar with the Dockerfile instruction. Below are some Dockerfile instructions that you must know.
FROM
Set the base-image for the new image that you want to create. The FROM instruction will initialize the new build-stage and must be located at the top of the Dockerfile.
LABEL
With this instruction, you can add additional information about your Docker image, such as the version, description, maintainer, etc. The LABEL instruction is a key-value pair that allows you to add multiple labels and multi-line values.
RUN
This instruction used to execute the command during the build process of the docker image. You can install additional packages needed for your Docker images.
ADD
The ADD instruction is used to copy files, directories, or remote files from URL to your Docker images, from the 'src' to the absolute path 'dest'. Also, you can set up the default ownership of your file.
ENV
The ENV instruction defines an environment variable that can be used during the build stage and can be replaced inline in many as well.
CMD
The CMD instruction defines the default command to execute when running the container. And the Dockerfile must only contain one CMD instruction, and if there is multiple CMD, the last CMD instruction will be run.
EXPOSE
This instruction exposes the container port on the specific network ports at runtime. The default protocol exposed is TCP, but you can specify whether the TCP or UDP.
ARG
The ARG instruction is used to define a variable that the user can pass at the built-time. You can use this instruction in the docker 'build command' during the build time using the '--build-arg variable=value' option and can be pass through the Dockerfile. Also, you can use multiple ARG at the Dockerfile.
ENTRYPOINT
The ENTRYPOINT instruction is used to define the first and default command that will be executed when the container is running. Define the command to start your application with the ENTRYPOINT instruction.
WORKDIR
The WORKDIR instruction is used to define the default working directory of your Docker image. The RUN, CMD, ENTRYPOINT, and ADD instructions follow the WORKDIR instruction. You can add multiple WORKDIR instruction on your Dockerfile, and if there is doesn't exist, it will be created automatically.
USER
The USER instruction is used to define the default user or gid when running the image. The RUN, CMD, and ENTRYPOINT follow the USER instruction in the Dockerfile.
VOLUME
The VOLUME instruction ad used to enable access/linked directory between the container and the host machine.
Now, let's start to create the first Dockerfile.
Step 1 - Install Docker on Ubuntu 22.04
Before creating a Dockerfile, we will install the Docker to our Ubuntu 22.04 system, which is available by default in the Ubuntu repository.
Update all packages list on the Ubuntu repository and install Docker using the apt command below.
sudo apt update
sudo apt install docker.io
Once all installation is completed, start the Docker service and add it to the system boot.
systemctl start docker
systemctl enable docker
Now check the Docker service using the command below.
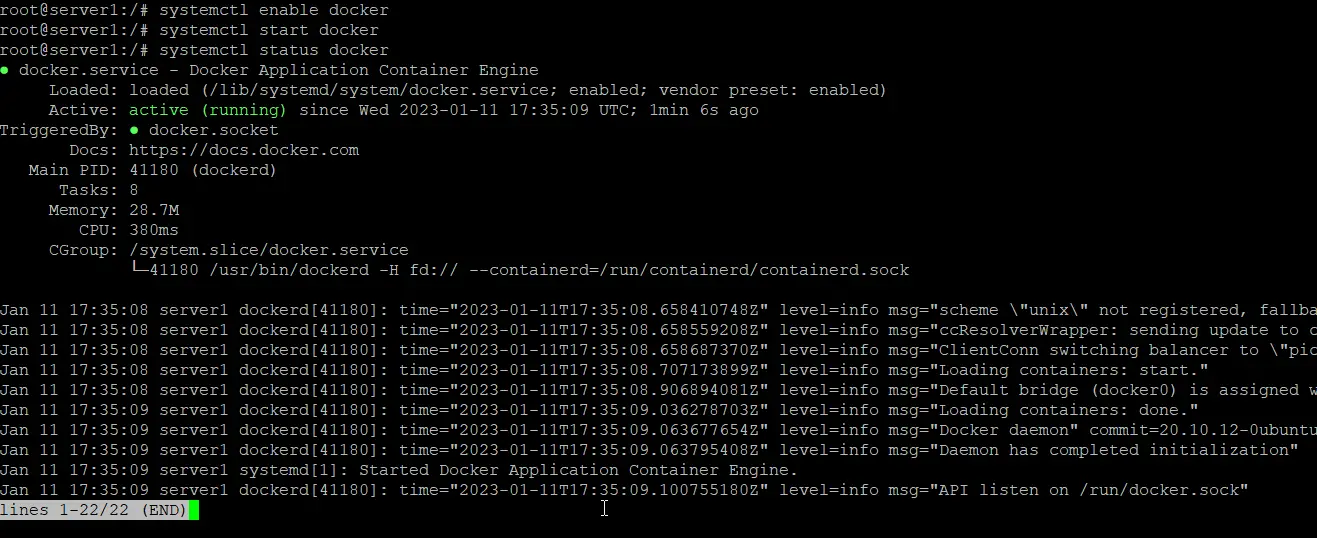
systemctl status docker
The Docker service is up and running on Ubuntu 22.04.
Next, run the docker command below to ensure the installation is correct.
docker run hello-world
Below is the result you will get.
Hello from Docker!
This message shows that your installation appears to be working correctly.

To generate this message, Docker took the following steps:
 1. The Docker client contacted the Docker daemon.
 2. The Docker daemon pulled the "hello-world" image from the Docker Hub.
    (amd64)
 3. The Docker daemon created a new container from that image which runs the
    executable that produces the output you are currently reading.
 4. The Docker daemon streamed that output to the Docker client, which sent it
    to your terminal.

To try something more ambitious, you can run an Ubuntu container with:
 $ docker run -it ubuntu bash

Share images, automate workflows, and more with a free Docker ID:
 https://hub.docker.com/

For more examples and ideas, visit:
 https://docs.docker.com/get-started/
As can be seen, you get the Hello World message from Docker, and the Docker installation on Ubuntu 22.04 has been completed successfully.
Step 2 - Create Dockerfile and Other Configurations
In this step, we will show you how to build a custom Docker image for your application using the Dockerfile. We will create a new custom Docker image based on Ubuntu 22.04 image, for the PHP-FPM and Nginx services, then run the new container with a simple phpinfo script.
First, create a new project directory and create an empty Dockerfile.
mkdir -p nginx-image
cd nginx-image/
touch Dockerfile
Now edit the 'Dockerfile' script using your own editor (for this example we're using nano).
nano Dockerfile
On the top of the line, add the base-image Ubuntu 22.04 image using the FROM instruction as below.
# Download base image ubuntu 22.04
FROM ubuntu:22.04
Now add detailed information about the custom image using the LABEL instruction.
# LABEL about the custom image
LABEL maintainer="[email protected]"
LABEL version="0.1"
LABEL description="This is a custom Docker Image for PHP-FPM and Nginx."
We will skip any interactive post-install step for the apt packages installation using the environment variable 'DEBIAN_FRONTEND=noninteractive'.
# Disable Prompt During Packages Installation
ARG DEBIAN_FRONTEND=noninteractive
Next, run the 'apt update' command before installing any packages.
# Update Ubuntu Software repository
RUN apt update
Now install the Nginx, PHP-FPM, and supervisor packages. Once all installation is completed, remove all packages cache to reduce the size of the custom image.
# Install nginx, php-fpm and supervisord from ubuntu repository
RUN apt install -y nginx php-fpm supervisor
RUN rm -rf /var/lib/apt/lists/*
RUN apt clean
Define a new environment variable that can be passed to the custom image.
# Define the ENV variable
ENV nginx_vhost /etc/nginx/sites-available/default
ENV php_conf /etc/php/8.1/fpm/php.ini
ENV nginx_conf /etc/nginx/nginx.conf
ENV supervisor_conf /etc/supervisor/supervisord.conf
Now copy the Nginx default configuration to the 'nginx_vhost' variable, replace the PHP configuration 'cgi.fix_pathinfo=1' with 'cgi.fix_pathinfo=0' on the php.ini config file, then add the 'daemon off' option to the default 'nginx_conf' variable.
# Enable PHP-fpm on nginx virtualhost configuration
COPY default ${nginx_vhost}
RUN sed -i -e 's/;cgi.fix_pathinfo=1/cgi.fix_pathinfo=0/g' ${php_conf} && echo "\ndaemon off;" >> ${nginx_conf}
Copy the custom supervisord configuration to the 'supervisor_conf' variable.
#Copy supervisor configuration
COPY supervisord.conf ${supervisor_conf}
Create a new directory for PHP-FPM sock file, change the ownership of the web-root directory '/var/www/html' and PHP-FPM directory '/run/php' to the default user 'www-data'.
RUN mkdir -p /run/php
RUN chown -R www-data:www-data /var/www/html
RUN chown -R www-data:www-data /run/php
Define the volume for the custom image so we can mount all of those directories to the host machine.
# Volume configuration
VOLUME ["/etc/nginx/sites-enabled", "/etc/nginx/certs", "/etc/nginx/conf.d", "/var/log/nginx", "/var/www/html"]
Now add the 'start.sh' script and define the default container command using the CMD instruction as below.
# Copy start.sh script and define default command for the container
COPY start.sh /start.sh
CMD ["./start.sh"]
And the last, open the default HTTP and HTTPS ports on the container using the EXPOSE instruction.
# Expose Port for the Application
EXPOSE 80 443
Save and close.
Below is the complete Dockerfile script that we just created.
# Download base image ubuntu 22.04
FROM ubuntu:22.04

# LABEL about the custom image
LABEL maintainer="[email protected]"
LABEL version="0.1"
LABEL description="This is a custom Docker Image for PHP-FPM and Nginx."

# Disable Prompt During Packages Installation
ARG DEBIAN_FRONTEND=noninteractive

# Update Ubuntu Software repository
RUN apt update
RUN apt upgrade -y

# Install nginx, php-fpm and supervisord from ubuntu repository
RUN apt install -y nginx php-fpm supervisor
RUN rm -rf /var/lib/apt/lists/*
RUN apt clean

# Define the ENV variable
ENV nginx_vhost /etc/nginx/sites-available/default
ENV php_conf /etc/php/8.1/fpm/php.ini
ENV nginx_conf /etc/nginx/nginx.conf
ENV supervisor_conf /etc/supervisor/supervisord.conf

# Enable PHP-fpm on nginx virtualhost configuration
COPY default ${nginx_vhost}
RUN sed -i -e 's/;cgi.fix_pathinfo=1/cgi.fix_pathinfo=0/g' ${php_conf} && echo "\ndaemon off;" >> ${nginx_conf}

# Copy supervisor configuration
COPY supervisord.conf ${supervisor_conf}

RUN mkdir -p /run/php
RUN chown -R www-data:www-data /var/www/html
RUN chown -R www-data:www-data /run/php

# Volume configuration
VOLUME ["/etc/nginx/sites-enabled", "/etc/nginx/certs", "/etc/nginx/conf.d", "/var/log/nginx", "/var/www/html"]

# Copy start.sh script and define default command for the container
COPY start.sh /start.sh
CMD ["./start.sh"]

# Expose Port for the Application
EXPOSE 80 443
Next, we will create an additional configuration for Nginx, supervisord, and the start.sh script.
The 'default' Nginx virtualhost configuration will contain the section for the PHP-FPM. In effect, you can run the PHP script using the Custom image without any changes.
Create a new Nginx 'default' virtualhost configuration with your editor.
nano default
Paste the following configuration into it.
server {
    listen 80 default_server;

    root /var/www/html;
    index index.html index.htm index.nginx-debian.html;

    server_name _;

    location / {
        try_files $uri $uri/ =404;
    }

    location ~ \.php$ {
        include snippets/fastcgi-php.conf;
        fastcgi_pass unix:/run/php/php8.1-fpm.sock;
    }
}
Save and close.
Next, we will create the 'supervisrod.conf' configuration, which contains both Nginx and PHP-FPM programs that will be run automatically.
Create the 'supervisrod.conf' file using your editor.
nano supervisord.conf
Paste the following configuration into it.
[unix_http_server]
file=/dev/shm/supervisor.sock   ; (the path to the socket file)

[supervisord]
logfile=/var/log/supervisord.log ; (main log file;default $CWD/supervisord.log)
logfile_maxbytes=50MB        ; (max main logfile bytes b4 rotation;default 50MB)
logfile_backups=10           ; (num of main logfile rotation backups;default 10)
loglevel=info                ; (log level;default info; others: debug,warn,trace)
pidfile=/tmp/supervisord.pid ; (supervisord pidfile;default supervisord.pid)
nodaemon=false               ; (start in foreground if true;default false)
minfds=1024                  ; (min. avail startup file descriptors;default 1024)
minprocs=200                 ; (min. avail process descriptors;default 200)
user=root             ;

[rpcinterface:supervisor]
supervisor.rpcinterface_factory = supervisor.rpcinterface:make_main_rpcinterface

[supervisorctl]
serverurl=unix:///dev/shm/supervisor.sock ; use a unix:// URL  for a unix socket

[include]
files = /etc/supervisor/conf.d/*.conf

[program:php-fpm8.1]
command=/usr/sbin/php-fpm8.1 -F
numprocs=1
autostart=true
autorestart=true

[program:nginx]
command=/usr/sbin/nginx
numprocs=1
autostart=true
autorestart=true
Save and close.
Now create the 'start.sh' script using an editor containing the supervisord command to start.
nano start.sh
Paste the following configuration into it.
#!/bin/sh
/usr/bin/supervisord -n -c /etc/supervisor/supervisord.conf
Save and close.
Make the 'start.sh' script executable.
chmod +x start.sh
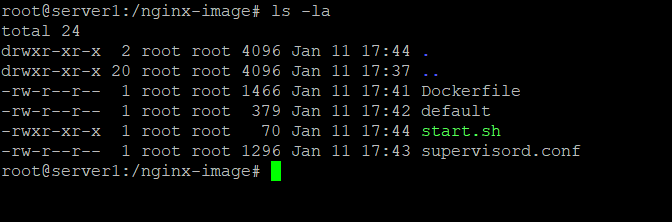
As a result, all configuration for our custom Docker image has been created, below are all configurations we've created.
ls -la
We're ready to create a new custom image based on these configurations now.
Step 3 - Build New Custom and Run New Container
To create the Docker custom image, go to the project directory 'nginx-image' and run the 'docker build' command as below.
docker build -t nginx-image .
The command will download the base-image Ubuntu 22.04 and create a new custom image with the name 'nginx-image.
Once all process is completed, check the list of available Docker image on your system using the following command.
docker image ls
Below is the result you will get.
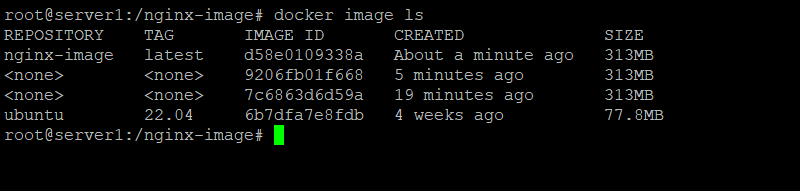
As can be seen, the new custom Docker image 'nginx-image' has been created.
Next, we will run the new Docker container based on the 'nginx-image'.
On your local machine, create a new directory named '/var/webroot' that will be used to store all web files.
mkdir -p /var/webroot
Now create a new container named test-container using the docker run command below.
docker run -d -v /var/webroot:/var/www/html -p 8080:80 --name test-container nginx-image
Note:
- --name test-container nginx-image = We create a new container with the name 'test-container', based on docker image 'nginx-image'.
- -p 8080:80 = test-container container running on port 8080 on the host machine.
- -v /var/webroot:/var/www/html = /var/webroot directory on the host machine rewrite the /var/www/html directory on the container.
After that, check all running containers on your system using the following command.
docker ps
Below is the result you will get.
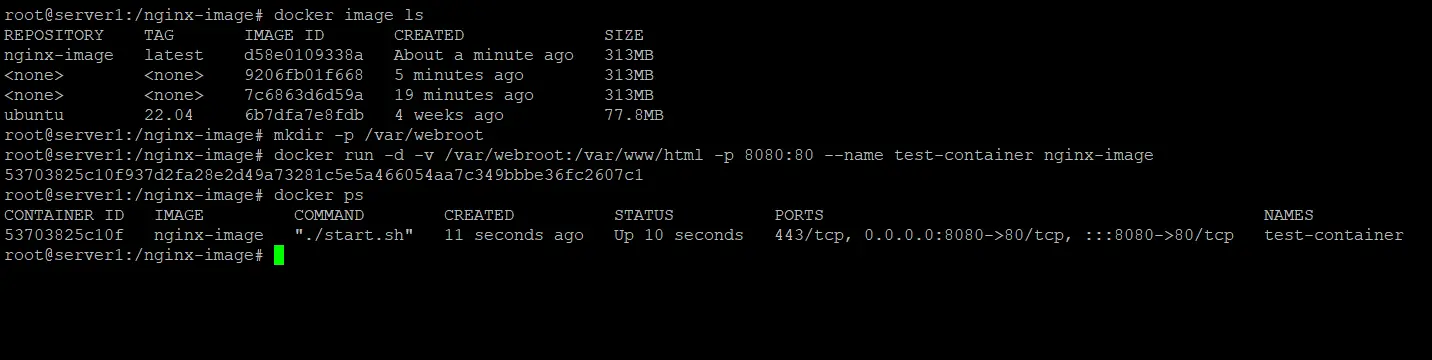
As a result, the new container named 'test-container' based on the 'nginx-image' and expose the port 8080 is up and running.
Step 4 - Testing
To ensure that the container is running correctly, we will create a new index.html and phpinfo file on the host machine's'/webroot' root directory. Because the '/var/webroot' directory is mounted into the container directory '/var/www/html'.
Create the index.html file on the '/webroot' directory using the following command.
echo '<h1>Nginx and PHP-FPM 8.1 inside Docker Container with Ubuntu 22.04 Base Image</h1>' > /var/webroot/index.html
Now test access your container with the curl command on port 8080.
curl server-ip:8080
curl -I server-ip:8080
As a result, you will get the default index.html page we just created.

Next, create a new PHP file 'info.php' on the '/webroot' directory to make sure that the PHP-FPM service is running.
Create the 'info.php' file using the following command.
echo '<?php phpinfo(); ?>' > /var/webroot/info.php
Next, open your web browser and type your server IP address with port '8080' followed by the path of the 'info.php' file.
http://server-ip:8080/info.php
Now you will get the phpinfo page as below.

As can be seen, the 'test-container' successfully loaded the PHP script.
And as a result, we've successfully created a new custom Docker image and run the new container based on it without any error.

