How to setup a SVN server on CentOS
This tutorial explains how to setup and use an SVN repository server on CentOS. Before I start, let me explain what actually SVN represents and what it is used for. SVN is actually an abbreviation of SubVersion which had been created by the Apache software developer. It enables you to create and maintain your own repository and gives fine-grained access rights to a dedicated user.
It is very effective for controlling the versioning of files, documents or folders. It is very useful for any group or team that intends to start their own software projects.
1. Preliminary Note
For this tutorial, I am using CentOS 6.4 in the 32bit version. The end result will show you how a dedicated client can manage to access the SVN repository using any kind of operating system platform.
2. SVN Installation
To start with a fresh SVN server, we need to install certain packages. The packages related are apache httpd, mod_dav_svn and subversion. The HTTPD package is needed as a web server service for this process.
As this tutorial uses the CentOS operating system, we'll take the packages from the yum repository. You may use other packages like nginx, lighttpd or any familiar web server service to replace httpd if you like. Below are the steps:
ifconfig
[root@SVNSVR641 ~]# ifconfig
eth0 Link encap:Ethernet HWaddr 08:00:27:61:E4:88
inet addr:192.168.43.101 Bcast:192.168.43.255 Mask:255.255.255.0
inet6 addr: fe80::a00:27ff:fe61:e488/64 Scope:Link
UP BROADCAST RUNNING MULTICAST MTU:1500 Metric:1
RX packets:4640 errors:0 dropped:0 overruns:0 frame:0
TX packets:6845 errors:0 dropped:0 overruns:0 carrier:0
collisions:0 txqueuelen:1000
RX bytes:444461 (434.0 KiB) TX bytes:549473 (536.5 KiB)
lo Link encap:Local Loopback
inet addr:127.0.0.1 Mask:255.0.0.0
inet6 addr: ::1/128 Scope:Host
UP LOOPBACK RUNNING MTU:16436 Metric:1
RX packets:2125 errors:0 dropped:0 overruns:0 frame:0
TX packets:2125 errors:0 dropped:0 overruns:0 carrier:0
collisions:0 txqueuelen:0
RX bytes:186888 (182.5 KiB) TX bytes:186888 (182.5 KiB)
yum install -y httpd
[root@SVNSVR641 ~]# yum install -y httpd
Loaded plugins: refresh-packagekit, security
Repository 'OEL64' is missing name in configuration, using id
Setting up Install Process
Resolving Dependencies
--> Running transaction check
---> Package httpd.i686 0:2.2.15-26.0.1.el6 will be installed
--> Finished Dependency Resolution
Dependencies Resolved
==============================================================================================================
Package Arch Version Repository Size
==============================================================================================================
Installing:
httpd i686 2.2.15-26.0.1.el6 OEL64 825 k
Transaction Summary
==============================================================================================================
Install 1 Package(s)
Total download size: 825 k
Installed size: 2.8 M
Downloading Packages:
Running rpm_check_debug
Running Transaction Test
Transaction Test Succeeded
Running Transaction
Installing : httpd-2.2.15-26.0.1.el6.i686 1/1
Verifying : httpd-2.2.15-26.0.1.el6.i686 1/1
Installed:
httpd.i686 0:2.2.15-26.0.1.el6
Complete!
yum install -y subversion
[root@SVNSVR641 ~]# yum install -y subversion
Loaded plugins: refresh-packagekit, security
Repository 'OEL64' is missing name in configuration, using id
Setting up Install Process
Resolving Dependencies
--> Running transaction check
---> Package subversion.i686 0:1.6.11-7.el6 will be installed
--> Finished Dependency Resolution
Dependencies Resolved
==============================================================================================================
Package Arch Version Repository Size
==============================================================================================================
Installing:
subversion i686 1.6.11-7.el6 OEL64 2.2 M
Transaction Summary
==============================================================================================================
Install 1 Package(s)
Total download size: 2.2 M
Installed size: 11 M
Downloading Packages:
Running rpm_check_debug
Running Transaction Test
Transaction Test Succeeded
Running Transaction
Installing : subversion-1.6.11-7.el6.i686 1/1
Verifying : subversion-1.6.11-7.el6.i686 1/1
Installed:
subversion.i686 0:1.6.11-7.el6
Complete!
yum install -y mod_dav_svn
[root@SVNSVR641 ~]# yum install -y mod_dav_svn
Loaded plugins: refresh-packagekit, security
Repository 'OEL64' is missing name in configuration, using id
Setting up Install Process
Resolving Dependencies
--> Running transaction check
---> Package mod_dav_svn.i686 0:1.6.11-7.el6 will be installed
--> Finished Dependency Resolution
Dependencies Resolved
==============================================================================================================
Package Arch Version Repository Size
==============================================================================================================
Installing:
mod_dav_svn i686 1.6.11-7.el6 OEL64 79 k
Transaction Summary
==============================================================================================================
Install 1 Package(s)
Total download size: 79 k
Installed size: 161 k
Downloading Packages:
Running rpm_check_debug
Running Transaction Test
Transaction Test Succeeded
Running Transaction
Installing : mod_dav_svn-1.6.11-7.el6.i686 1/1
Verifying : mod_dav_svn-1.6.11-7.el6.i686 1/1
Installed:
mod_dav_svn.i686 0:1.6.11-7.el6
Complete!
3. SVN Configuration
Great, now the installation part is done. Next, we'll move forward on the configuration part. First, let's create a dedicated directory for SVN repository usage. This is an optional process but it's a good practice when implementing for a larger scale group. Below are the steps:
mkdir /data/svn
Now we will create our first repository directory, I will name it repo1. As a client shall be able to access the repository via browser or SVN client tools later, we will grant the ownership for the directory to apache as it is the owner of the web server service. Below are the steps:
svnadmin create /data/svn/repo1
chown -R apache:apache /data/svn/repo1
Once done, you'll notice that several related folder and files will be created by default under our new repository directory.
cd /data/svn/repo1
ls
[root@SVNSVR641 repo1]# ls
conf db format hooks locks README.txt
Now we edit the configuration file to meet our requirements. First, we will edit the configuration file svnserver.conf to accept the related privileges that we'll assign on the granted user. Below are the steps:
cd conf/
ls
[root@SVNSVR641 conf]# ls
authz passwd svnserve.conf
vi svnserve.conf
[general]
anon-access = none
auth-access = write
password-db = passwd
authz-db = authz
Then create a new file named passwd that will contain a list of users for the SVN repository. Below are the steps:
htpasswd -c /data/svn/repo1/conf/passwd jay
[root@SVNSVR641 conf]# htpasswd -c /data/svn/repo1/conf/passwd jay
New password:
Re-type new password:
Adding password for user jay
[root@SVNSVR641 conf]# cat passwd
jay:14hCNCmBZY/qA
Done, we have successfully created a user for the SVN repository use. Let's create 2 more users to access SVN repository. Below are the steps:
htpasswd /data/svn/repo1/conf/passwd fikri
[root@SVNSVR641 conf]# htpasswd /data/svn/repo1/conf/passwd fikri
New password:
Re-type new password:
Adding password for user fikri
htpasswd /data/svn/repo1/conf/passwd farid
[root@SVNSVR641 conf]# htpasswd /data/svn/repo1/conf/passwd farid
New password:
Re-type new password:
Adding password for user farid
[root@SVNSVR641 conf]# cat passwd
jay:14hCNCmBZY/qA
fikri:/hlooqJMfYLkw
farid:P7Zvu6B3HyFGo
Done, now there are 3 users listed for SVN repository use. For this practice, I would like to show how we can limit the privileges of a user. Let's assign the privilege to access the repo1 repository. To do this, we need to edit the authz configuration file. Below are the steps:
vi authz
[repo1:/]
farid = r
fikri = rw
* =
Based on the configuration above, we've set different privileges for the 3 users that we created earlier. We assigned user FARID to have READ ONLY privileges, FIKRI to have READ WRITE privileges and JAY or others to not having any privileges. Means that later in testing I'll show you that user JAY will not be able to view any files in the repo1 repository.
Now let's edit the HTTPD service configuration file.
vi /etc/httpd/conf/httpd.conf
Check that the following line exists to include external configuration files into the httpd.conf file. If it does not exist, add it at the end of the file.
[.....]
Include conf.d/*.conf
[.....]
Next we go to the conf.d directory to do some changes in the related configuration files. You'll notice that there is a file subversion.conf already. Edit the file in order to make the repository available to be viewed in the browserBelow are the steps :-
cd /etc/httpd/conf.d/
ls
[root@SVNSVR641 conf.d]# ls
mod_dnssd.conf README subversion.conf welcome.conf
vi subversion.conf
LoadModule dav_svn_module modules/mod_dav_svn.so
LoadModule authz_svn_module modules/mod_authz_svn.so

<Location /repo1>
DAV svn
SVNPath /data/svn/repo1
Authtype Basic
AuthName "My Repository"
AuthzSVNAccessFile /data/svn/repo1/conf/authz
AuthUserFile /data/svn/repo1/conf/passwd
Require valid-user
</Location>
The first two lines load the apache SVN module, the next lines define that the URL /repo1 points to our created repository.
We also set that specific users have read/write privileges on specific items within the repository using AuthzSVNAccessFile. The list of users will be taken from the /data/svn/repo1/conf/passwd file.
Now restart the HTTPD server in order to load the configuration changes made.
service httpd restart
[root@SVNSVR641 conf.d]# service httpd restart
Stopping httpd: [ OK ]
Starting httpd: [ OK ]
4. SVN Testing Phase
Let us check whether the configuration we've made meets the purpose or not. For the testing phase, I'll use 2 different client machines. I will use Microsoft Windows and a Linux CentOS 6.4 Desktop.
First I'll go to the Linux CentOS 6.4 machine and checkout the repository into the local system. As Linux client, we need to install the subversion package to connect to the SVN repository.
yum install -y subversion
[root@TEST01 ~]# yum install -y subversion
Loaded plugins: refresh-packagekit, security
Repository 'OEL64' is missing name in configuration, using id
Setting up Install Process
Resolving Dependencies
--> Running transaction check
---> Package subversion.i686 0:1.6.11-7.el6 will be installed
--> Finished Dependency Resolution
Dependencies Resolved
==============================================================================================================
Package Arch Version Repository Size
==============================================================================================================
Installing:
subversion i686 1.6.11-7.el6 OEL64 2.2 M
Transaction Summary
==============================================================================================================
Install 1 Package(s)
Total download size: 2.2 M
Installed size: 11 M
Downloading Packages:
--------------------------------------------------------------------------------------------------------------
Total 70 MB/s | 2.2 MB 00:00
Running rpm_check_debug
Running Transaction Test
Transaction Test Succeeded
Running Transaction
Installing : subversion-1.6.11-7.el6.i686 1/2
Verifying : subversion-1.6.11-7.el6.i686 2/2
Installed:
subversion.i686 0:1.6.11-7.el6
Complete!
mkdir repo_client
svn co http://192.168.43.101/repo1 repo_client
[root@TEST01 ~]# mkdir repo_client
[root@TEST01 ~]# svn co http://192.168.43.101/repo1 repo_client
Authentication realm: <http://192.168.43.101:80> My Repository
Password for 'fikri':
-----------------------------------------------------------------------
ATTENTION! Your password for authentication realm:
<http://192.168.43.101:80> My Repository
can only be stored to disk unencrypted! You are advised to configure
your system so that Subversion can store passwords encrypted, if
possible. See the documentation for details.
You can avoid future appearances of this warning by setting the value
of the 'store-plaintext-passwords' option to either 'yes' or 'no' in
'/root/.subversion/servers'.
-----------------------------------------------------------------------
Store password unencrypted (yes/no)? yes
Checked out revision 0.
[root@TEST01 ~]# cd repo_client/
[root@TEST01 repo_client]# ls -a
. .. .svn
Excellent! We've managed to checkout the repository from our SVN server using the user fikri. Now, to check whether this user has READ and WRITE privileges, we'll create a folder inside the repository directory.
cd repo_client/
svn mkdir first_dir
And then commit the change back to the repository:
svn commit -m "My first folder"
You will see this:
Committed revision 1.
Which means that our commit was successful.
Great job! We have managed to create a folder inside the repository directory and committed it.
Now let's test this on a Microsoft Windows machine. Browse the repository URL via firefox browser. You can use any of your favorite browsers to test it. Once the URL http://192.168.43.101/repo1 has been entered in the browser field, it will popup an authorization window like the one below:
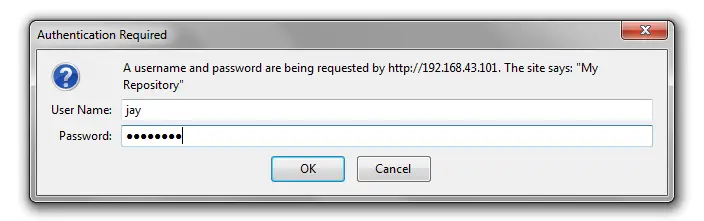
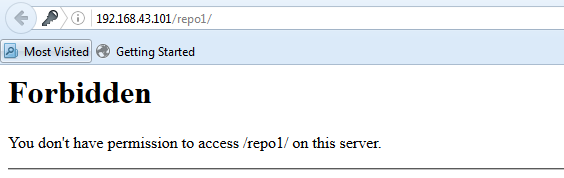
Login with the user JAY. I'll assume that this user will not able to access the page as he is not a member of the privileged group.
Nice, now let's make a final test for this tutorial. Let's use the Microsoft Windows machine as SVN client. To do this, we have to install a SVN client software, for this cases, I'll use TortoiseSVN . You may download it here or use any of your familiar SVN clients.
Once installed, create a new folder in your Windows machine and name it as testSVN.
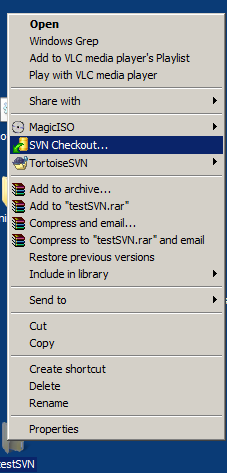
Then right click on the folder, you'll notice that there are links for SVN CheckOut now (if you dont see the links, restart Windows). Click on "SVN Checkout" to proceed.
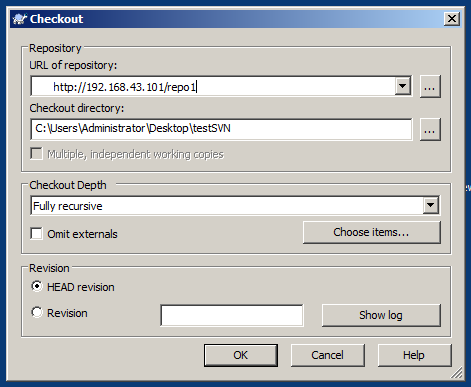
Once clicked, a popup box will be shown like the one below. Enter the SVN server repository under the URL field then click OK.
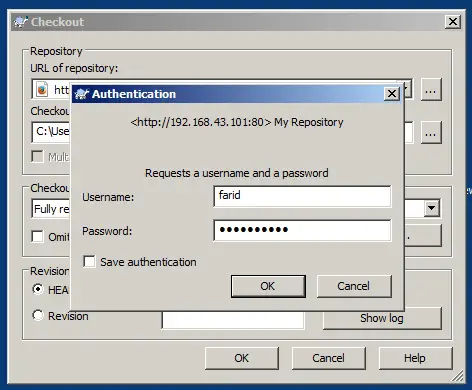
A popup box will be shown that requests you to enter a username and password for authentication. For this cases, we will use user FARID to proceed.
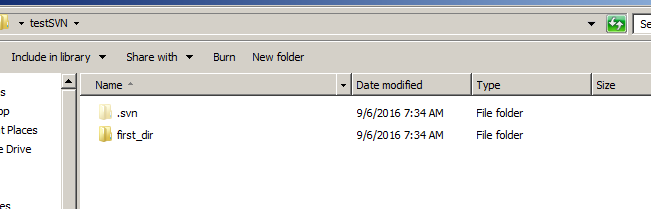
Once done, a popup box will show that the SVN repository checkout has been finished. From here, we can conclude that user FARID has the privilege to READ from the repository.

You'll notice that the folder that was created previously from user FIKRI exists in your testSVN directory.
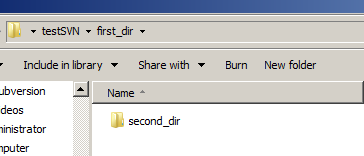
To finish the test. Let's test that user FARID should have READ ONLY access. To do that, let's go inside the FIRST_DIR folder and create another folder, I call it SECOND_DIR
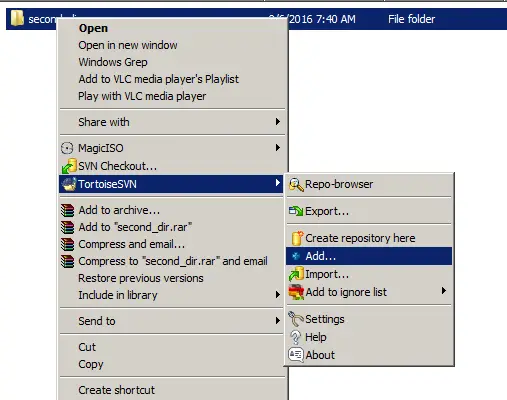
Once created, right-click on the folder and hover to TortoiseSVN, you'll see there are several of choices listed in there. To proceed, click on the Add button. This button will add the folder that we created to the local svn repository.
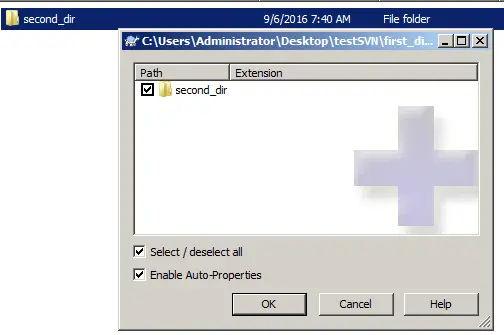
A popup box like the one below will show up, click OK to proceed.
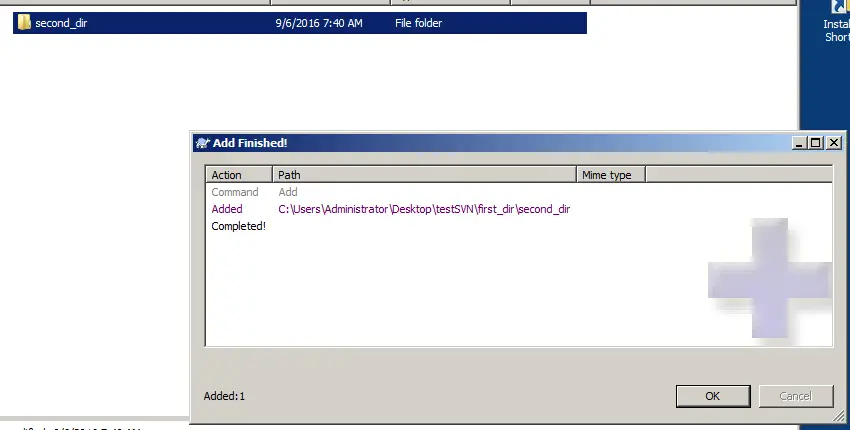
Once done, a popup message like below will be shown. Now you've successfully created a folder in your client repository.
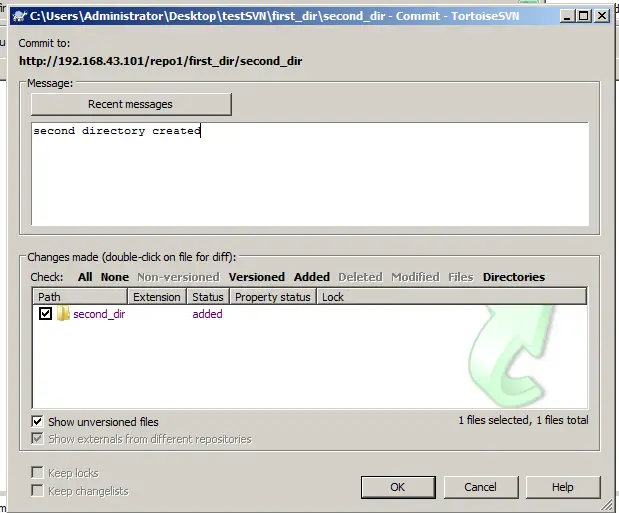
Even though the folder has successfully created and added locally, it is not yet synced to the SVN server, Therefore other users from other machines won't be able to see the folder that we have created just now. Save and commit the folder now. To do that, right-click on the folder and click on SVN Commit as per below screenshot.

A popup box like below will be shown to request you to confirm several details. Type in any optional comment, then click OK to proceed.
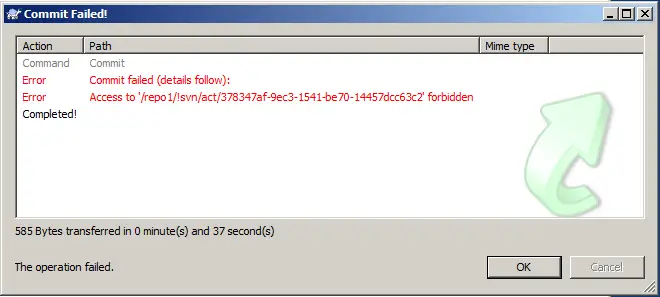
An authorization box will appear to request for a login username. Type in as user FARID and proceed.
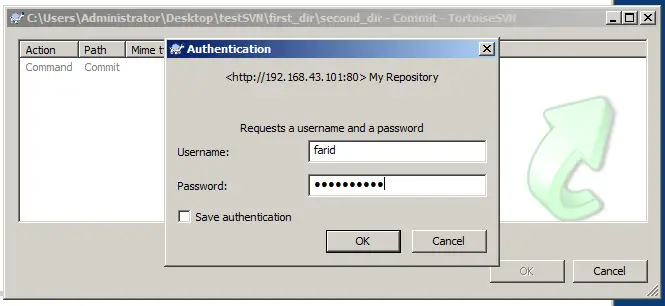
Once done, you will be shown an error stated that you are forbidden to do the changes. Thst what we expected as the user farid has just Read-Only privileges.
Congratulations! Now we have set up our first SVN server and successfully configured proper privileges on certain user limitation.

