To Create Virtual Machines from oVirt Engine Web Administrator portal first we have to make sure following things are set.
- Data Center
- Clusters
- Hosts ( oVirt Node or hypervisor)
- Network ( default ovirtmgmt is created)
- Storage Domain( ISO storage and Data Storage )
In our previous article we have already discuss the oVirt Engine and oVirt Node / Hypervisor installation. Please refer the URL for “Installation Steps of oVirt Engine and Ovirt Node”
Refer the following steps to complete above set of tasks. Login to your oVirt Engine Web Administrator Portal. In my Case web portal URL is “https://ovirtengine.example.com”
Table of Contents
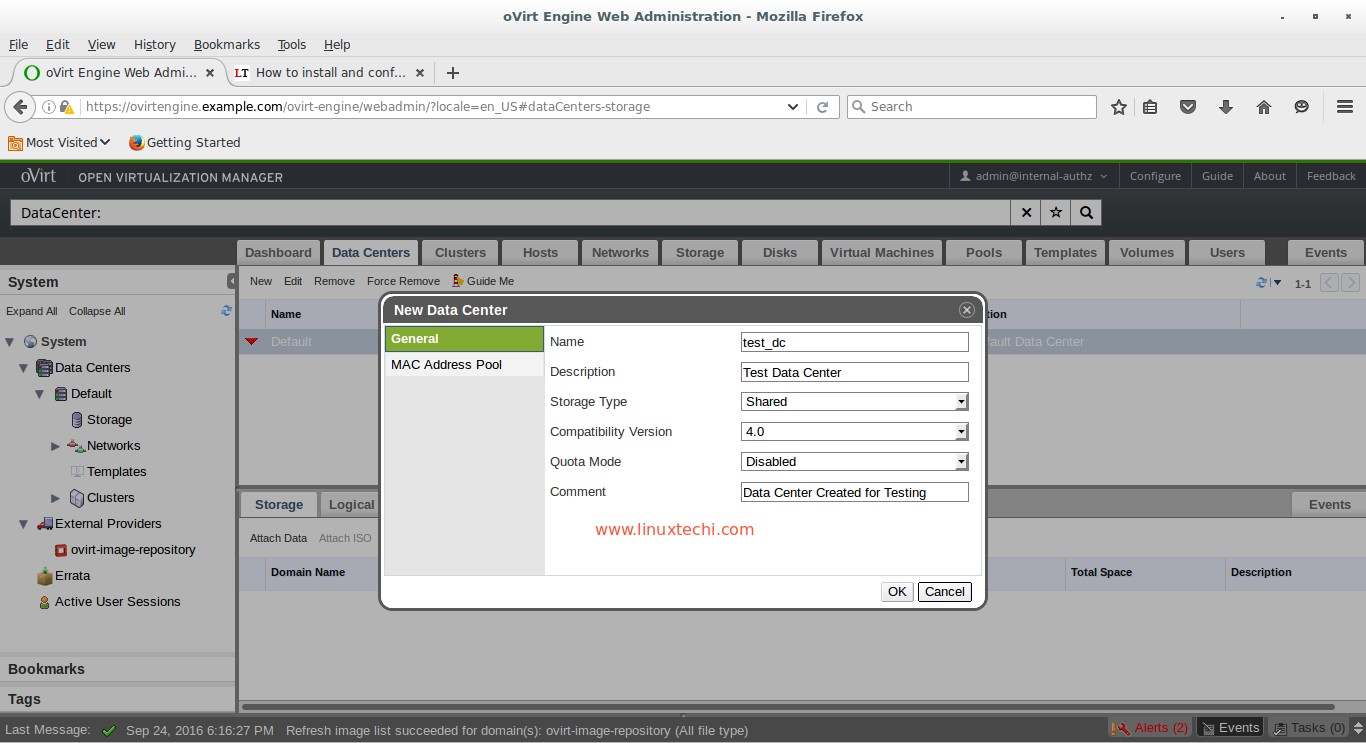
Step:1 Create new Data Center
Go to Data Centers Tab and then click on New
Specify the Data Center Name, Description and Storage Type and Compatibility version.In my case Data Center name is “test_dc”
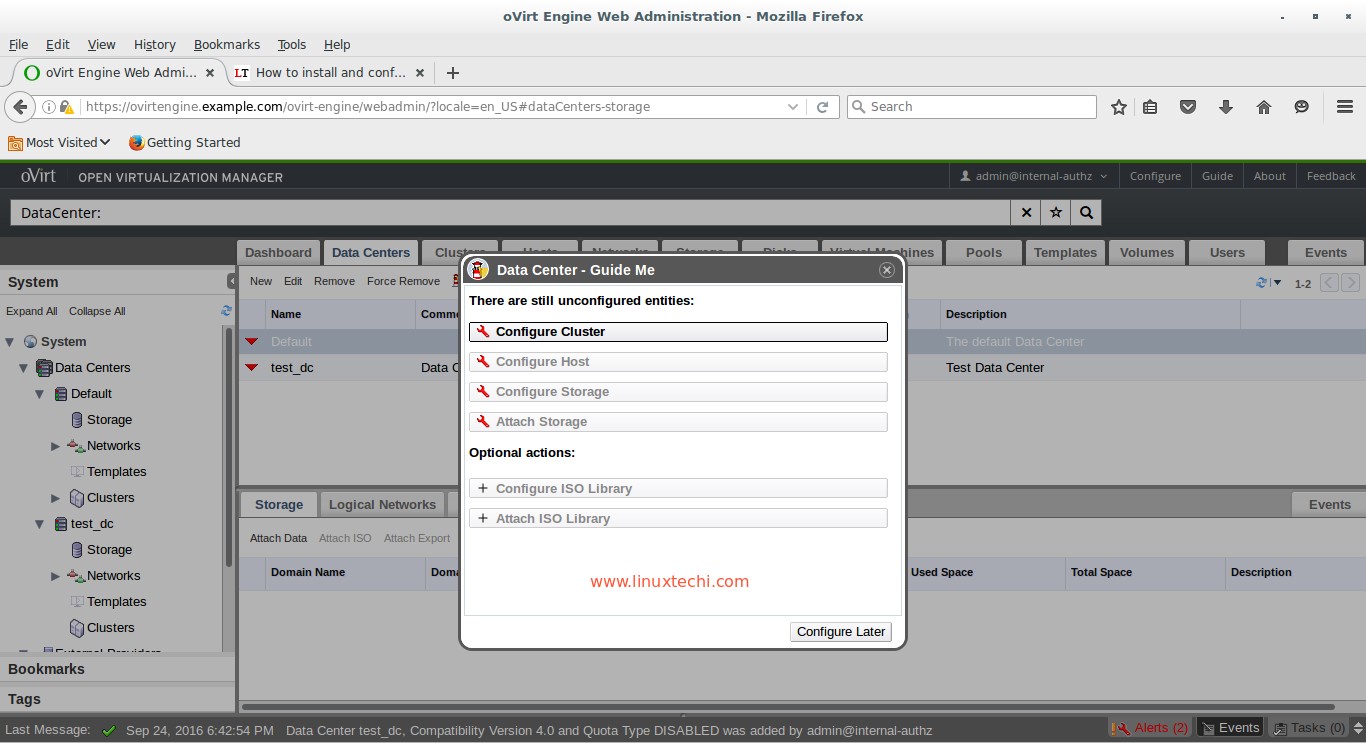
Step:2 Configure Cluster for Data Center
When we click on OK on above step, it will ask to configure Cluster. So Select “Configure Cluster” option
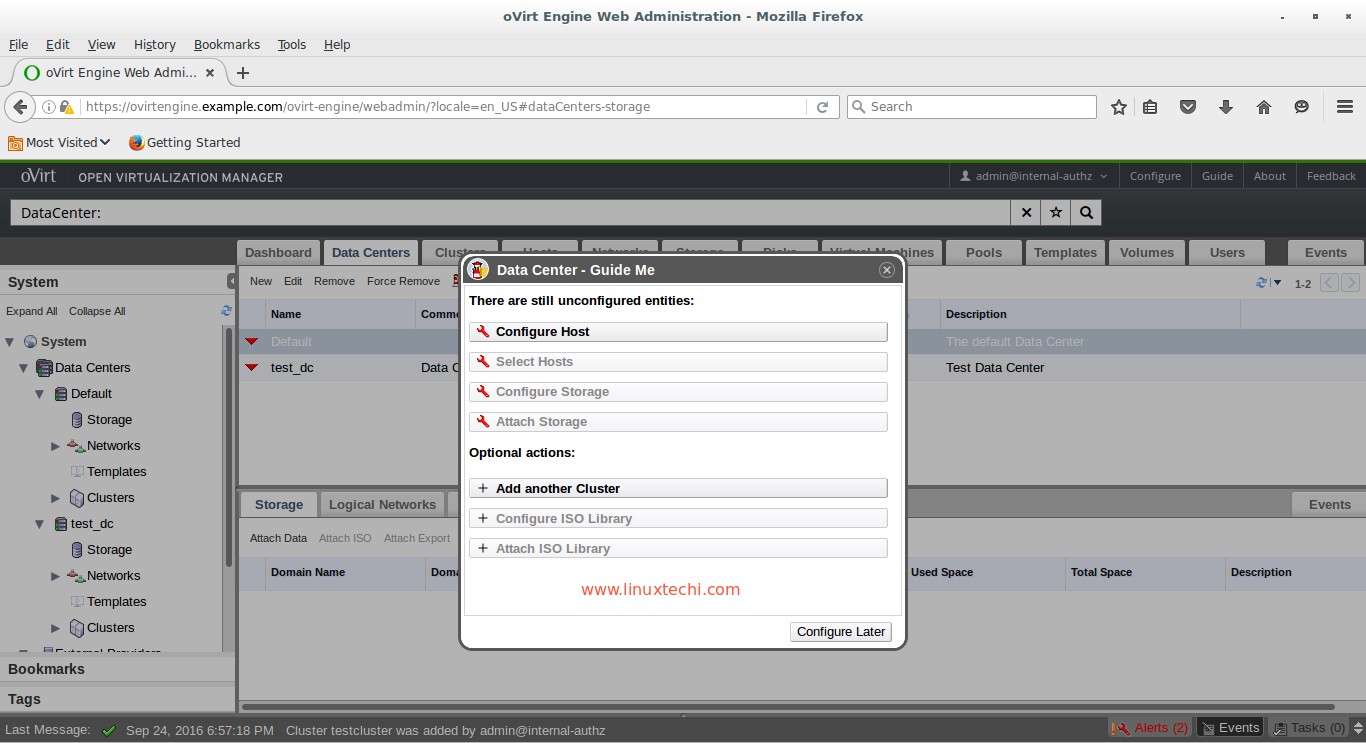
Specify the cluster name, Description, CPU architecture as per your setup leave the other parameters as it is. We can define optimization, migration and fencing policy as per our requirement but i am not touching these policy as of now.
In my case Cluster name is “testcluster”

Click on OK.
In the next step click on Configure Later
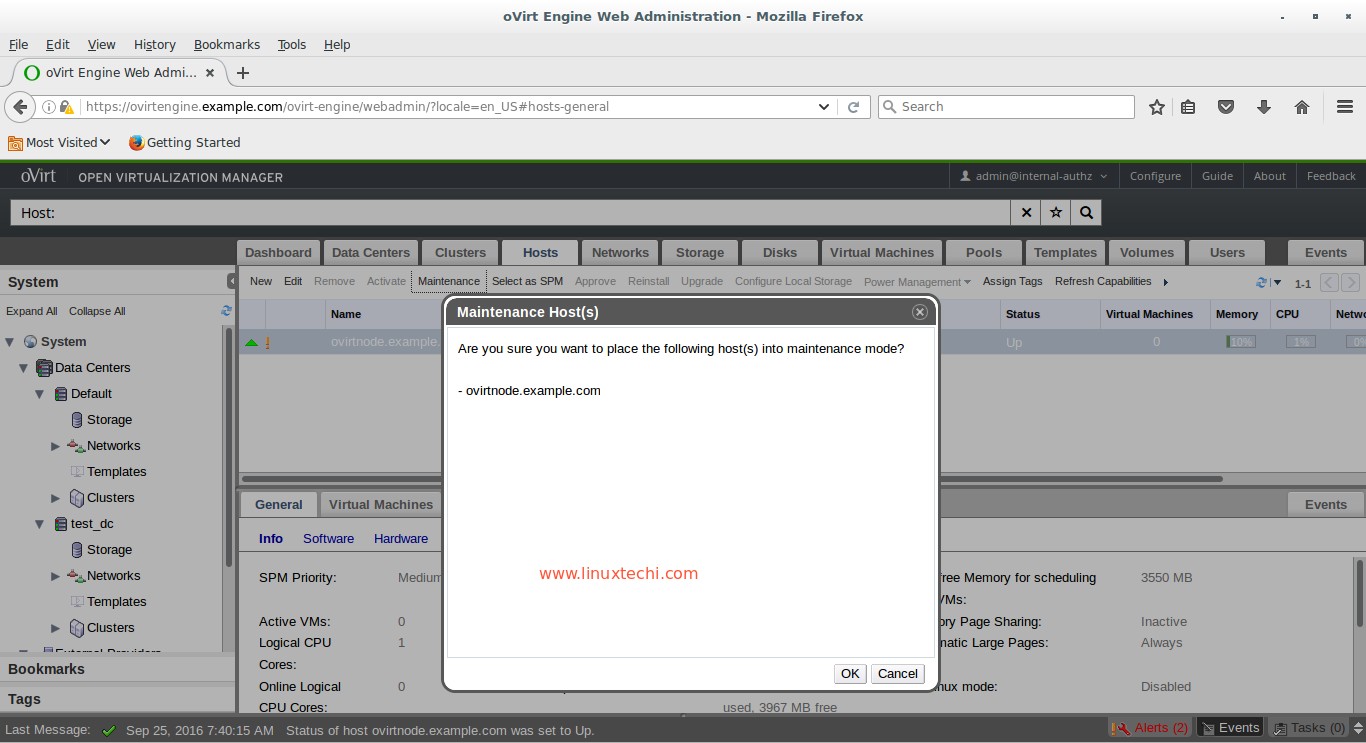
Step:3 Add Host or oVirt Node to above created data center & cluster.
By default when we add any host or oVirt Node in oVirt Engine it is added to the default data center and Cluster. So to change the data center and cluster of any node first put the host in maintenance mode
Select the Node click on Maintenance option then click on OK
Now Select the Edit option and update the Data center and Cluster information for the selected host.
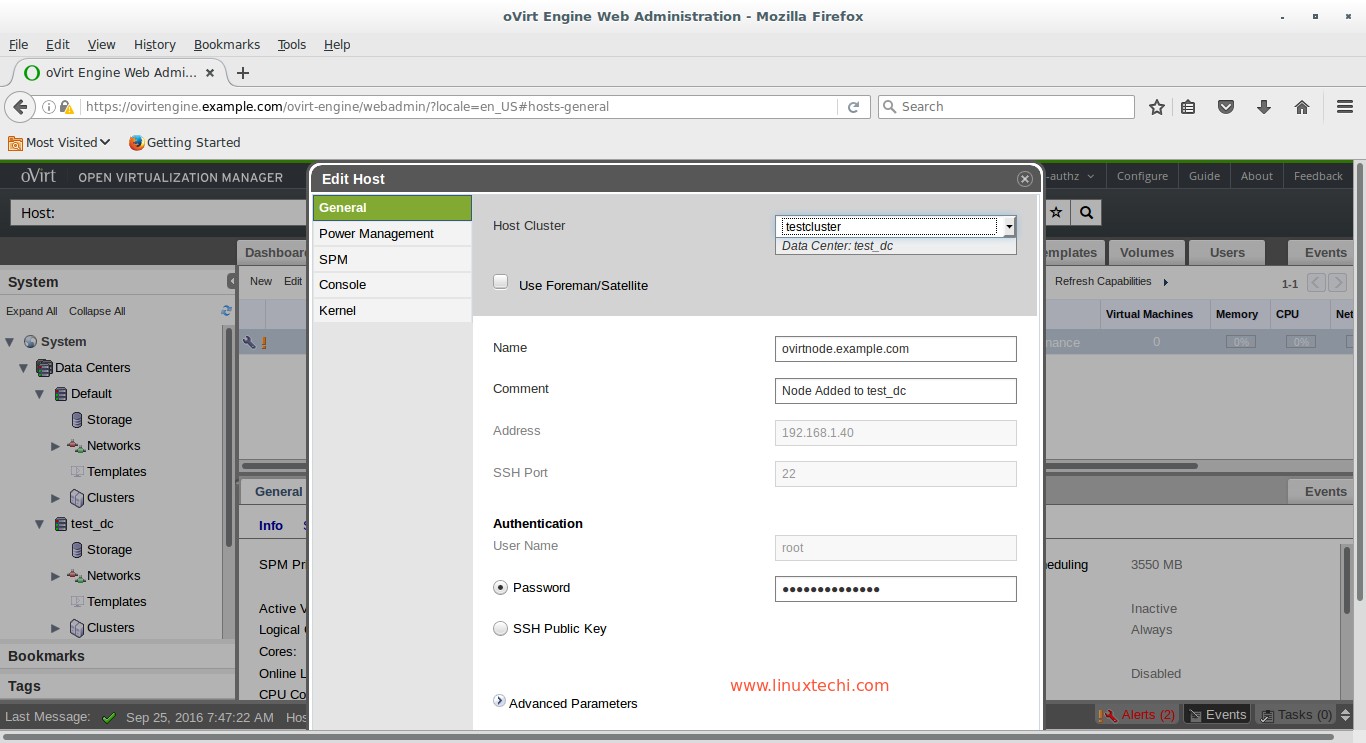
Click on OK
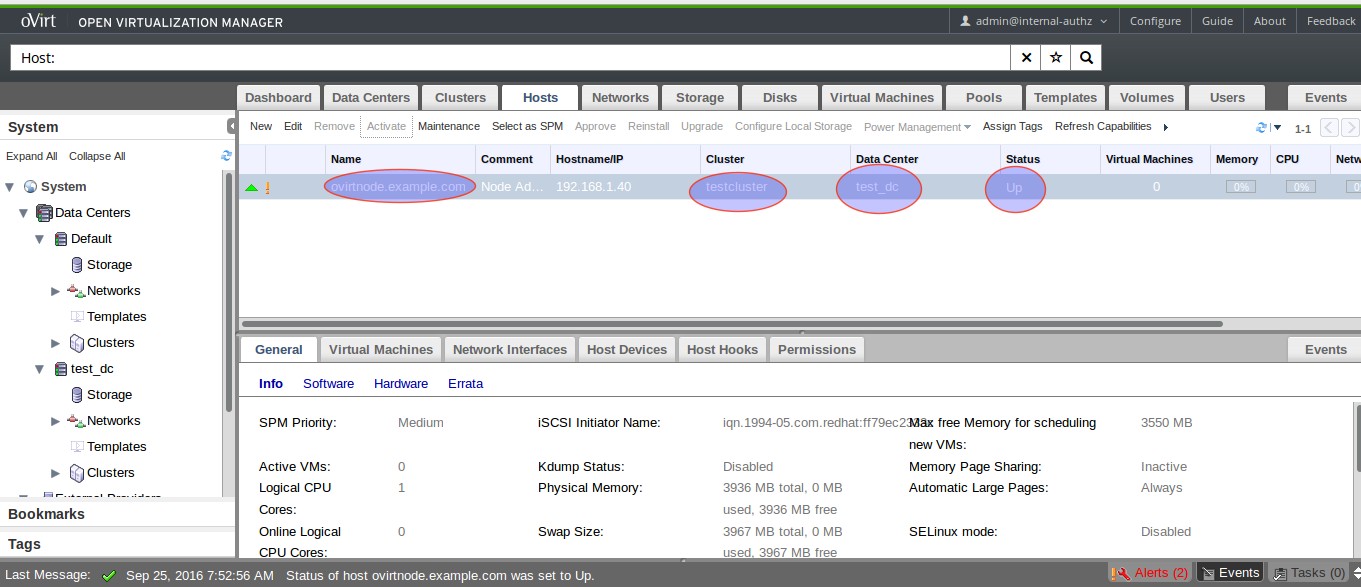
Now Click on Activate option to activate the host.
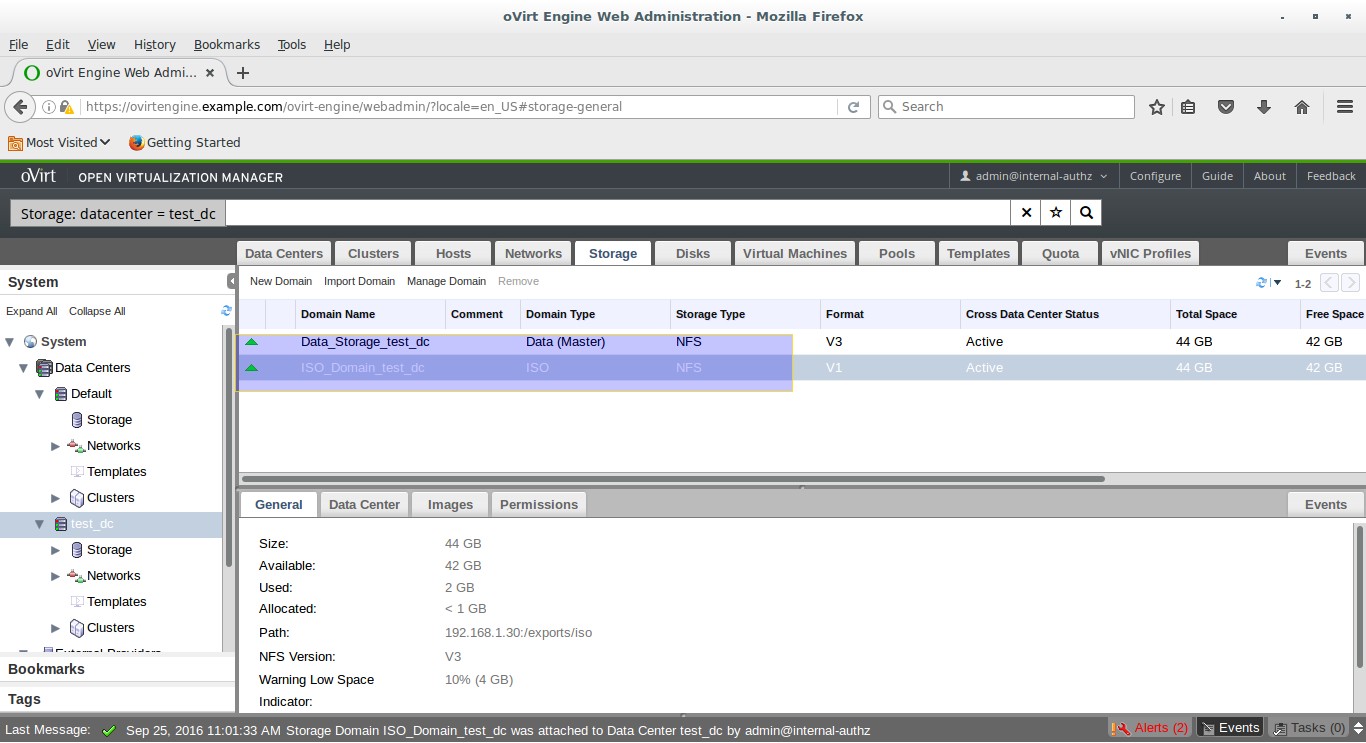
Step:4 Creating Storage Domains
As the name suggests storage domain is centralized repository of disk which is used for storing the VM disk images, ISO files and VMs meta data its Snapshots. Storage Domain is classified into three types :
- Data Storage Domain : It is used for storing hard disk images of all the VMs
- Export Storage Domain : It is used to store the backup copies of VMs, it also provides transitory storage for hard disk images and templates being transferred between data centers.
- ISO Storage Domain : It is used for storing the ISO files.
In this article Data Storage and ISO storage is shared via NFS. Though data storage can be configure via ISCSI , GlusterFS and Storage using Fibre Channels. Following NFS share is available for Data Storage and ISO domain.
[root@ovirtnode ~]# showmount -e 192.168.1.30
Export list for 192.168.1.30:
/exports/vmstorage 192.168.1.0/24
/exports/iso       192.168.1.0/24
[root@ovirtnode ~]#
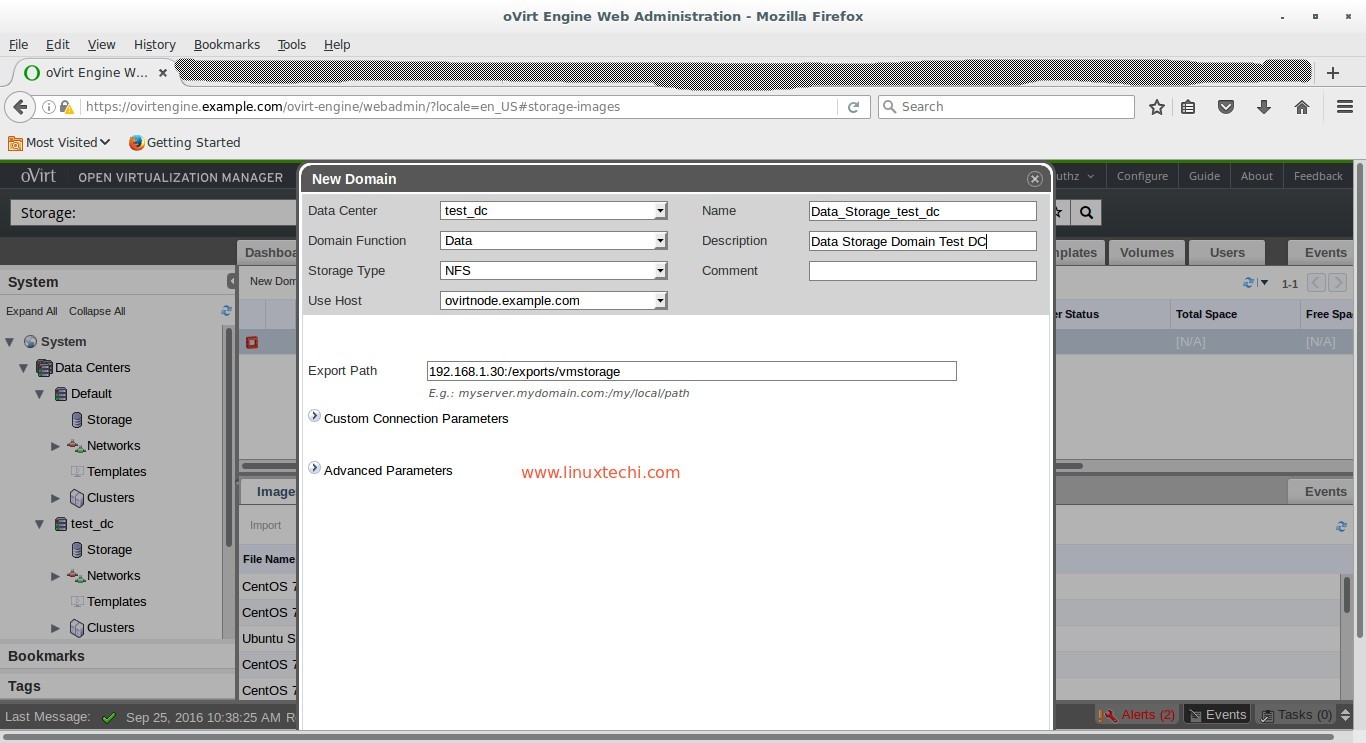
Create Data Storage Domain, Click on the Storage Tab and then Click on New Domain, Select the Domain function as “Data” and Storage Type as NFS and Specify the NFS servers’ share ip and name.
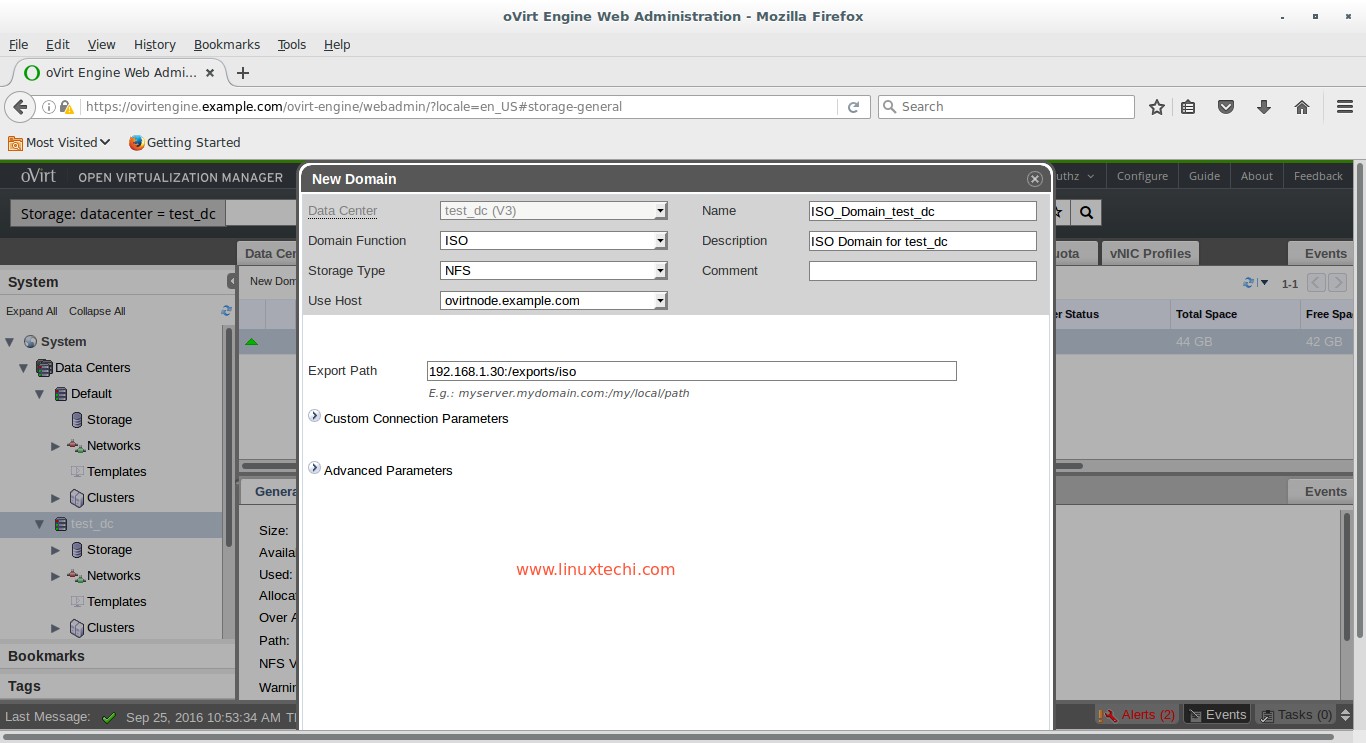
Now Again Click on New Domain from Storage Tab and Select Domain Function as “ISO” and Storage Type as “NFS”
As we see both the storage Domains are activated now. Once the storage Domain got activated then automatically our Data Center initialized and becomes active.
Step:5 Upload ISO files to ISO Storage Domain.
Transfer the ISO file to ovirt-engine and run the ‘engine-iso-uploader’. In my case i am uploading Ubuntu 16.04 LTS iso file.
[root@ovirtengine ~]# engine-iso-uploader -i ISO_Domain_test_dc upload ubuntu-16.04-desktop-amd64.iso
Please provide the REST API password for the admin@internal oVirt Engine user (CTRL+D to abort):
Uploading, please wait...
INFO: Start uploading ubuntu-16.04-desktop-amd64.iso
Uploading: [########################################] 100%
INFO: ubuntu-16.04-desktop-amd64.iso uploaded successfully
[root@ovirtengine ~]#
Now we are ready create Virtual machines.
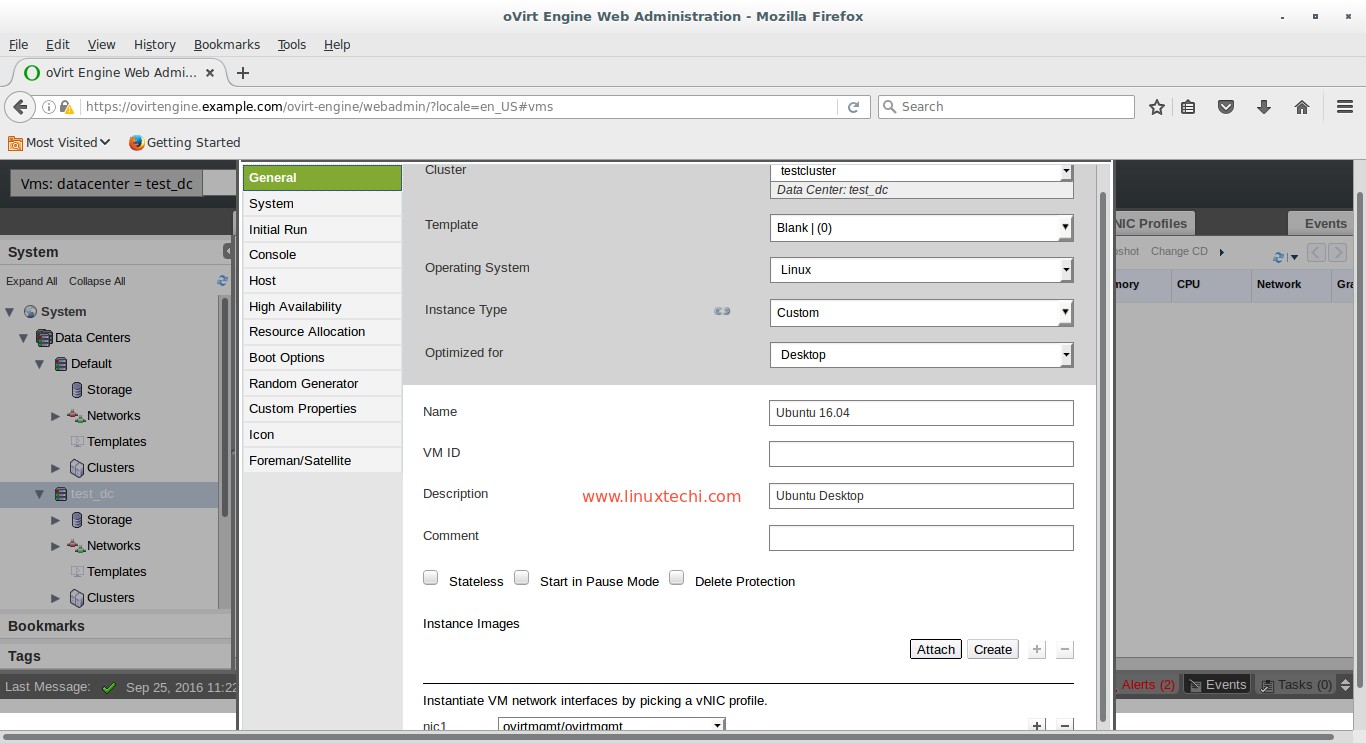
Step:6 Create Virtual Machine
As we have uploaded Ubuntu 16.04 ISO file so at this point of time we will create Ubuntu virtual machine.
Click on New VM from Virtual Machine Tab . Specify the followings parameters under the “General” Tab
- Data Center “test_dc”
- Operating System Type as “Linux”
- Optimized for “Desktop”
- Name as “Ubuntu 16.04”
- nic1 as “ovirtmgmt”
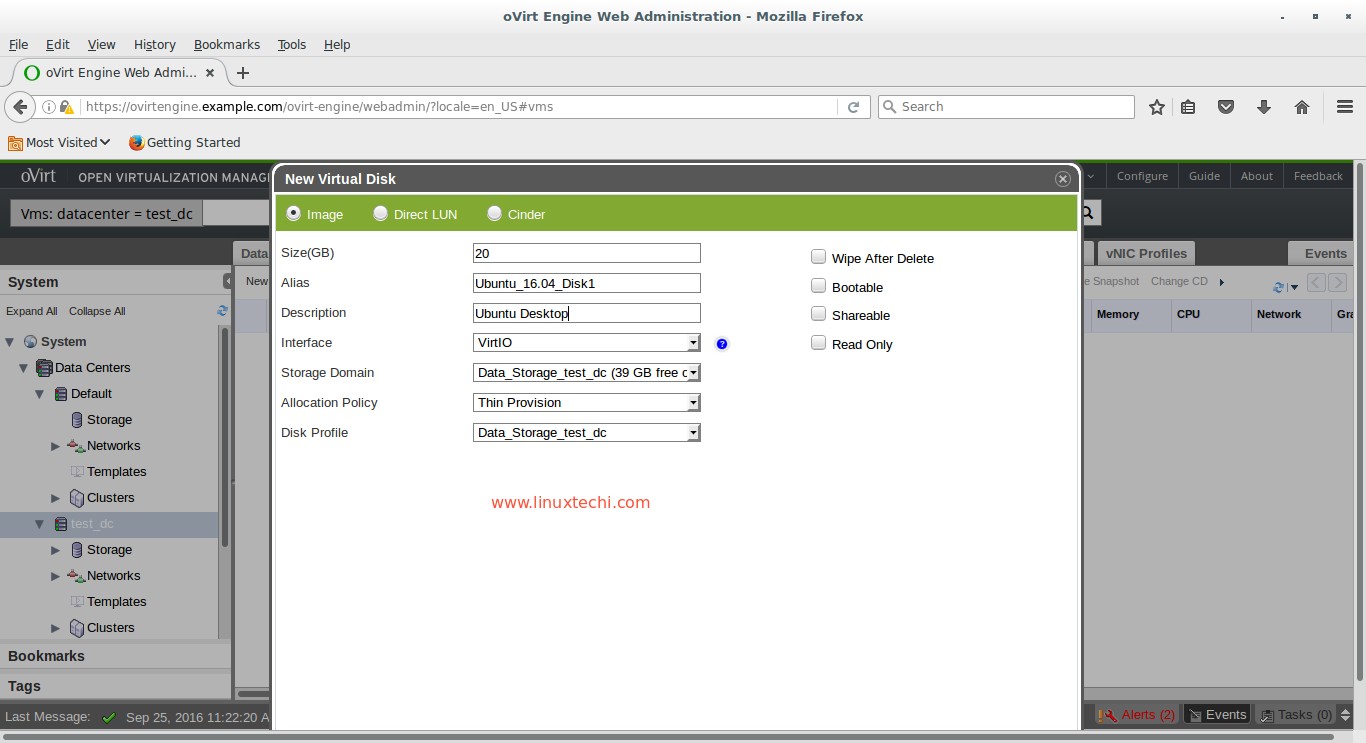
Specify the disk space for the Virtual machine. Click on Create option which is available in front of “Instance Images” Specify the Disk Size and leave other parameters as it and click on OK.
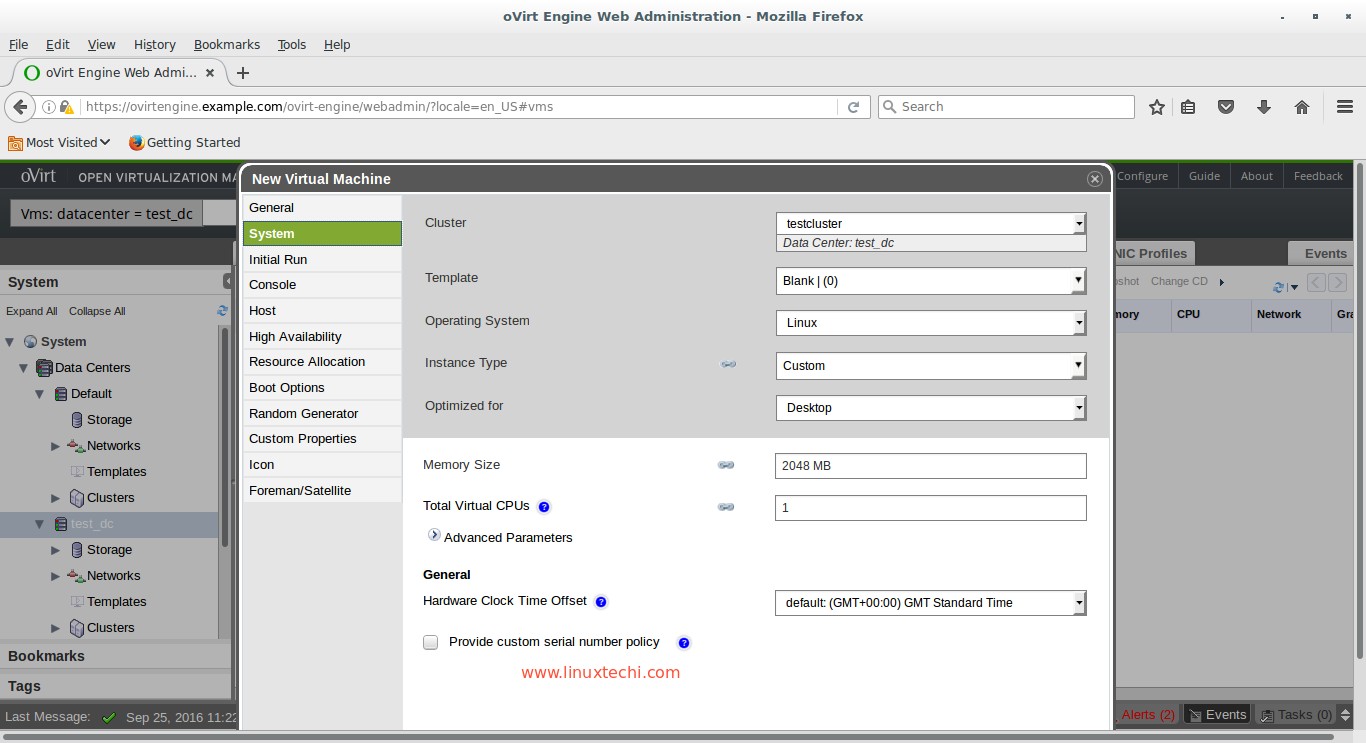
Click on “Show Advance option” then Go to System Tab, Specify the Memory and CPU for the Virtual Machine
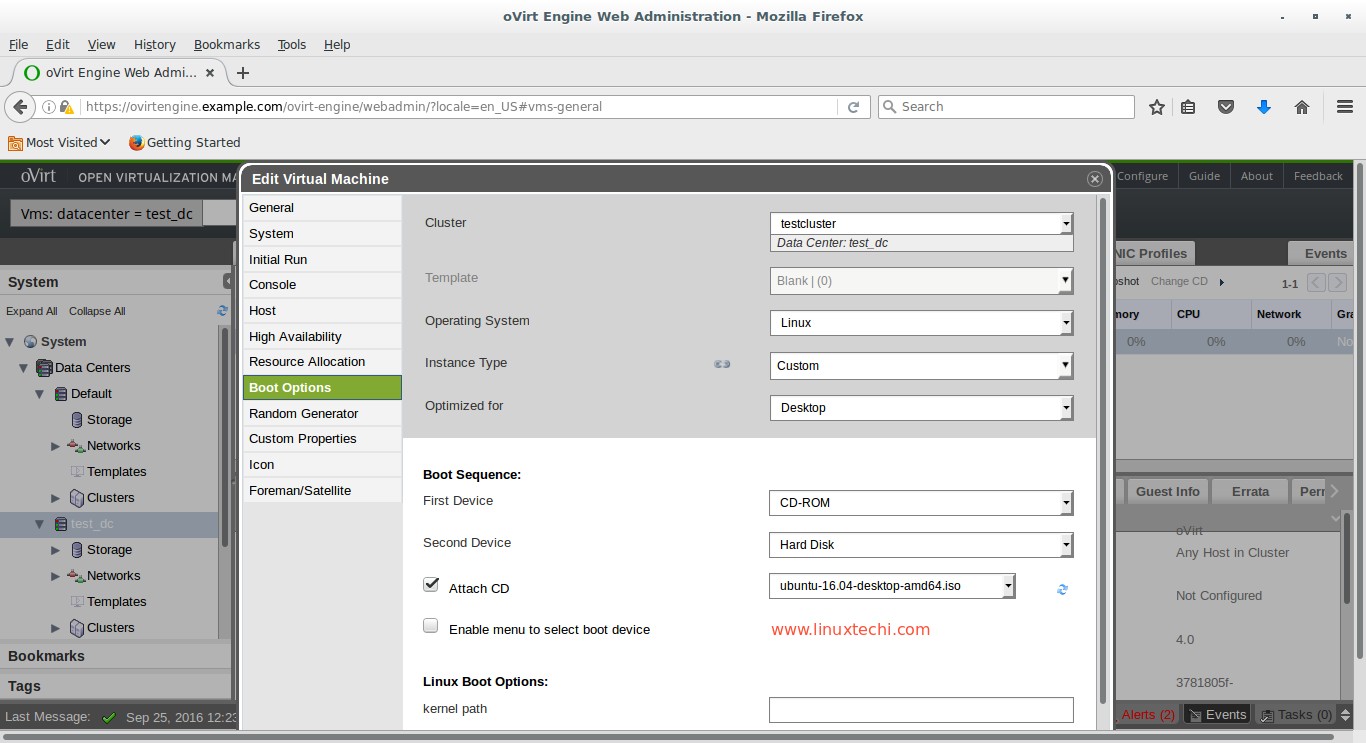
Go to “Boot Options” Tab , attach the Ubuntu 16.04 ISO file and change the boot sequence and Click on OK
Now Select the VM and Click on “Run Once” option from Virtual Machines Tab.
To Get the Console of VM. Do the Right Click on VM and then select Console.
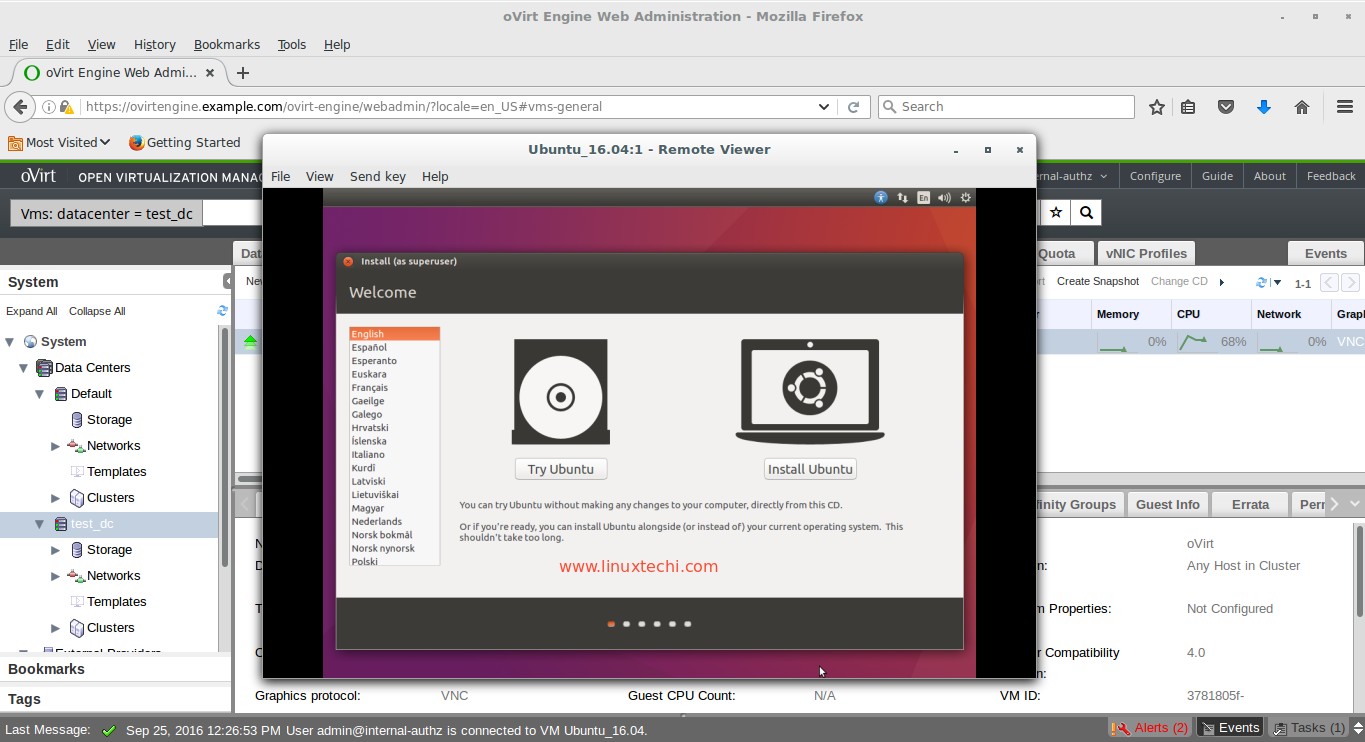
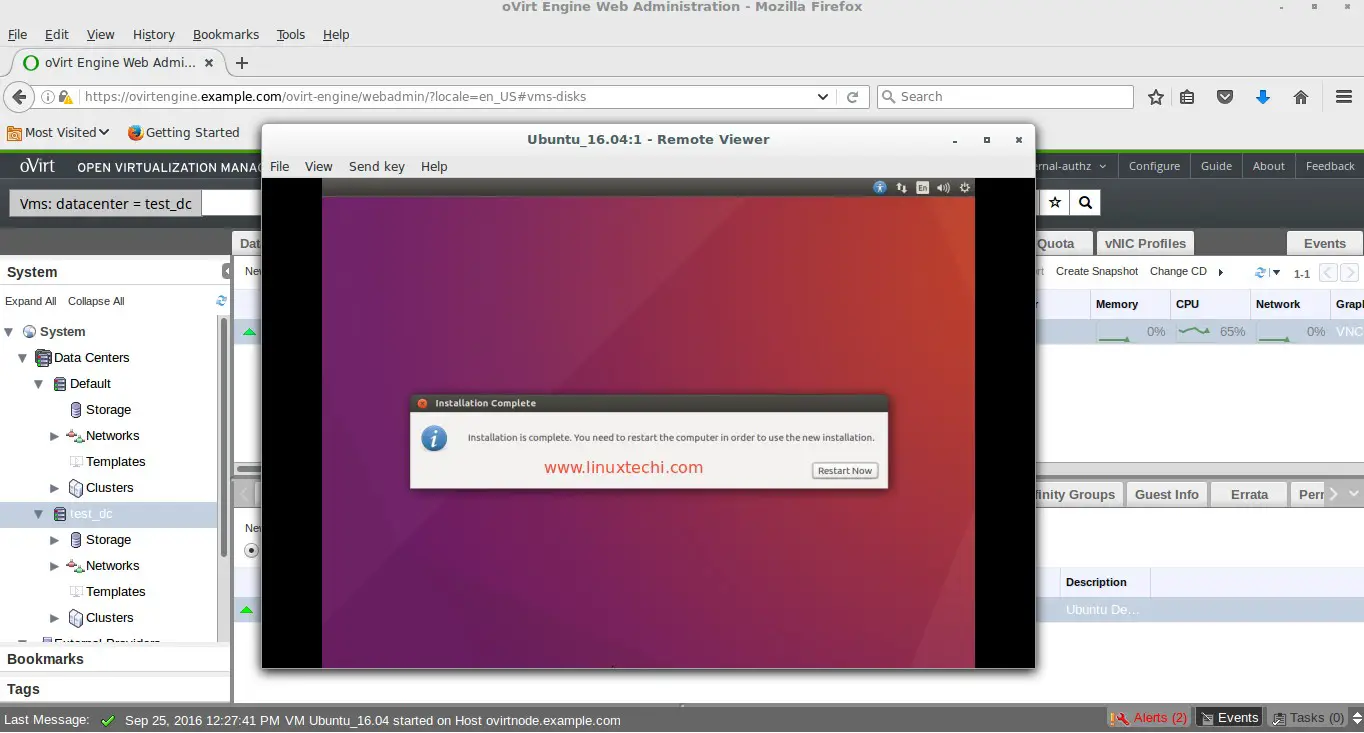
Click on Install Ubuntu and follow the screen instructions and reboot the VM once installation is completed
Change the Boot Sequence of VM so that it will boot from Disk.

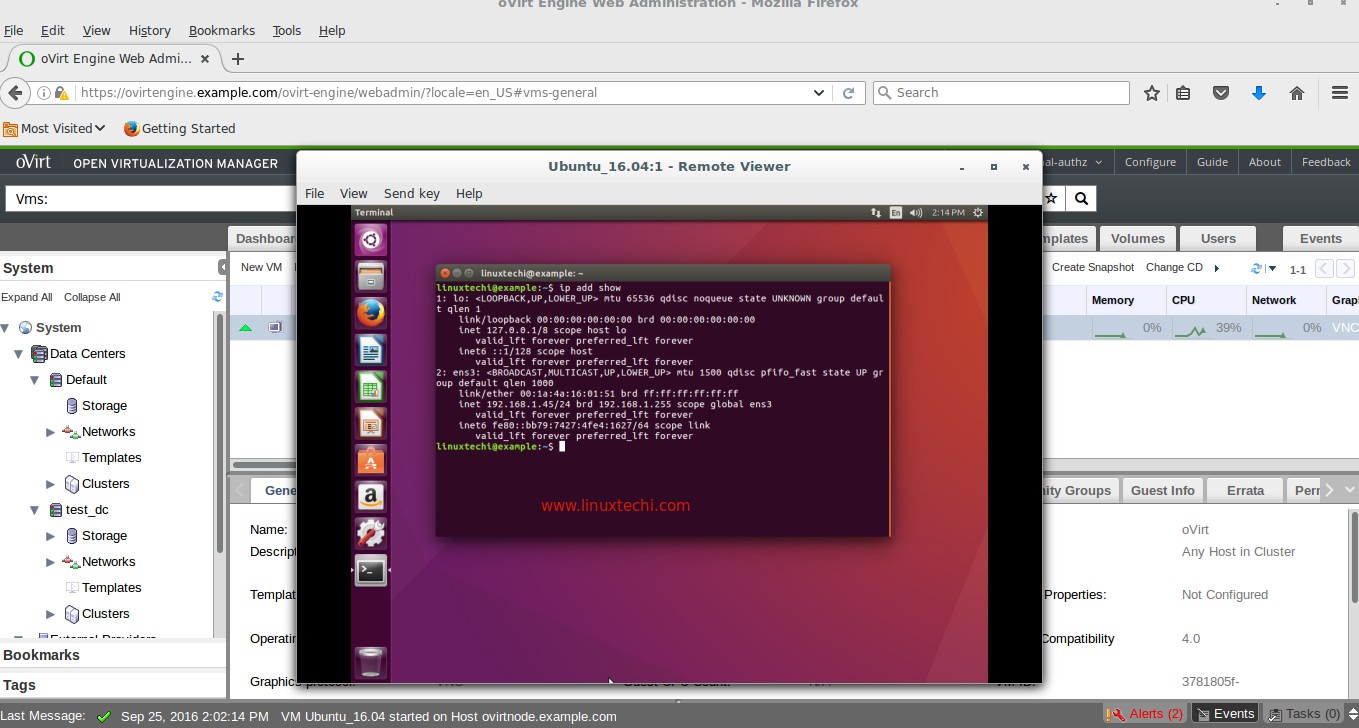
Enter the Credentials that you set during installation
That’s all for this article. Hope you under stand how to create or deploy virtual machines in oVirt Environment.
Quick question – I am trying to do all this on a Dell 720 server. I made 3 virtual drives – one for ovirt-engine (on a base centos7 install), one for the ovirt-node (another centos 7?) and the rest for the VM’s. Is this correct?
Hello Kathy,
You should create a virtual env (KVM or VirtualBox) on your Dell, like Separate VMs for ovirt-engine and ovirt-node.
Hi, How to configure the Fiber Channel Storage in the similar environment? Can you please post the guide?