
Previously in this series (see links below), I’ve described the dig utility and its many uses in performing DNS lookups, along with several examples to help solve specific problems. In this final installment, I’ll look briefly at some security options and wrap up with additional examples.
All Secure Here
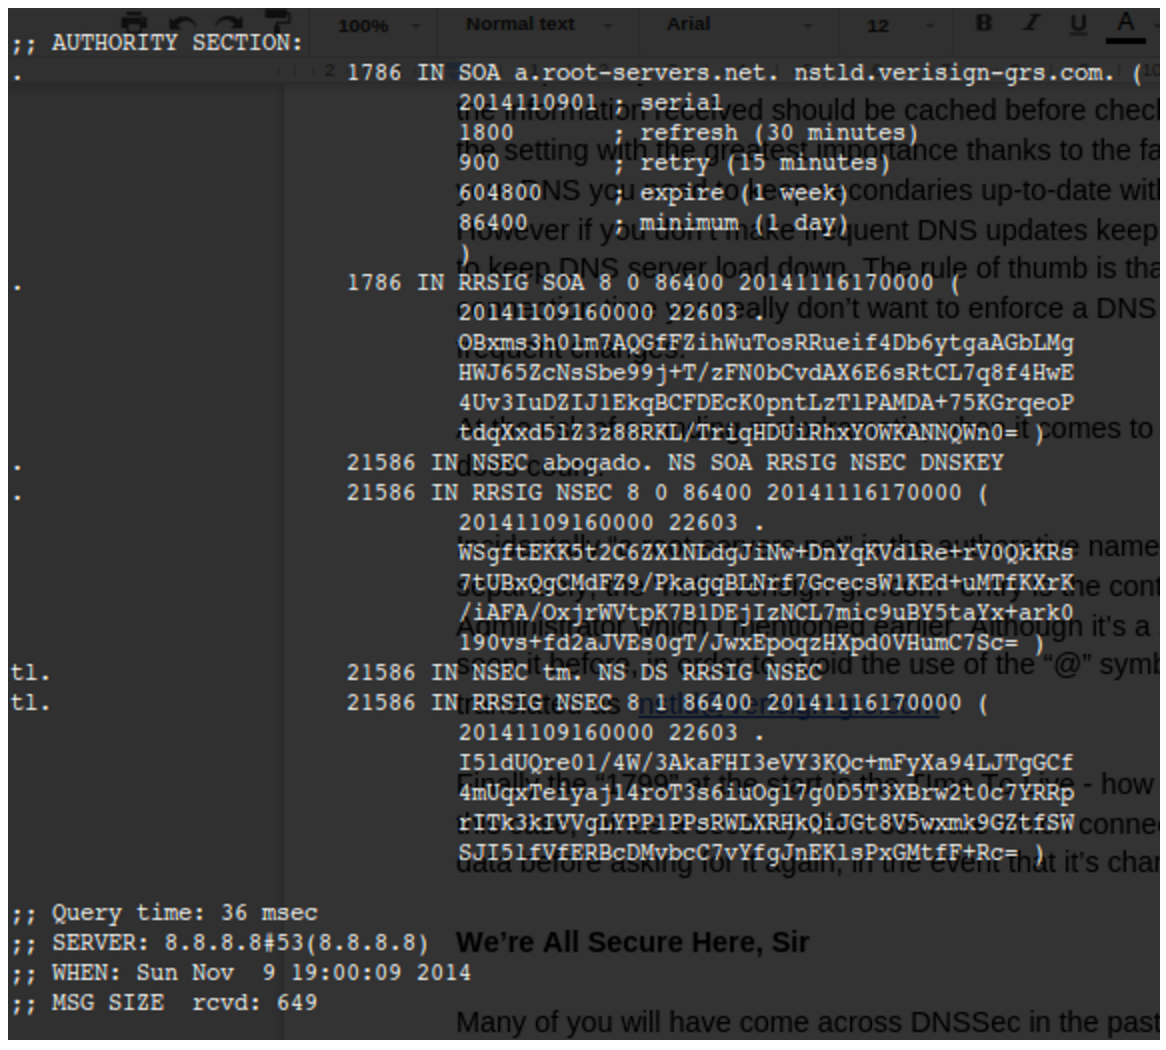
Many of you will have come across DNSSec in the past. It’s not an area that I have explored in great detail, I admit, but as you would expect the excellent dig utility takes the securing of DNS in its stride with the following option:
# dig @8.8.8.8 chrisbinnie.tld A +dnssec +multiline
where I request an “A” record and any associated DNSSec records with it.
We can see the inclusion of DNSSec records in Figure 1. For clarity, we are purposefully interrogating a non-existent domain name so you can see the response from the a root server (a.root-servers.net) again.
Custom Fitted
To facilitate those readers with a compulsive, painstaking need to make certain configuration changes with the dig utility, there’s a config file option which reads from within a user’s home directory, named as follows:
# cat ~/.digrc

+nocomments +recurse +multiline +nostats +time=1 +retry=5
As you can see, my “.digrc” file is simple and to the point, but it keeps the output straightforward. Note that the standard “A Record” is the default lookup unless another type of record is specified such as “MX” etc. That might affect how much information you usually want from your output, and thus how you set up your “.digrc” file, should you be looking up less popular record types more frequently.
Negatory
It would be remiss not to mention at this stage that I have intentionally — to keep things simple for newcomers to the dreaded DNS realm — so far not mentioned the fact that each and every one (barring a couple exceptions where it simply wouldn’t make sense) of the powerful dig utility’s command-line options can be negated with a prepended “no”.
A simple example, which I will leave you to apply to your heart’s content, might be as follows:
# dig chrisbinnie.tld +notrace
I’m sure you get the gist and that any further explanation would be futile. You can try any of the other options with a “no” in front if you’re unsure.
Eggs, Beans, Spam
With the viral outbreak of spam during the latter years of the Internet, clearly it’s critical that the largely successful attempt by the community to suppress it within DNS be integrated into the dig utility.
Step forward TXT record checking. You can either point at a “@server” to query directly or use something like this in the same format as before:
# dig chrisbinnie.tld txt
If you look closely at the ANSWER section, the IP addresses that SPF (Sender Policy Framework) pays attention to should be fairly obvious. In brief, this shows which IP addresses are authorized to send email on behalf of a domain name amongst other settings. Another important parameter is how strictly to enforce such settings before bouncing or blackholing an email as spam.
Suit Yourself
In keeping with the truly accommodating perspective with which the dig utility was written, there are also a couple of useful options that have caught my eye in the past.
First, the try-hard dig utility offers the ability to look past any malformed or corrupted responses received from name servers with the following option:
# dig @8.8.8.8 chrisbinnie.tld A +besteffort
In other words, this says to display some corruption if it exists, even if the output is a little nonsensical, in the hope that some useful information might be gleaned. You might see why this could be very useful if I mention that the dig utility even pays attention to non-ASCII based domain names.
Referred to as IDN Support, (which the manual reports is Internationalized Domain Name Support), the mighty dig tool can covertly change its character set before receiving an answer or sending a question to an international name server. On today’s Internet, this is of significant value and will likely only become more useful in the future as international languages meld further.
Actually, It’s A Feature
One concluding note, which I enjoyed reading from the June 30th, 2000 version of dig’s man pages, was at the foot of the information under the “BUGS” section. This line might be read differently on a number of levels but expresses simple sentiments if read literally.
The BUGS section of the manual is usually a way of briefing declaring known issues. In dig’s case, however, the line “There are probably too many query options.” is all that exists.
I’m afraid that on the surface I would have to agree, but I suspect that, at one stage or another, each one of those DNS options has been very useful to someone, somewhere. I mention this because it’s not always obvious how far to delve into DNS, even when faced with relatively complex scenarios such as using name servers for failing-over between web servers. Be assured, however, that whatever you need from a DNS query, the ever-faithful dig utility will almost certainly provide it, in varying levels of detail, to suit your preference.
Summary
I have barely scratched the surface of the dig utility’s feature list and how DNS actually works. If you are new to working as a sysadmin, there will likely be many opportunities for you to learn DNS and evolve your knowledge over time.
My hope in writing these articles was to give you the confidence required to turn to the dig utility if you ever need to query DNS in detail. And, having written this series, I have come to realize that “dig www.domainname.tld” is actually shorter than using the “host” command alternative. You never know, maybe my daily DNS habits have been changed forever as a result, and I will turn to the dutiful dig over the “host” command from now on.
Read previous articles in the series: Part 1, Part 2, and Part 3.
Chris Binnie is a Technical Consultant with 20 years of Linux experience and a writer for Linux Magazine and Admin Magazine. His new book Linux Server Security: Hack and Defend teaches you how to launch sophisticated attacks, make your servers invisible and crack complex passwords.
Learn more about network and system management with the Essentials of System Administration course from The Linux Foundation.


