How to take screenshots on Ubuntu 16.04 with ScreenCloud
Screenshots come in handy in many situations. For example, while making tutorials, discussing problems, or sharing information. What I mean to say is that it's a very common activity, so much so that there's a dedicated keyboard button to take screenshots.
However still, there are many screenshot taking applications available in the market, and their selling point is the list of useful features they offer, including the ability to store captured images on cloud in some cases. If you are looking for such an application, look no further, as in this tutorial we'll be discussing a useful screenshot taking app dubbed ScreenCloud.
Please note that all the commands and instructions mentioned in this tutorial have been tested on Ubuntu 16.04, and the ScreenCloud version we've used is 1.3.0.
About ScreenCloud
ScreenCloud is a screenshot taking application developed by Olav S Thoresen. The project started back in 2012, and is aimed at "providing an easy to use and crossplatform way to share screenshots," according to the official website. The app is available for Linux as well as other popular operating systems including Windows and Mac OS X.
The tool not only lets you take a screenshot but, if you want, also automatically uploads it to cloud - hence its name. Should you choose to upload the screenshot to the ScreenCloud server, a link will automatically be copied to your clipboard.
Please note that there's also a Premium version of the application available, but we'll only focus on the free version in this article.
Download and Install ScreenCloud
I am not sure about any other platform, but getting ScreenCloud to work on Ubuntu 16.04 is not a straightforward task. But worry not, I'll guide you through the process, and am sure you'll also be able to successfully install the tool on your Ubuntu 16.04 box.
To begin with, you need to download the tool package for your Ubuntu 16.04 system, something which you can do by heading here. Note that I downloaded the screencloud_1.3.0-1qt5_i386.deb file since mine is a 32 bit machine. There's, however, a version available for 64-bit systems as well. So, choose the one that fits your case.
Once you're done downloading the .deb file, you can install the tool using the following command:
sudo dpkg -i <deb-file-name>
For example, in my case, I executed the following command:
sudo dpkg -i screencloud_1.3.0-1qt5_i386.deb
The command, however, didn't execute successfully in my case, and I expect the same to be the case with most Ubuntu 16.04 users. Following errors were thrown:
...
...
dpkg: dependency problems prevent configuration of screencloud:
screencloud depends on libquazip5-1 | libquazip-qt5-1 | libquazip-qt5; however:
Package libquazip5-1 is not installed.
Package libquazip-qt5-1 is not installed.
Package libquazip-qt5 is not installed.
screencloud depends on libpythonqt-qt5; however:
Package libpythonqt-qt5 is not installed
...
...
As a remedy, I tried the following command:
sudo apt-get -f install
and succeeded in fixing most of the errors. However, the dpkg command was still not successful - this time it threw the following error:
...
...
dpkg: dependency problems prevent configuration of screencloud:
screencloud depends on libpythonqt-qt5; however:
Package libpythonqt-qt5 is not installed.
...
...
Now, to fix this dependency error, I downloaded the libpythonqt-qt5 package by heading here, and installed the package using the following command:
sudo dpkg -i libpythonqt-qt5_3.0-1_i386.deb
The above command, thankfully, didn't throw any errors. Thereafter, when I executed the following command again:
sudo dpkg -i screencloud_1.3.0-1qt5_i386.deb
the ScreenCloud app got installed successfully.
ScreenCloud Usage
You can either launch the app through Ubuntu Dash
![]()
or through the command line by executing the following command:
screencloud
When the app is launched for the first time, it asks you whether or not you are new to the tool, as well as have a ScreenCloud account.
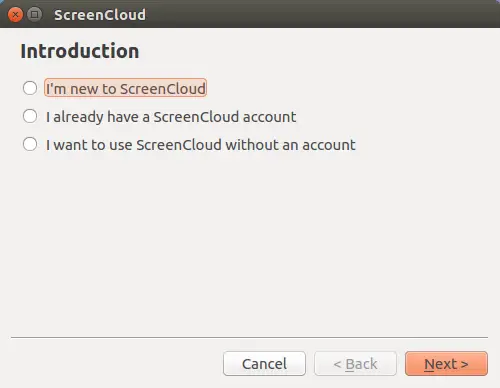
I selected the first option, and clicked Next. It then asked me to create an account.
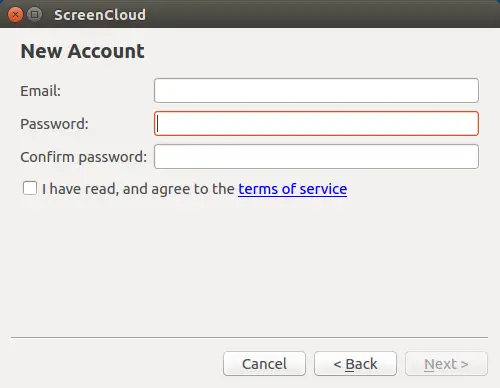
After I provided the required details and clicked Next, the account was created, but the tool asked me to activate it first.
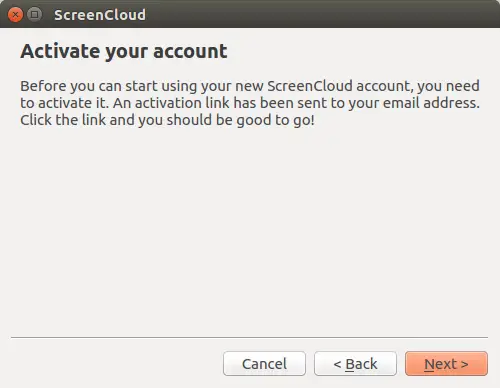
I followed the process to activate my account, and was then able to log-in successfully. The tool then greeted me with the following informative messages:
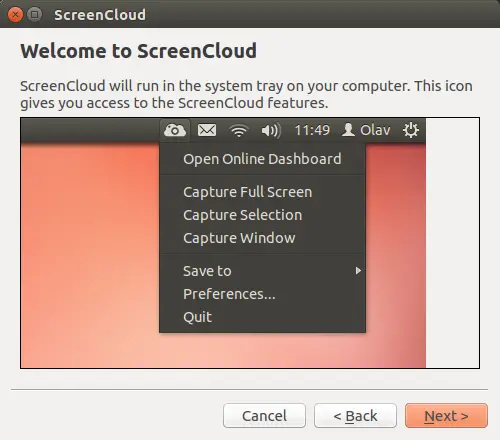
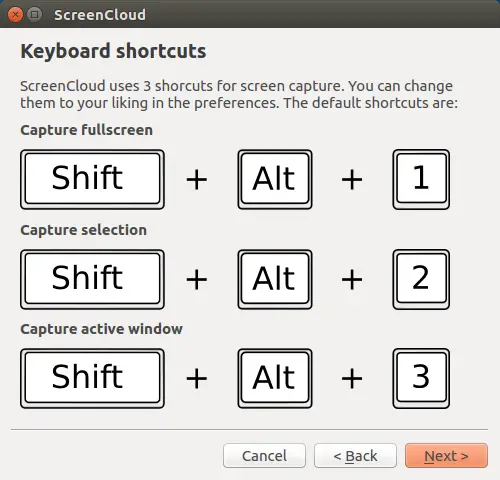
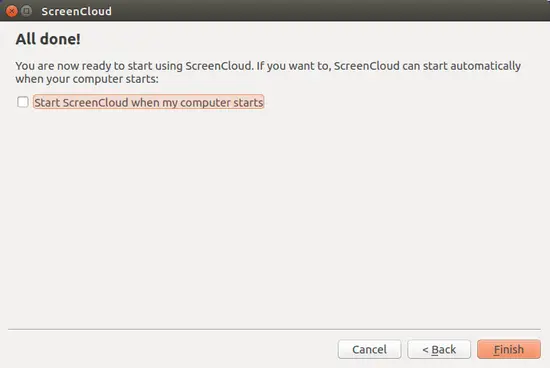
After I clicked the Next button in the last window (shown above), the ScreenCloud icon appeared in my system tray.
![]()
Then I tested the tool by capturing fullscreen, selected area, and current window - all three features worked fine.
Here's the application's Preferences menu:
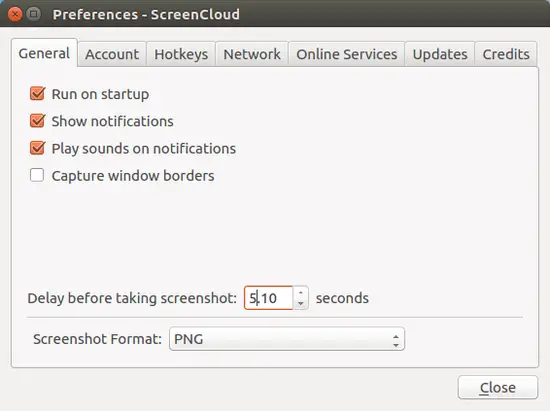
In the General tab, there are options to allow/disallow the app to run on startup, show notifications, play sounds, and capture window borders. You can also set a delay of your choice as well as choose the file format for screenshots.
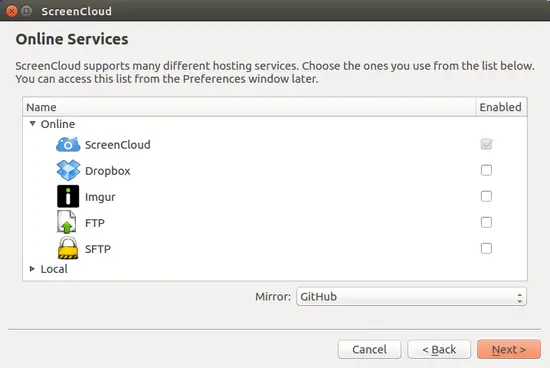
Moving on, the Online Services tab contains just two options: ScreenCloud and Clipboard (the latter is not an online service, choosing Clipboard will copy the image to your system clipboard so that - for example - you can copy it in any of your documents).
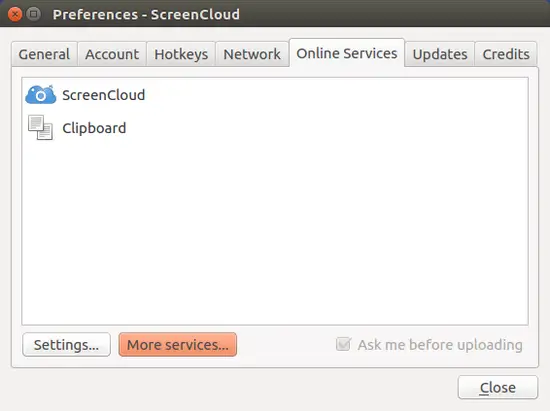
You can, however, add more services by clicking the More services button. Available options are:
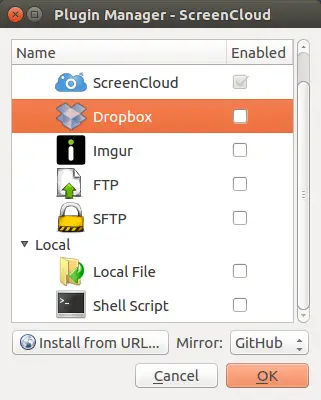
Please note that ScreenCloud does not save a captured screenshot as a file anywhere on your local system - at least that's not the default behavior. To enable this behavior, you need to install the Local File service plugin that's listed in the More services window (shown above).
Conclusion
Personally, I found the app quite useful - it sits on your system tray (meaning it's always in front of you) and lets you quickly take screenshots and save them locally as well as online. You can easily access your online ScreenCloud account by clicking the first option in the drop-down menu, and tweak the tool's behavior as per your requirements using the Preferences menu.
Frankly, I found the free version more than enough for my daily work, and I am sure you'll agree with me once you start using the tool. My advice: go ahead, and give ScreenCloud a try.

