This tutorial exists for these OS versions
- Ubuntu 22.04 (Jammy Jellyfish)
- Ubuntu 20.04 (Focal Fossa)
- Ubuntu 18.04 (Bionic Beaver)
- Ubuntu 16.04 (Xenial Xerus)
- Ubuntu 14.04 LTS (Trusty Tahr)
On this page
How to Install and Configure Apache Tomcat 8.5 on Ubuntu 16.04
Apache Tomcat is an open source Java Servlet implementation developed by the Apache Software Foundation. In addition to the implementation of Java Servlets, Tomcat supports other Java server technologies too, including JavaServer Pages (JSP), Java Expression Language, and Java WebSocket. Tomcat provides an HTTP Web Server for Java applications that supports HTTP/2, OpenSSL for JSSE and the TLS virtual hosting.
In this tutorial, I will show you how to install and configure Apache Tomcat 8.5 on Ubuntu 16.04 LTS (Yakkety Yak) and how to install and configure the prerequisite Java 8 on the Ubuntu server.
Prerequisite
- Ubuntu 16.04 - 64bit
- 2 GB or more memory (Recommended)
- Root Privileges
Step 1 - Install Java (JRE and JDK)
In this step, we will install Java JRE and JDK from an Ubuntu PPA repository. To do that, we have to install a new packe 'python-software-properties' first for managing the repository.
Install python software properties:
sudo apt-get install python-software-properties -y
When the package is installed, add the new PPA java repository and run apt-get update.
sudo add-apt-repository ppa:webupd8team/java
sudo apt-get update
Next, install Java JRE and JDK from the PPA repository with apt:
sudo apt-get install oracle-java8-installer -y
It will take some time, wait until the installation is done.
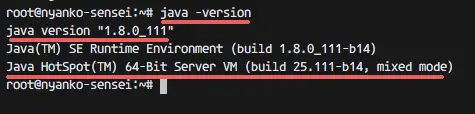
Check the java version with command below:
java -version
You can see the desired results below:
java version "1.8.0_111"
Java(TM) SE Runtime Environment (build 1.8.0_111-b14)
Java HotSpot(TM) 64-Bit Server VM (build 25.111-b14, mixed mode)
Step 2 - Configure Java Home Environment
In the first step, we've installed Java. Now we need to configure the JAVA_HOME environment variable on the Ubuntu server so that Java applications can find the Java installation directory. Tomcat needs a JAVA_HOME environment to be setup properly.
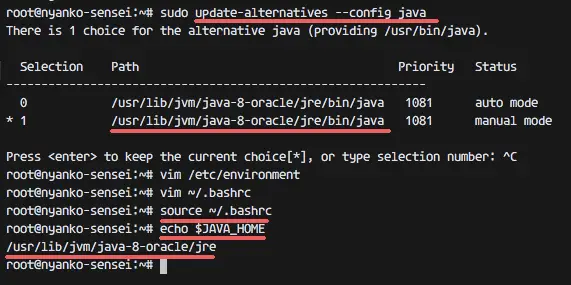
Before we configure the JAVA_HOME environment, we need to know where the Java directory is. Check the location of the Java directory with the command below:
sudo update-alternatives --config java
Java directory = "/usr/lib/jvm/java-8-oracle/jre"
Then edit the environment file with vim:
vim /etc/environment
Add JAVA_HOME environment by adding the configuration line below:
JAVA_HOME="/usr/lib/jvm/java-8-oracle/jre"
Save the file and exit the editor.
Next, edit the .bashrc file and add lines to export the JAVA_HOME environment variables:
vim ~/.bashrc
At the end of the file, paste the configuration below:
export JAVA_HOME=/usr/lib/jvm/java-8-oracle/jre
export PATH=$JAVA_HOME/bin:$PATH
Save and exit, then reload the .bashrc file.
source ~/.bashrc
Make sure there is no error, and check the JAVA_HOME environment:
echo $JAVA_HOME
You will see java directory path.
Step 3 - Install Apache Tomcat 8.5
In this step, we will install Apache Tomcat under the user tomcat.
Create a user and group named tomcat:
groupadd tomcat
useradd -s /bin/false -g tomcat -d /opt/tomcat tomcat
Note:
-s /bin/false = disable shell access.
-g tomcat = assign the new user to the group tomcat.
-d /opt/tomcat = define the home directory for the user.
Next, go to the /opt directory and download tomcat with the wget command:
cd /opt/
wget http://mirror.wanxp.id/apache/tomcat/tomcat-8/v8.5.6/bin/apache-tomcat-8.5.6.tar.gz
Extract the Tomcat archive and rename the directory to 'tomcat'.
tar -xzvf apache-tomcat-8.5.6.tar.gz
mv apache-tomcat-8.5.6 tomcat
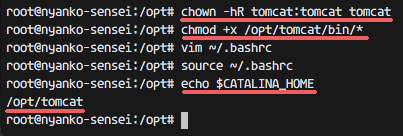
Change the owner of the tomcat directory to the tomcat user, and make all files in the bin directory executable.
chown -hR tomcat:tomcat tomcat
chmod +x /opt/tomcat/bin/*
Next, we need to define the CATALINA_HOME directory, so we can run a test with Apache Tomcat. Catalina is the Tomcat servlet container.
Edit the .bashrc file with vim:
vim ~/.bashrc
Paste the configuration line below at the end of the line:
export CATALINA_HOME=/opt/tomcat
Save and exit, and then reload the .bashrc.
source ~/.bashrc
Check the CATALINA_HOME environment.
echo $CATALINA_HOME
Step 4 - Test Apache Tomcat
In step 3, we configured the basic Tomcat setup, in this step, we will do some testing and make sure that there is no error in our configuration.
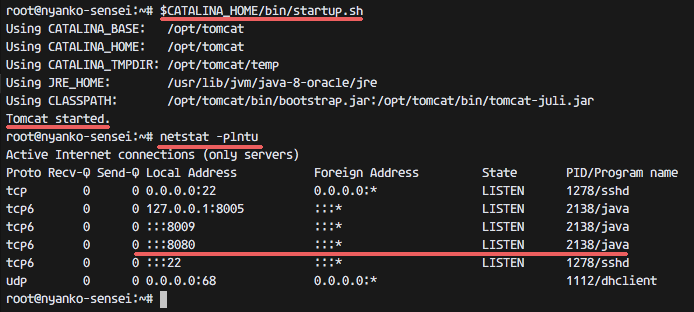
Run the command below to test the Apache Tomcat:
$CATALINA_HOME/bin/startup.sh
Make sure the results is 'Tomcat started' to verify that Tomcat is successfully installed.
Tomcat is using port 8080, check the open port on the server with netstat command.
netstat -plntu
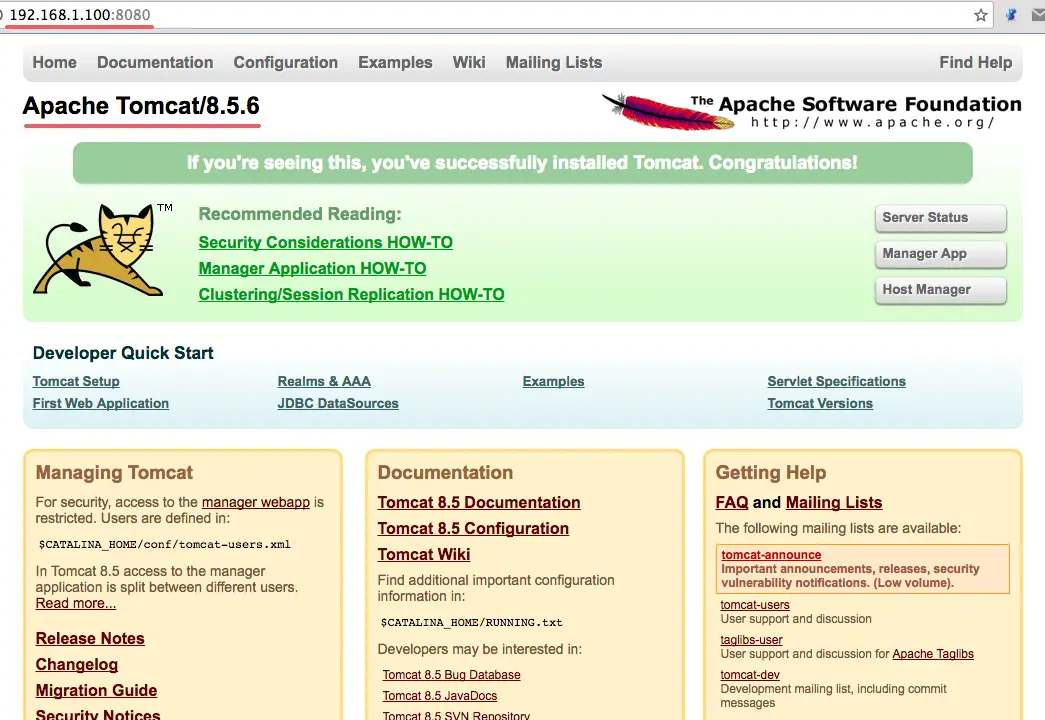
Or you can visit the server IP address with port 8080 - in my case http://192.168.1.100:8080 with a web browser. You will see the Apache Tomcat default page.
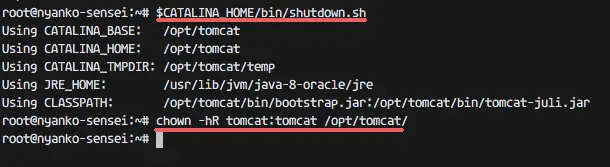
Next, stop Apache Tomcat because we will run Tomcat with a service file now. Ensure the tomcat directory is under tomcat user.
$CATALINA_HOME/bin/shutdown.sh
chown -hR tomcat:tomcat /opt/tomcat/
Step 5 - Setup an Apache Tomcat Service
In this tutorial, we want run Apache Tomcat as tomcat user with a systemd service file so it can be started and stopped easily. Now we need to create the 'tomcat.service' file.
Go to the systemd system directory and create a new file 'tomcat.service'.
cd /etc/systemd/system/
vim tomcat.service
Paste configuration below:
[Unit]
Description=Apache Tomcat 8 Servlet Container
After=syslog.target network.target

[Service]
User=tomcat
Group=tomcat
Type=forking
Environment=CATALINA_PID=/opt/tomcat/tomcat.pid
Environment=CATALINA_HOME=/opt/tomcat
Environment=CATALINA_BASE=/opt/tomcat
ExecStart=/opt/tomcat/bin/startup.sh
ExecStop=/opt/tomcat/bin/shutdown.sh
Restart=on-failure

[Install]
WantedBy=multi-user.target
Save the file and exit the editor.
Reload the systemd daemon, then start the Tomcat service and add the Apache Tomcat service to start at boot time.
systemctl daemon-reload
systemctl start tomcat
systemctl enable tomcat
Check that tomcat is running by checking the open port.
netstat -plntu
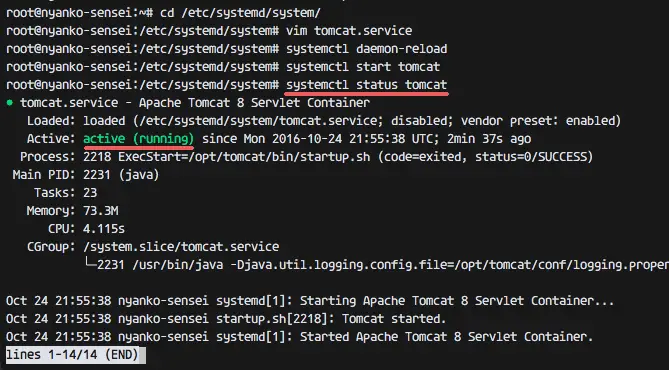
And check the tomcat status, make sure the service is active.
systemctl status tomcat
Step 6 - Configure Apache Tomcat Users
In this step, we will configure the users for Apache Tomcat. Tomcat is installed, and it's running by default on port 8080, we can access it from the web browser, but we can not access the site-manager dashboard until now. This is the purpose of this step, to enable and configure Tomcat users, edit the file 'tomcat-users.xml'.
Go to the tomcat configuration directory and edit the tomcat-users.xml with vim.
cd /opt/tomcat/conf/
vim tomcat-users.xml
Create a new line under line 43 and paste configuration below:
<role rolename="manager-gui"/>
<user username="admin" password="password" roles="manager-gui,admin-gui"/>
Save and exit.
Next, go to the manager directory and edit the context.xml file.
cd /opt/tomcat/webapps/manager/META-INF/
vim context.xml
Comment line 19 and 20.
<Context antiResourceLocking="false" privileged="true" >
<!--  <Valve className="org.apache.catalina.valves.RemoteAddrValve"
         allow="127\.\d+\.\d+\.\d+|::1|0:0:0:0:0:0:0:1" /> -->
</Context>
Save and exit.
And go to the host-manager directory and edit the context file again.
cd /opt/tomcat/webapps/host-manager/META-INF/
vim context.xml
Comment out line 19 and 20.
<Context antiResourceLocking="false" privileged="true" >
<!--  <Valve className="org.apache.catalina.valves.RemoteAddrValve"
         allow="127\.\d+\.\d+\.\d+|::1|0:0:0:0:0:0:0:1" /> -->
</Context>
Save and exit, then restart tomcat.
systemctl restart tomcat
Step 7 - Testing Tomcat
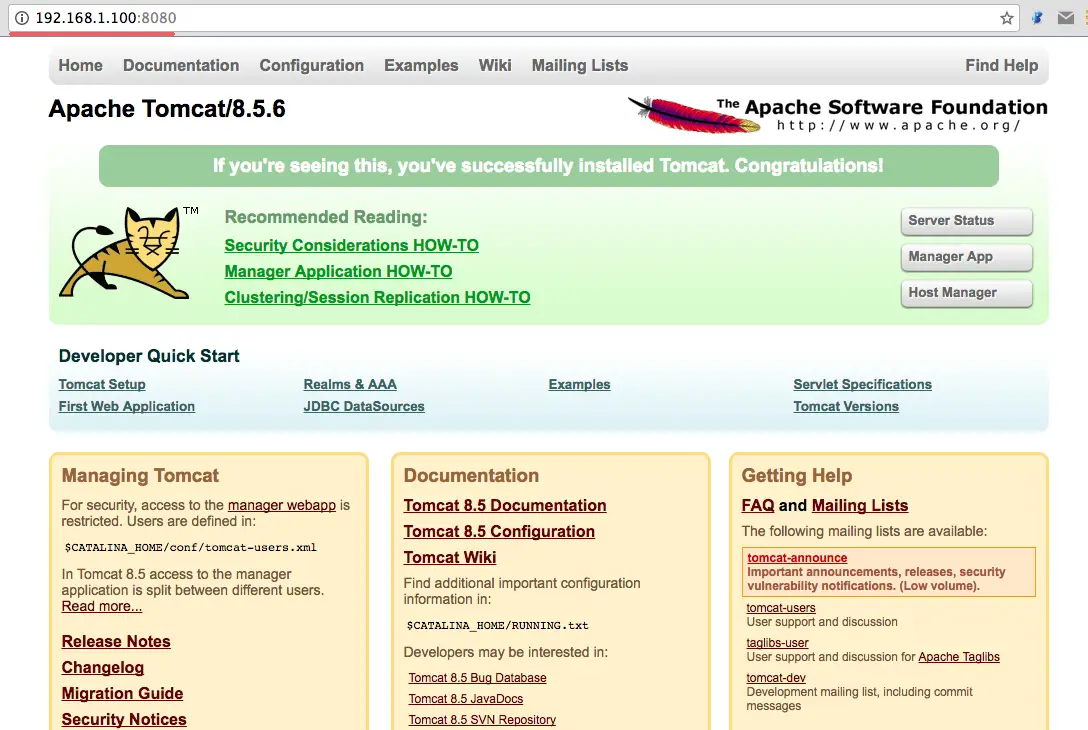
Open your web browser and type in your server IP with port 8080. You will see the Apache Tomcat home directory.
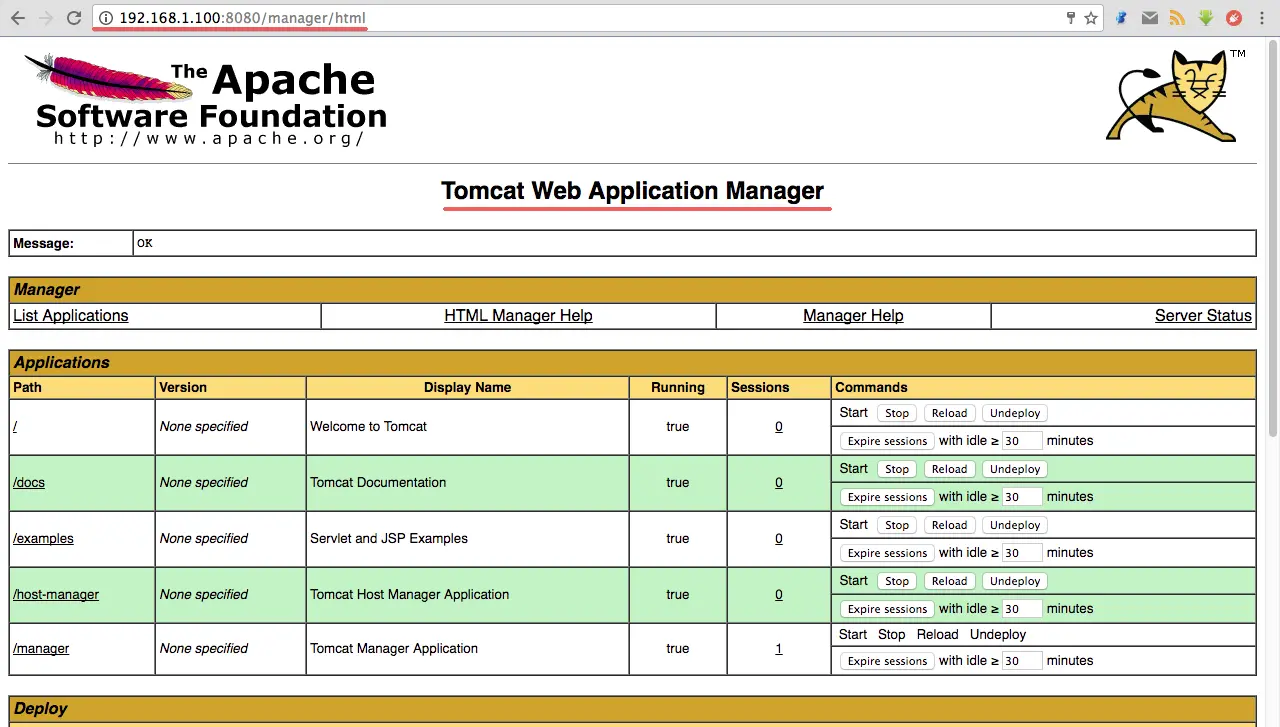
Go to the manager dashboard with the URL below:
http://192.168.1.100:8080/manager/html
Type the admin username 'admin' with password 'mypassword', the configuration from step 5.
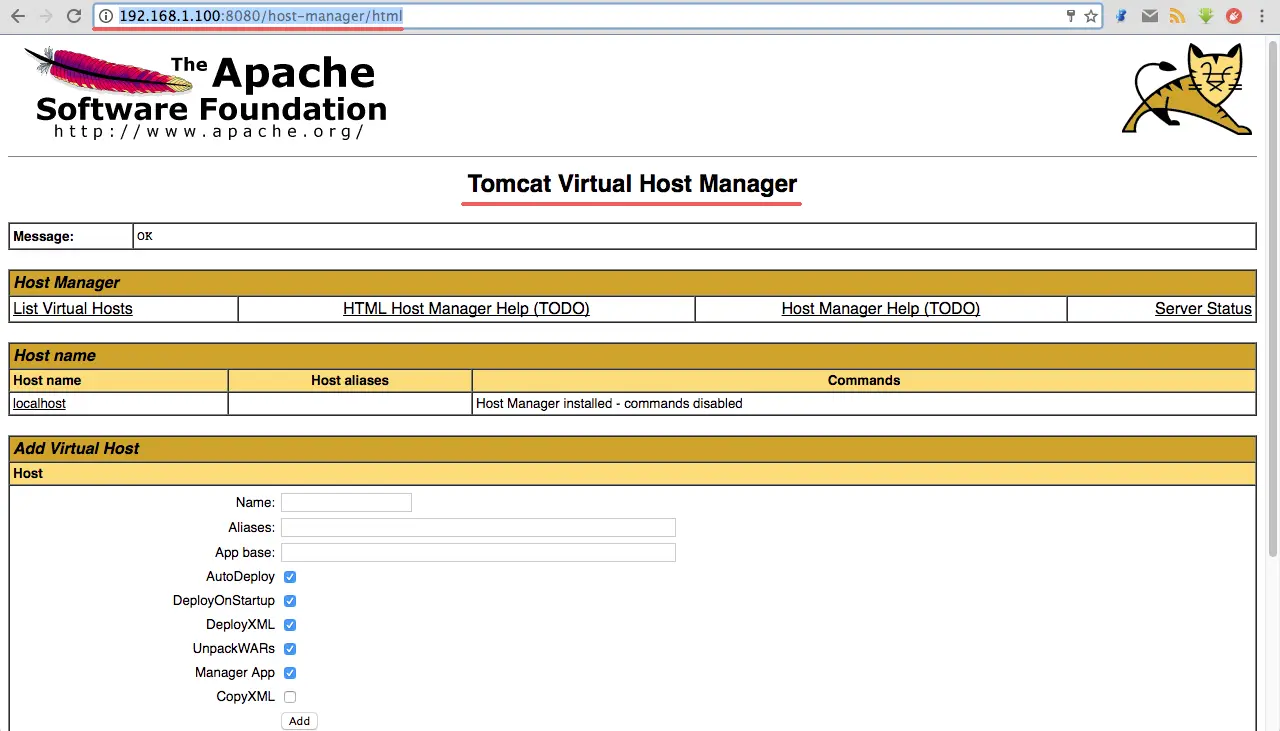
Now go to the host-manager dashboard with URL below:
http://192.168.1.100:8080/host-manager/html
Enter the admin user and password from step 5, you will see the Tomcat Virtual host Manager.
Apache Tomcat 8.5 has been installed and tested on Ubuntu 16.04.

