How to capture and stream your gaming session on Linux with OBS Studio
On this page
There may not be many hardcore gamers who use Linux, but there certainly are quite a lot Linux users who like to play a game now and then. If you are one of them and would like to show the world that Linux gaming isn’t a joke anymore, then you will find the following quick tutorial on how to capture and/or stream your gaming session interesting. The software tool that I will be using for this purpose is called “Open Broadcaster Software Studio” and it is maybe the best of the kind that we have at our disposal.
Capture settings
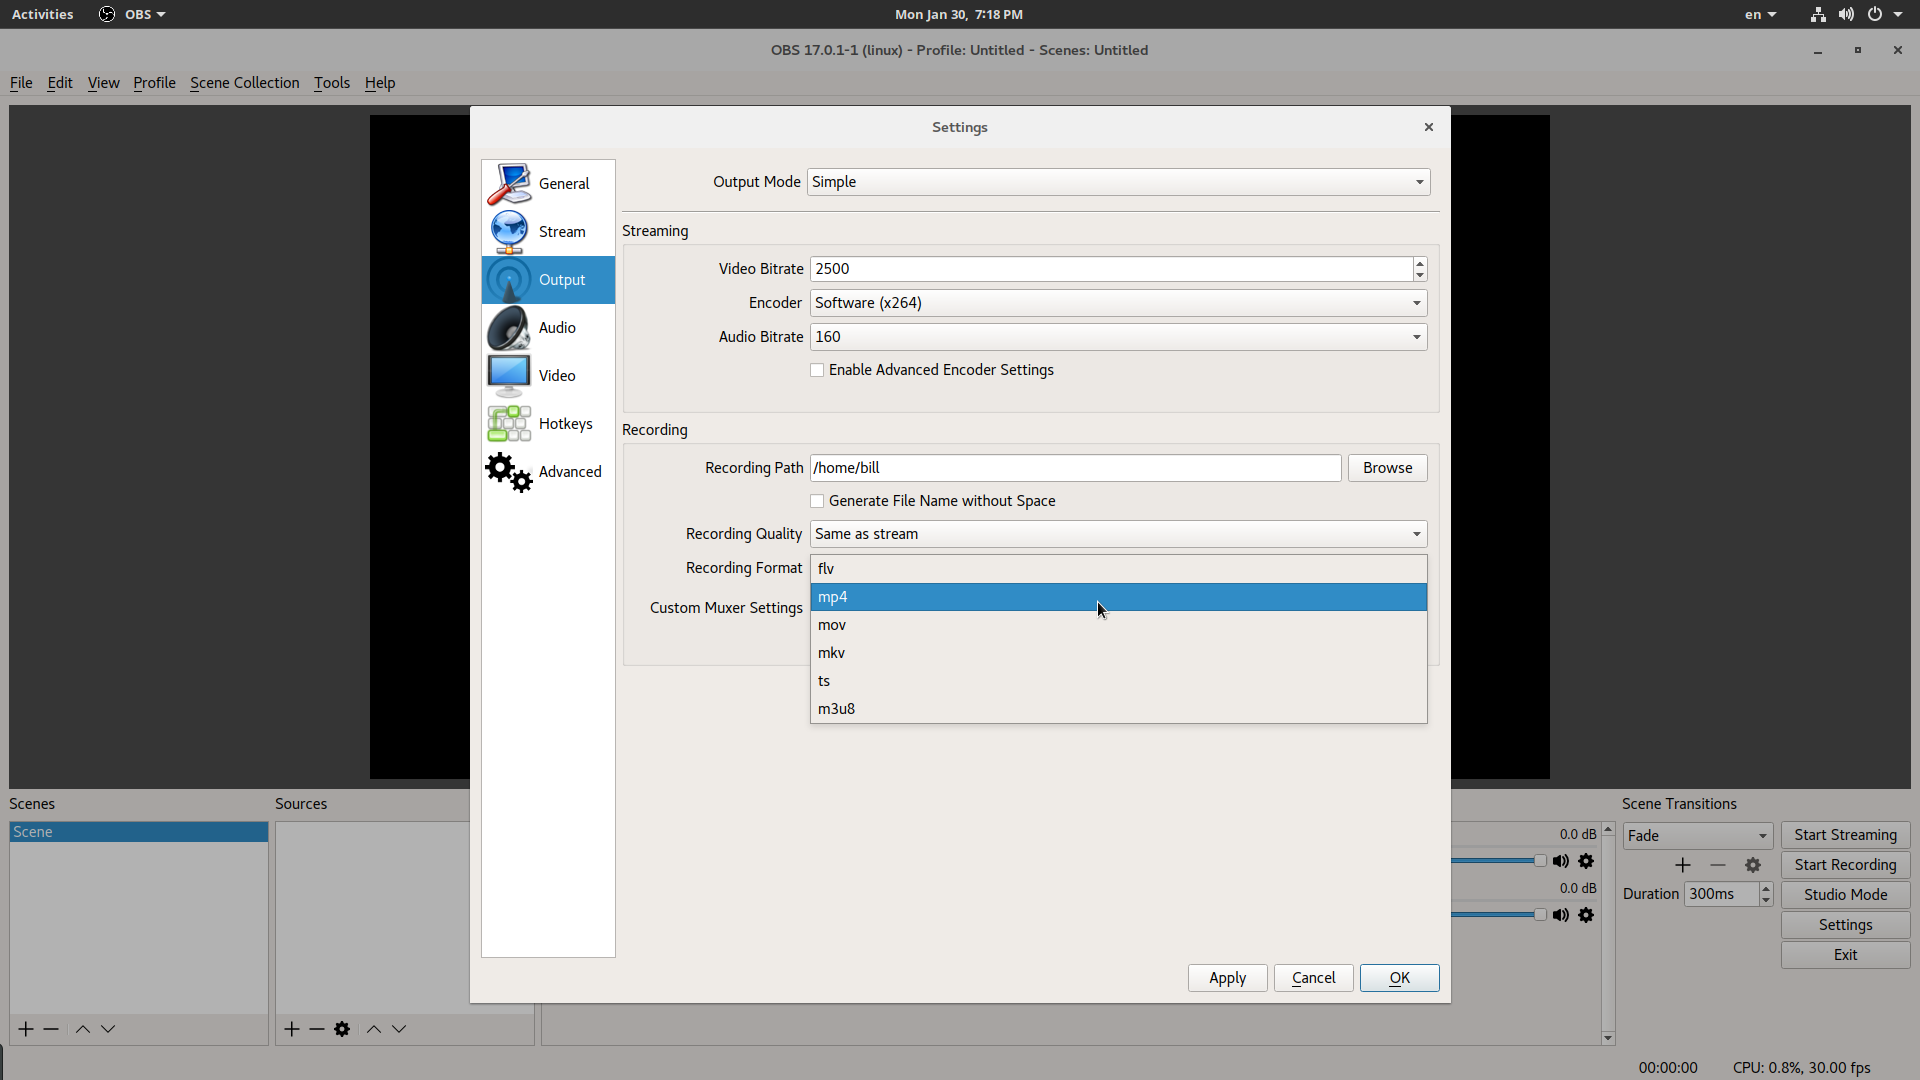
Through the top panel menu, we choose File → Settings and then we select the “Output” to set our preferences for the file that is to be produced. Here we can set the audio and video bitrate that we want, the destination path for the newly created file, and the file format. A rough setting for the quality is also available on this screen.
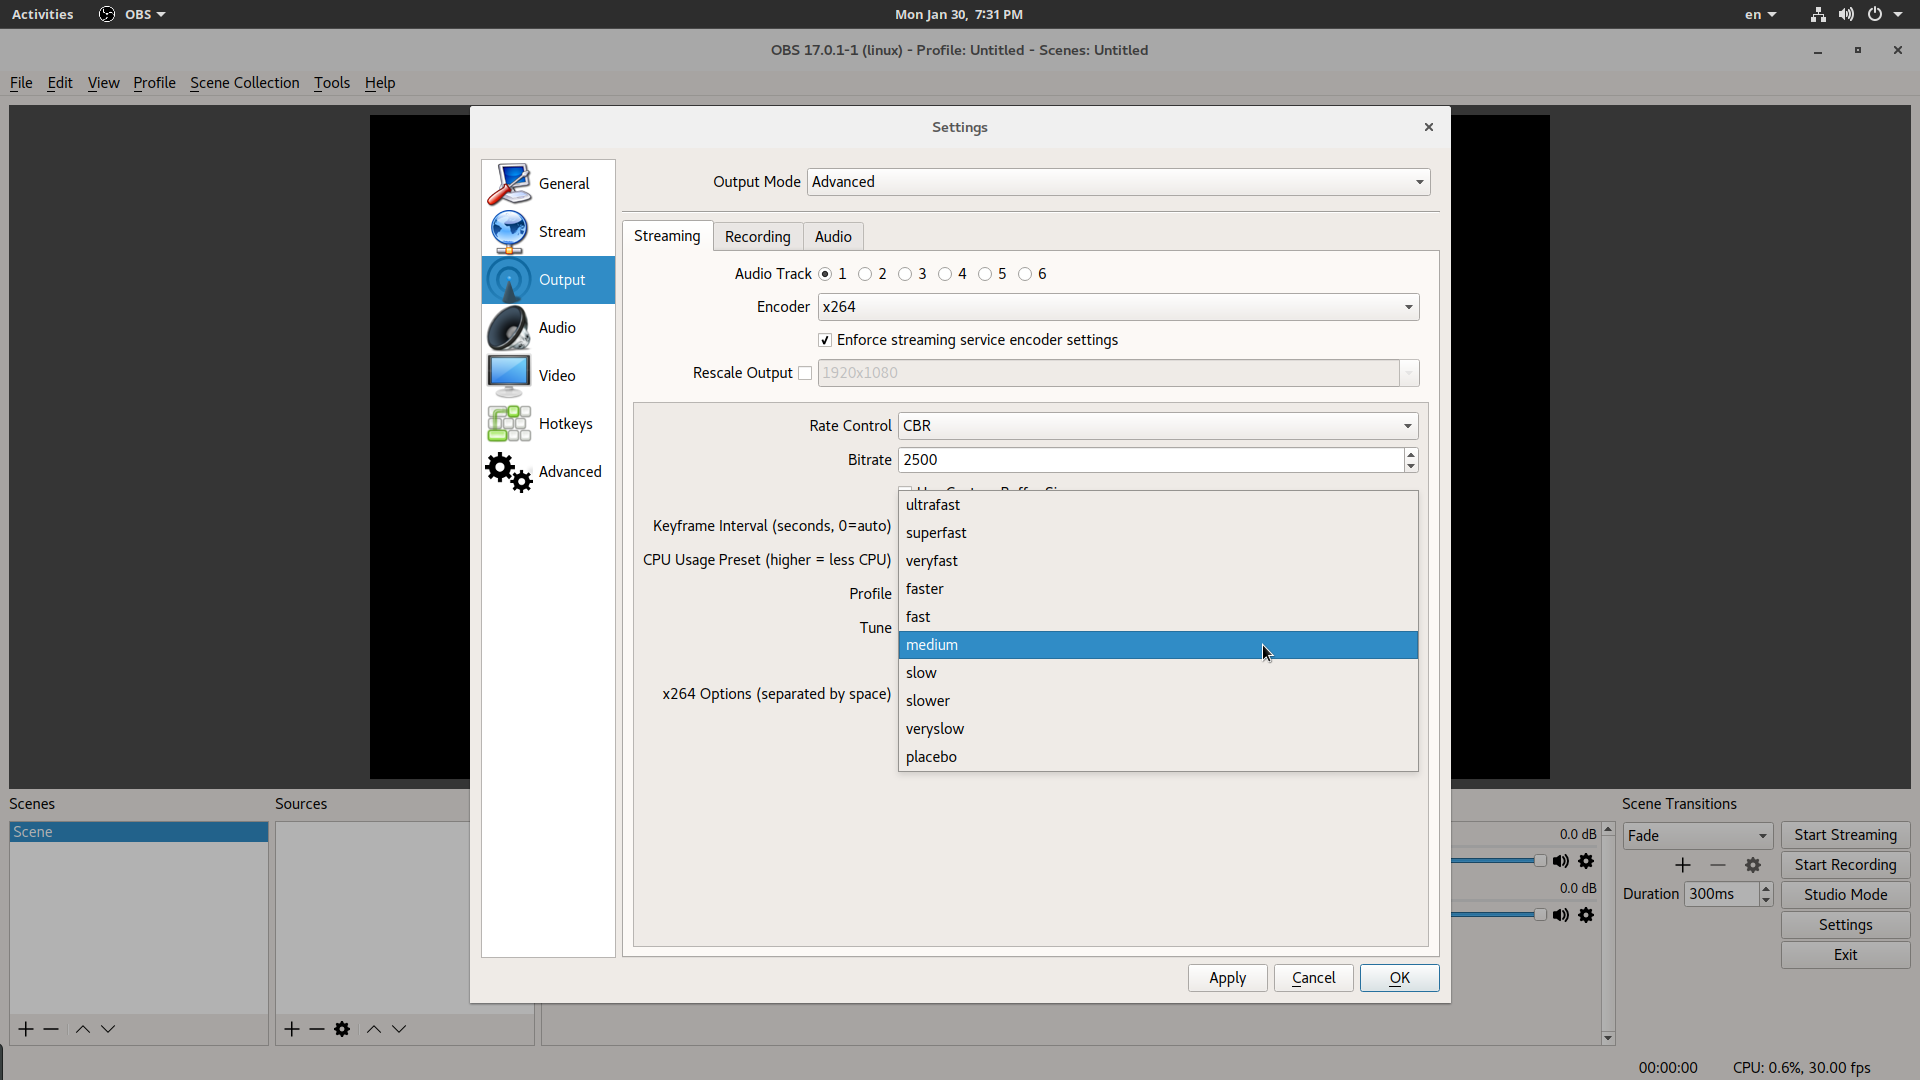
If we change the output mode on the top from “Simple” to “Advanced” we will be able to set the CPU usage load that we allow OBS to induce to our system. Depending on the selected quality, the CPU capabilities, and the game that we are capturing, there’s a CPU load setting that won’t cause the frames to drop. You may have to do some trial to find that optimal setting, but if the quality is set to low you shouldn’t worry about it.
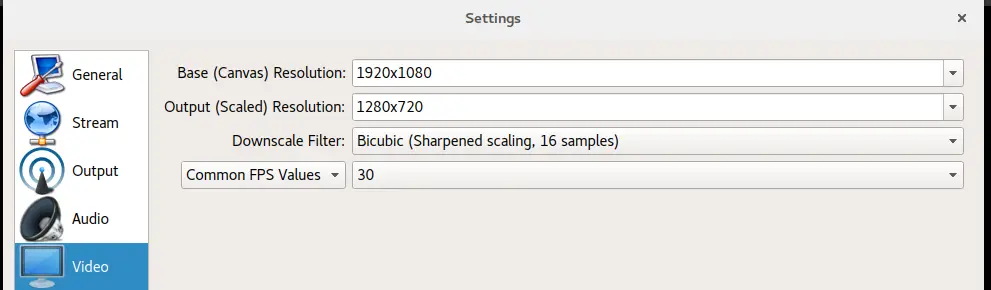
Next, we go to the “Video” section of the settings where we can set the output video resolution that we want. Pay attention to the down-scaling filtering method as it makes all the difference in regards to the quality of the end result.
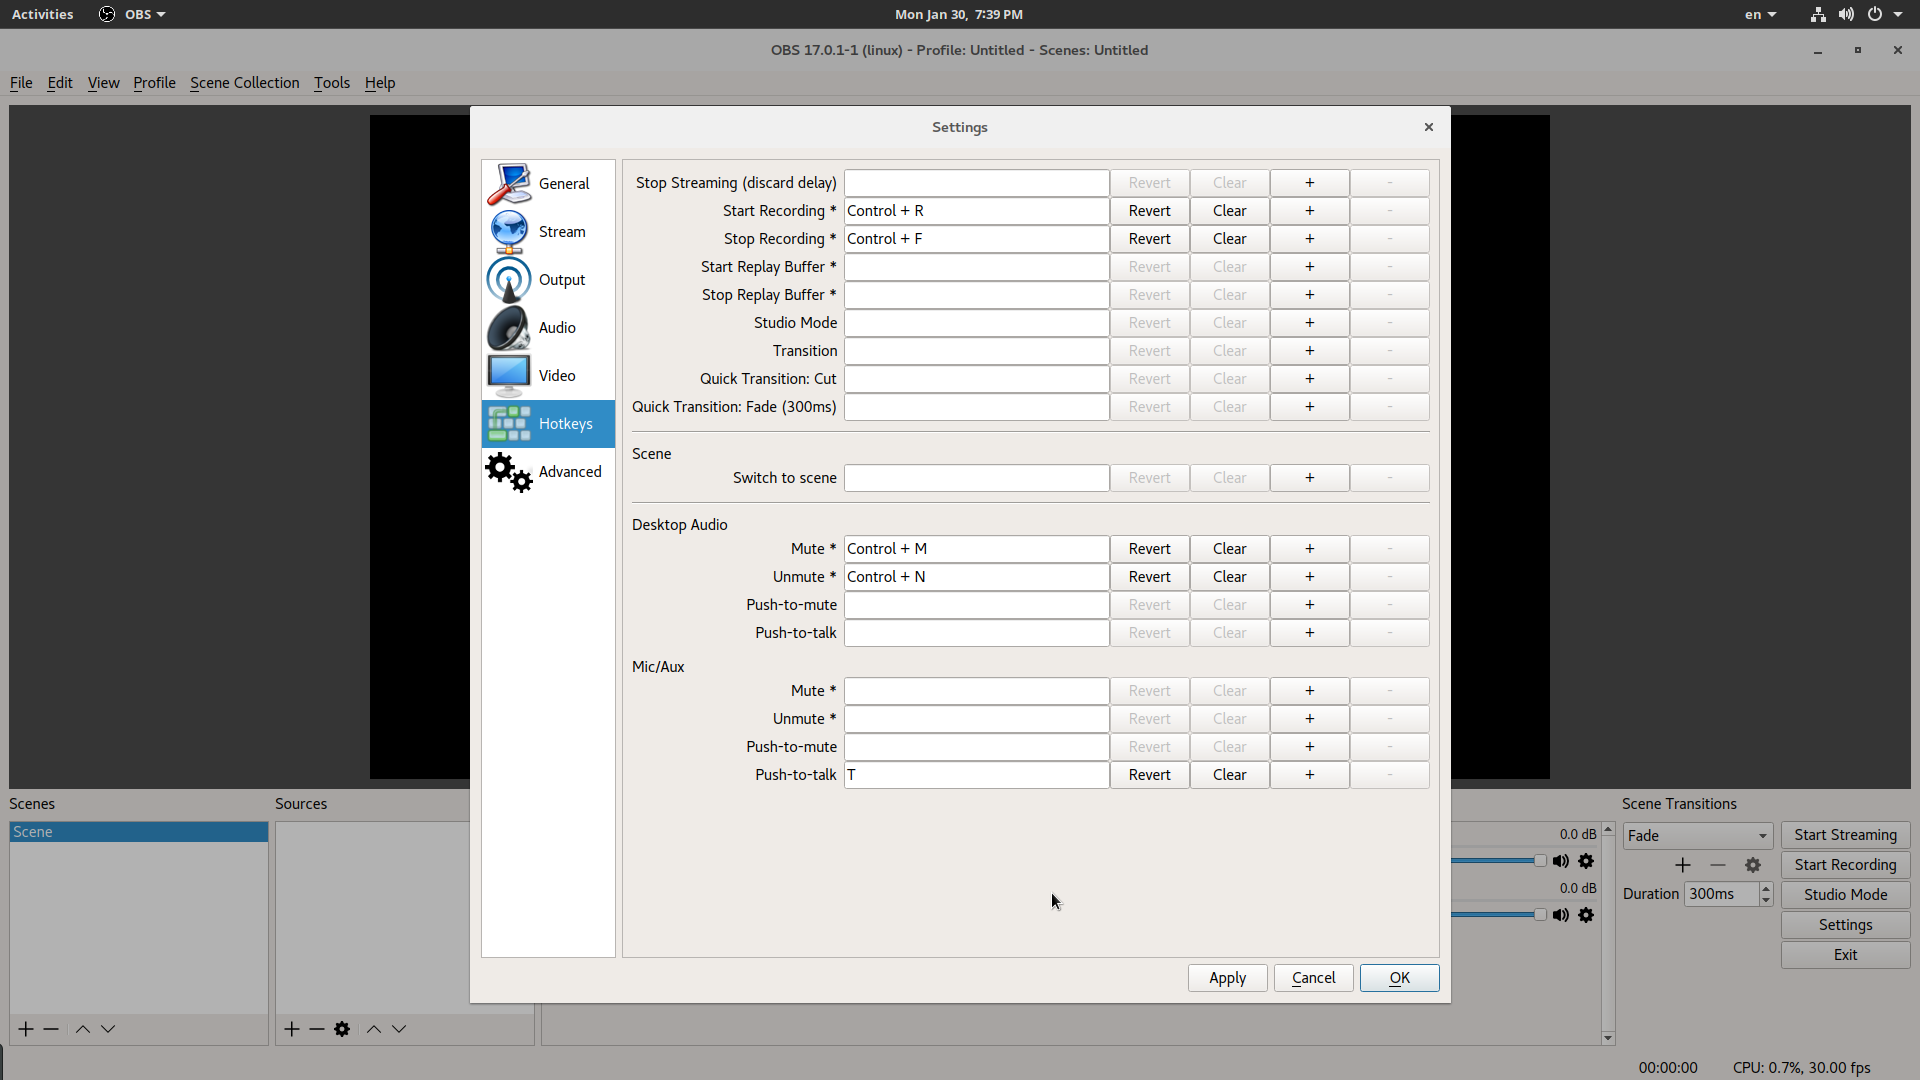
You may also want to bind hotkeys for the starting, pausing, and stopping of a recording. This is especially useful since you will be seeing your game’s screen while recording. To do this, choose the “Hotkeys” section in the settings and assign the keys that you want in the corresponding boxes. Of course, you don’t have to fill out every box, only the ones you need.
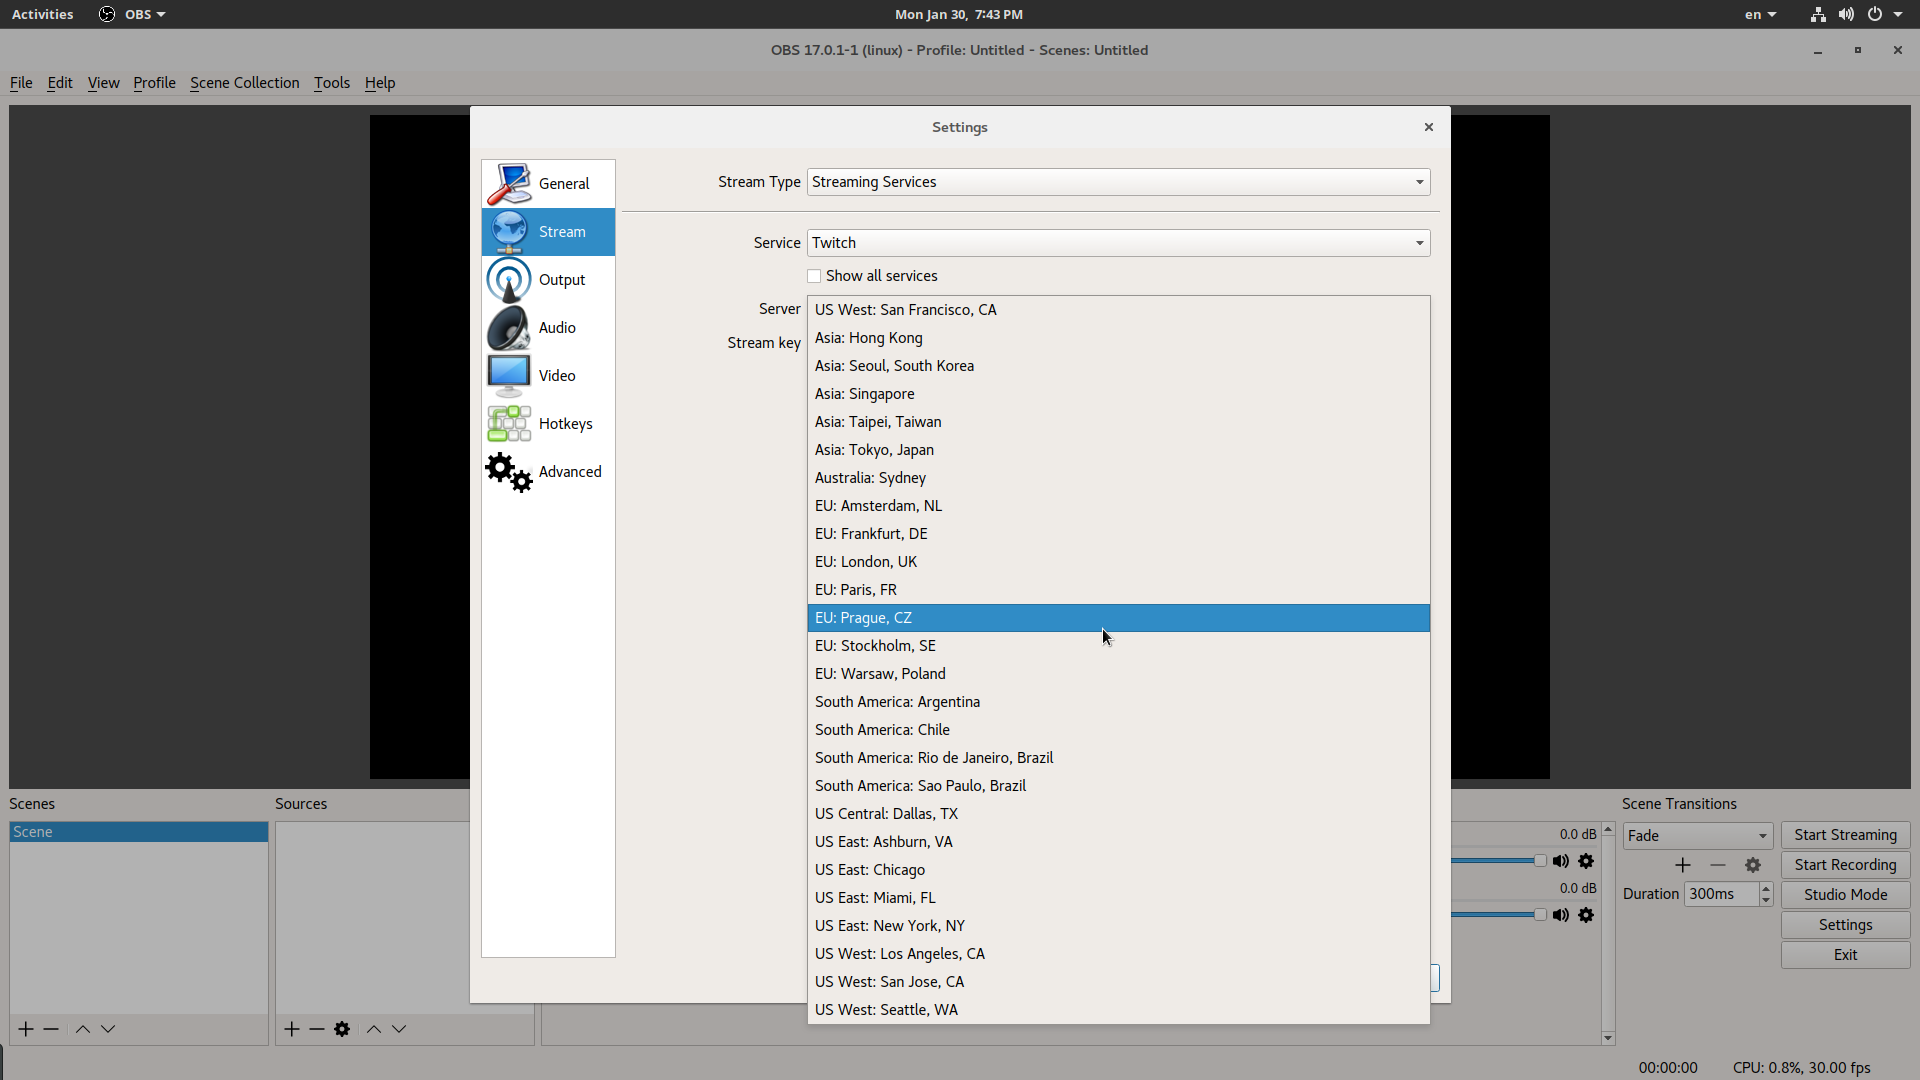
If you are interested in streaming and not just recording, then select the “Stream” category of settings and then you may select the streaming service among the 30 that are supported including Twitch, Facebook Live and Youtube, and then select a server and enter a stream key.
Setting up the sources
On the lower left, you will find a box entitled as “Sources”. There we press the plus sign button to add a new source that is essentially our recording media source. Here you can set audio and video sources, but images and even text as well.
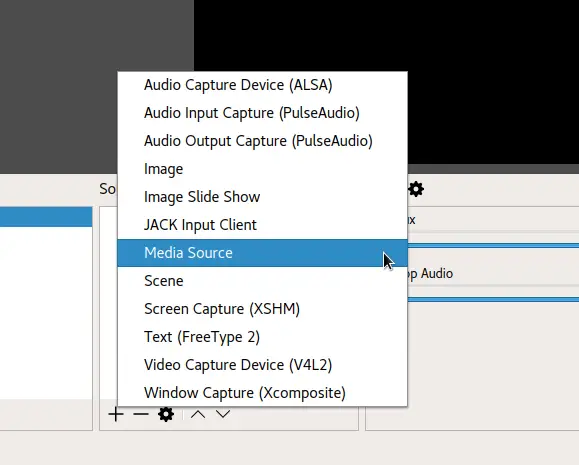
The first three concern audio sources, the next two images, the JACK option is for live audio capturing from an instrument, the Media Source is for the addition of a file, etc. What we are interested in for our purpose are the “Screen Capture (XSHM)”, the “Video Capture Device (V4L2)”, and the “Window Capture (Xcomposite) options.
The screen capture option let’s you select the screen that you want to capture (including the active one), so everything is recorded. Workspace changes, window minimizations, etc. It is a suitable option for a standard bulk recording that will get edited before getting released.
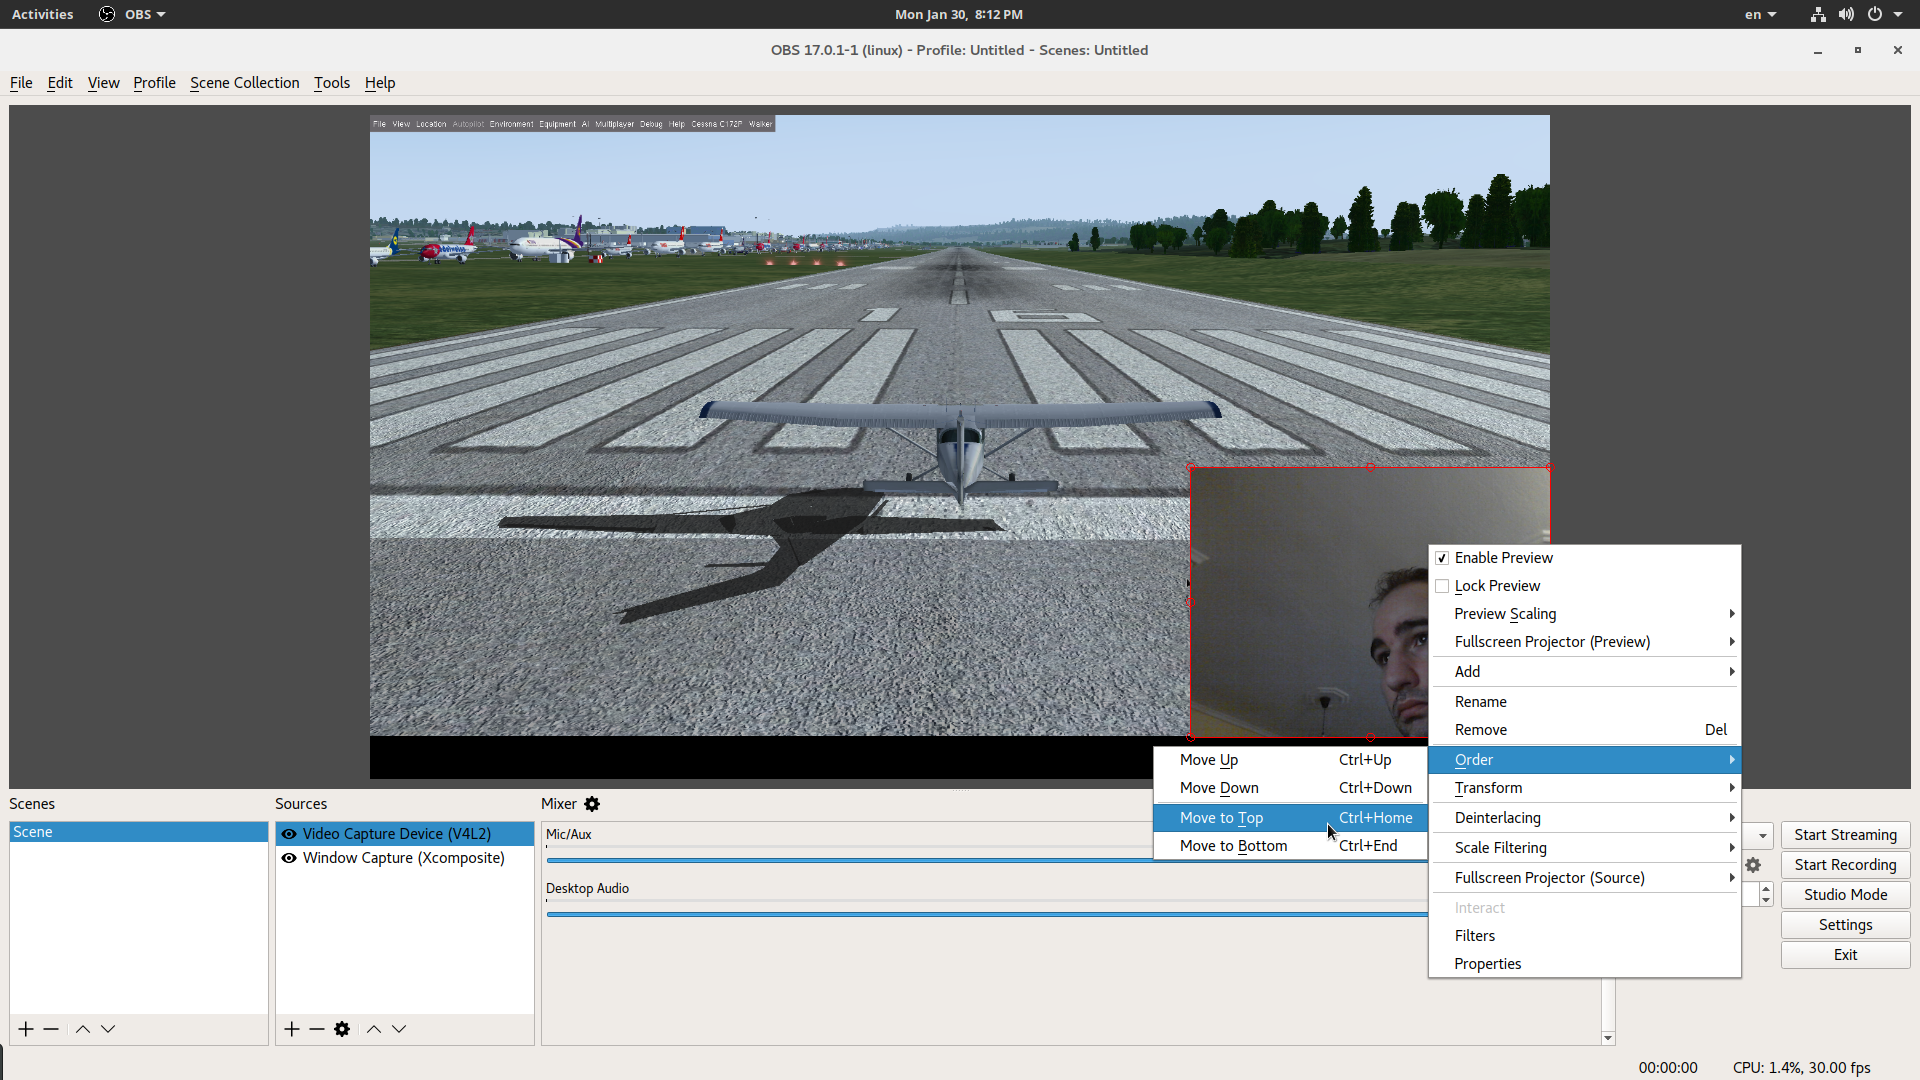
Let’s explore the other two. The Window Capture will let us select one of our active windows and put it into the capturing monitor. The Video Capture Device is useful in order to put our face right there on a corner so people can see us while we’re talking. Of course, each added source offers a set of options that we can fiddle with in order to achieve the result that we are after.

The added sources are re-sizable and also movable along the plane of the recording frame, so you may add multiple sources, arrange them as you like, and finally perform basic editing tasks by right-clicking on them.
Transitioning
Finally, let’s suppose that you are streaming your gaming session and you want to be able to rotate between the game view and yourself (or any other source). To do this, change to “Studio Mode” from the lower right and add a second scene with assigned another source assigned to it. You may also rotate between sources by unchecking the “Duplicate scene” and checking the “Duplicate sources” on the gear icon next to the “Transitions”. This is helpful for when you want to show your face only for short commentary, etc.
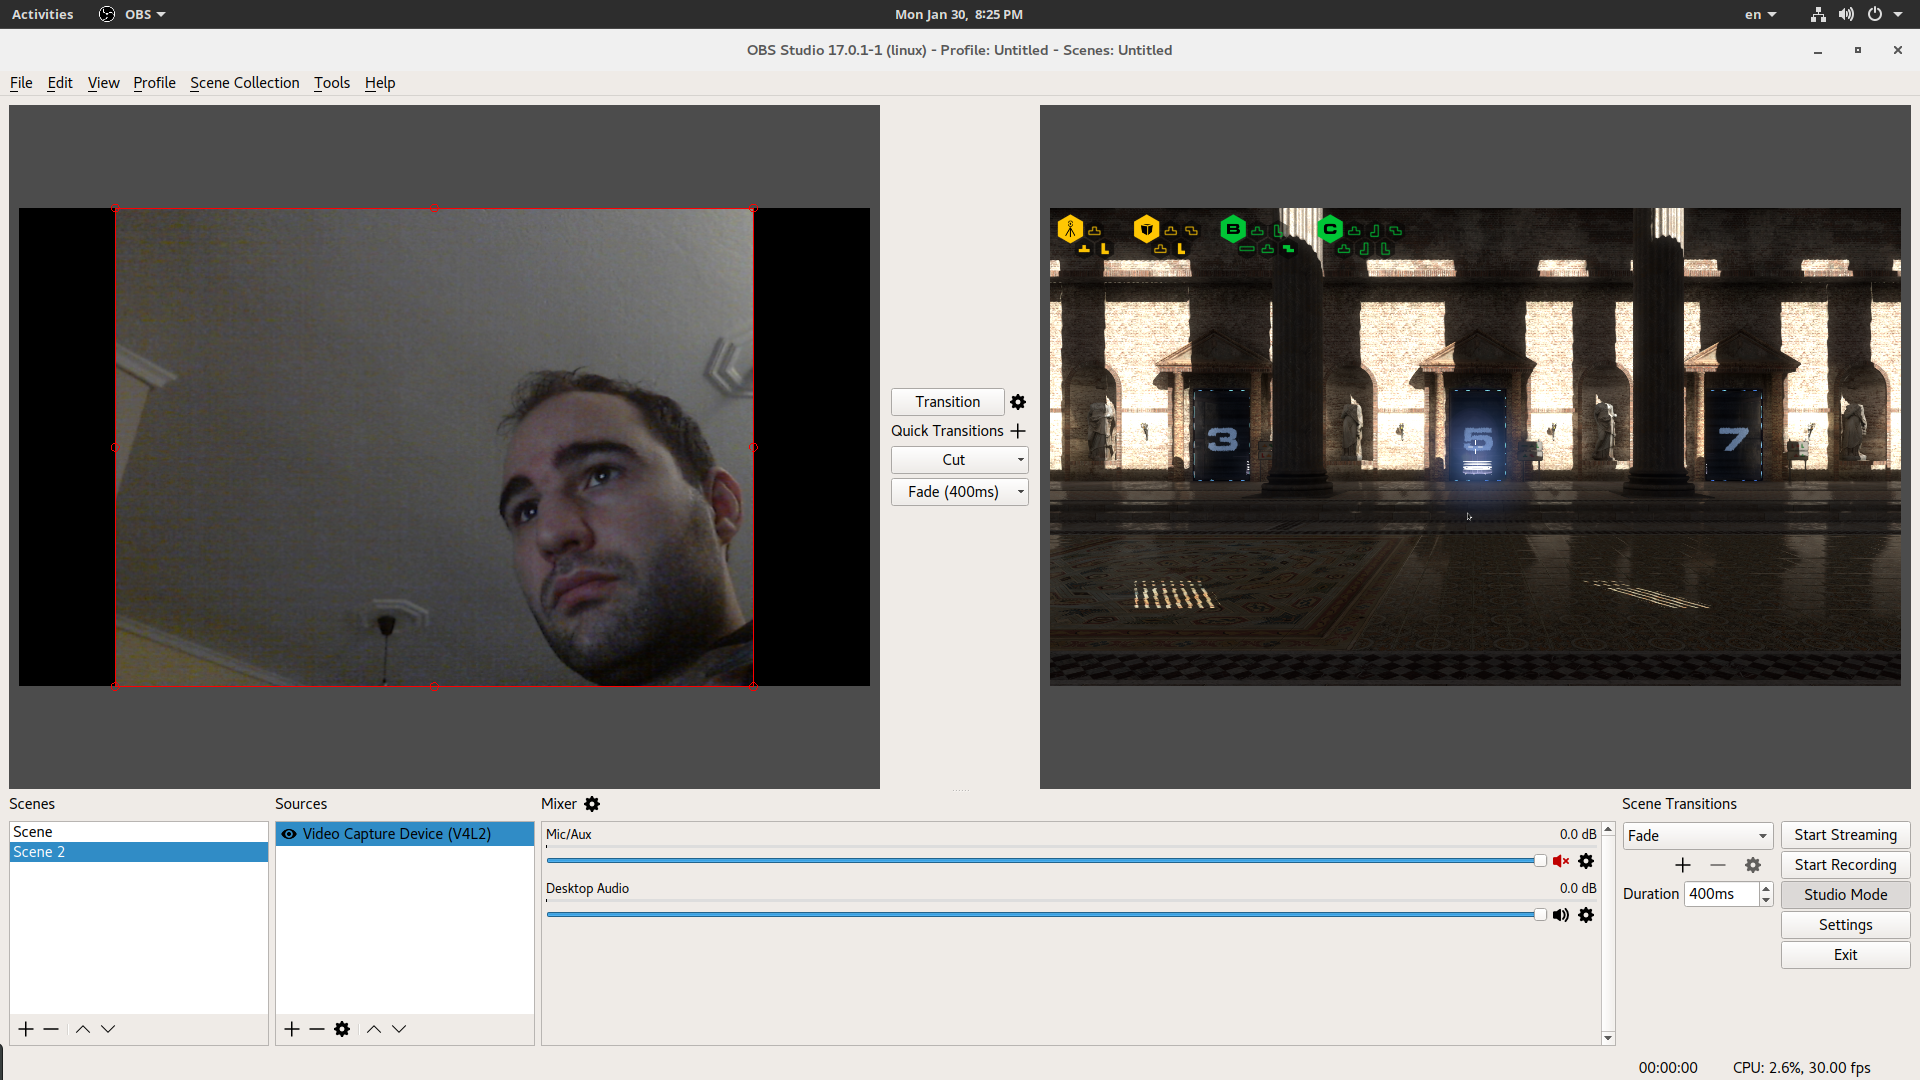
There are many transition effects available in this software and you may add more by pressing the plus sign icon next to “Quick Transitions” in the center. As you add them, you will also be prompt to set them.
Conclusion
The OBS Studio software is a powerful piece of free software that works stably, is fairly simple and straightforward to use, and has a growing set of additional plugins that extend its functionality. If you need to record and/or stream your gaming session on Linux, I can’t think of a better solution other than using OBS. What is your experience with this or other similar tools? Share in the comments and feel free to also include a video link that showcases your skills. :)

