


WordPress started as a simple blogging system, but has evolved into a reputable content management system. It’s also one of the most popular open source projects. Furthermore, it’s easy to set up WordPress on your Fedora system.
Install the packages
Fedora provides a set of pre-packaged software to make installation easy. Open a terminal, and at the command prompt, use sudo to install the following packages.
sudo dnf install @"Web Server" wordpress php-mysqlnd mariadb-server
This example assumes you’ll run the web and database servers on the same machine. This is often the case for students and developers alike.
Enable the web and database services to start at boot time, then start them immediately:
sudo systemctl enable httpd.service mariadb.service
sudo systemctl start httpd.service mariadb.service
Set up the database server
If this is your first use of MariaDB, you should create a password for your root user. Store it somewhere secure and safe, in case you forget it. Don’t use the system’s own root (administrator) password.
sudo mysqladmin -u root password
Next, create a database. You can host more than one WordPress site on a machine. Therefore, you may want to choose a distinctive name for yours. For instance, this example uses mywpsite. The -p switch prompts you for a password. You’ll need that, since you’ve added a password for root.
sudo mysqladmin create mywpsite -u root -p
Next, set up a special privileged user and password for the database. The web app uses these credentials to run. Use the standard mysql client program for this step. The -D mysql option attaches to the built-in mysql database where privileges are stored.
Your input is shown in boldface in the example below. Make sure to use a strong password and not password itself.
$ sudo mysql -D mysql -u root -p
Enter password:
Reading table information for completion of table and column names
You can turn off this feature to get a quicker startup with -A

Welcome to the MariaDB monitor.  Commands end with ; or \g.
Your MariaDB connection id is 6
Server version: 10.1.18-MariaDB MariaDB Server

Copyright (c) 2000, 2016, Oracle, MariaDB Corporation Ab and others.

Type 'help;' or '\h' for help. Type '\c' to clear the current input statement.

MariaDB [mysql]> GRANT ALL PRIVILEGES ON mywpsite.* TO 'sqluser'@'localhost' IDENTIFIED BY 'password';
Query OK, 0 rows affected (0.00 sec)

MariaDB [mysql]> FLUSH PRIVILEGES;
Query OK, 0 rows affected (0.01 sec)

MariaDB [mysql]> QUIT;
Bye
Set up the web server
Next, tune the SELinux parameters so the web server can perform necessary functions.
sudo setsebool -P httpd_can_network_connect_db=1
sudo setsebool -P httpd_can_sendmail=1
Next, edit the configuration file for the web server to allow connections. The file to edit is /etc/httpd/conf.d/wordpress.conf. Change the following line:
Require local
Instead, edit it as follows:
Require all granted
Next, configure your firewall so it allows traffic on port 80 (HTTP):
sudo firewall-cmd --add-service=http --permanent
sudo firewall-cmd --reload
Configure WordPress
Next, edit the /etc/wordpress/wp-config.php file. Provide the database settings needed so WordPress can use the database you provided. Here are the lines to change. Search for each and edit the required setting:
// ** MySQL settings - You can get this info from your web host ** //
/** The name of the database for WordPress */
define('DB_NAME', 'database_name_here');

/** MySQL database username */
define('DB_USER', 'username_here');

/** MySQL database password */
define('DB_PASSWORD', 'password_here');

/** MySQL hostname */
define('DB_HOST', 'localhost');
The DB_HOST setting should stay localhost if you’re serving the database on the same system as the web server.
Finally, restart the web server:
systemctl restart httpd
Visit the WordPress site
Next, you’re ready to configure the web app itself. Open a web browser on the system, or a connected system. Then browse to the IP address of your WordPress host, followed by /wordpress. For instance, your URL might be http://192.168.122.210/wordpress. If you’re on the same box, you can use http://localhost/wordpress. This step begins the setup process:
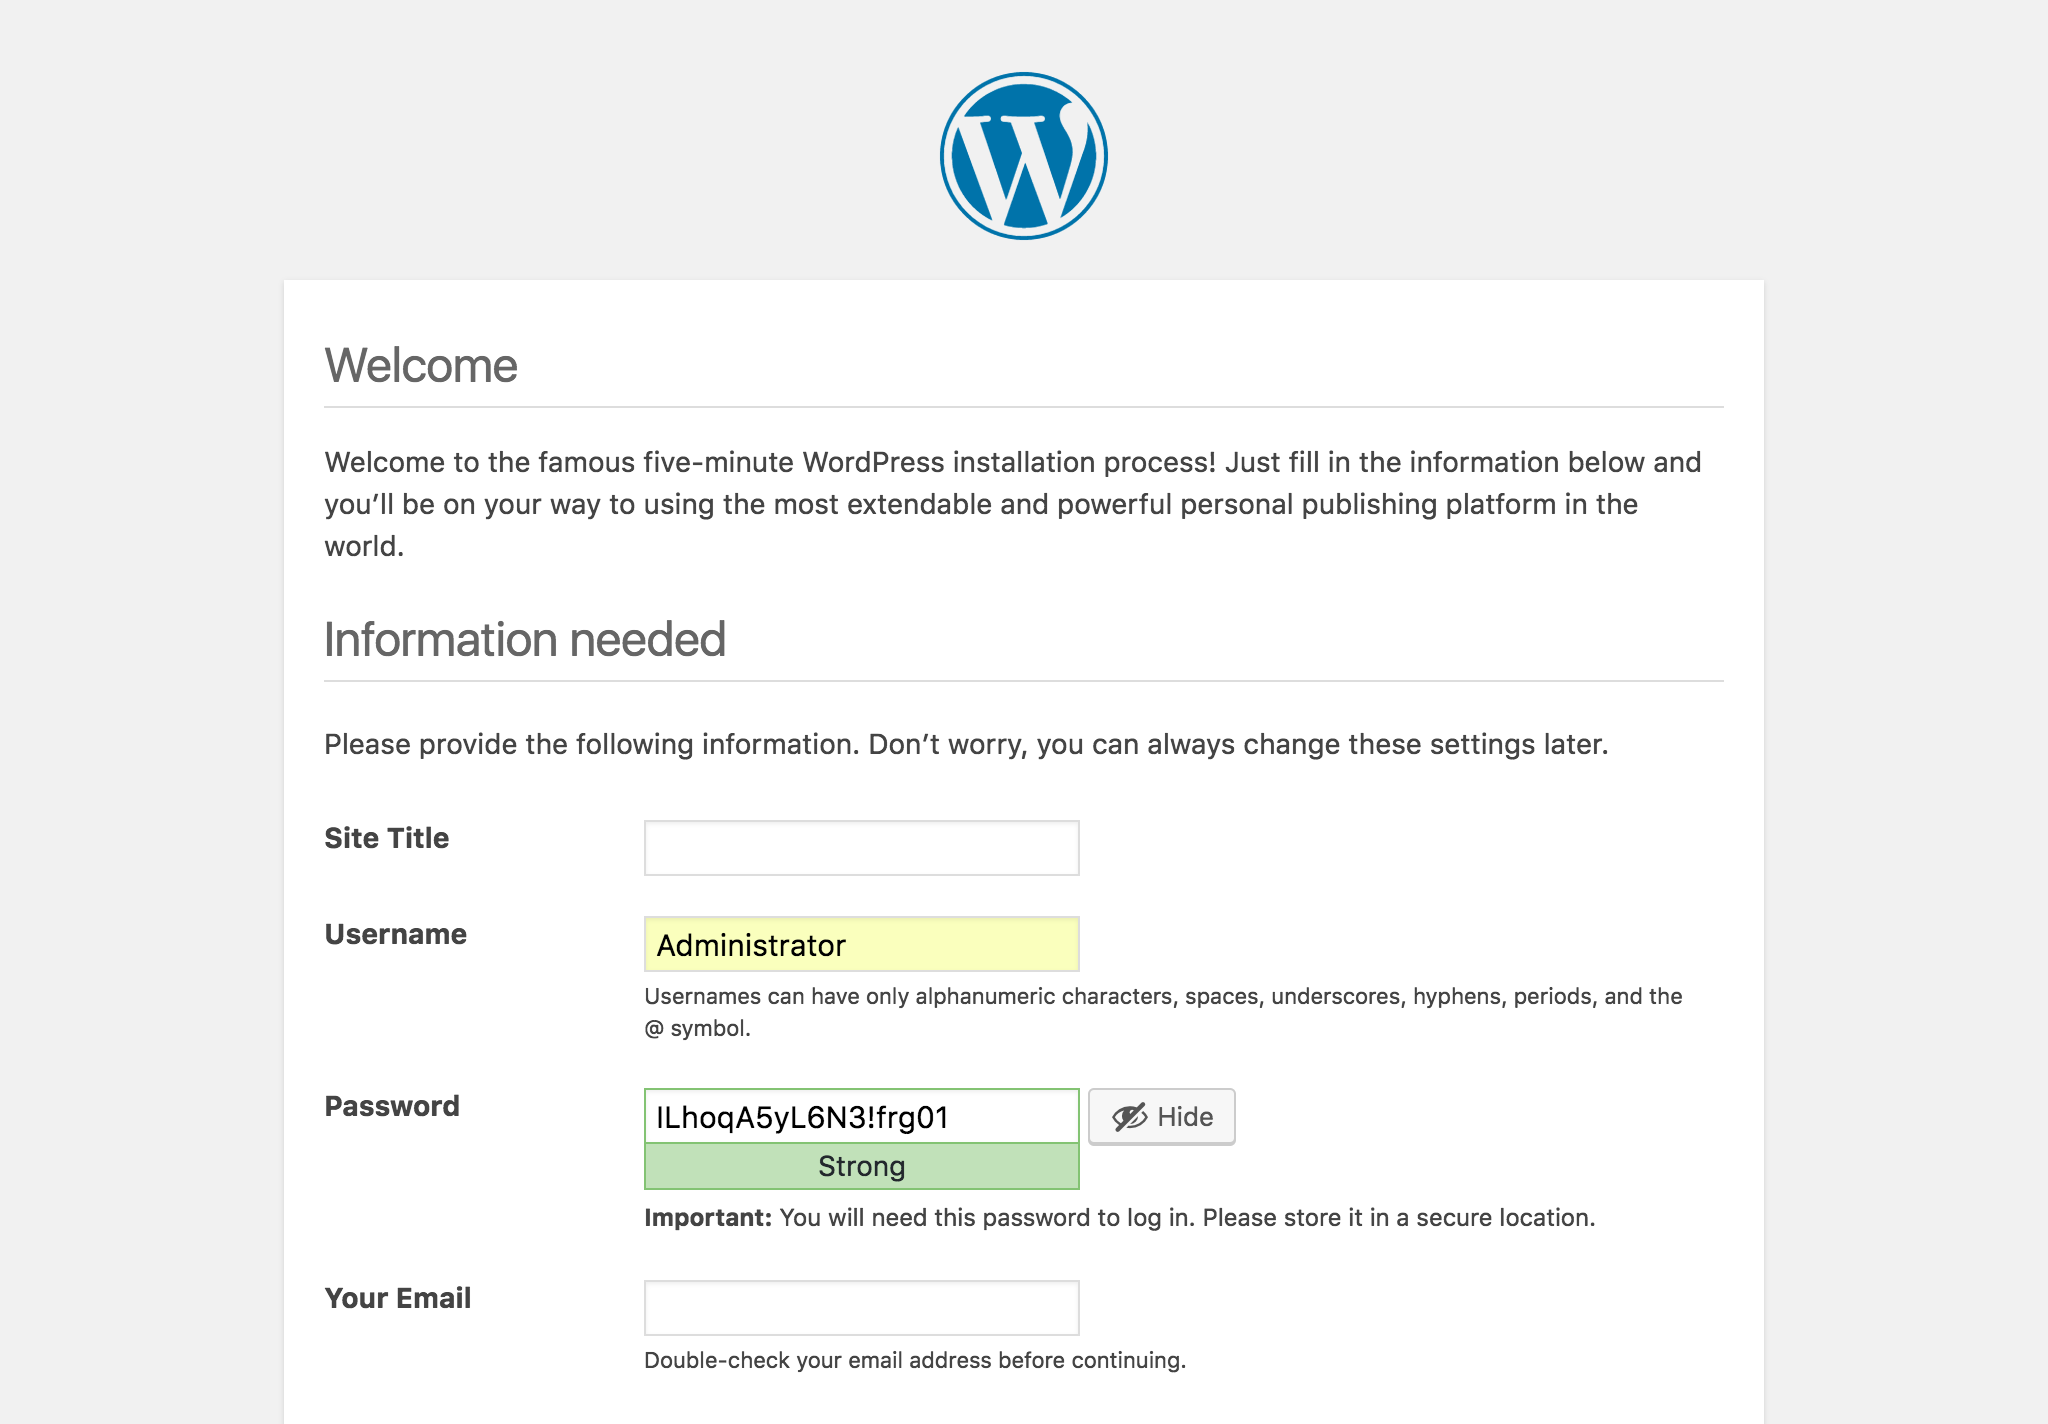
Fill out the information required. Remember to use a strong password for this account, since it has administrator access to the entire WordPress blog. Once done, select Install WordPress at the bottom.
A login screen appears so you can verify the WordPress username and password you just entered. Login, and the following screen appears:
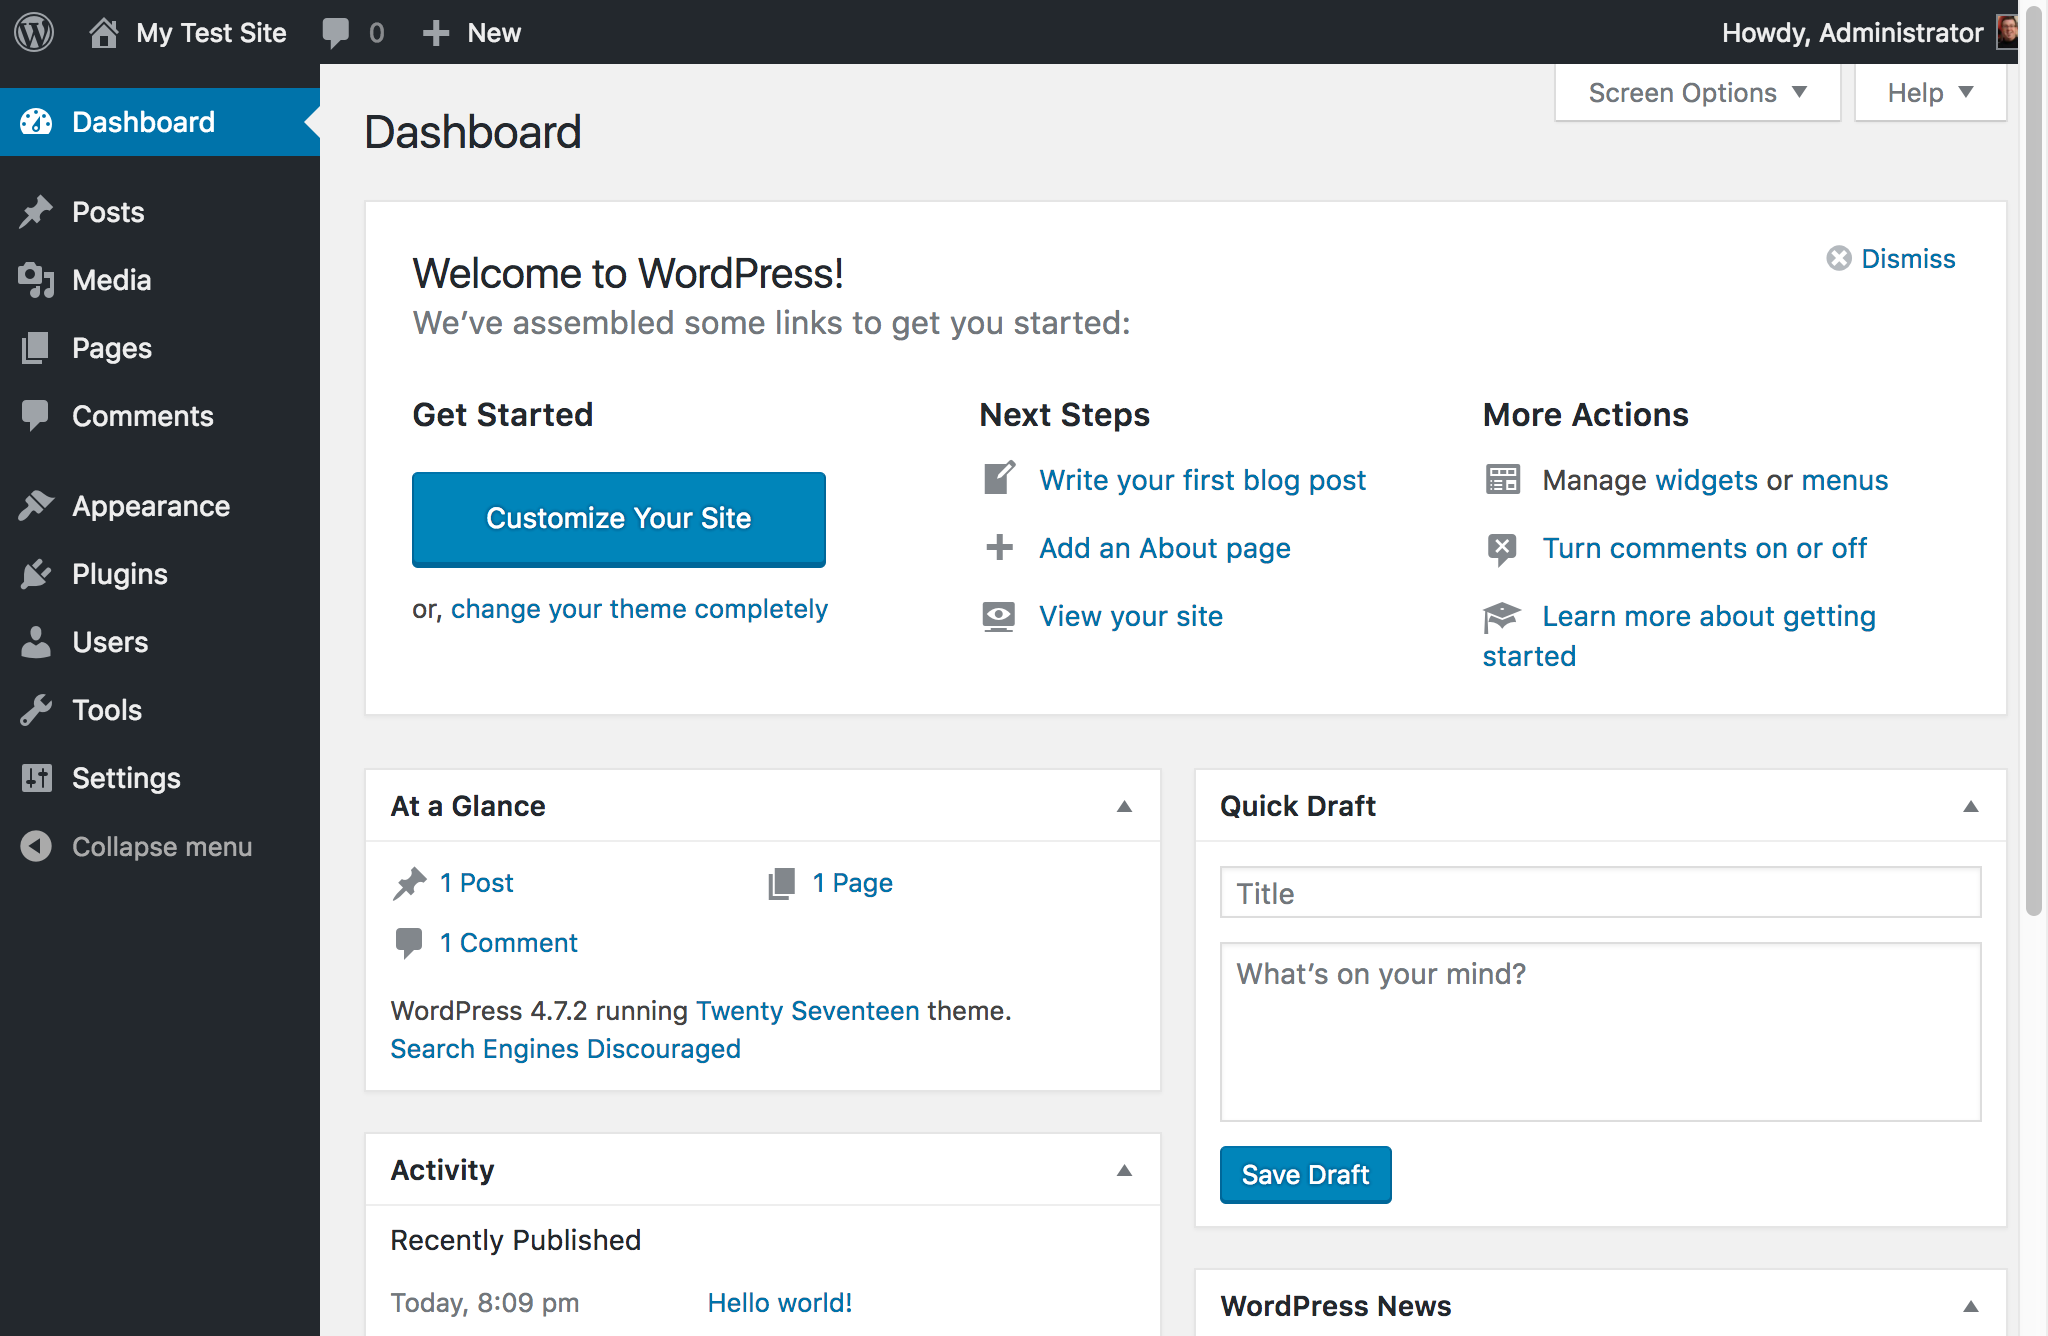
You’re now ready to create content. There are thousands of themes and plugins available to customize your site. For more information on how to proceed, visit the WordPress website.

Richzendy
Hi! thank you for sharing your tutorial, today i prefer use vagrant to install wordpress, actually i use the http://vccw.cc/ vagrant machine but is ubuntu, will be nice to have some similar but with Fedora / Vagrant.
Adam Williamson
Please also consider not installing WordPress, unless you really need a big dynamic CMS. If all you want to to do is run a simple blog, strongly consider using a static site generator like Pelican instead, as it’s less maintenance work and much, much less prone to security issues than a big complex PHP app.
Mark
I strongly agree with this statement.
WordPress is a mess to manage, let alone all the vulnerabilities that are left open from slightly outdated versions. Github will host your statically generated site for free, and will generate sites based on Jekyll for you too 😀
Ed
It doesn’t really need to be a “big” website.
For production usage WordPress is perfect, and a fresh installation of it is lightweight enough.
Adam Williamson
Size isn’t the problem, the problem is that WordPress is written in PHP – a language with a notorious history of security issues – and has all kinds of complex CMS features you don’t actually need to run a personal site, all of which introduce potential avenues for security vulnerabilities. It is also one of the most commonly attacked pieces of software on the internet precisely because it’s so widely used.
linuxmodder
And piggybacking off Adam’s comment. While installing on the same host/machine may be common it’s also the BIGGEST single mistake security wise most users make as if the host or the database is compromised it’ a simple escalation to own the whole thing.
Patrick Mumo
The bit about configuring the firewall to enable access to the local site on the LAN, I found out specifying the zone is what gets the desired result like thus:
firewall-cmd –permanent –zone=public –add-service=http
NB: determine the zone from active connections using the command:
firewall-cmd –get-active-zones
To undo the command from this how to:
firewall-cmd –remove-service=http –permanent
José Monteiro
I have successfully installed WordPress by these instructions, but, after logging in, Appearance –> Themes does not show an “Add New Theme” option.
So, I can not install a zipped theme I have.
Is it a bug or did I do something wrong?
Thanks for any help.
Eduardo Silva
I installed by the instructions, and also don’t see that option… don’t know why it’s not there either
Eduardo Silva
Anyway, a work around is extracting the theme’s zip then copy its folder to
/nas/content/live/fedoramag/wp-content/themes/
and then making a change to SELinux:
sudo setsebool -P httpd_read_user_content 1
Though I don’t know how unwise this last step is security-wise.
Adam Williamson
It’s better to run ‘restorecon -vr’ on the theme directory (or on all of wp-content if you like). That should apply correct SELinux contexts to the files. httpd_read_user_content is not usually a good idea.
Artemis
You just need to apply the proper label to the wordpress directory. Here’s how you do it:
#First, let’s get the current labels. It might be useful to know.
ls -Z /nas/content/live/fedoramag/wp-content
#Now we set the label on wordpress themes to something appropriate. httpd system content seems to fit the bill.
chcon -R -t httpd_sys_content_t /nas/content/live/fedoramag/wp-content/themes
#Now we make a file context rule, so our work doesn’t get blown away if we need to relabel.
#Alternatively, we could do this first and use restorecon to set the labels, but using chcon first allows us to test the label first.
semanage fcontext -a -t httpd_sys_content_t /nas/content/live/fedoramag/wp-content/themes
Arcturus
That sounds like a labelling issue. What do you get when you ls -Z the themes directory?
Pierre
It helps to edit the file wp-config.php and change the following lines:
/* Disable all file change, as RPM base installation are read-only */
define(‘DISALLOW_FILE_MODS’, false);
/* Disable automatic updater, in case you want to allow
above FILE_MODS for plugins, themes, … */
define(‘AUTOMATIC_UPDATER_DISABLED’, true);
Ashesh
Where will the theme folder be after installation?