
Chance are, you have a database or two, running on one or more Linux systems, that has become crucial to your business or job. If you happen to be a Linux administrator, the likelihood of those databases being of the MySQL sort is pretty high. With such a priority placed on information, what are you doing to ensure those databases are backed up? You could be running bare metal backups (which is always smart). But what if you need to have a separate, automated backup of your databases? If that sounds like your situation, you only need turn to Backupninja.
Backupninja is a very handy tool that allows for coordinated system backups by simply adding simple configuration files into the /etc/backup.d/ directory. Backupninja can work with:
-
MySQL
-
maildir
-
Makecd
-
PostgreSQL
-
rdiff
-
rsync
I want to demonstrate to you how easy it is to install Backupninja and configure an automated MySQL database backup. I’ll be demonstrating this process on a Ubuntu 16.04 Server platform, but know that the software can be installed from source or from Git. It should be noted that Backupninja has not been updated for some time now; however, the tool works exactly as expected (even on the latest releases of your favorite distribution).
With that said, let’s get Backupninja up and running on Ubuntu.
Installation
The installation of Backupninja, on Ubuntu (and other Debian-based distributions), is very simple. Open up a terminal window and issue the following commands:
sudo apt-get update

sudo apt-get install backupninja
You could also run sudo apt-get upgrade before running the installation command. I tend to like upgrading a system before installing. However, if your machine is a production server, and you tend to schedule upgrades, hold off on that command. The installation command for Backupninja will install a few dependencies, including:
-
bsd-mailx
-
dialog
-
liblockfile-bin
-
liblockfile1
-
postfix
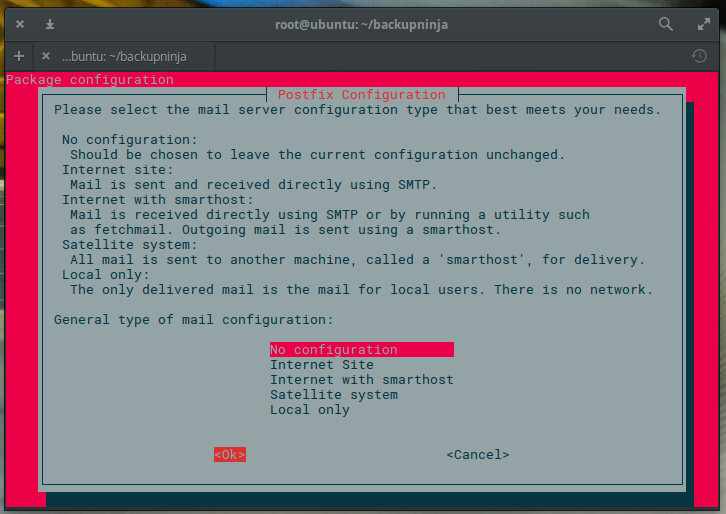
Allow those dependencies; otherwise, the installation will fail. During the installation you will be required to select the mail server configuration type. This is for the delivery of Backupninja reports. If you don’t want this server to function as an SMTP server, select either No configuration or Local only, when prompted (Figure 1).
With the software installed, you’re ready to configure.
Configuring Backupninja
Remember, earlier, when I mentioned all you had to do was drop a configuration file into the /etc/backup.d directory? That seems to imply you would have to manually create that configuration file. You don’t. Backupninja includes a very handy setup wizard that will walk you through the configuration of your automated backup.
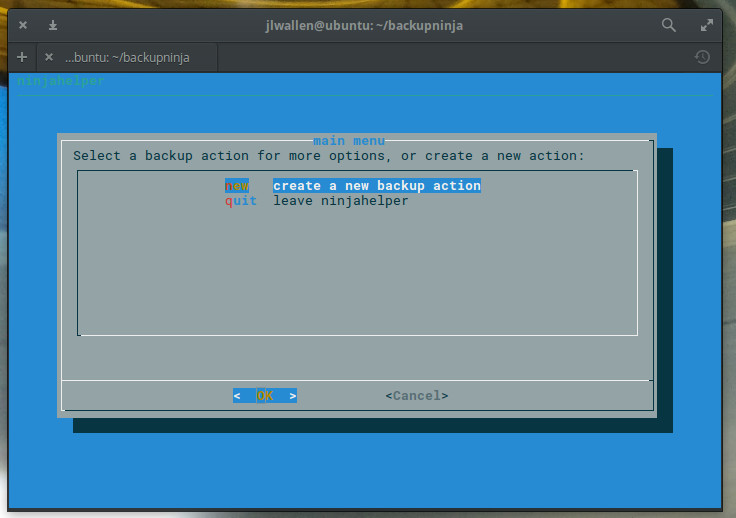
To start the Backupninja wizard, issue the command sudo ninjahelper. The wizard is an ncurses tool that will ask you a few simple questions. The first question (Figure 2), is straightforward; select new and tab down to OK. Hit Enter on your keyboard and you’re ready to configure your backup.
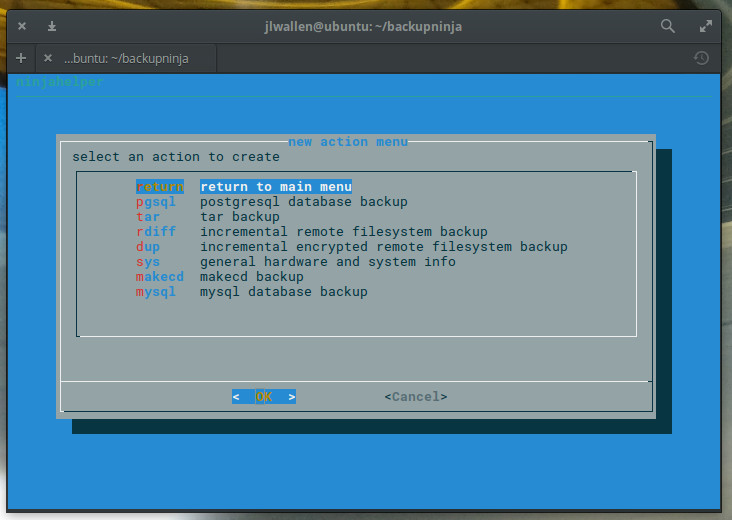
Since we’re going to be backing up MySQL database(s), select mysql in the next window (Figure 3), tab down to OK, and hit Enter on your keyboard.
In the next window, enter the directory that will store the backups. By default, these will be in /var/backups/mysql. You can place these backups anywhere on your system (even an externally attached drive). Type the full path to house the backups, tab down to OK, and hit Enter on your keyboard.
Now you have to decide if you want to backup all of your databases or choose individual databases. This is important. If you have multiple large databases, your best bet is to create backup jobs for individual databases. If your databases aren’t all that large (or you only have one database to backup), select Yes and hit Enter on your keyboard. If you choose to backup individual databases, you will have to enter the names of each database to be backed up in the next screen (Figure 4).
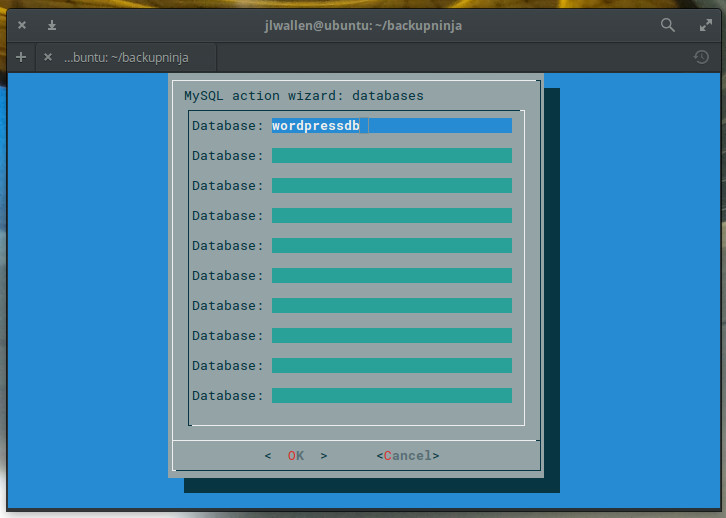
Once you’ve typed out all the names of the databases to be backed up, tab down to OK and hit Enter on your keyboard.
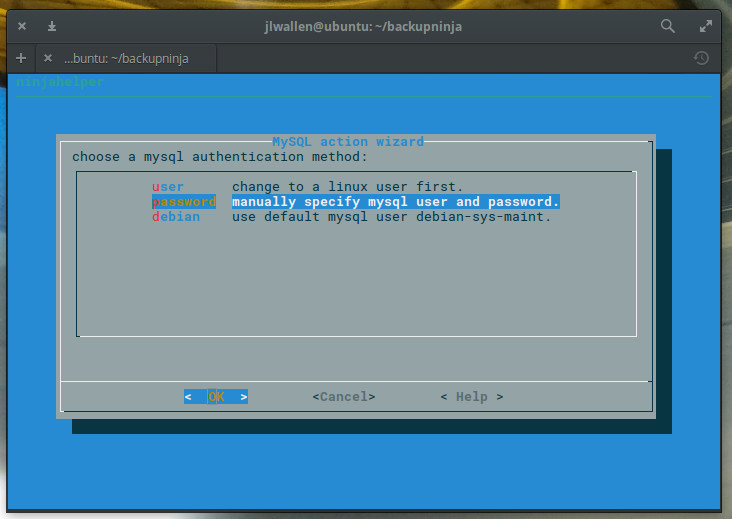
The next window requires you to select a MySQL authentication method (Figure 5). The simplest method is password. Select that, tab down to OK, and hit Enter on your keyboard.
In the resulting window, enter your MySQL admin password, tab down to OK, and hit Enter. You will have to verify the password in the same manner.
Now you can select one of three options for your backup:
-
sqldump – Create the backup using mysqldump
-
hotcopy – Create the backup using mysqlhotcopy
-
compress – Compress the backup files
I would suggest enabling both sqldump and compress (especially if you’re databases are large). Select those two options by using the cursor keys to highlight the option and tapping the spacebar to enable. Tab down to OK and hit Enter on your keyboard.
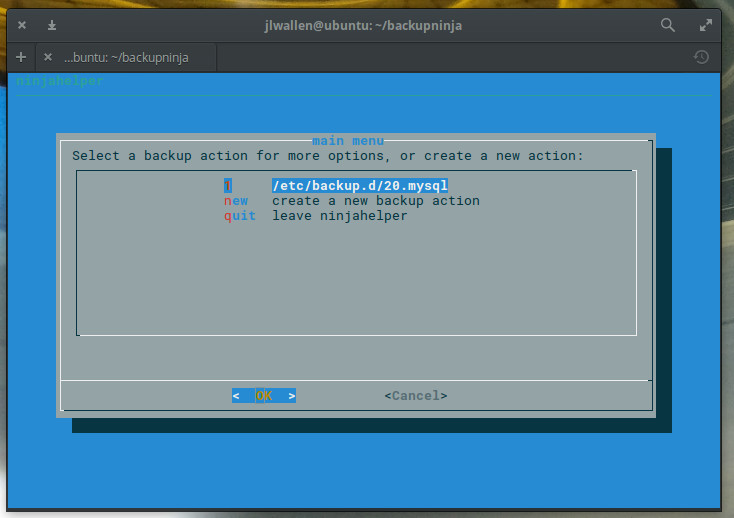
Finally, you must select an action for the backup. By default, backupninja will assign a number to the backup you are creating (lowest executed first). If you already have a backup in place, it will select the next number (e.g., 10, 20, 30, 40, etc.) and apply it to the backup. Select the default (Figure 6), tab down to OK, and hit Enter on your keyboard (this action serves to save your backup).
Your backup is saved and will begin running.
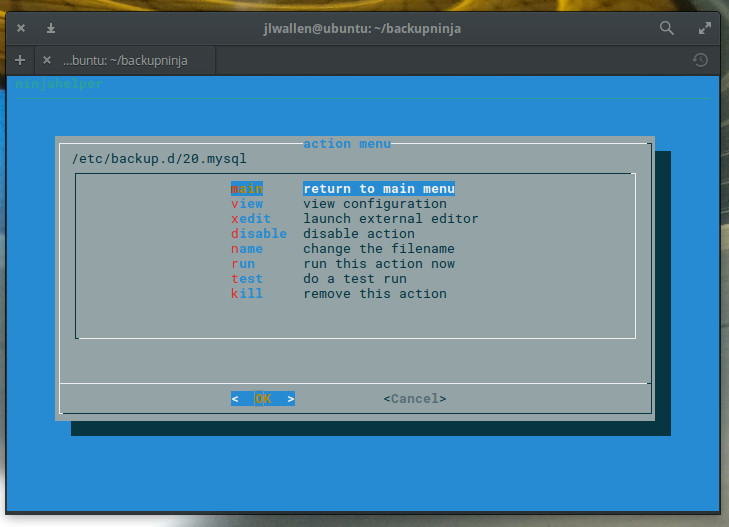
In the next window, you can opt to return to the main menu or view/edit/run/test/disable the configuration of the backup you just created. To make sure the backup you created is good to go, select either test or run (Figure 7) and await the results.
Quick and easy database backups
You’d be hard pressed to find an easier way to setup an automated database backup than with Backupninja. Yes, you could always script a more flexible backup; but if you don’t want to bother with manually creating a Bash script/cron job to handle this task, Backupninja is an outstanding alternative.
Learn more about Linux through the free “Introduction to Linux” course from The Linux Foundation and edX.


