How To Install Gibbon on Ubuntu 16.04
This tutorial exists for these OS versions
- Ubuntu 20.04 (Focal Fossa)
- Ubuntu 16.04 (Xenial Xerus)
On this page
Gibbon is a free and open source web-based Educational Management system that can be used to solve teachers and students daily problems. Gibbon is very flexible, extensible and themable application with many features, including online application forms, messenger, planner, external assessment, and much more. Gibbon helps teachers to easily understand each student's ups and downs in each subject, and they can help the students in every possible way. Gibbon comes with lots of modules that are used to extend functionality that is commonly required in schools of different kinds. You can easily turn on or off each module as per your requirements.
In this tutorial, we will go through step by step installation of Gibbon on Ubuntu 16.04 server.
Requirements
- Ubuntu 16.04 server installed on your system.
- Static IP address 192.168.15.189 setup on your server
- Non root user with sudo user setup on your server.
Update Base System
Before installing Gibbon, it is recommended to update your system with the latest stable version. You can do this by running the following command:
sudo apt-get update -y
sudo apt-get upgrade -y
Once your system is updated, restart the system and login with sudo user.
Install Apache Web Server
Apache web server is required to install Gibbon. You can easily install Apache and other required libraries by running the following command:
sudo apt-get install apache2 apache2-bin libapache2-mod-php7.0 -y
Once Apache web server is installed, start apache service and enable it to start on boot time with the following command:
sudo systemctl start apache2
sudo systemctl enable apache2
Once you are done, you can proceed to install PHP.
Install PHP
Gibbon also requires PHP and other PHP libraries. You can install all of them by running the following command:
sudo apt-get install php7.0 php7.0-mcrypt php7.0-curl php7.0-gd php7.0-json php7.0-mysql php7.0-xml php7.0-zip -y
After installing PHP, you will need to tweak PHP settings. You can do this by editing php.ini file:
sudo nano /etc/php/7.0/cli/php.ini
Make the following changes:
file_uploads = On
allow_url_fopen = On
dispaly_errors = Off
error_reporting = E_ALL & ~E_NOTICE
register_globals = off
magic_quotes_gpc = Off
set max_input_vars = 4000
Save and close the file when you are finished.
Install and Configure MariaDB
Next, MariaDB is required to store database of Gibbon. You can install it by running the following command:
sudo apt-get install mariadb-server mariadb-client -y
After installing MariaDB, you will need to secure it first. You can secure it by running the following command:
sudo mysql_secure_installation
Answer all the questions as shown below:
NOTE: RUNNING ALL PARTS OF THIS SCRIPT IS RECOMMENDED FOR ALL MariaDB
      SERVERS IN PRODUCTION USE!  PLEASE READ EACH STEP CAREFULLY!

In order to log into MariaDB to secure it, we'll need the current
password for the root user.  If you've just installed MariaDB, and
you haven't set the root password yet, the password will be blank,
so you should just press enter here.

Enter current password for root (enter for none):
OK, successfully used password, moving on...

Setting the root password ensures that nobody can log into the MariaDB
root user without the proper authorisation.

You already have a root password set, so you can safely answer 'n'.

Change the root password? [Y/n] n

 ... skipping.

By default, a MariaDB installation has an anonymous user, allowing anyone
to log into MariaDB without having to have a user account created for
them.  This is intended only for testing, and to make the installation
go a bit smoother.  You should remove them before moving into a
production environment.

Remove anonymous users? [Y/n] Y
 ... Success!

Normally, root should only be allowed to connect from 'localhost'.  This
ensures that someone cannot guess at the root password from the network.

Disallow root login remotely? [Y/n] Y
 ... Success!

By default, MariaDB comes with a database named 'test' that anyone can
access.  This is also intended only for testing, and should be removed
before moving into a production environment.

Remove test database and access to it? [Y/n] Y
 - Dropping test database...
 ... Success!
 - Removing privileges on test database...
 ... Success!

Reloading the privilege tables will ensure that all changes made so far
will take effect immediately.

Reload privilege tables now? [Y/n] Y
 ... Success!

Cleaning up...

All done!  If you've completed all of the above steps, your MariaDB
installation should now be secure.

Thanks for using MariaDB!
Once the MariaDB is secured, login to MariaDB console with the following command:
mysql -u root -p
Enter your root password and create a database for Gibbon with the following command:
MariaDB [(none)]>CREATE DATABASE gibbon_db;
After creating database for Gibbon, create a username, and password with the following command:
MariaDB [(none)]>CREATE USER 'gibbon'@'localhost' IDENTIFIED BY 'password';
Next, grant privileges to the Gibbon database with the following command:
MariaDB [(none)]>GRANT ALL PRIVILEGES ON gibbon_db.* TO 'gibbon'@'localhost';
Next, run the FLUSH PRIVILEGES command so that the privileges table will be reloaded by MariaDB and we can use new credential:
MariaDB [(none)]>FLUSH PRIVILEGES;
Finally, exit from the MariaDB console with the following command:
MariaDB [(none)]>\q
Install Gibbon
You can download the latest version of the Gibbon from their official website. Run the following command to download it:
wget https://github.com/GibbonEdu/core/archive/v14.0.00.zip
After downloading Gibbon, extract the downloaded file with the following command:
unzip v14.0.00.zip
Next, move the extracted directory to the Apache web root directory:
sudo mv core-14.0.00 /var/www/html/gibbon
Next, you will need to change ownership of the gibbon directory and also give necessary permission to it:
sudo chown -R www-data:www-data /var/www/html/gibbon
sudo chmod -R 777 /var/www/html/gibbon
Next, you will need to create an Apache virtualhost file for Gibbon. You can do this by creating gibbon.conf file inside /etc/apache2/sites-available/ directory:
sudo nano /etc/apache2/sites-available/gibbon.conf
add the following lines:
<VirtualHost *:80>
ServerAdmin [email protected]
DocumentRoot "/var/www/html/gibbon/"
ServerName yourdomain.com
ServerAlias www.yourdomain.com
<<Directory "/var/www/html/gibbon/">
Options FollowSymLinks
AllowOverride All
Order allow,deny
allow from all
</Directory>
ErrorLog /var/log/apache2/gibbon-error_log
CustomLog /var/log/apache2/gibbon-access_log common
</VirtualHost>
Save and close the file when you are finished, then enable virtualhost file with the following command:
sudo a2ensite gibbon
Finally, restart apache2 service so it read the new virtualhost configuration:
sudo systemctl restart apache2
Access Gibbon Web Installation Wizard
Gibbon runs on port 80, so before accessing Gibbon you will need to allow port 80 through UFW firewall. By default, UFW firewall is disabled in Ubuntu 16.04, so you will need to enable it first.
sudo ufw enable
Then, allow port 80 through UFW firewall by running the following command:
sudo ufw allow 80
Once the firewall is configured, open your web browser and navigate to URL http://yourdomain.com, you will be redirected to the Gibbon web installation wizard as shown in the below image:
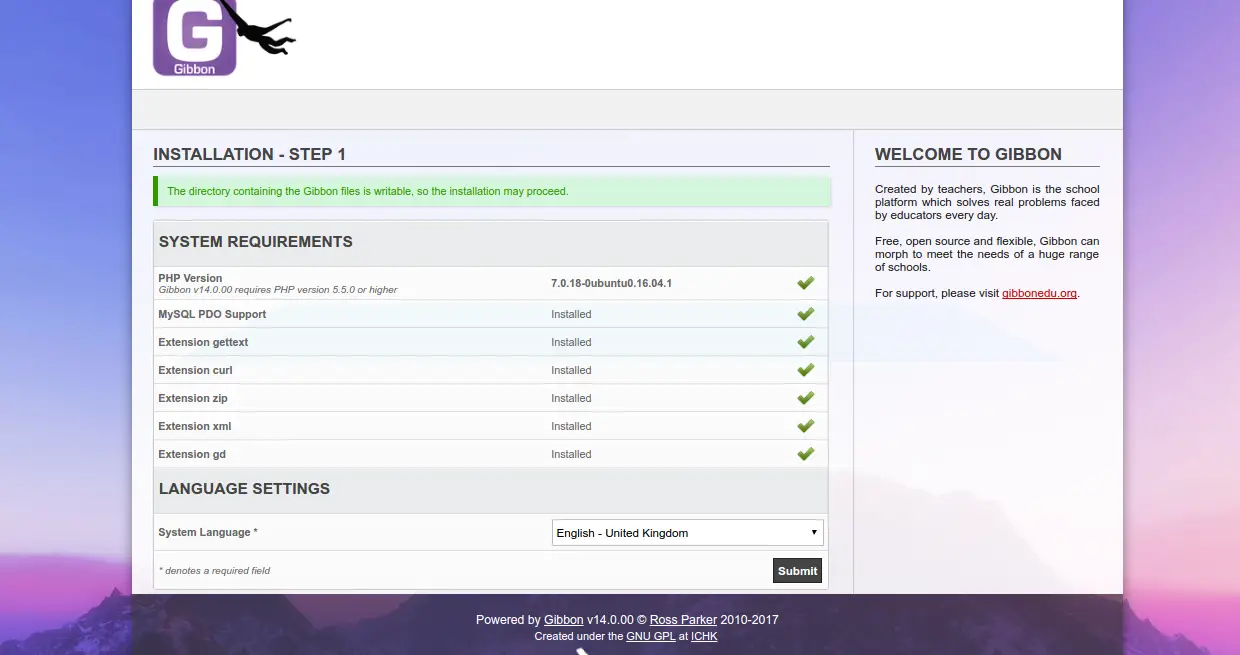
Here, check all the system requirements and select English as system language, then click on the Submit button, you should see the following image:
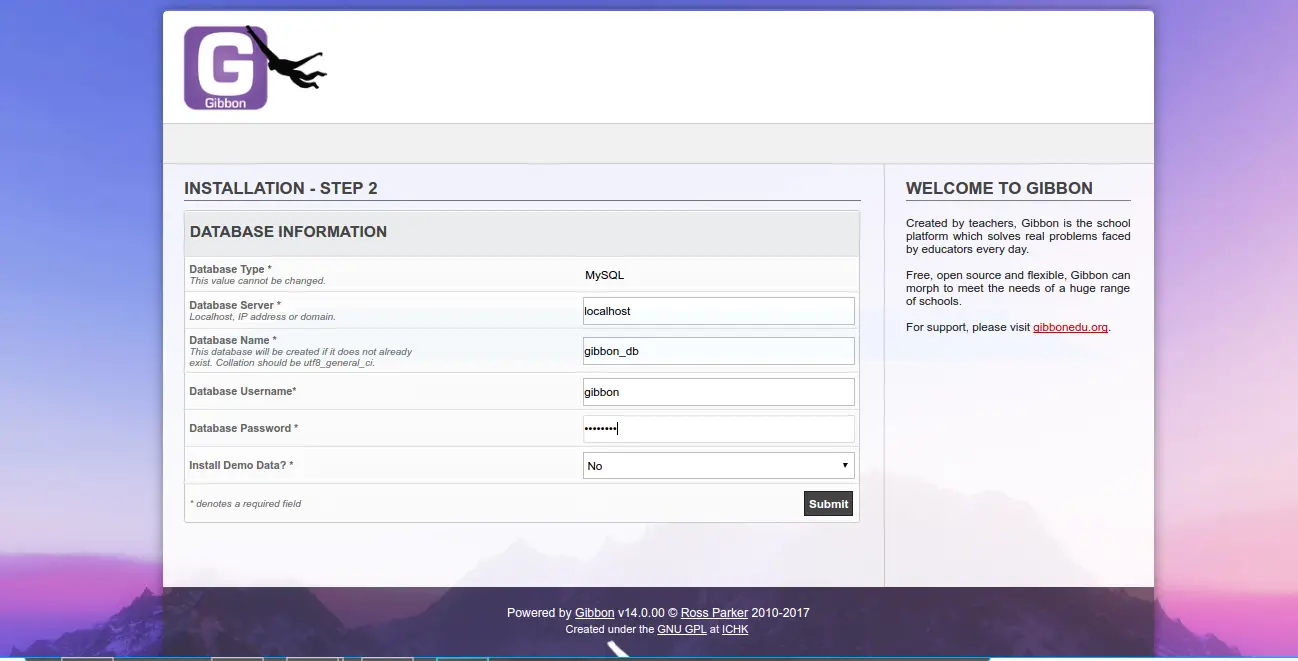
In the database configuration page, give database name, username, and password, then click on the Submit button, you should see the following page:
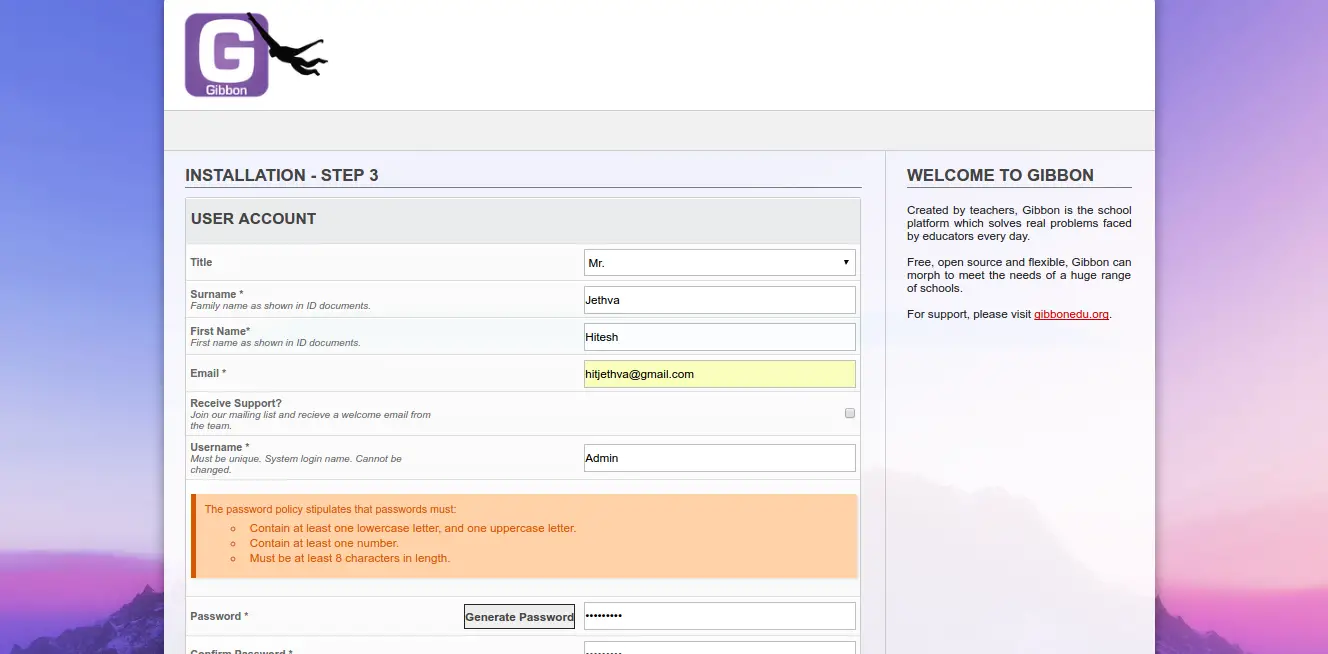
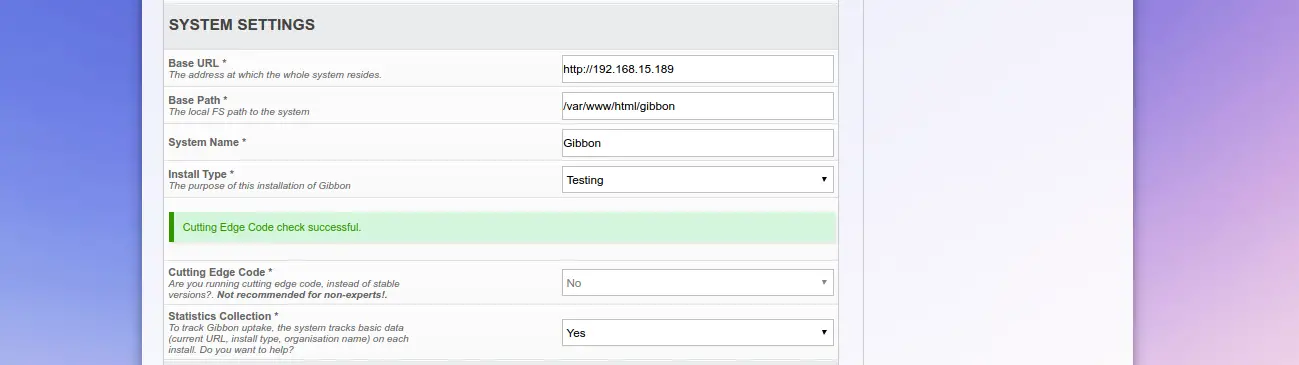
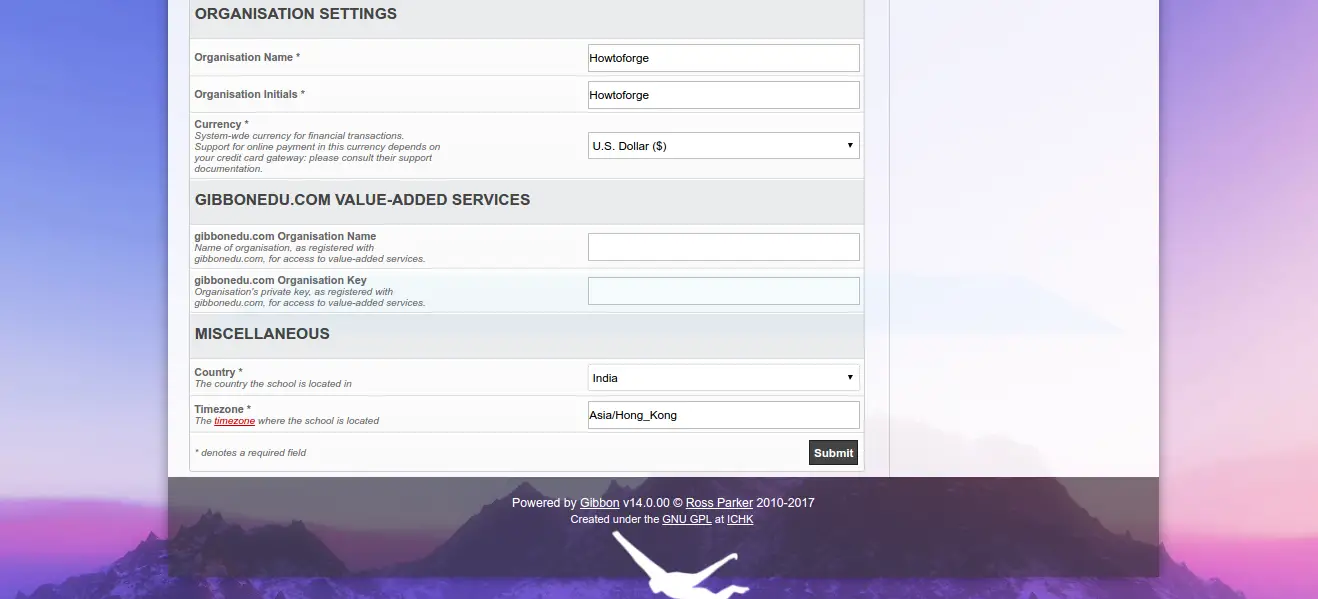
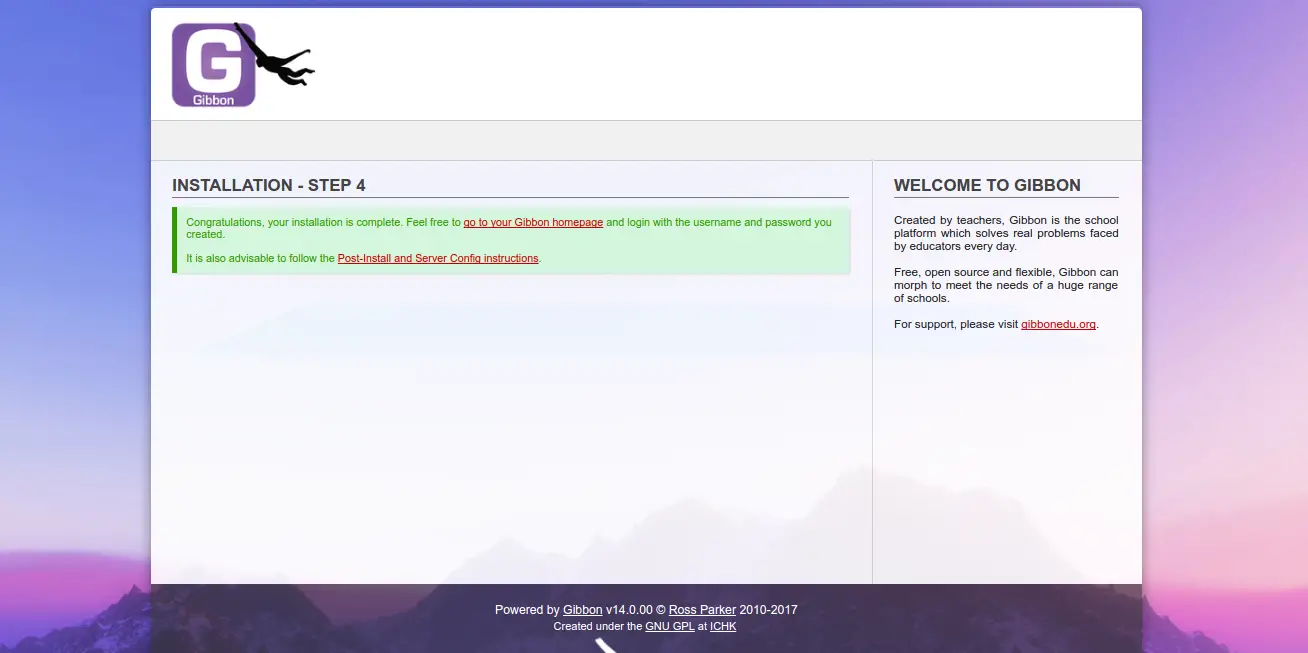
In the account configuration, system settings and organization settings, provide all the necessary information and click on the Submit button. After Gibbon installed successfully you should see the following page:
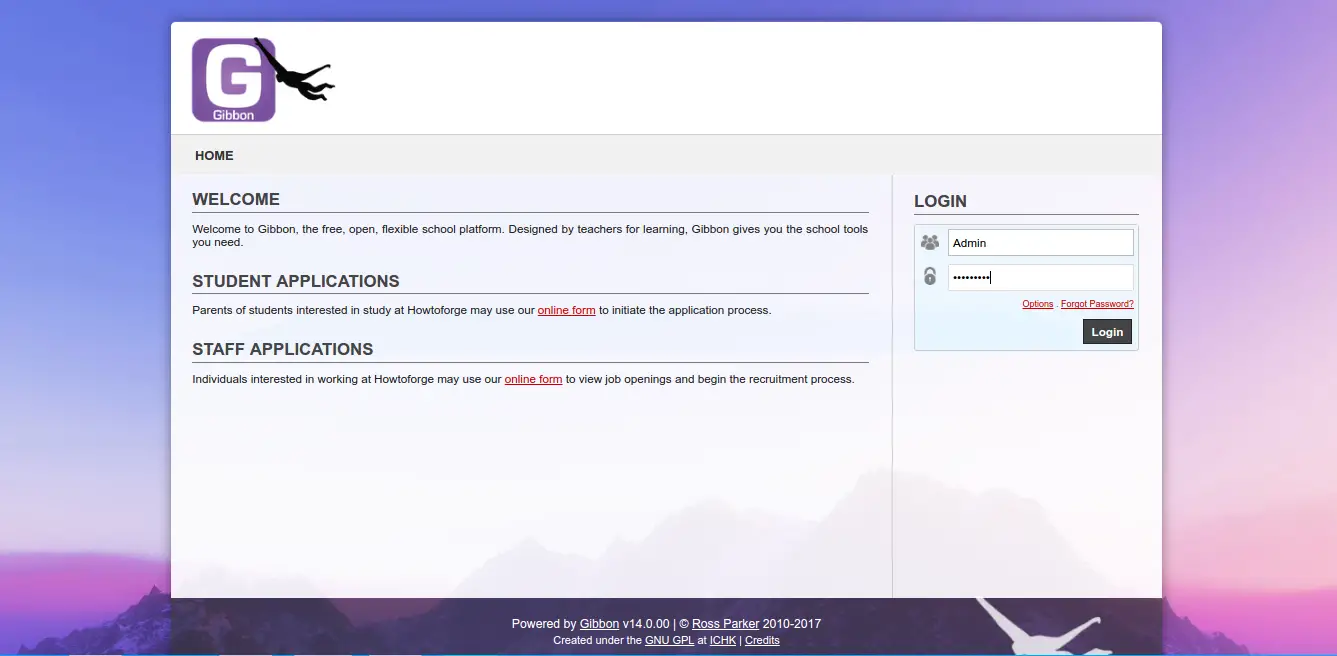
Next, click on go to your Gibbon homepage, you should see the Gibbon login page in the following image:
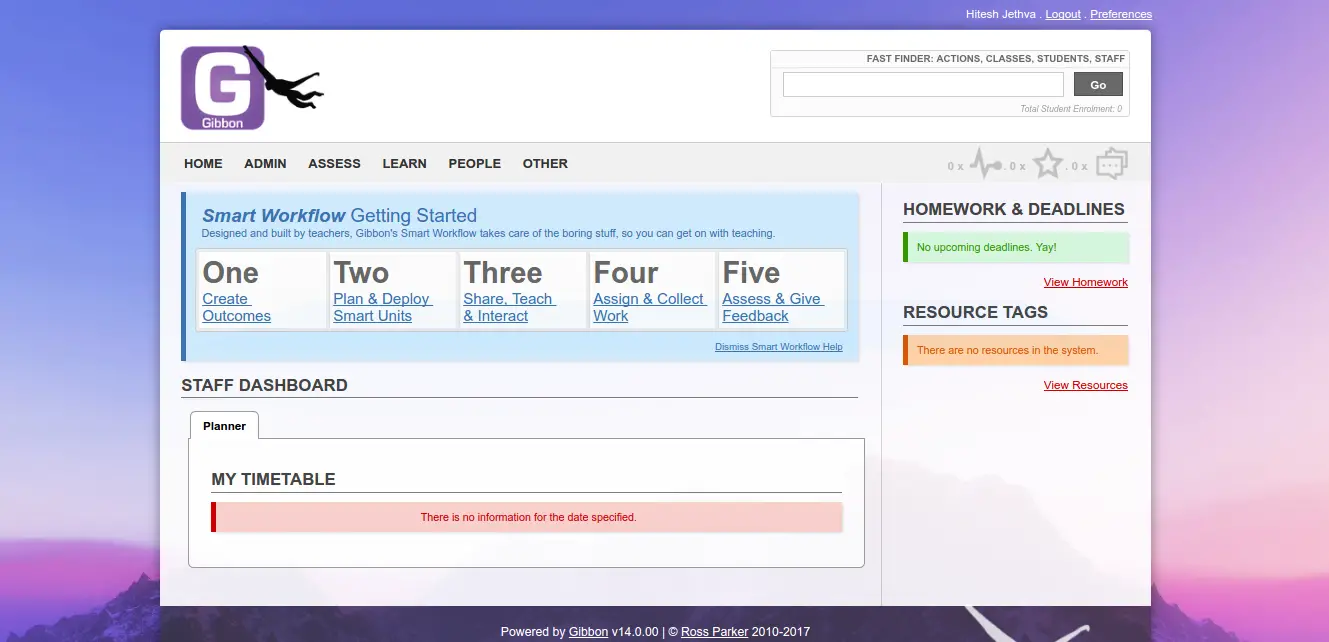
Provide your admin credential and click on the Login button, you should see the Gibbon default Dashboard in the following image:
After installing Gibbon, it is recommended to set permissions of all Gibbon files so they are not publicly writeable. You can do this by running the following command:
sudo chmod -R 755 /var/www/html/gibbon
Conclusion
Congratulations! you have successfully installed and configured Gibbon on Ubuntu 16.04 server. You can check the official Gibbon website for additional help or useful information.

