Server Monitoring with OpenNMS on Ubuntu 16.04
This tutorial exists for these OS versions
- Ubuntu 22.04 (Jammy Jellyfish)
- Ubuntu 20.04 (Focal Fossa)
- Ubuntu 16.04 (Xenial Xerus)
On this page
OpenNMS is a free and open source enterprise grade network monitoring web application system that can be used to monitor unlimited devices at a single instance. OpenNMS detects and monitor services or nodes automatically in your network. You can also add particular device or service to monitor. OpenNMS is written in Java, so it can run on any platform.
OpenNMS comes with set of features, some of them are listed below:
- Support multiple operating system including, Windows, Mac, Linux/Unix, and Solaris.
- Performance Management and Fault Management.
- Send notification through E-mail.
- Provide web based customizable dashboard.
- Able to process 125,000 syslog messages per minute, continuously.
- Contains an advanced provisioning system for adding devices to the management system.
In this tutorial, we will go through step by step instruction to install OpenNMS on Ubuntu 16.04 serve r.
Prerequisites
- A server running Ubuntu 16.04.
- A non-root user with sudo privileges setup on your server.
- A static IP address 192.168.0.187 setup on your server.
Getting Started
Lets start by updating your system to the latest stable version. You can do this by running the following command:
sudo apt-get update -y
sudo apt-get upgrade -y
After updating system, you will need to set proper fully qualified domain name. You can do this by editing /etc/hosts file:
sudo nano /etc/hosts
Add the following line:
192.168.0.187 server.opennms.local server
Next, open the /etc/hostname file:
sudo nano /etc/hostname
Add the following line:
server.opennms.local
Save the file when you are finished, then restart your system to apply these changes.
1 Install PostgreSQL
OpenNMS requires the PostgreSQL for database purpose. You can install PostgreSQL by running the following command:
sudo apt-get install postgresql -y
After installing PostgreSQL, you will need to allow user access to the database. PostgreSQL only allows you to connect if you are logged in to the local account name that matches the PostgreSQL user. Since OpenNMS runs as root, so you will need to change the configuration to allow root user.
You can do this by editing pg_hba.conf file.
sudo nano /etc/postgresql/9.5/main/pg_hba.conf
Find the following lines:
local   all         all                                         local
host    all         all         127.0.0.1/32                    md5
host    all         all         ::1/128                         md5
And, change them to look like the following:
local   all         all                                          trust
host    all         all         127.0.0.1/32                     trust
host    all         all         ::1/128                          trust
Save and close the file when you are finished, then restart the PostgreSQL service and enable it to start on boot with the following command:
sudo systemctl restart postgresql
sudo systemctl enable postgresql
Once you are done, you can proceed to install Java.
2 Install Java
OpenNMS doesn't support Java 8 yet, It is strongly recommended to use Java 7. To install Java 7, you will need to add PPA to the apt source list. You can do this by running the following command:
sudo add-apt-repository ppa:webupd8team/java
Next, update your repository by running the following command:
sudo apt-get update -y
Once your repository is updated, you can install Java 7 by just running the following command:
sudo apt-get install oracle-java7-installer -y
You can check the Java version with the following command:
sudo jave -version
You should see the following output:
java version "1.7.0_101"
Java(TM) SE Runtime Environment (build 1.7.0_101-b13)
Java HotSpot(TM) 64-Bit Server VM (build 25.101-b13, mixed mode)
Once you are done, you can proceed to the next step.
3 Install OpenNMS
By default OpenNMS is not available in Ubuntu default repository. So you will need to add OpenNMS repository to the /etc/apt/sources.list.d directory. You can do this by running the following command:
sudo nano /etc/apt/sources.list.d/opennms.list
Add the following lines:
deb http://debian.opennms.org stable main
deb-src http://debian.opennms.org stable main
Save the file when you are finished, then add OpenNMS key with the following command:
wget -O - http://debian.opennms.org/OPENNMS-GPG-KEY | sudo apt-key add -
Now, update the repository lists using the following command:
sudo apt-get update -y
Once repository is up to date, install OpenNMS by running the following command:
sudo apt-get install default-mta opennms -y
Once OpenNMS is installed, you will need to create a database for OpenNMS. You can do this by running the following command:
sudo /usr/share/opennms/bin/install -dis
You should see the following output:
OpenNMS Installer
==============================================================================
Configures PostgreSQL tables, users, and other miscellaneous settings.
.
.
.
- Running post-execution phase
  Removing backup /usr/share/opennms/etc/discovery-configuration.xml.zip
Finished in 0 seconds
Finally, start OpenNMS service with the following command:
sudo systemctl start opennms
4 Access OpenNMS
By default, OpenNMS runs on port 8980. So you will need to allow port 8980 through UFW firewall. By default UFW is disabled on your system, so you need to enable it first. You can enable it with the following command:
sudo ufw enable
Once UFW firewall is enabled, you can allow port 8980 by running the following command:
sudo ufw allow 8980
You can now check the status of UFW firewall by running the following command:
sudo ufw status
Once the UFW firewall is configured, open your web browser and type the URL http://192.168.0.187:8980/opennms, you should see the following screen:
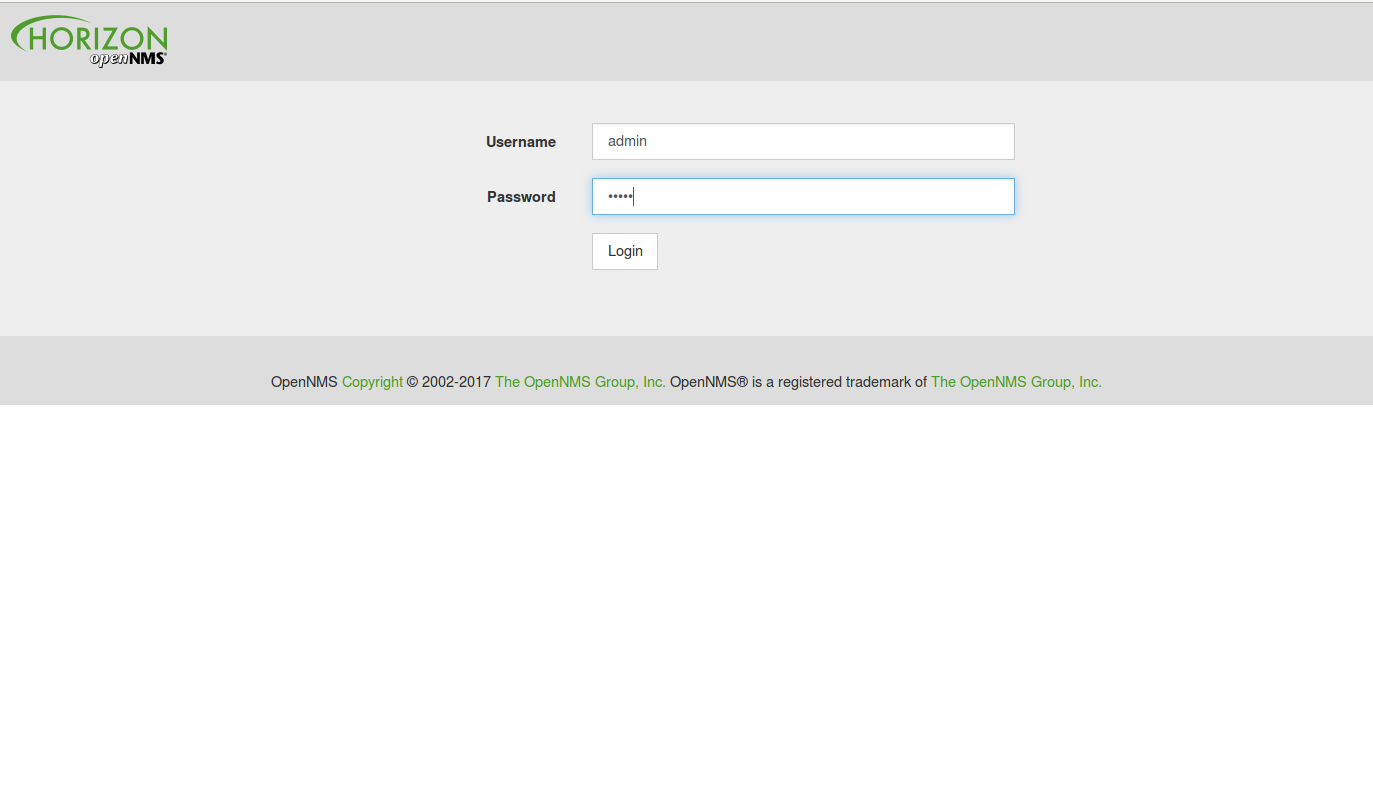
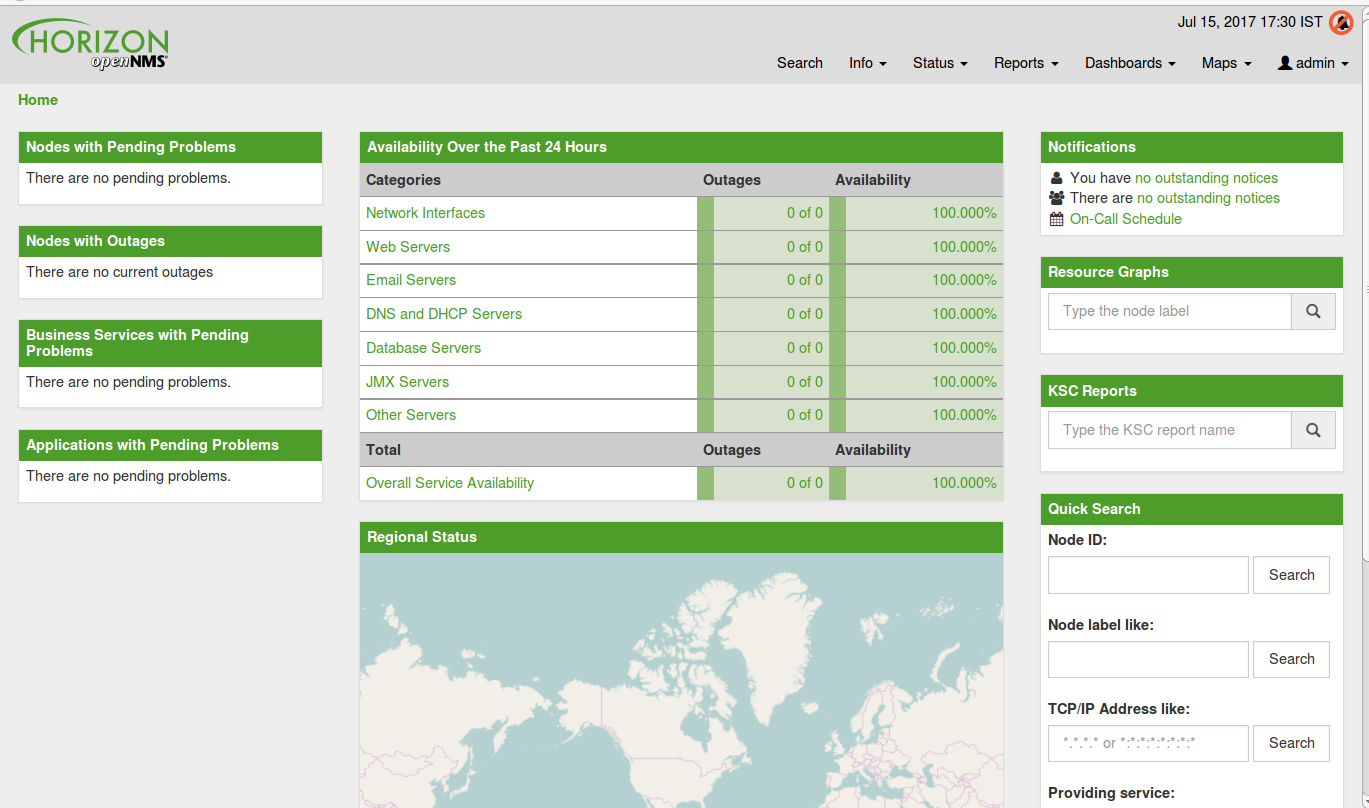
Now, login with username "admin" and password "admin", you should see the following screen:
If you want to add new server node for monitoring click on Admin > Quick Add Node button, you should see the following screen:

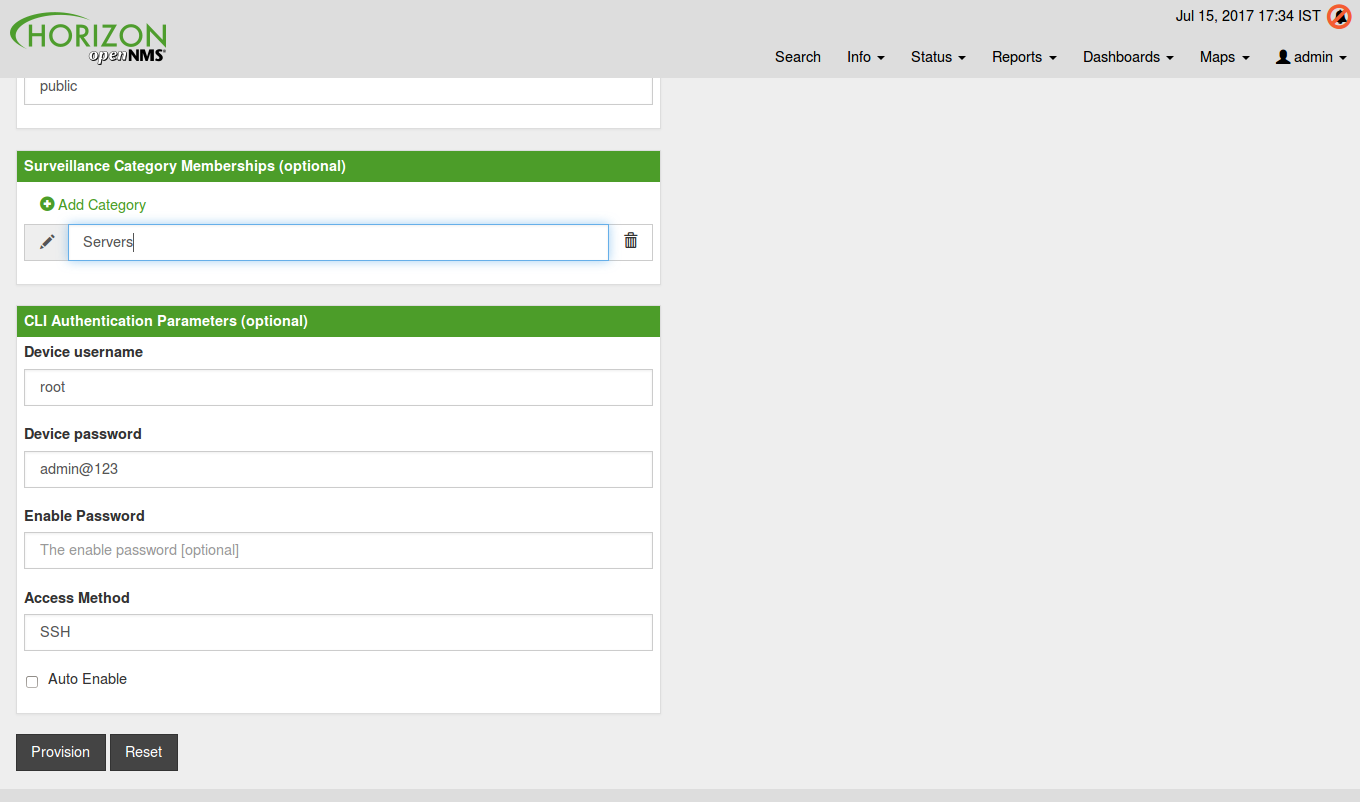
Here, fill up all the required information like, Requisition, IP Address, Node Label, Community string, Device username, Device password, then click on Provision button. You should see the following screen:
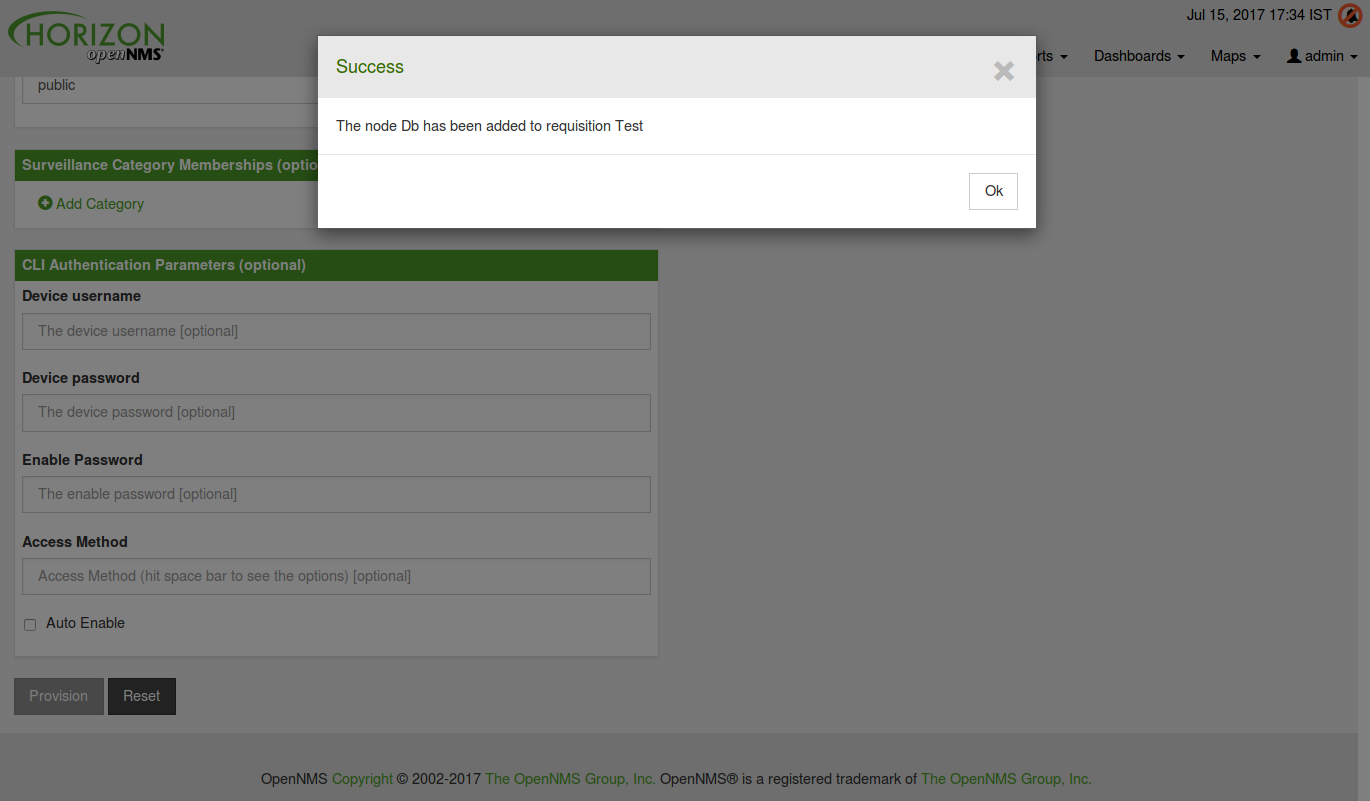
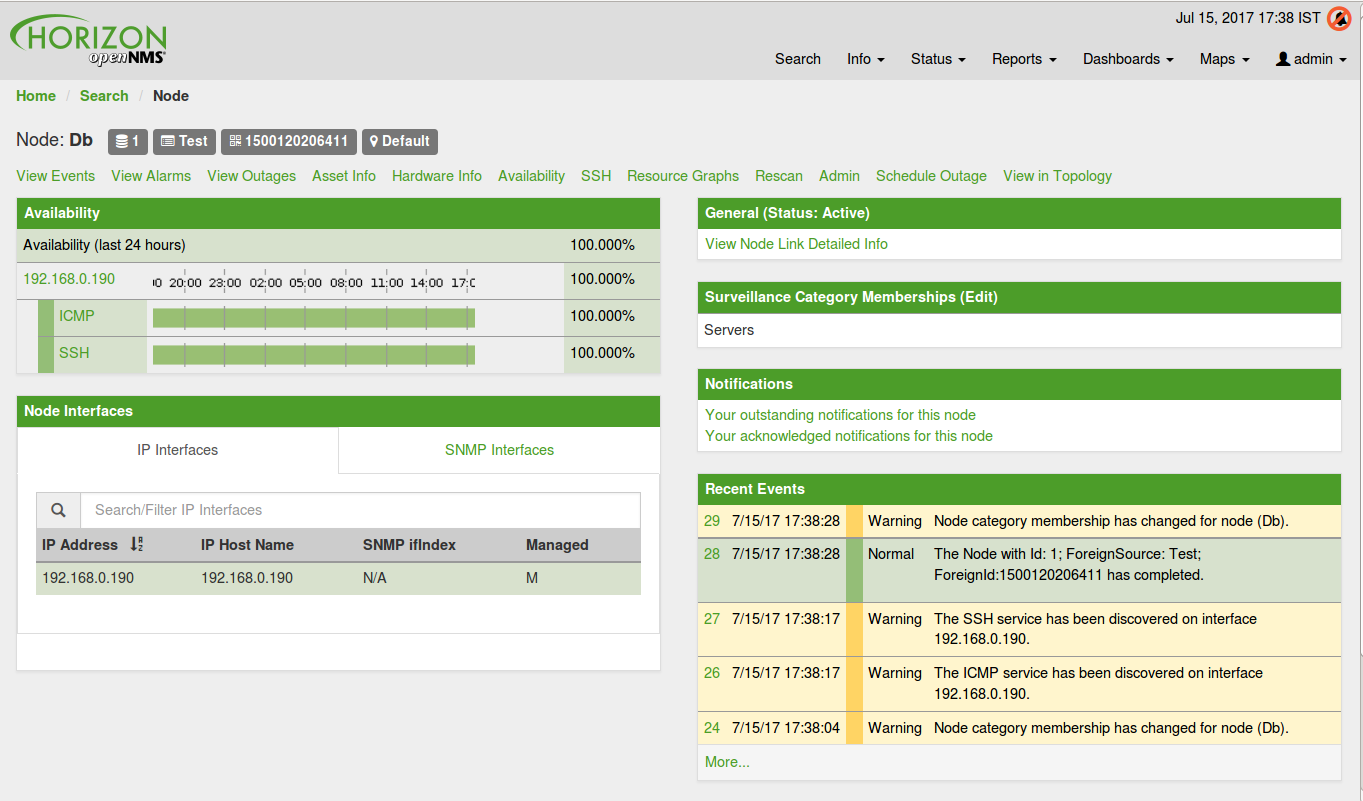
Next, click Ok to continue, then go to Info > Nodes and find out the node by its label name. Finally, click on the label button, you should see the node status, notification, and events in the following screen:
Conclusion
Congratulations! you have successfully installed and configured OpenNMS on Ubuntu 16.04 server. You can now easily add more server nodes for monitoring. Feel free to comment me if you have any questions.

