How to Install OrientDB NoSQL Database on CentOS 7
OrientDB is a free and open source NoSQL database management system. Unlike relational database management systems which store the data in a relational tabular form, NoSQL stores data in other than the tabular form which can be document form or Graph form. OrientDB comes with an integrated web based graphical user interface to easily manage the database through a web browser. It supports ACID transactions as well as atomic operations and easily returns complete graph with interconnected documents. Its query language is built on SQL and it supports three different indexing algorithms for faster performance.
Prerequisite
- Minimal CentOS 7 server.
- Root privileges. This guide is written as the root user, if you are logged in as sudo user, run sudo -i.
Update Base System
Before installing any package it is recommended that you update the packages and repository using the following command.
yum -y update
Once the system is updated, you can proceed further to install the dependencies required for OrientDB.
Install JAVA
OrientDB supports both OpenJDK and Oracle JAVA, in this tutorial we will install the latest version of Oracle Java into the server. Run the following command to download the RPM package.
wget --no-cookies --no-check-certificate --header "Cookie:oraclelicense=accept-securebackup-cookie" "http://download.oracle.com/otn-pub/java/jdk/8u144-b01/090f390dda5b47b9b721c7dfaa008135/jdk-8u144-linux-x64.rpm"
If you do not have wget installed, you can run the yum -y install wget to install wget. Now install the downloaded RPM using the following command.
yum -y localinstall jdk-8u144-linux-x64.rpm
You can now check the Java version using the following command.
java -version
You will get the following output.
[root@liptan-pc ~]# java -version
java version "1.8.0_144"
Java(TM) SE Runtime Environment (build 1.8.0_144-b01)
Java HotSpot(TM) 64-Bit Server VM (build 25.144-b01, mixed mode)
You will also need to check if JAVA_HOME environment variable is set. Run the following command for same.
echo $JAVA_HOME
If you get a null or blank output, you will need to manually set the JAVA_HOME variable. Edit the .bash_profile file using your favourite editor. In this tutorial, we will use nano editor. Run the following command to edit .bash_profile using nano.
nano ~/.bash_profile
Now add the following lines at the at the end of the file.
export JAVA_HOME=/usr/java/jdk1.8.0_144/
export JRE_HOME=/usr/java/jdk1.8.0_144/jre
Now source the file using the following command.
source ~/.bash_profile
Now you can run the echo $JAVA_HOME command again to check if the environment variable is set or not.
[root@pc ~]# echo $JAVA_HOME
/usr/java/jdk1.8.0_144/
Install OrientDB
It is recommended to run OrientDB as it own user to create an isolated environment for the process. Run the following command to create a user for OrientDB.
adduser orientdb -d /opt/orientdb
The above command will create the user orientdb and will set its home directory to /opt/orientdb.
Now you can download the OrientDB binary archive by running the following command.
cd /opt/orientdb/
wget https://orientdb.com/download.php?file=orientdb-community-importers-2.2.25.tar.gz -O orientdb.tar.gz
You can always look for the link to the latest version of the file by going to OrientDB download page.
Now extract the archive by running the following command.
tar -xf orientdb.tar.gz
The above command will extract the archive into orientdb-community-importers-2.2.25 directory. Move all the files to the root directory by running the following command.
mv orientdb-community-importers*/* .
Clean the install directory and archive by running.
rm -rf orientdb-community-importers*/ orientdb.tar.gz
Now provide appropriate permissions to the OrientDB user by running the following command.
chown -R orientdb:orientdb /opt/orientdb
OrientDB is now installed on your server.
Starting the Server
OrientDB provides an installer script for you to start the server. Switch to the OrientDB user.
su - orientdb
Now start the server by running the following command.
bin/server.sh
You will be asked to set the password of the OrientDB root user. Make sure that you use a strong password.
+---------------------------------------------------------------+
|                WARNING: FIRST RUN CONFIGURATION               |
+---------------------------------------------------------------+
| This is the first time the server is running. Please type a   |
| password of your choice for the 'root' user or leave it blank |
| to auto-generate it.                                          |
|                                                               |
| To avoid this message set the environment variable or JVM     |
| setting ORIENTDB_ROOT_PASSWORD to the root password to use.   |
+---------------------------------------------------------------+

Root password [BLANK=auto generate it]: ***********
Please confirm the root password: ***********
You should get following output if the server is started successfully.
2017-08-05 12:48:04:444 INFO  OrientDB Studio available at http://108.61.201.197:2480/studio/index.html [OServer]
2017-08-05 12:48:04:445 INFO  OrientDB Server is active v2.2.25 (build 72a35a4bb42c4ca33272e7a59ad4c7a1d3ee859d). [OServer]
To stop the execution, you can press ctrl + C buttons together. Exit to root user by running exit command.
Configure OrientDB Systemd Service
Although OrientDB can be started and managed using the startup script but to ensure that the server is automatically started at failures and boot time, you will need to configure Systemd service. Create a new systemd service by running the following command.
nano /etc/systemd/system/orientdb.service
Now populate the file with the following content.
[Unit]
Description=OrientDB service
After=network.target

[Service]
Type=simple
ExecStart=/opt/orientdb/bin/server.sh
User=orientdb
Group=orientdb
Restart=always
RestartSec=9
StandardOutput=syslog
StandardError=syslog
SyslogIdentifier=orientdb

[Install]
WantedBy=multi-user.target
Now you can start OrientDB using:
systemctl start orientdb
To configure OrientDB to automatically start at boot time, use.
systemctl enable orientdb
To check if OrientDB service is started correctly, you can run the following command to check the status of the OrientDB service.
systemctl status orientdb
You should get output similar to shown below.
[root@liptan-pc ~]# systemctl status orientdb
? orientdb.service - OrientDB service
   Loaded: loaded (/etc/systemd/system/orientdb.service; enabled; vendor preset: disabled)
   Active: active (running) since Sat 2017-08-05 17:34:40 UTC; 15s ago
 Main PID: 6939 (java)
   CGroup: /system.slice/orientdb.service
           ??6939 /bin/java -d64 -server -Xms2G -Xmx2G -Djna.nosys=true -XX:+HeapDumpOnOutOfMemoryError -XX:MaxDirectMe...

Aug 05 17:34:43 liptan-pc orientdb[6939]: 2017-08-05 17:34:43:477 INFO  Installing dynamic plugin 'orientdb-telepo...ager]
Aug 05 17:34:43 liptan-pc orientdb[6939]: 2017-08-05 17:34:43:504 INFO  [OVariableParser.resolveVariables] Error o...gies]
Aug 05 17:34:43 liptan-pc orientdb[6939]: 2017-08-05 17:34:43:573 WARNI Authenticated clients can execute any kind...eter]
Aug 05 17:34:43 liptan-pc orientdb[6939]: 2017-08-05 17:34:43:578 INFO  OrientDB Studio available at http://108.61...rver]
Hint: Some lines were ellipsized, use -l to show in full.
Further, we will also create a soft link to the OrientDB script which starts the console for OrientDB. This will enable us to easily switch to the OrientDB console. Run the following command for same.
ln -s /opt/orientdb/bin/console.sh /usr/bin/orientdb
Now you can connect to the OrientDB console by running the following command.
orientdb
Your terminal should change to orientdb and you should get following output:
[root@liptan-pc ~]# orientdb

OrientDB console v.2.2.25 (build 72a35a4bb42c4ca33272e7a59ad4c7a1d3ee859d) https://www.orientdb.com
Type 'help' to display all the supported commands.
Installing extensions for GREMLIN language v.2.6.0

orientdb>
You can exit the OrientDB prompt by running:
exit
Access OrientDB Studio
OrientDB Studio is a web based GUI tool to easily administrator OrientDB installation. It is shipped along with OrientDB package. Once you start OrientDB server, Studio is also started along with it.
To access the OrientDB Studio, open the following web address in your favourite browser.
http://your-server-IP:2480
If you encounter any error then, you may have a firewall running and you will need to allow port 2480 through the firewall. Run the following commands to add an exception for port 2480 and then reload the firewall to apply the changes.
firewall-cmd --zone=public --permanent --add-port=2480/tcp
firewall-cmd --reload
You will be greeted by the following web page.
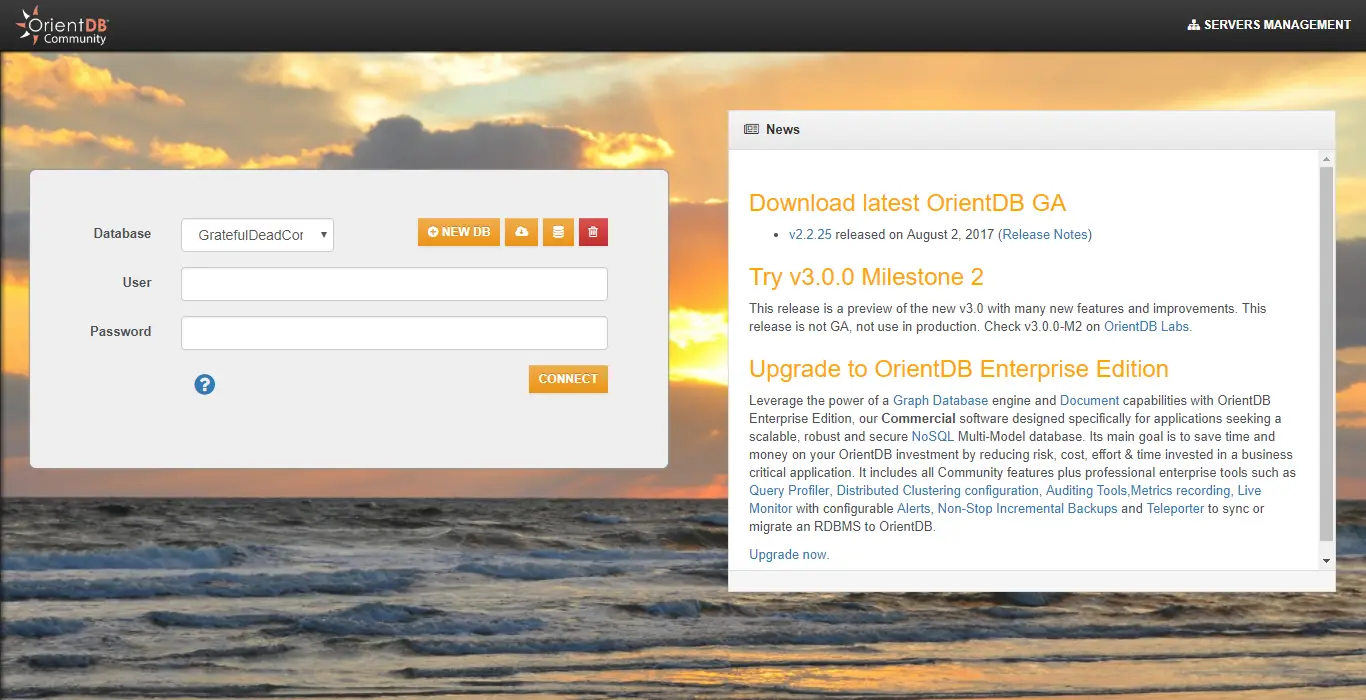
To create a new database click on NEW DB button and you will see the following interface.
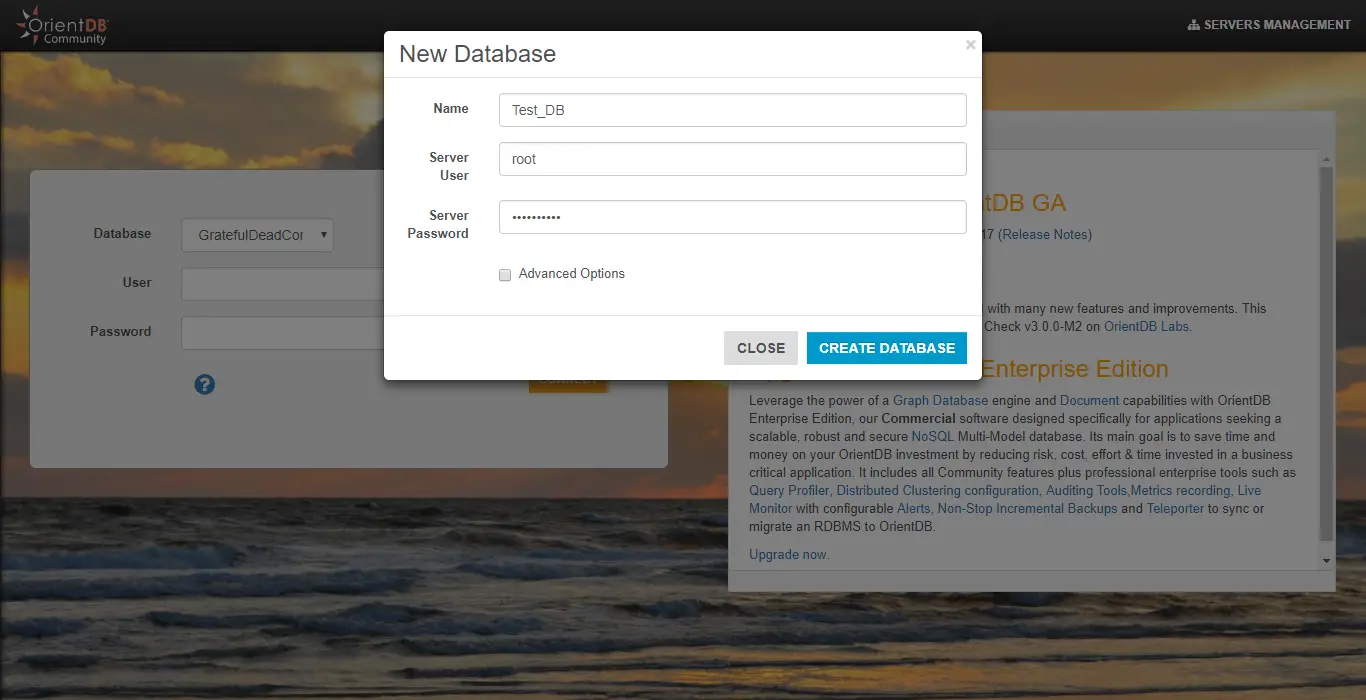
Provide the name of the database and root as the Server User and provide the password of the root user which you have set during the initial run. Click on CREATE DATABASE to create a new database.
The database will be created automatically and you will be taken to the dashboard to manage the database.
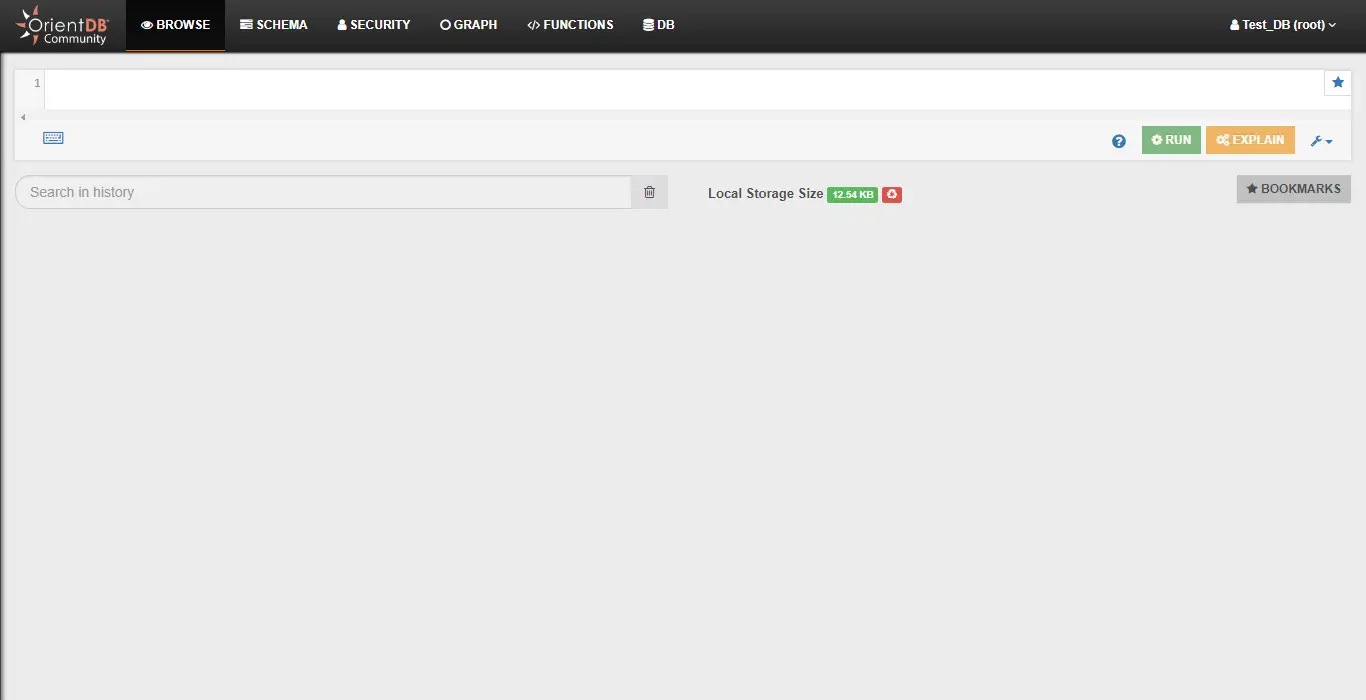
In the Browse tab, you can run the query on the database and get the result.
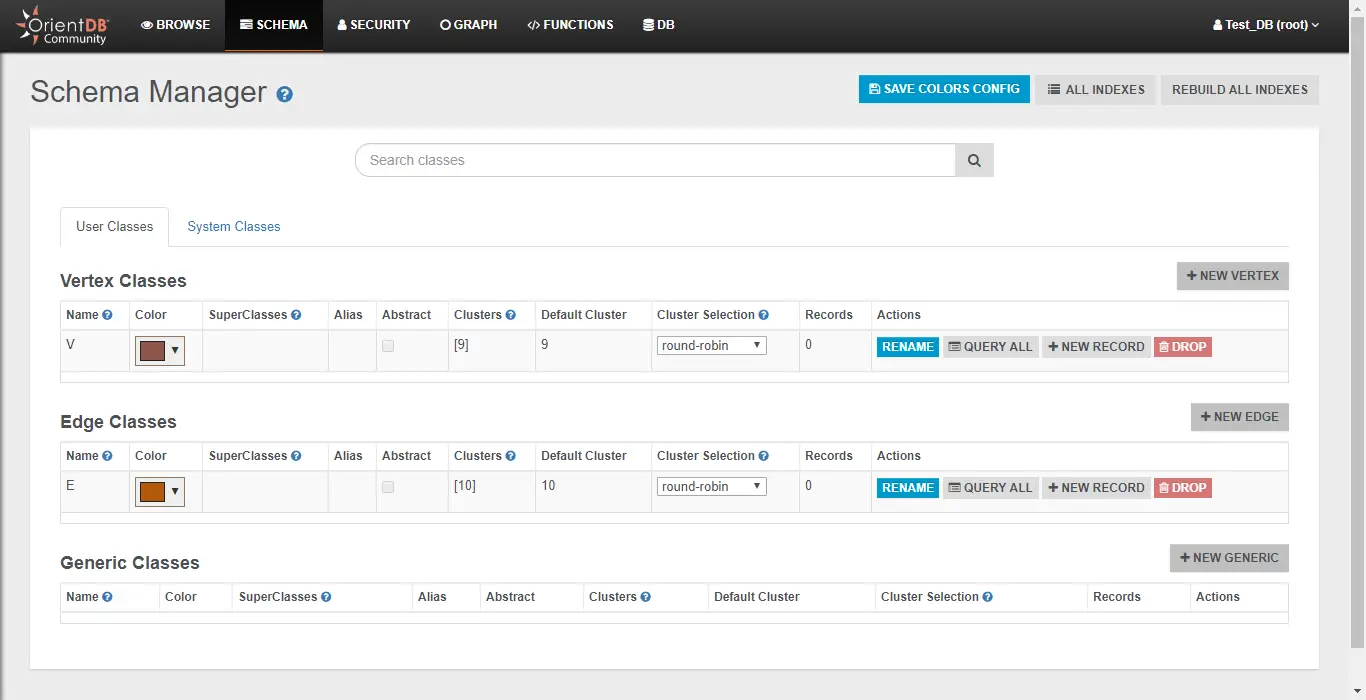
In Schema tab you can add and edit the table schema of your database.
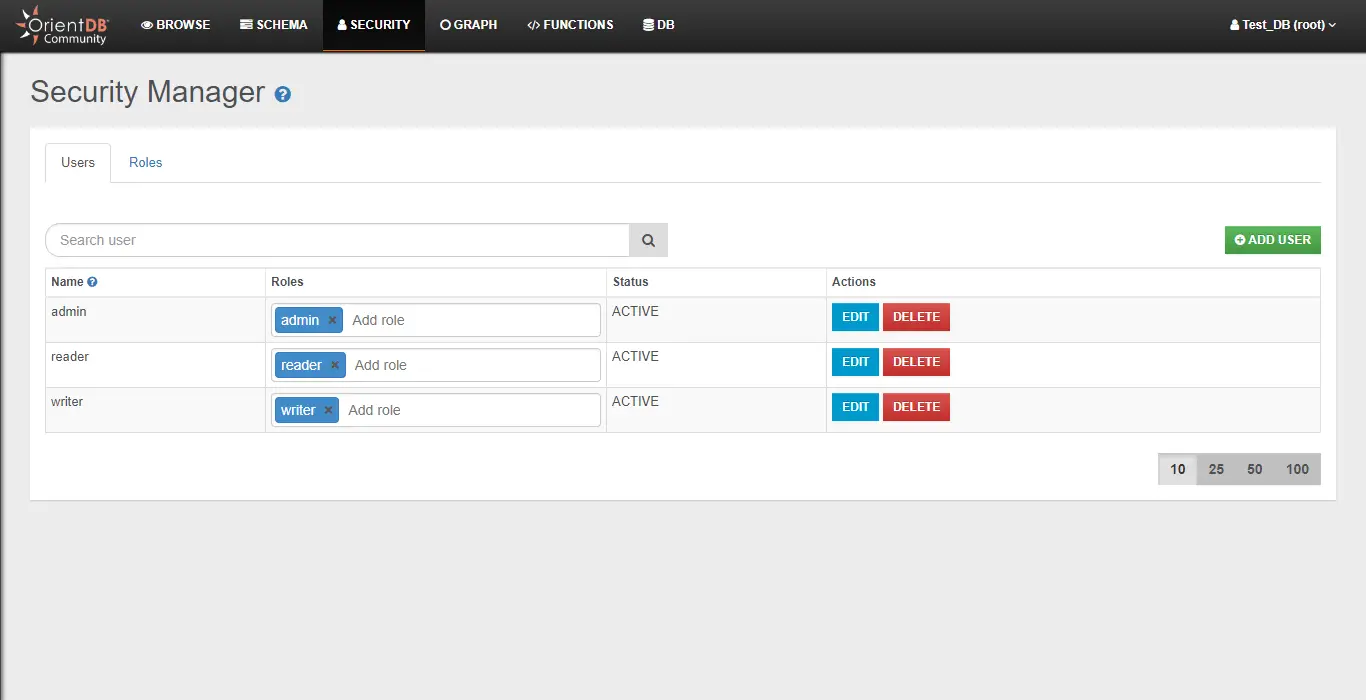
In Security tab, you can add or remove users to the database.
Conclusion
In this tutorial, we have installed OrientDB on CentOS 7 server. You can use this database to store your data in NoSQL format. To learn more about OrientDB, you can go the OrientDB website.

