How to Setup Automatic Security Updates on CentOS 7
Security updates, as most of you'd agree, are very important. On Linux, it's always advisable to keep the installed packages up to date, especially when it comes to security. In general, users should apply security updates to their Linux systems within 30 days of being released.
In this tutorial, we will discuss how you can configure a CentOS 7 server for automatic security updates. This will make sure the system automatically downloads packages and applies all security updates without any manual intervention.
What we will discuss:
- How to Install yum-cron on CentOS 7
- How to configure yum-cron for automatic security updates
- How to exclude specific packages from automatic updates
- How to check yum-cron logs
Prerequisite
- CentOS 7 server
- Root privileges
Step 1 - Install yum-cron on CentOS 7
Yum-cron is a command-line tool to manage system and package updates on CentOS systems.
The utility is available in the CentOS 7 repository. You can install it using the command below.
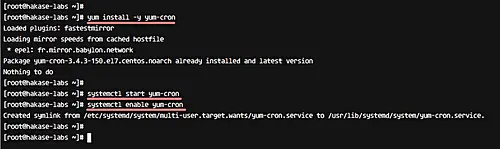
yum -y install yum-cron
After the installation is complete, start the yum-cron service, and then make sure it starts automatically at system boot from now on. All this can be done using the following commands:
systemctl start yum-cron
systemctl enable yum-cron
That's it. Yum-cron is now properly installed on your CentOS 7 server.
Step 2 - Configure Yum-Cron for automatic updates
After installing the yum-cron package, we need to configure it for automatic updates. By default, yum-cron provides three kinds of updates: default update using yum upgrade command, minimal update, and security update.
Note that in this tutorial, we will configure yum-cron for security updates (related to both system and packages). So let's begin.
As a first step, go to the 'yum' configuration directory and edit the 'yum-cron.conf' file using the Vim editor.
cd /etc/yum/
vim yum-cron.conf
Note: Of course, you can use any other editor of your choice. And for those who want to learn Vim, check out our comprehensive tutorial here.
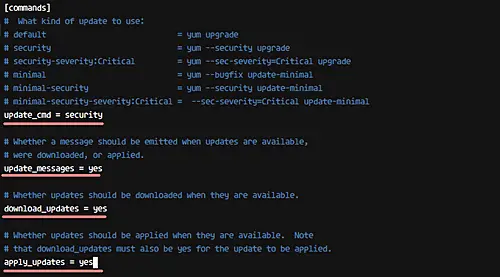
In the file, head to the line beginning with the string 'update_cmd', and define the kind of update you want to use. For example, in this tutorial, we are focusing only on security updates, so change the value from 'default' to 'security'.
update_cmd = security
Similarly, head to the line beginning with the 'update_messages' string, and make sure its value is 'yes'.
update_messages = yes
Then do the same for 'download_updates' and 'apply_updates' lines.
download_updates = yes
apply_updates = yes
So whenever there's a security update available, the system will now automatically download the required packages and then apply all the updates.
Next up is message notification configuration. Basically, Yum-cron provides two ways: either you can have notifications displayed on STDIO, or have them sent to an email address. For this tutorial, we will be going with the second option, which is email.
So change the value of 'emit_via' to 'email' as shown below.
emit_via = email
There are a handful of other related changes that you have to do, including specifying from and to email addresses and email host. Here're the values that we've set:
email_from = root@hakase-labs
email_to = [email protected]
email_host = hakase-labs

That's it. Now save the file and exit the editor.
The final step is to restart the yum-cron service, which you can do using the following command:
systemctl restart yum-cron
At this stage, any security updates on the system will be automatically downloaded and applied using yum-cron on daily basis.
Step 3 - Configure exclude packages
Sometimes, for whatever reason, we don't want to apply automatic updates on some packages, including kernel. In this step, we will discuss the configuration that'll let you disable updates for select packages.
So the first step here is to edit the configuration file yum-cron.conf, which resides in the yum configuration directory.
cd /etc/yum/
vim yum-cron.conf
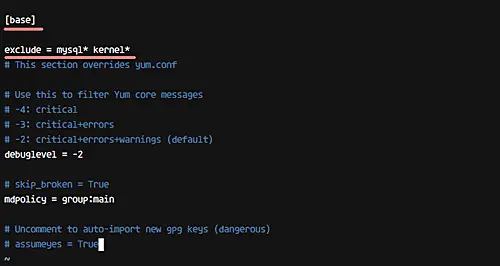
Towards the bottom of the file, you will see the '[base]' section. Add the a new line under this section containing names of packages you want to exclude. For example, something similar to the following:
exclude = mysql* kernel*
Now just save the changes and exit.
Yeah, you guessed it right, now you'll have to restart the yum-cron service.
systemctl restart yum-cron
So in our case, all packages with names beginning with 'mysql' or 'kernel' will be disabled for automatic updates.
Step 4 - Check yum-cron logs
Yum-cron uses a cronjob for automatic security updates, and all logs for this cron is available under the '/var/log' directory.
So you need to head to the '/var/log' directory to access the 'cron' log file.
cd /var/log/
cat cron | grep yum-daily
And in case you want to see the packages that have been updated, you can check the yum.log file.
cat yum.log | grep Updated
References

