How to Install Cacti SNMP Monitoring Tool on Debian 9
This tutorial exists for these OS versions
- Debian 11 (Bullseye)
- Debian 10 (Buster)
- Debian 9 (Stretch)
On this page
This tutorial will show you how to install and configure Cacti network monitoring tool from source to ensure that you get the latest version on Debian 9, codename Stretch.
Cacti is a web-based network monitoring tool, completely open source, designed to display network and system graphics via RRDtool. It uses the SNMP (Simple Network Management Protocol) protocol to gather and monitor network traffic from network devices, such as switches, routers, Linux, Unix and Windows servers or other types of network-based devices that support SNMP.
Requirements
- Debian 9 minimal installation on a bare-metal machine or on a virtual private server.
- A static IP address configured for one of your system network interfaces cards.
- Access to root account or a user with root account privileges via sudo.
Initial Configuration
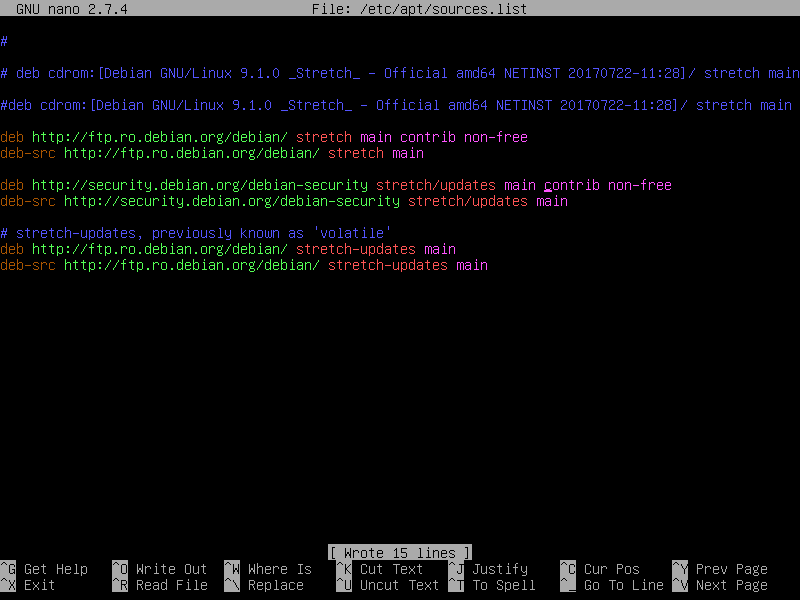
Before we start to install Cacti from source, first assure that your system meets all the software requirements for compiling and installing Cacti. In the first step, open the Debian sources list file for editing with root privileges and append the contrib and non-free repositories as shown in the below file excerpt.
nano /etc/apt/sources.list
sources.list file sample:
deb http://ftp.ro.debian.org/debian/ stretch main contrib non-free
deb-src http://ftp.ro.debian.org/debian/ stretch main

deb http://security.debian.org/debian-security stretch/updates main contrib non-free
deb-src http://security.debian.org/debian-security stretch/updates main
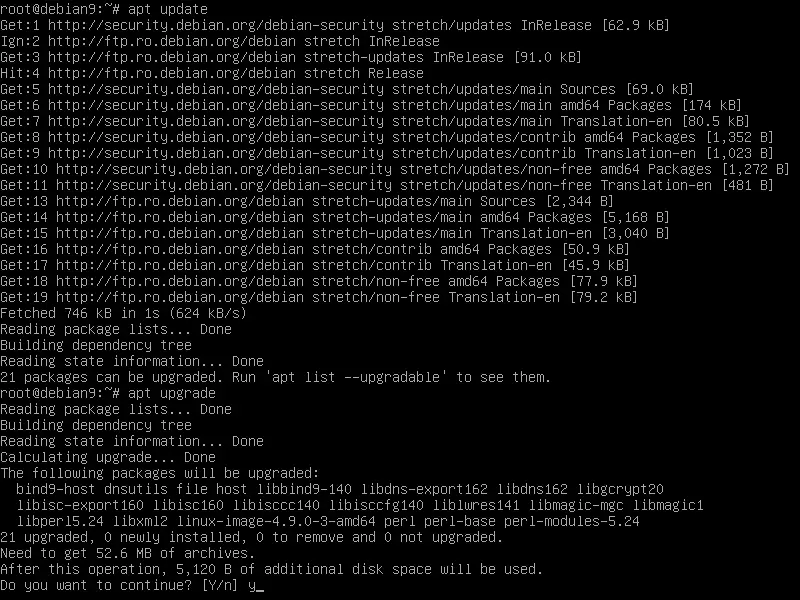
After finished editing the file, save and close the file and update your system repositories and software packages to incorporate the new packages, by issuing the below commands.
apt update
apt upgrade
Next, fire up a new command in order to install some necessary utilities that will be used to further manage your system from command line.
apt install wget patch unzip zip bash-completion
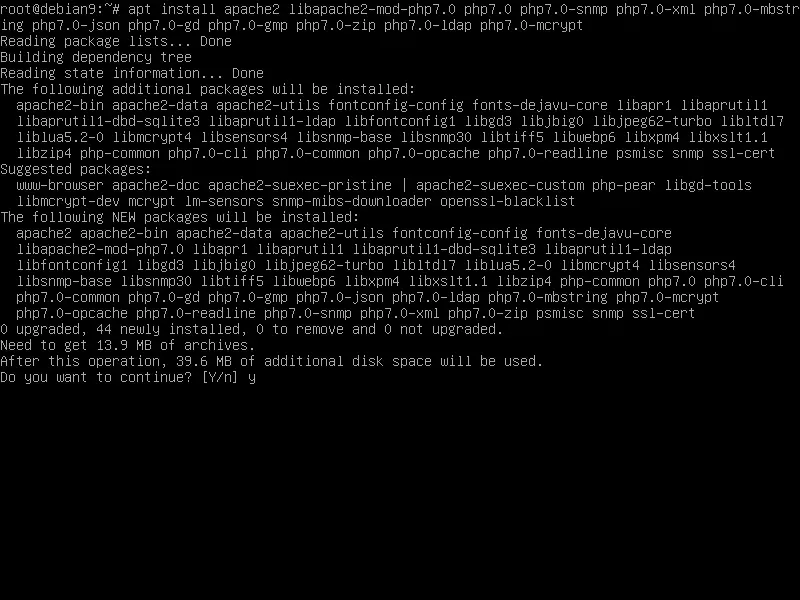
Cacti is a web-based monitoring tool mostly written in PHP server-side programming language. In order to run the Cacti php file scripts, a web server, such as Apache HTTP server, and a PHP interpreter must be installed and functional in the system. In order to install Apache web server and the PHP interpreter alongside with all required PHP modules needed by Cacti to run properly, issue the following command in your server console.
apt install apache2 libapache2-mod-php7.0 php7.0 php7.0-snmp php7.0-xml php7.0-mbstring php7.0-json php7.0-gd php7.0-gmp php7.0-zip php7.0-ldap php7.0-mcrypt
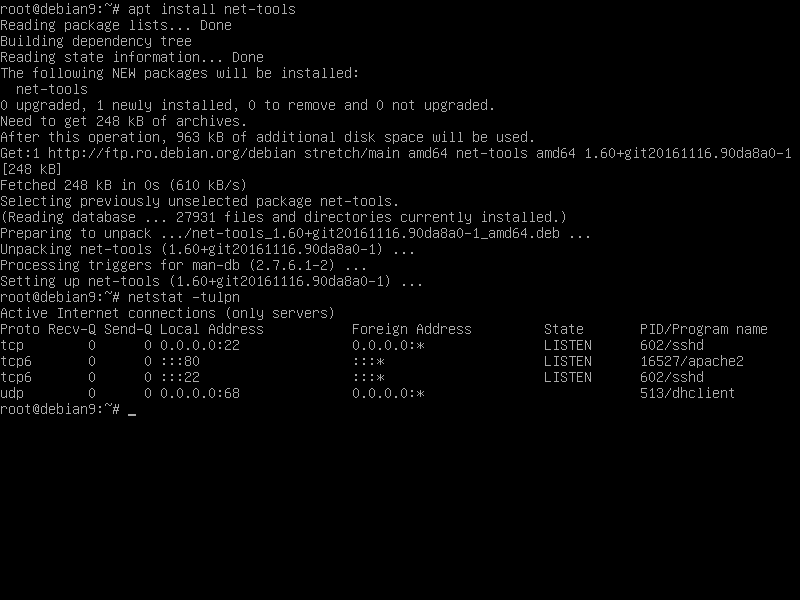
After Apache and PHP have been installed, test if the web server is up and running and listening for network connections on port 80 by issuing the following command with root privileges.
netstat –tlpn
In case netstat network utility is not installed by default on your Debian system, execute the below command to install it.
apt install net-tools
By inspecting the netstat command output you can see that apache daemon is listening for incoming network connections on port 80.
In case you have a firewall enabled on your system, such as UFW firewall application, you should add a new rule to allow HTTP traffic to pass through the firewall by issuing the following command.
ufw allow WWW
or
ufw allow 80/tcp
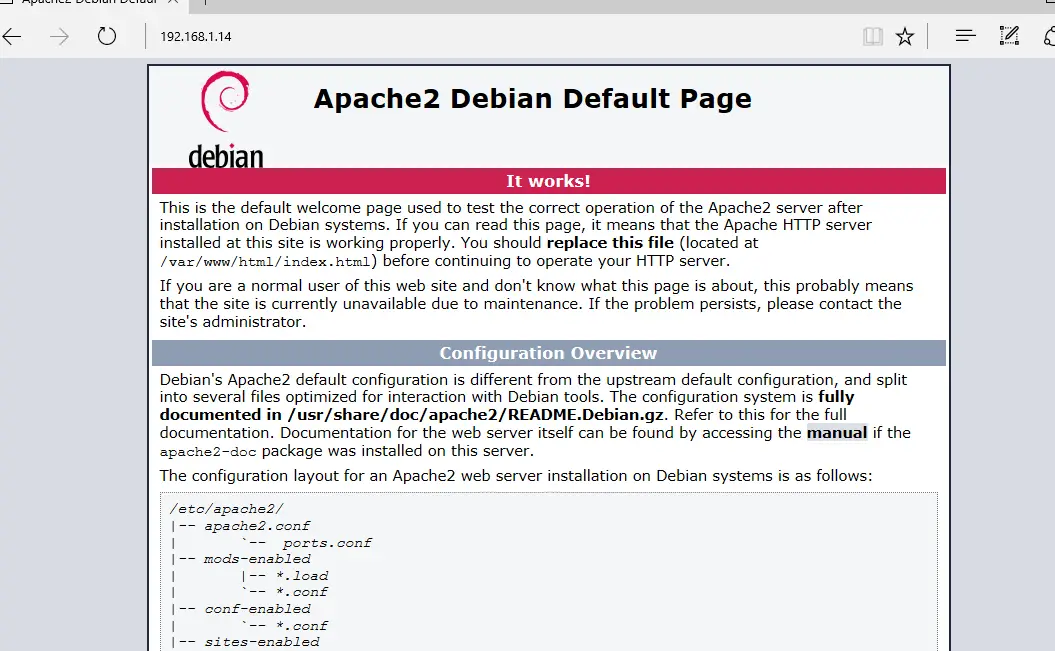
Finally, test if the Apache web server default web page can be displayed in your client's browser by visiting your Debian machine IP address via HTTP protocol, as shown in the below image. If you don’t know your machine IP address, execute 'ifconfig' or 'ip a' commands. My IP in this setup is: http://192.168.1.14
In the next step, we need to make some further changes to PHP default configuration file in order to assure that the file_uploads variable is enabled and the PHP timezone setting is correctly configured and matches your system physical location. Open /etc/php/7.0/apache2/php.ini file for editing and assure that the following lines are set up as follows.
file_uploads = On
date.timezone = Europe/London
Replace the timezone variable accordingly to your physical time zone by consulting the list of timezones provided by PHP docs at the following link http://php.net/manual/en/timezones.php
After you’ve made the required changes, create a php info file and restart apache daemon to apply changes by issuing the following commands.
echo '<?php phpinfo(); ?>'| tee /var/www/html/info.php
systemctl restart apache2
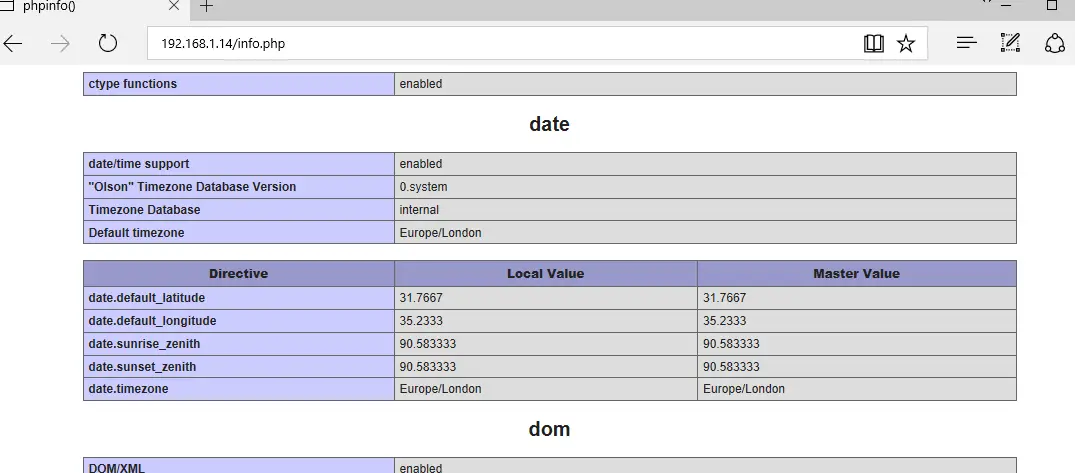
Check if the PHP timezone has been correctly configured by visiting the php info script from a browser at the following URL (as illustrated in the below image). Scroll down to date setting to check php timezone setting.
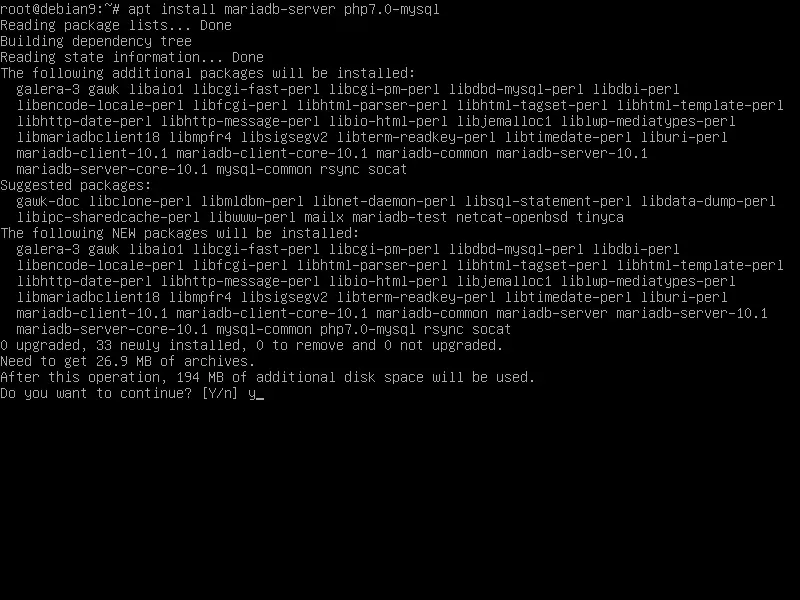
Cacti monitoring tool stores configurations and collected data in an RDBMS database. In this tutorial, we’ll configure Cacti with MariaDB database backend. Issue the below command to install MariaDB database and the PHP module needed to access mysql database.
apt install mariadb-server php7.0-mysql
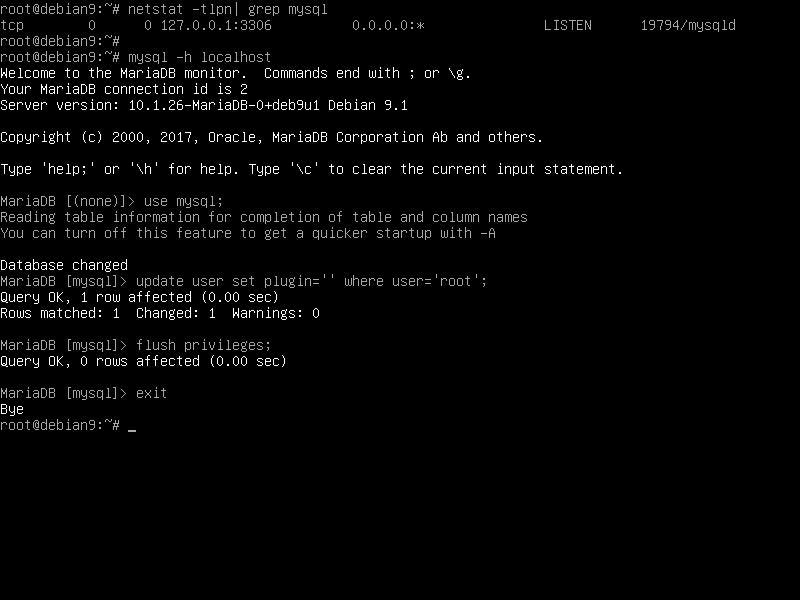
After you’ve installed MariaDB, verify that the daemon is running and listens for network connections on localhost, port 3306, by running netstat command.
netstat –tlpn | grep mysql
Then log into MySQL console and secure MariaDB root account by issuing the following commands.
mysql -h localhost
use mysql;
update user set plugin='' where user='root';
flush privileges;
exit
In the next step, secure MariaDB by executing the script mysql_secure_installation provided by the installation package from Debian Stretch repository. While running, the script will ask a series of questions to secure the MariaDB database, such as: to change MySQL root password, to remove anonymous users, to disable remote root logins and to delete the test database. Execute the script by issuing the below command and assure you type yes to all questions asked in order to fully secure MySQL daemon. Use the below script output except as a guide.
sudo mysql_secure_installation
NOTE: RUNNING ALL PARTS OF THIS SCRIPT IS RECOMMENDED FOR ALL MariaDB
SERVERS IN PRODUCTION USE! PLEASE READ EACH STEP CAREFULLY!
In order to log into MariaDB to secure it, we'll need the current
password for the root user. If you've just installed MariaDB, and
you haven't set the root password yet, the password will be blank,
so you should just press enter here.
Enter current password for root (enter for none):
OK, successfully used password, moving on...
Setting the root password ensures that nobody can log into the MariaDB
root user without the proper authorisation.
You already have a root password set, so you can safely answer 'n'.
Change the root password? [Y/n] y
New password:
Re-enter new password:
Password updated successfully!
Reloading privilege tables..
... Success!
By default, a MariaDB installation has an anonymous user, allowing anyone
to log into MariaDB without having to have a user account created for
them. This is intended only for testing, and to make the installation
go a bit smoother. You should remove them before moving into a
production environment.
Remove anonymous users? [Y/n] y
... Success!
Normally, root should only be allowed to connect from 'localhost'. This
ensures that someone cannot guess at the root password from the network.
Disallow root login remotely? [Y/n] y
... Success!
By default, MariaDB comes with a database named 'test' that anyone can
access. This is also intended only for testing, and should be removed
before moving into a production environment.
Remove test database and access to it? [Y/n] y
- Dropping test database...
... Success!
- Removing privileges on test database...
... Success!
Reloading the privilege tables will ensure that all changes made so far
will take effect immediately.
Reload privilege tables now? [Y/n] y
... Success!
Cleaning up...
All done! If you've completed all of the above steps, your MariaDB
installation should now be secure.
Thanks for using MariaDB!
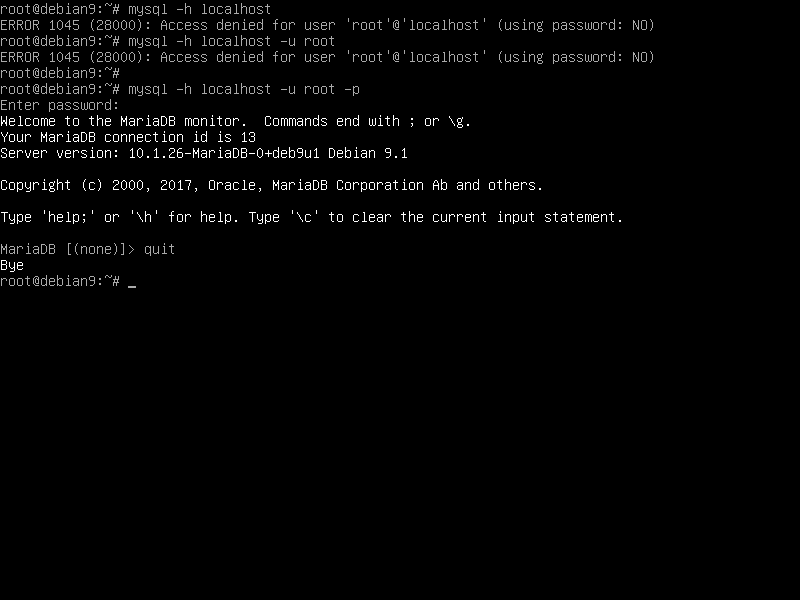
In order to test MariaDB security, try to login to the database from console with no root password. The access to the database should be denied if no password is provided for the root account. If the password is supplied, the login process should be granted to MySQL console, as shown in the below screenshot.
mysql -h localhost -u root
mysql -h localhost -u root –p
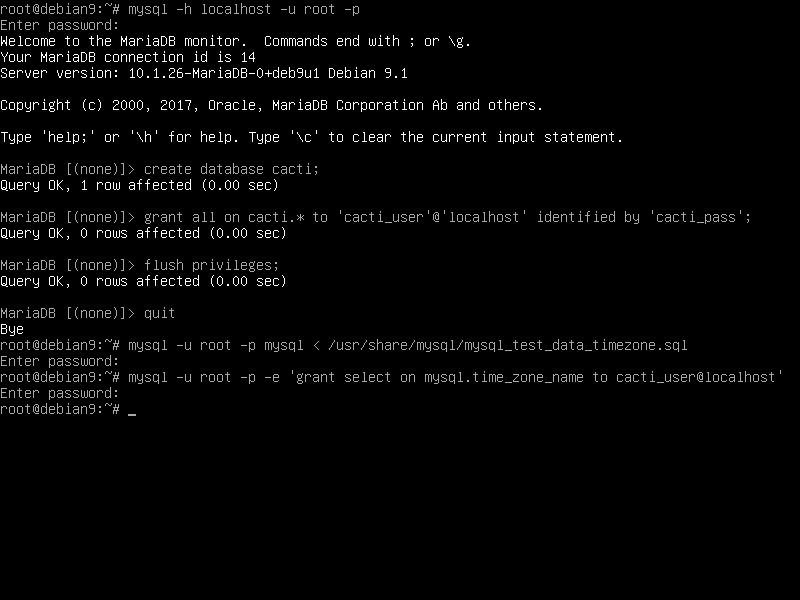
While logged in to MariaDB database, go ahead and create a database for Cacti installation and create the user that will be used to manage cacti database, by issuing the following commands. Replace the cacti database user and password accordingly.
create database cacti;
grant all on cacti.* to 'cacti_user'@'localhost' identified by 'cacti_pass';
flush privileges;
exit
Also, grant select permissions to the cacti database user for MySQL time zone by issuing the below commands. This is a new requirement in order to install and run the latest release of Cacti.
mysql -u root -p mysql < /usr/share/mysql/mysql_test_data_timezone.sql
mysql -u root -p -e 'grant select on mysql.time_zone_name to cacti_user@localhost'
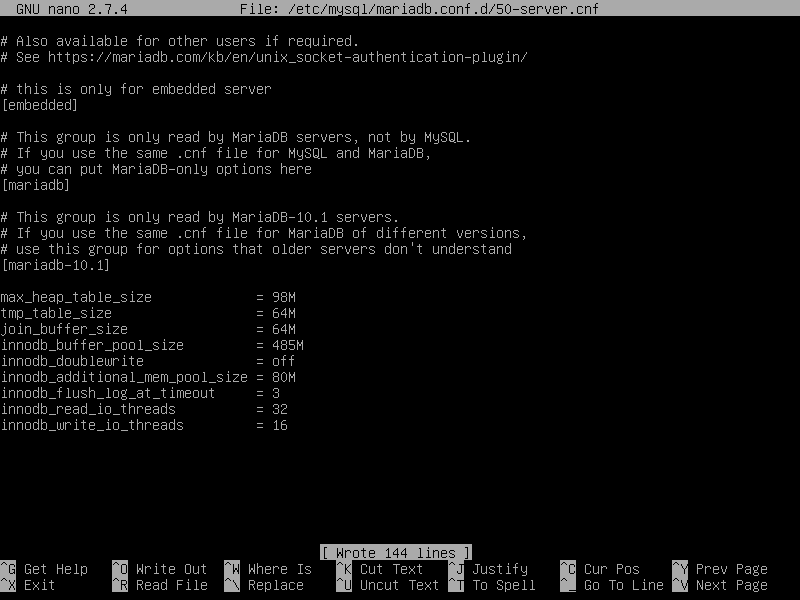
In the next step, open MySQL server default configuration file and append the following lines as shown in the below sample.
nano /etc/mysql/mariadb.conf.d/50-server.cnf
Add the following lines at the bottom of the 50-server.cnf file:
max_heap_table_size              = 98M
tmp_table_size                   = 64M
join_buffer_size                 = 64M
innodb_buffer_pool_size          = 485M
innodb_doublewrite               = off
innodb_additional_mem_pool_size  = 80M
innodb_flush_log_at_timeout      = 3
innodb_read_io_threads           = 32
innodb_write_io_threads          = 16
In order to apply all changes we made so far, restart MySQL and Apache daemons and verify that the daemons are running by issuing the following commands.
systemctl restart mysql apache2
systemctl status mysql apache2
Configure SNMP Service
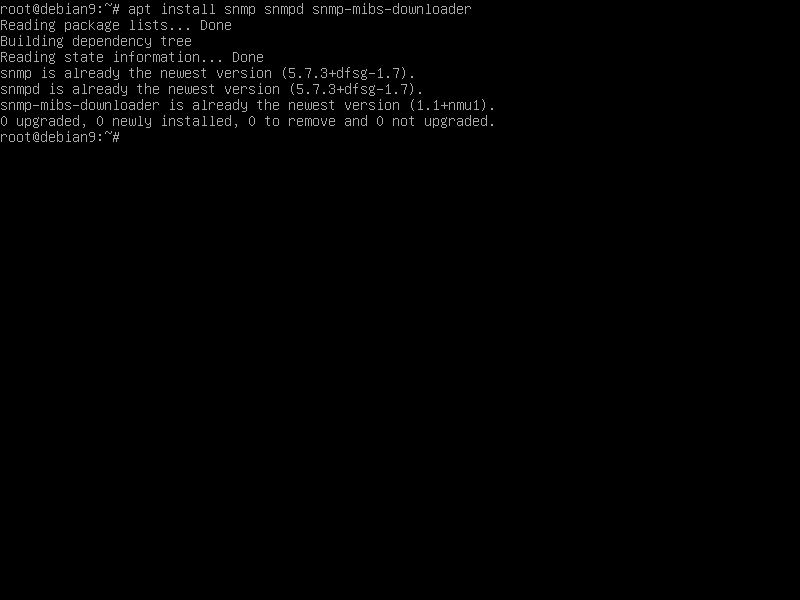
Cacti web monitoring service uses the SNMP protocol in order to collect device data and statistics. In order to install the SNMP program, SNMP daemon service and SNMP MIBS in your local Debian 9 system, issue the following command with root privileges.
apt install snmp snmpd snmp-mibs-downloader
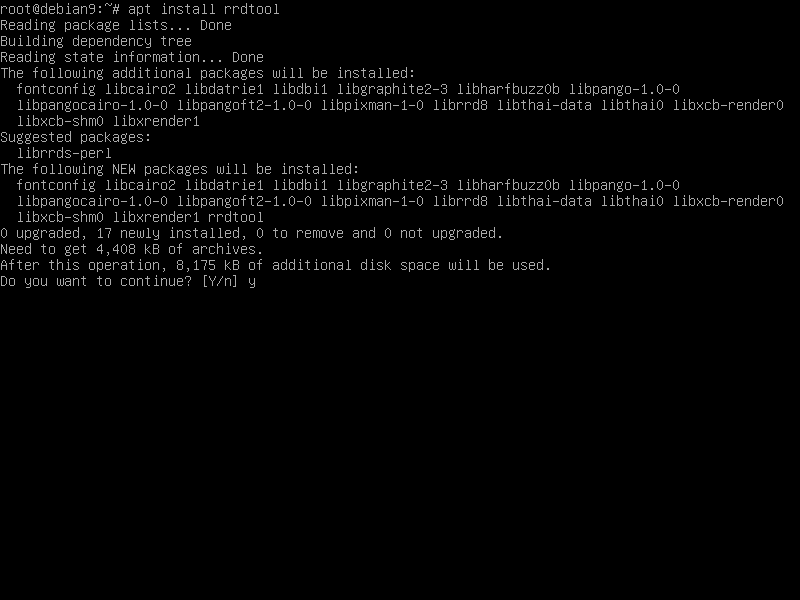
Also, install the industry-standard data logging tool RRDtool, which is used by Cacti to display the graphing functionality.
apt install rrdtool
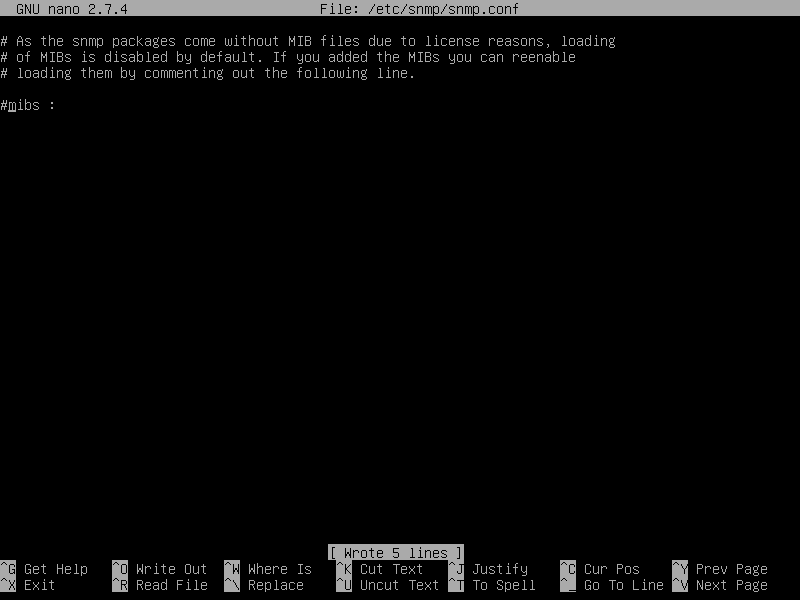
Next, edit the SNMP configuration file /etc/snmp/snmp.conf and comment the “mibs” line by adding a hashtag (#) in front of the line as described in the below image.
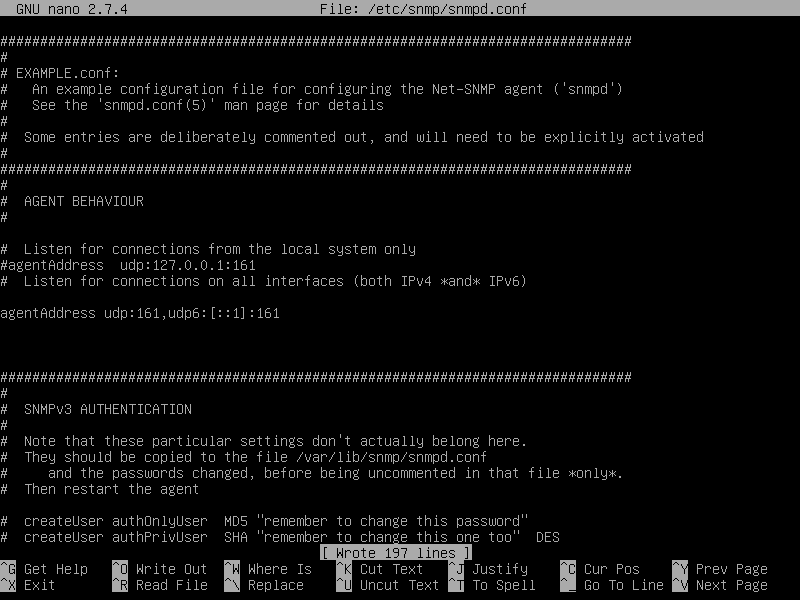
Also configure SNMP daemon remote and localhost access, by opening the snmpd.conf file for editing and search and update the below lines as follows:
nano /etc/snmp/snmpd.conf
Uncomment the line to listen for connections on all interfaces
agentAddress udp:161,udp6:[::1]:161
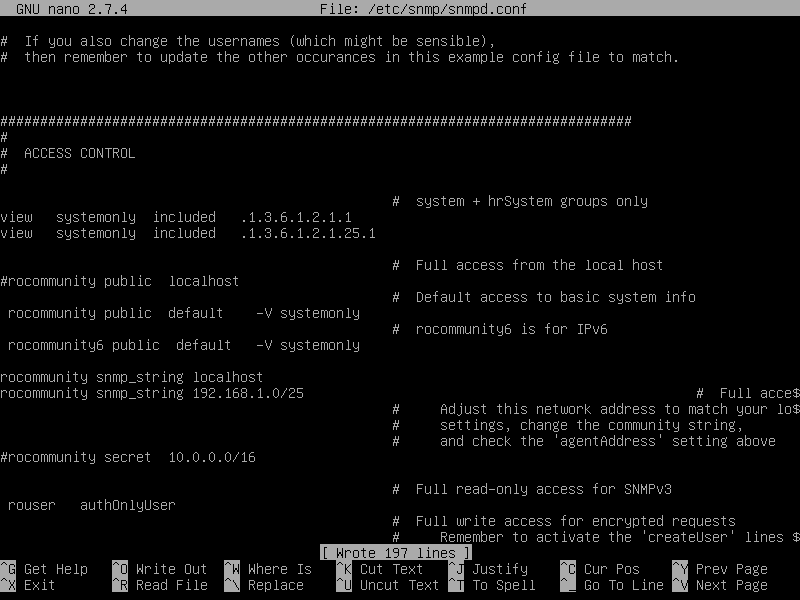
Add the following lines to allow SNMP query for your local network via the snmp_string password. Replace the snmp community string snmp_string password and your network CIDR address accordingly.
rocommunity snmp_string localhost
rocommunity snmp_string 192.168.1.0/25
Optionally, you can also modify the contact and location variable in order to provide information about your server. This information is displayed in Cacti notification area when you check your server details. Also, your system hostname, kernel version and system uptime are displayed in Cacti notification area.
In order to modify this information, edit the sysLocation and sysContact lines under the system information section and add your own values. By default, the following values are configured for sysLocation and sysContact.
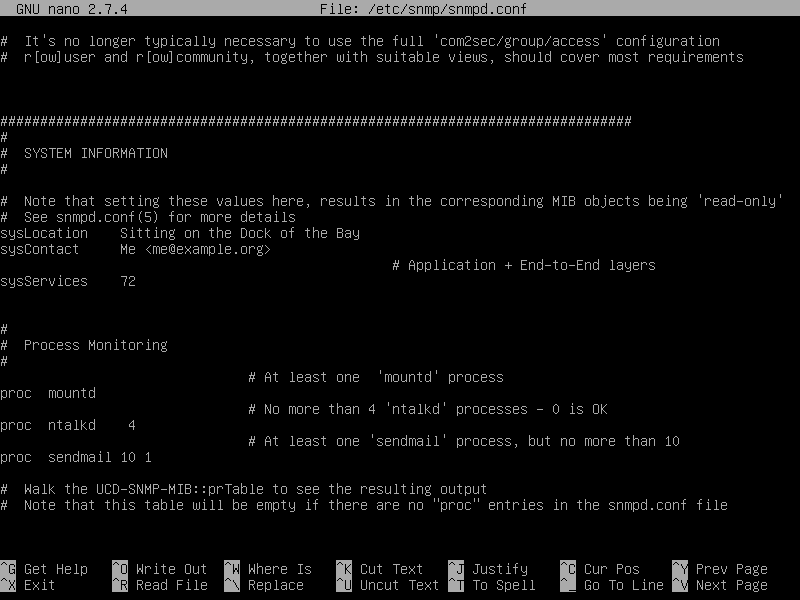
sysLocation Sitting on the Dock of the Bay
sysContact Me <[email protected]>
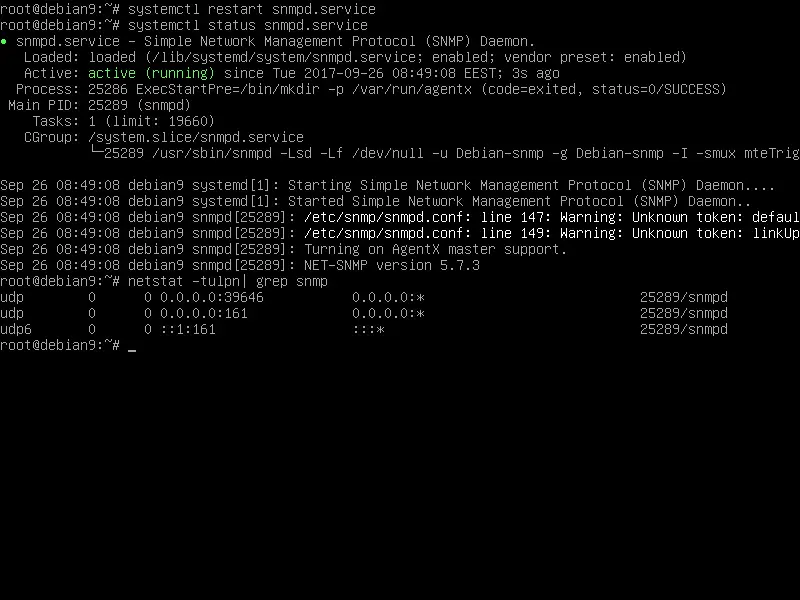
After you’ve made the proper changes to snmpd.conf file, save and close the file and restart snmp daemon to reflect changes by issuing the below commands. Then check the snmpd daemon status and the owned ports in listening state.
systemctl restart snmpd.service
systemctl status snmpd.service
netstat -tulpn| grep snmp
Open firewall port for SNMP:
ufw allow 161/udp
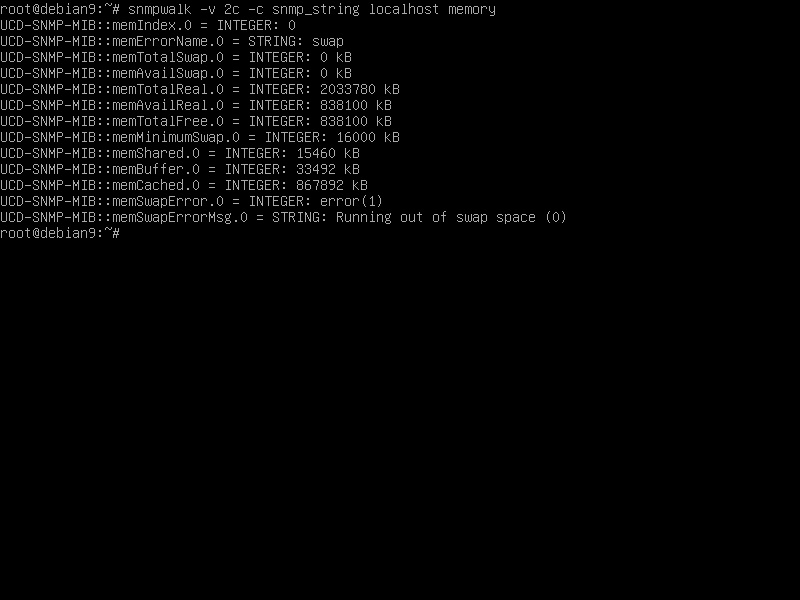
In order to verify that the SNMP daemon is working as expected and retrieves all the SNMP values under memory tree for localhost, run the below command.
snmpwalk -v 2c -c snmp_string localhost memory
Install Cacti-Spine
Cacti-Spine is a replacement for the default cmd.php poller, written in C for faster execution time. In order to compile and install Cacti-Spine pooler from sources in Debian 9, first, execute the following command in order to install all the required dependencies into the system.
apt install build-essential dos2unix dh-autoreconf help2man libssl-dev libmysql++-dev libmariadb-dev libmariadbclient-dev librrds-perl libsnmp-dev
Next, download the latest version of Cacti-Spine tar compressed archive with wget utility, extract the tarball archive and enter cacti-spine extracted directory by issuing the following commands.
wget https://www.cacti.net/downloads/spine/cacti-spine-latest.tar.gz
tar xfz cacti-spine-latest.tar.gz
cd cacti-spine-1.1.24/
Now, compile and install Cacti-Spine utility from sources by issuing the below commands.
./bootstrap
./configure
make
make install
Cacti-Spine will be installed in /usr/local/spine/ system path. Spine recommends that you set the SUID bit for the spine binary in order to support ICMP ping requests.
chown root:root /usr/local/spine/bin/spine
chmod +s /usr/local/spine/bin/spine
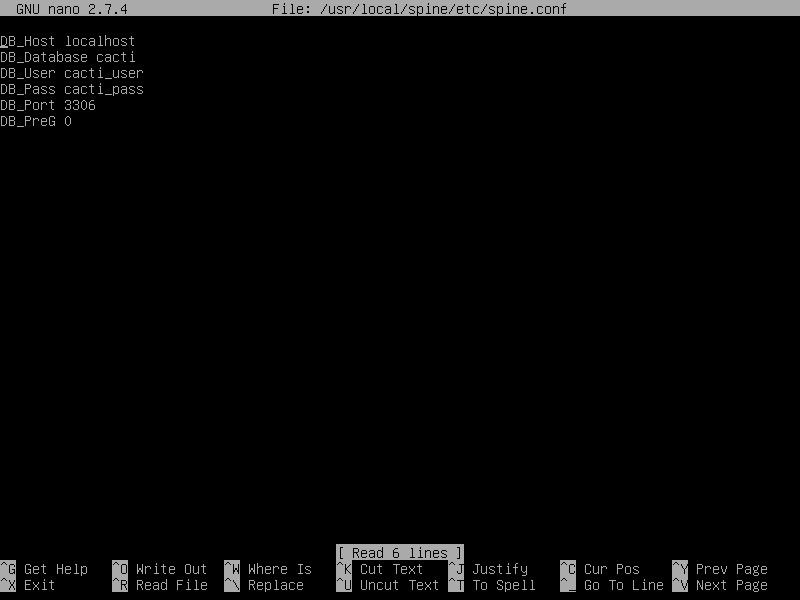
You must also connect Spine to the cacti database by editing the configuration file with as shown in the below file excerpt.
nano /usr/local/spine/etc/spine.conf
spine.conf file sample. Replace the credentials accordingly. Use the same database credentials as configured for Cacti.
DB_Host localhost
DB_Database cacti
DB_User user_cacti
DB_Pass pass_cacti
DB_Port 3306
DB_PreG 0
Install Cacti
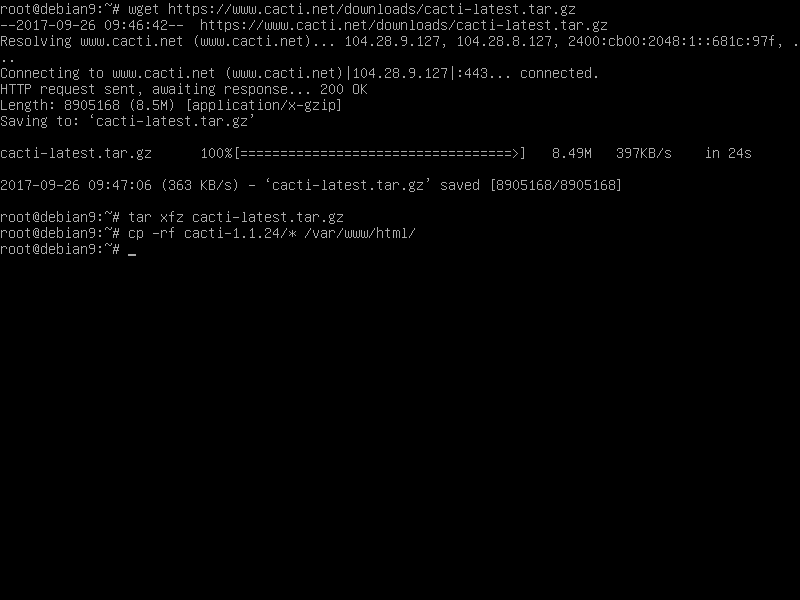
In order to install Cacti from sources in Debian 9, first, download and extract the latest version of Cacti tarball compressed archive, then copy all the extracted files to apache web root path, by issuing the following commands.
wget https://www.cacti.net/downloads/cacti-latest.tar.gz
tar xfz cacti-latest.tar.gz
cp -rf cacti-1.1.24/* /var/www/html/
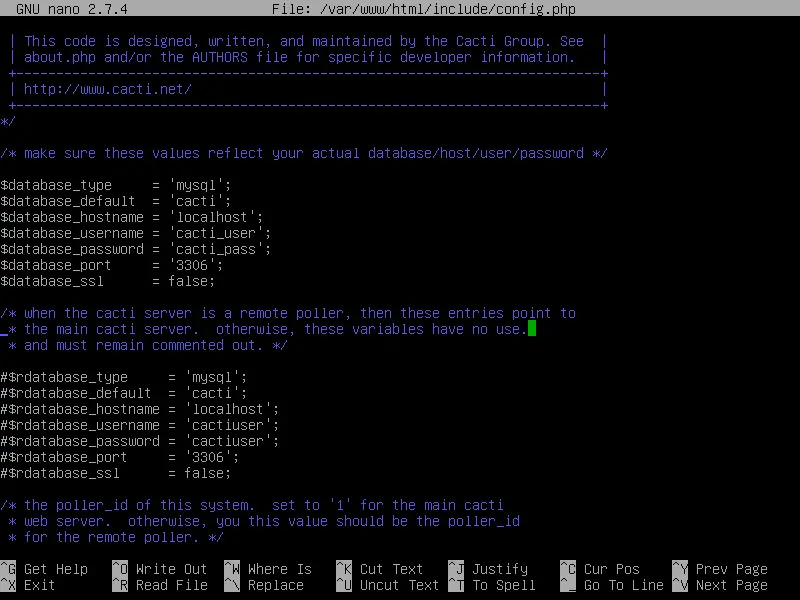
In the next step, open cacti configuration file and update the following lines to reflect MySQL cacti database username, password, host and URL path accordingly, as illustrated in the below example.
nano /var/www/html/include/config.php
Cacti config.php file sample:
$database_type     = 'mysql';
$database_default  = 'cacti';
$database_hostname = 'localhost';
$database_username = 'cacti_user';
$database_password = 'cacti_pass';
$database_port     = '3306';
$database_ssl      = false;
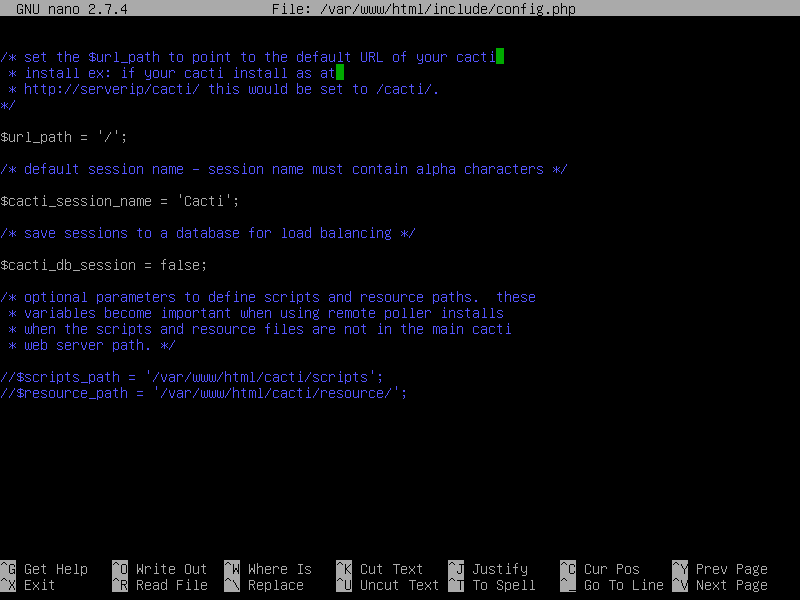
Scroll down and change the path variable from “/cacti” to “/”
$url_path = '/';
Next, you need to populate cacti database by loading the cacti.sql script located in your web server document root location and verify cacti mysql tables by issuing the below commands.
mysql -u cacti_user cacti -p < /var/www/html/cacti.sql
mysql -u cacti_user cacti -p -e 'show tables'
Finally, before starting to install Cacti from web interface, execute the below commands in order to remove the default index.html file installed by Apache web server, create the log file for Cacti and allow Apache runtime user with full write permissions to cacti installation path.
rm /var/www/html/index.html
touch /var/www/html/log/cacti.log
chown -R www-data:www-data /var/www/html/
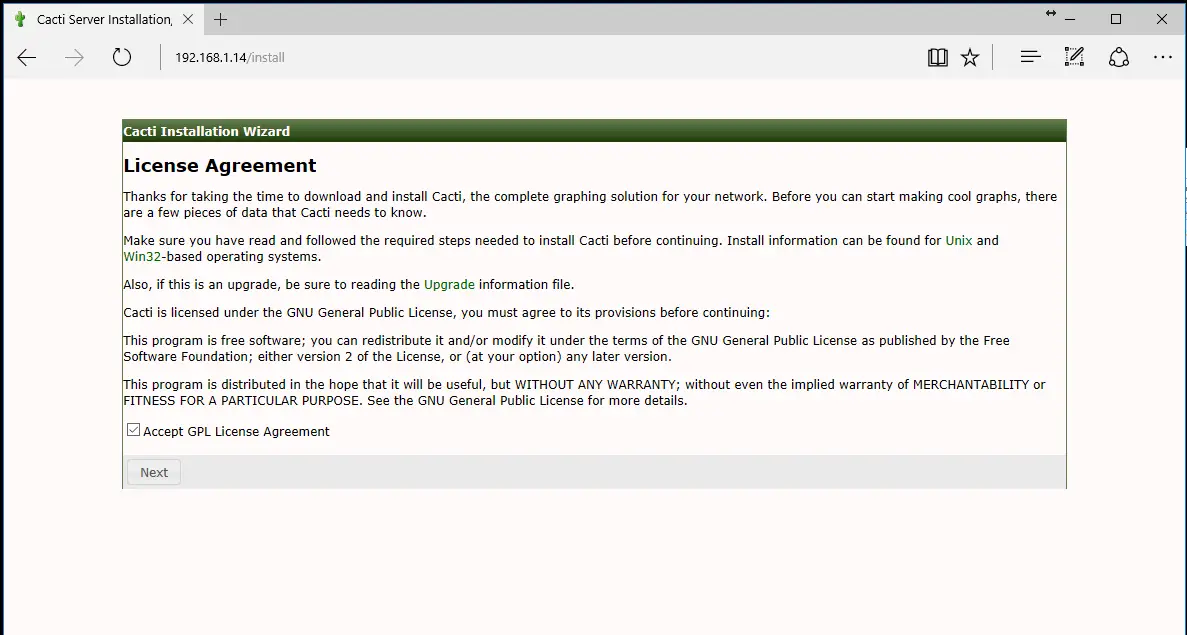
Start installing Cacti via the web interface by visiting your system IP address or domain name from a browser and opening the following URL.
At the first screen check Accept GPL License Agreement and hit on the Next button to continue as shown in the below screenshot.
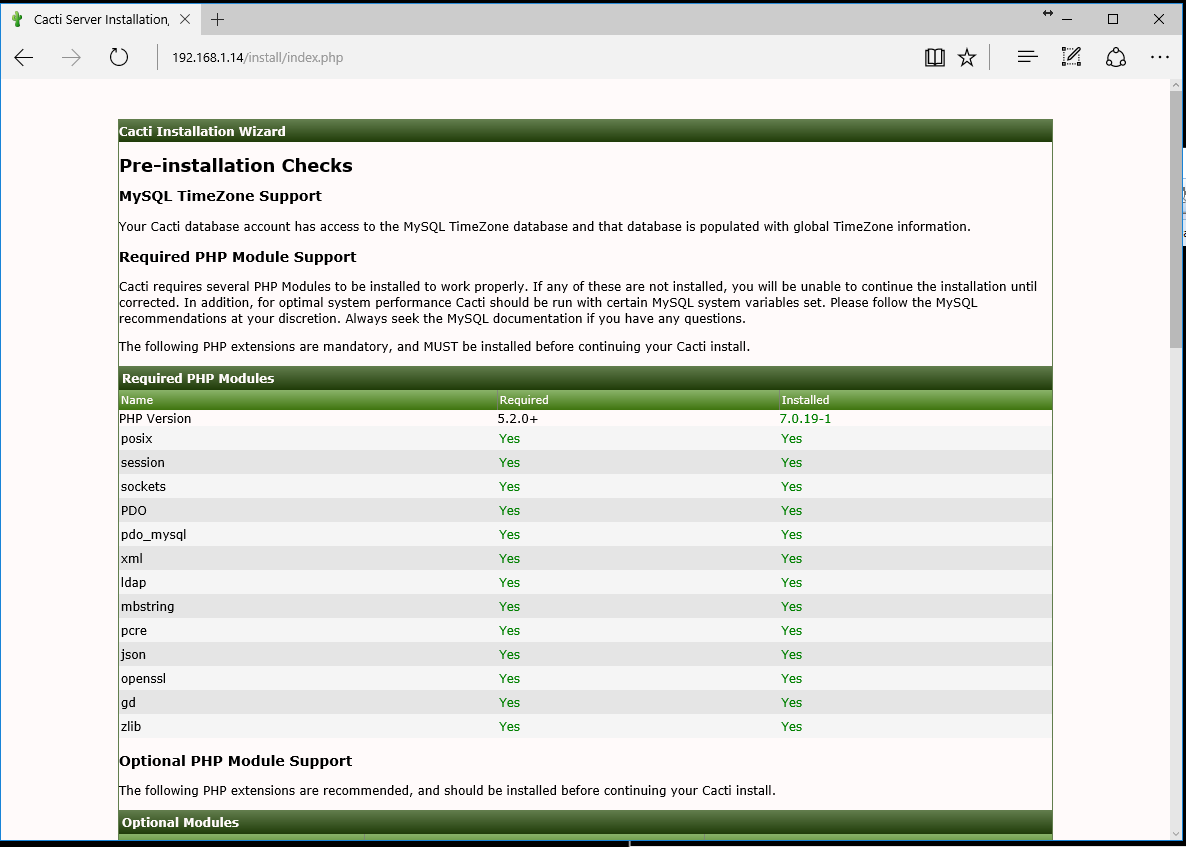
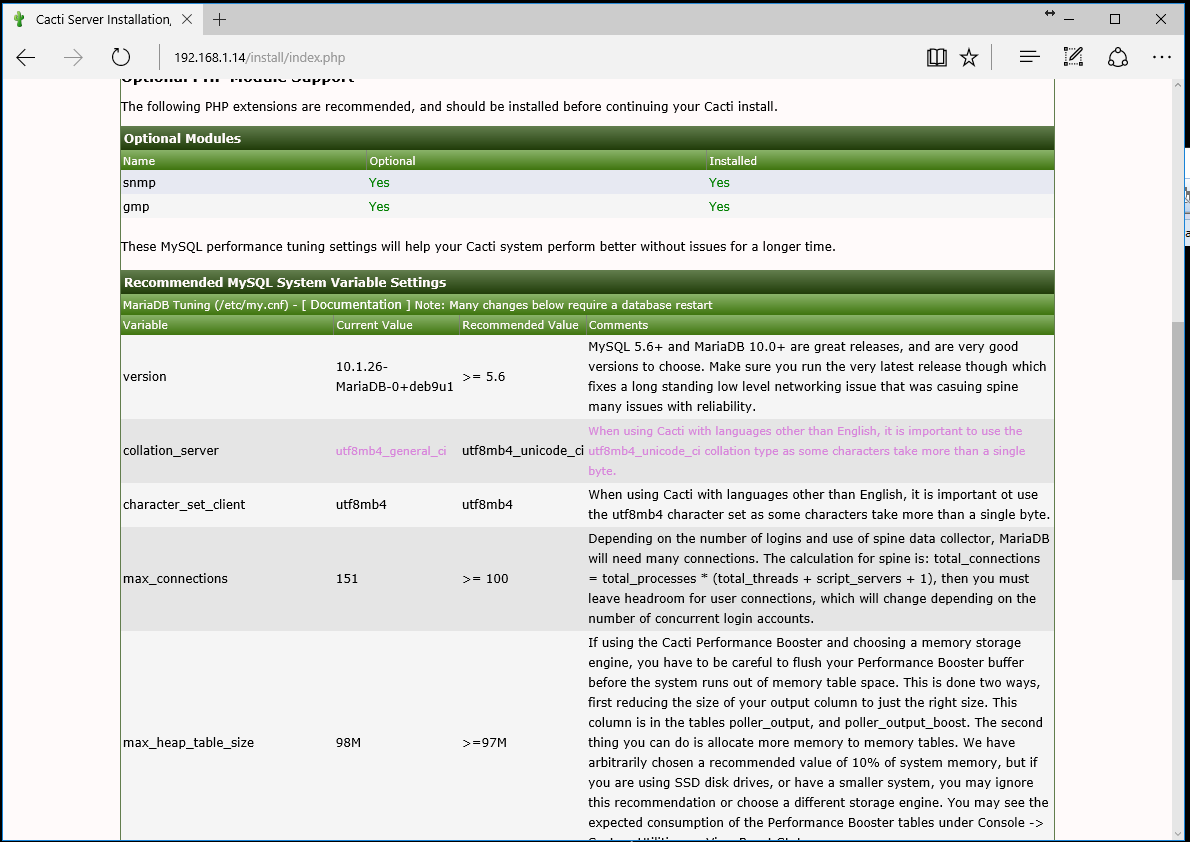
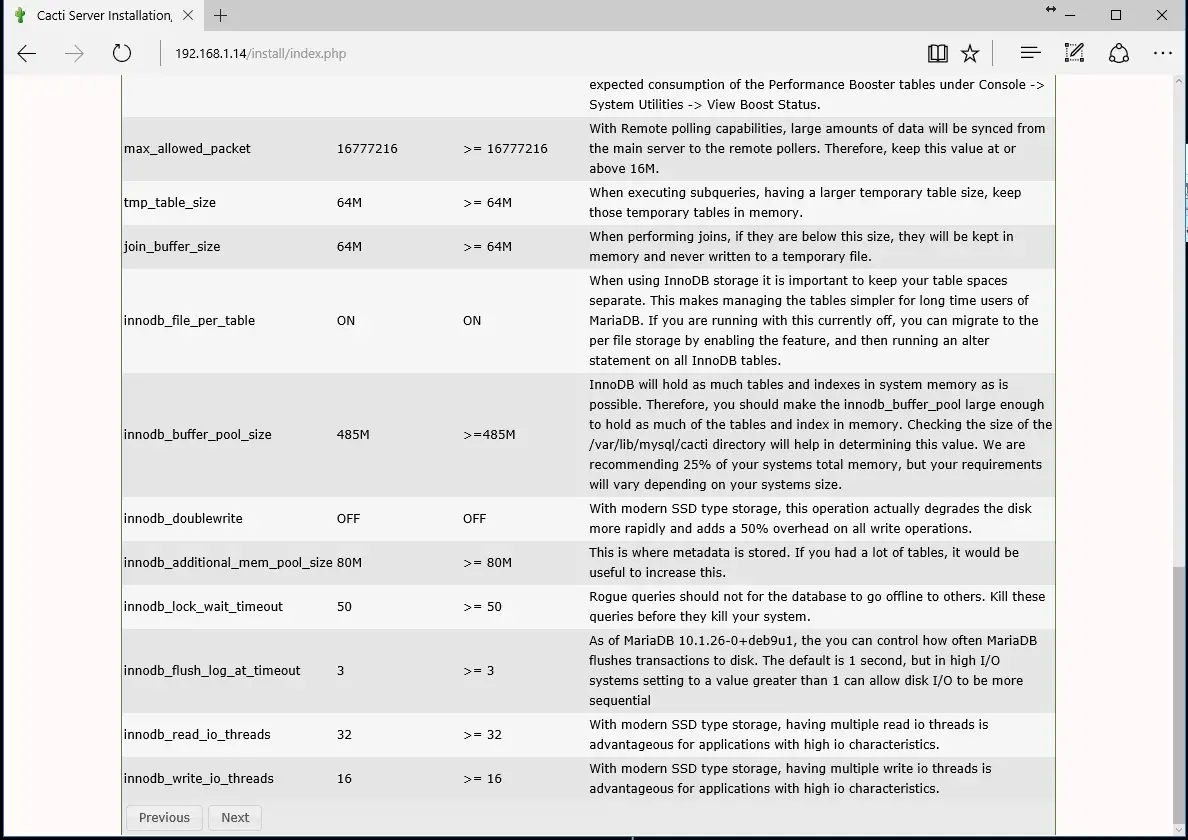
On the next screen, scroll down and verify if all system requirements are passed by the installer and hit Next button to move forward with the installation process.
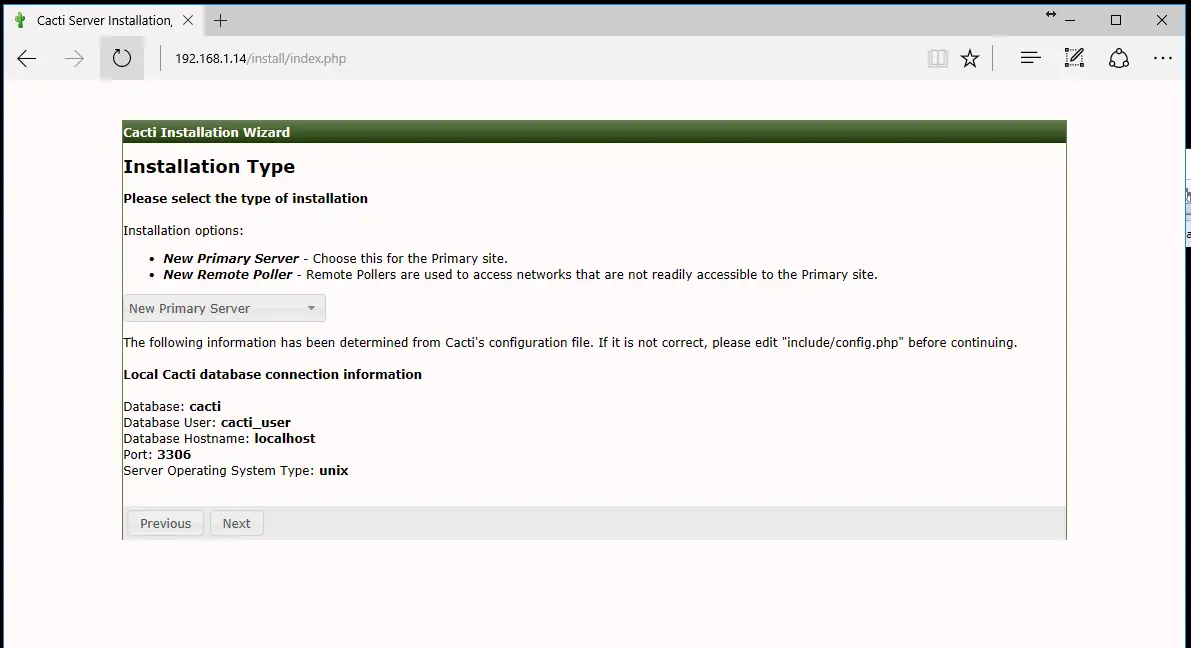
Next, choose New Primary Server as the installation type and click on Next button to continue.
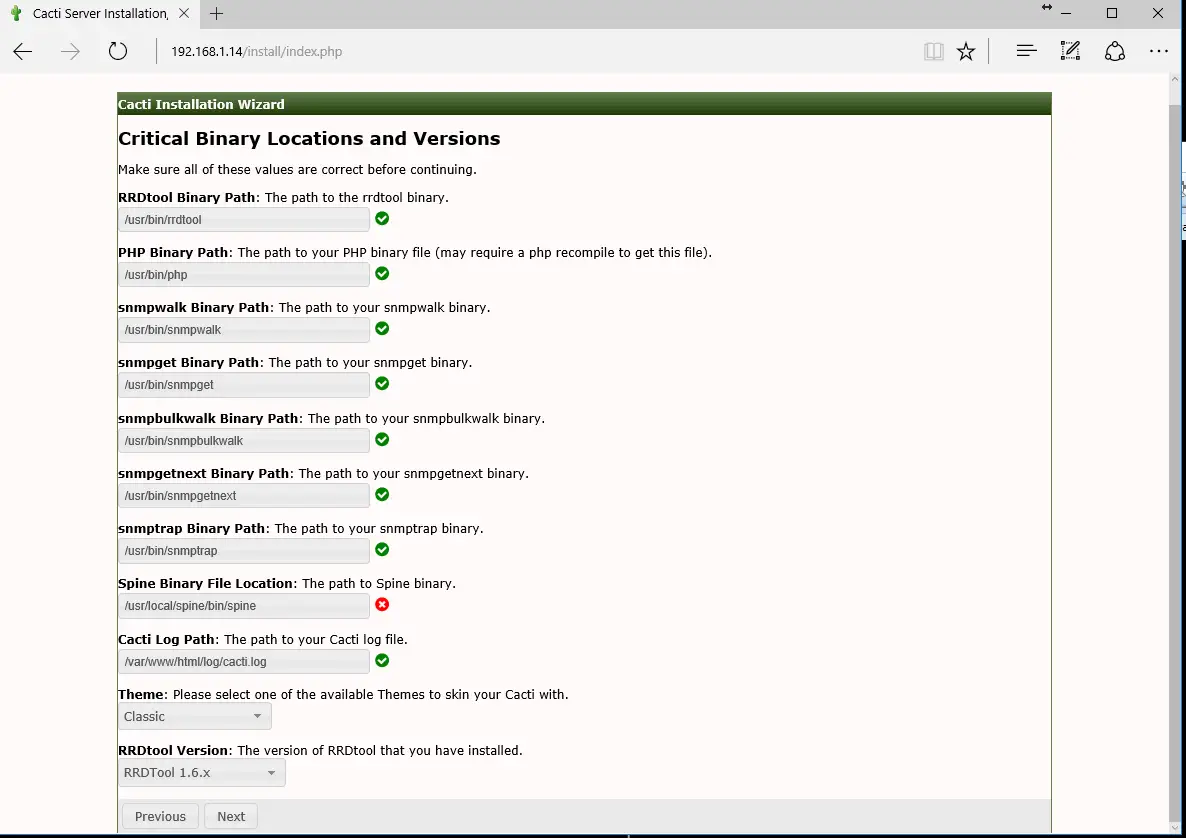
Now verify if all critical binary locations and versions are correctly detected by cacti installer. Also, you should update Spine binary path to /usr/local/spine/bin/spine. You can choose the Classical theme and hit Next button to continue.
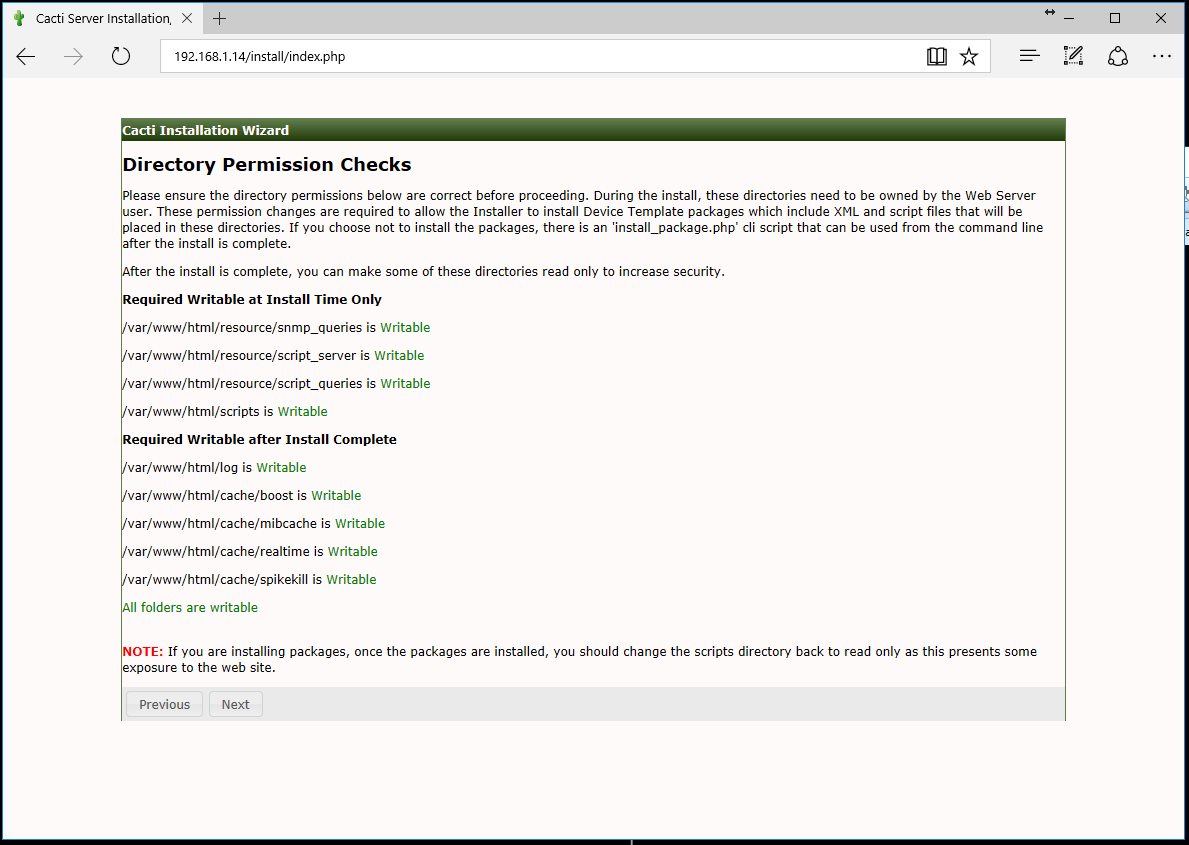
On the next screen, the installer will verify Apache web root directory permissions in order to check if the web server is allowed to perform writes to cacti installation path. If all the required paths are writable, hit on Next button to continue.
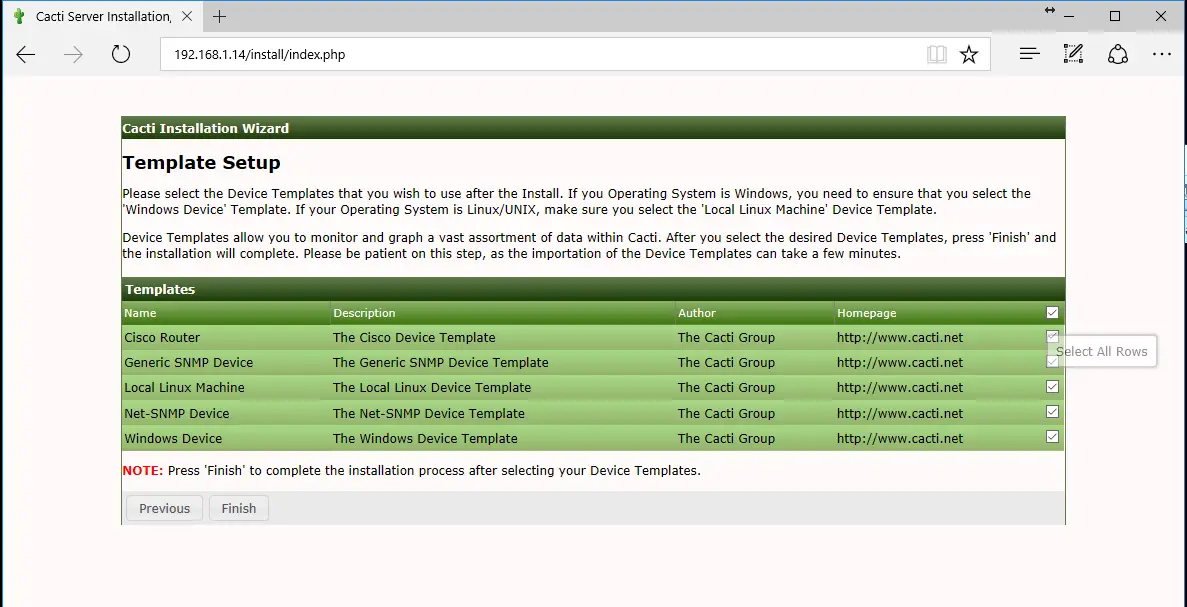
Select all the templates from the provided list and hit on Finish button in order to complete the installation.
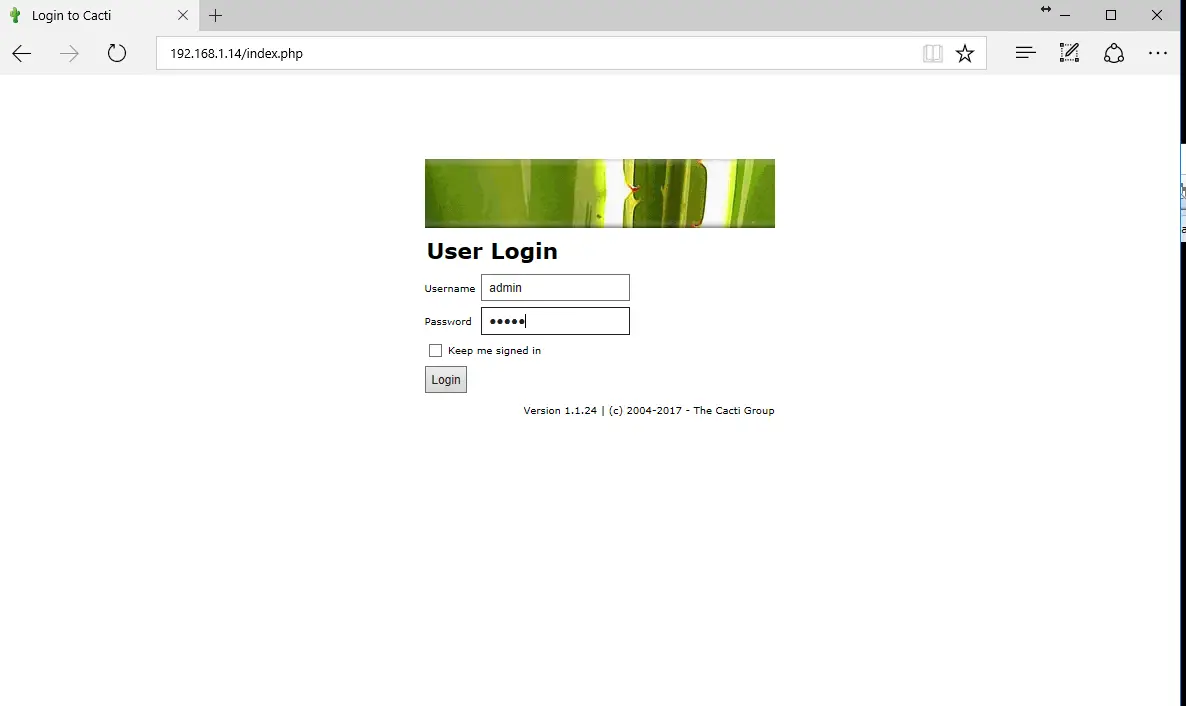
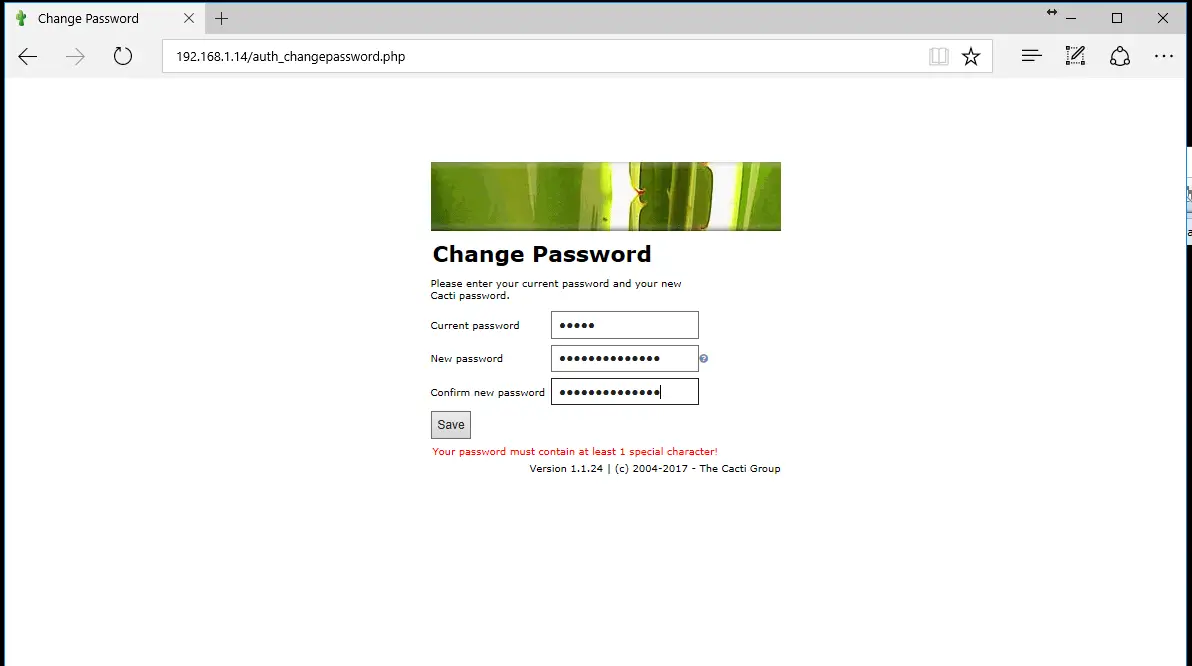
After you’ve finished the installation process, log in to Cacti web interface with the following default credentials and replace the admin default password with a new strong password, as illustrated in the following screenshots.
Username: admin
Password: admin
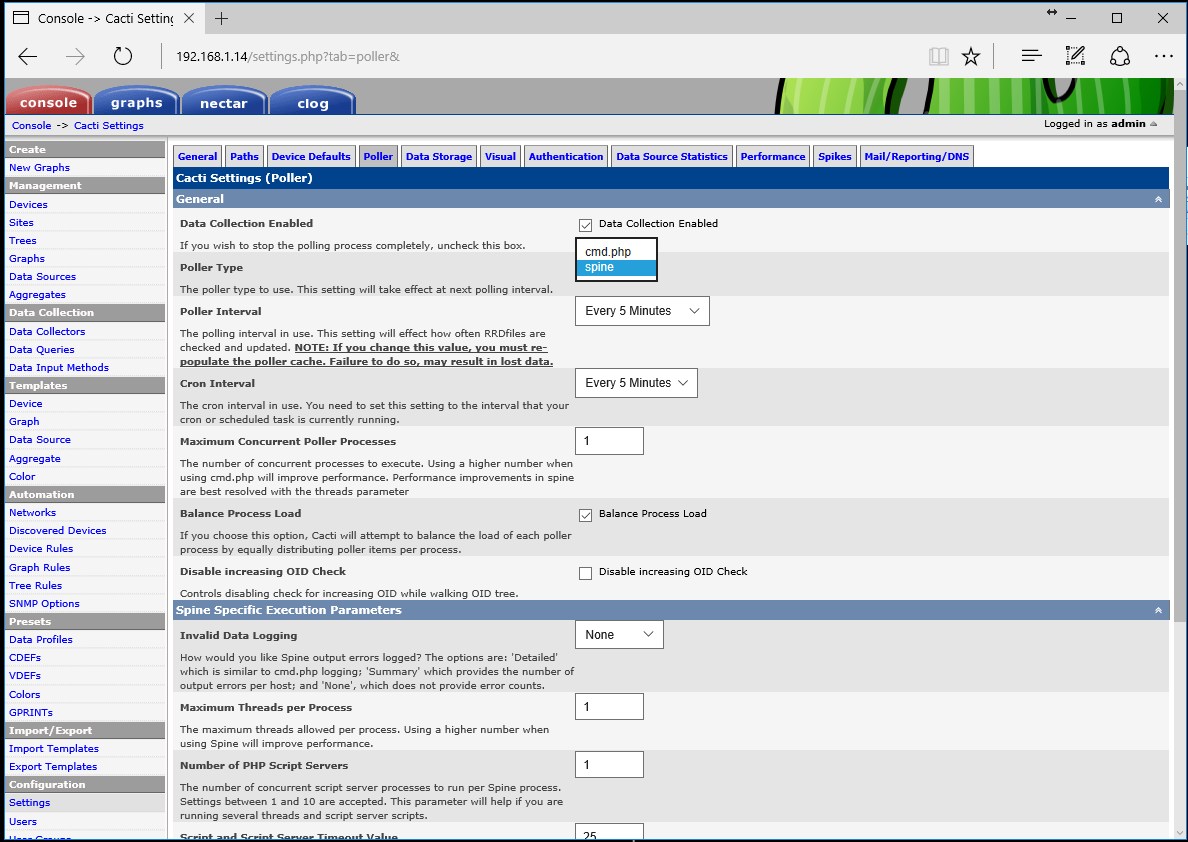
After you log in to Cacti web interface, navigate to Console -> Configuration -> Settings -> Poller and change the poller type from cmd.php to spine binary, as shown in the below image. Scroll down and hit the Save button to apply changes.
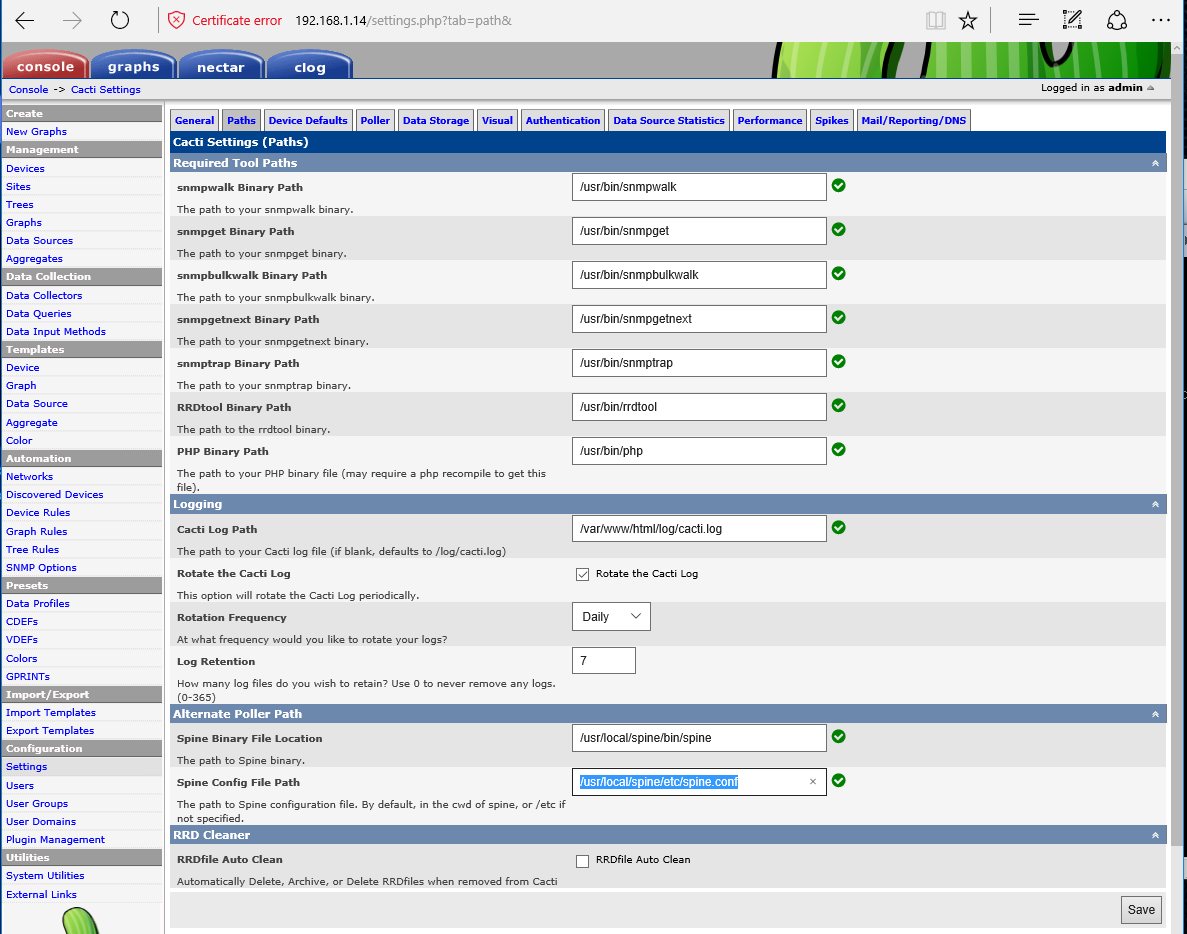
Then navigate to Console -> Configuration -> Settings -> Paths and update Cacti-Spine and set the configuration file path to the following path /usr/local/spine/etc/spine.conf and hit on Save button to apply configuration, as illustrated in the below image.
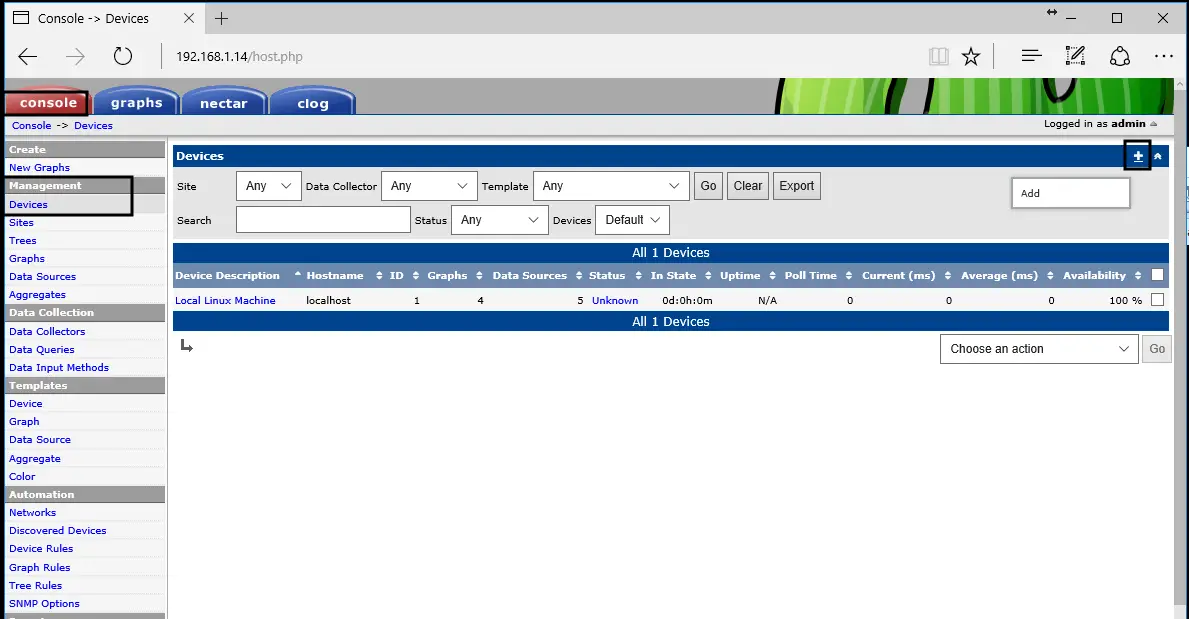
In order to add a new device to be monitored via SNMP, go to Console -> Management -> Devices and hit on + icon, as illustrated in the below image. For demonstration purposes, we’ll add the localhost machine to be monitored by Cacti via SNMP protocol.
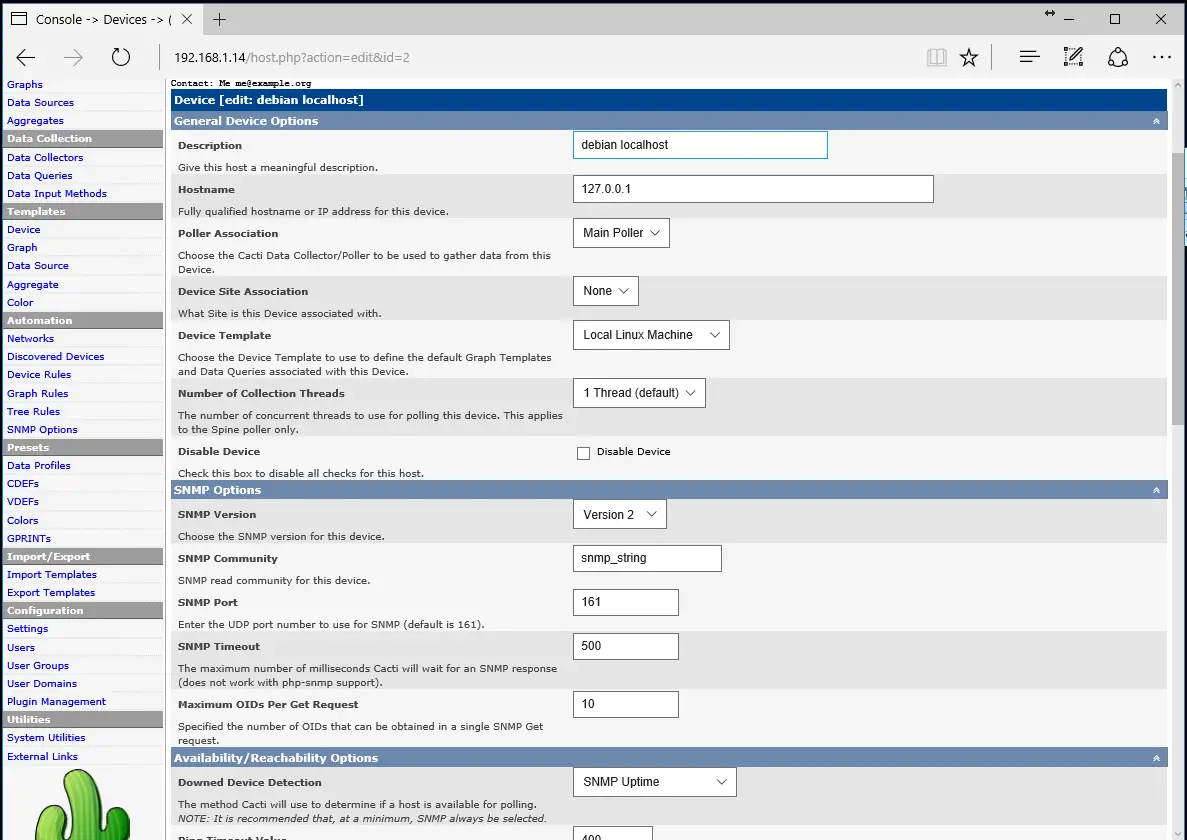
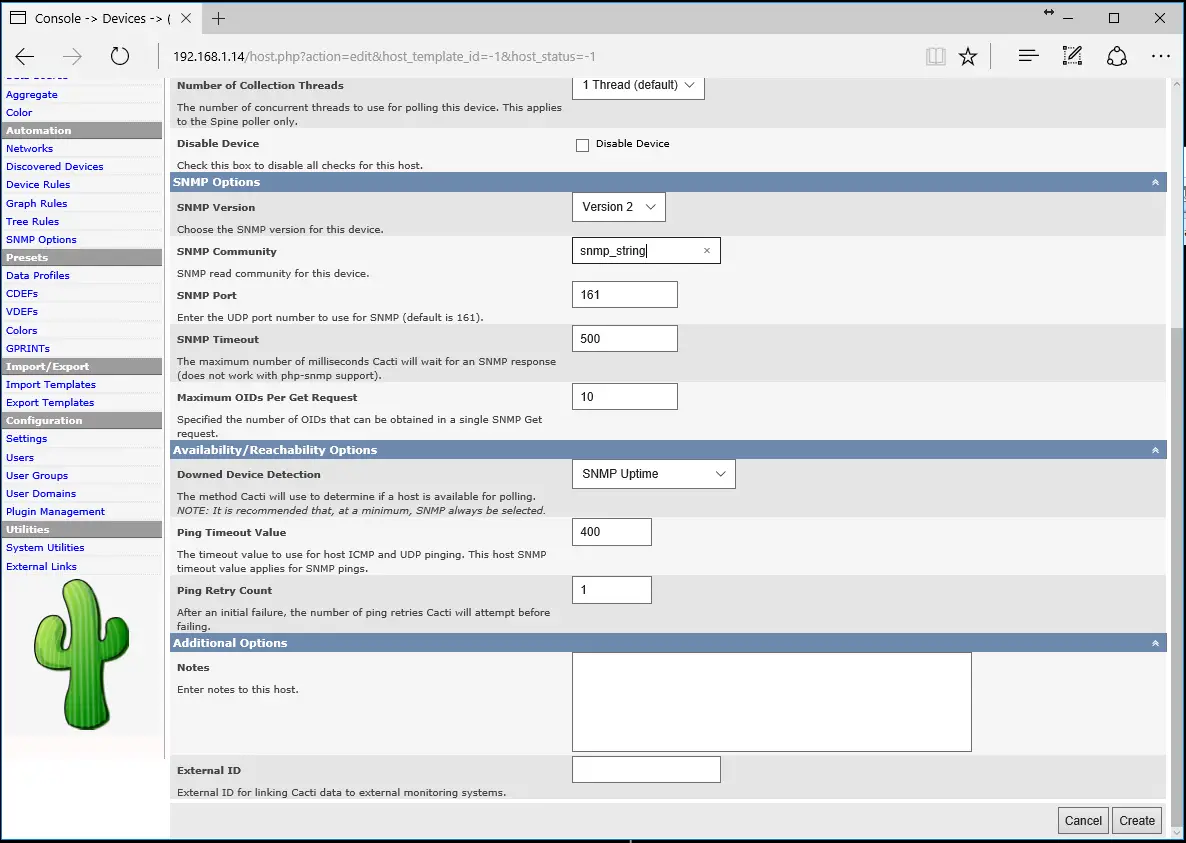
For the newly added Linux device that will be monitored via SNMP, add a description for the device, the hostname, FQDN or the IP address of the monitored device and select Local Linux Machine as device template. In SNMP options, select the proper SNMP Version (in this case we’ll use the version 2) and write your device SNMP community string, as described in the below images. In case the SNMP port hasn’t been changed, leave the port value as default and, when you finish, scroll down and hit on Create button to add the device to Cacti database in order to be monitored.
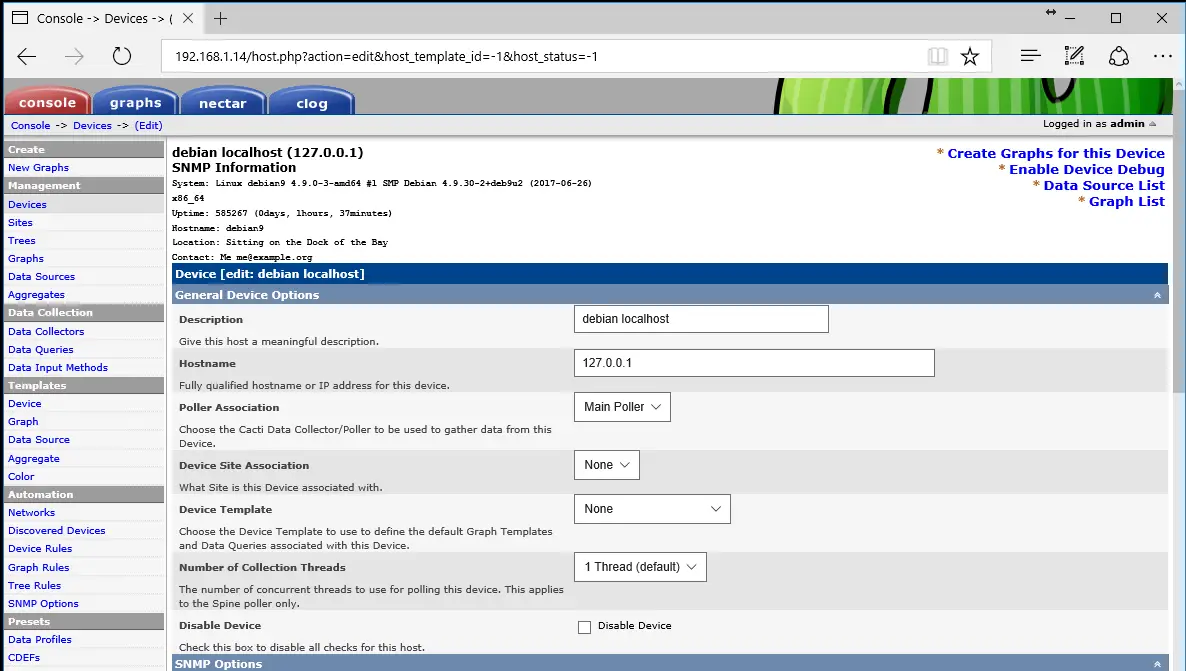
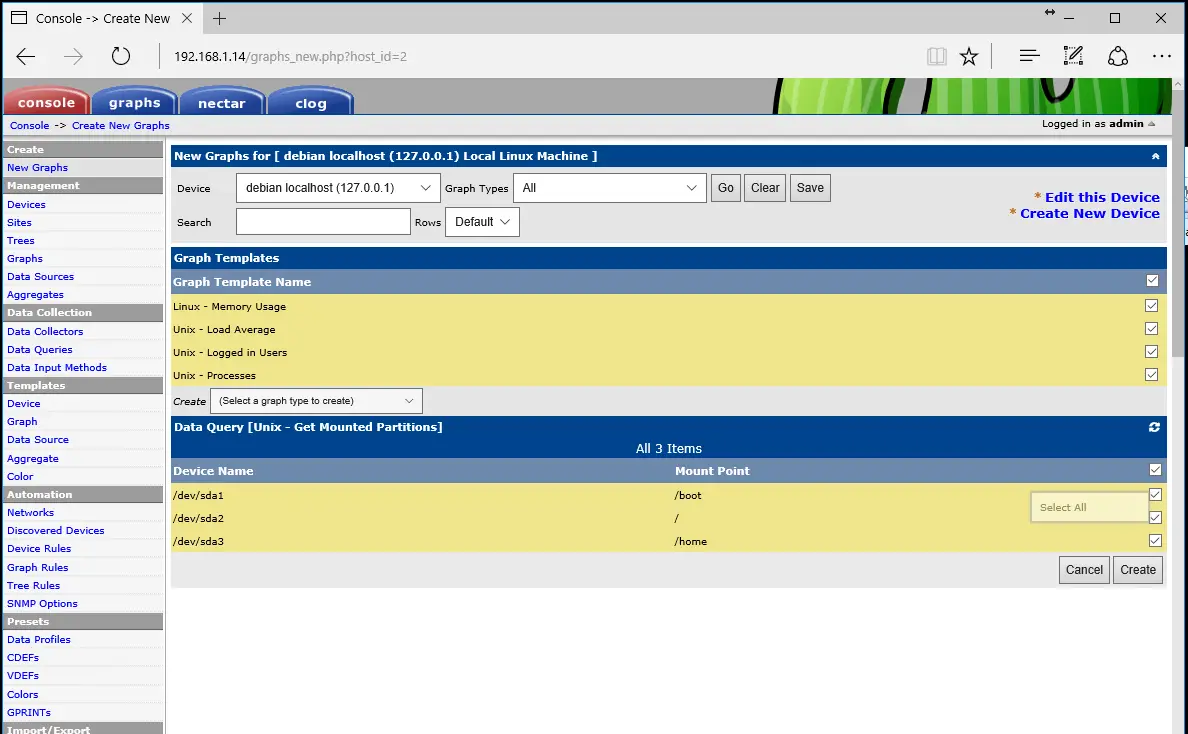
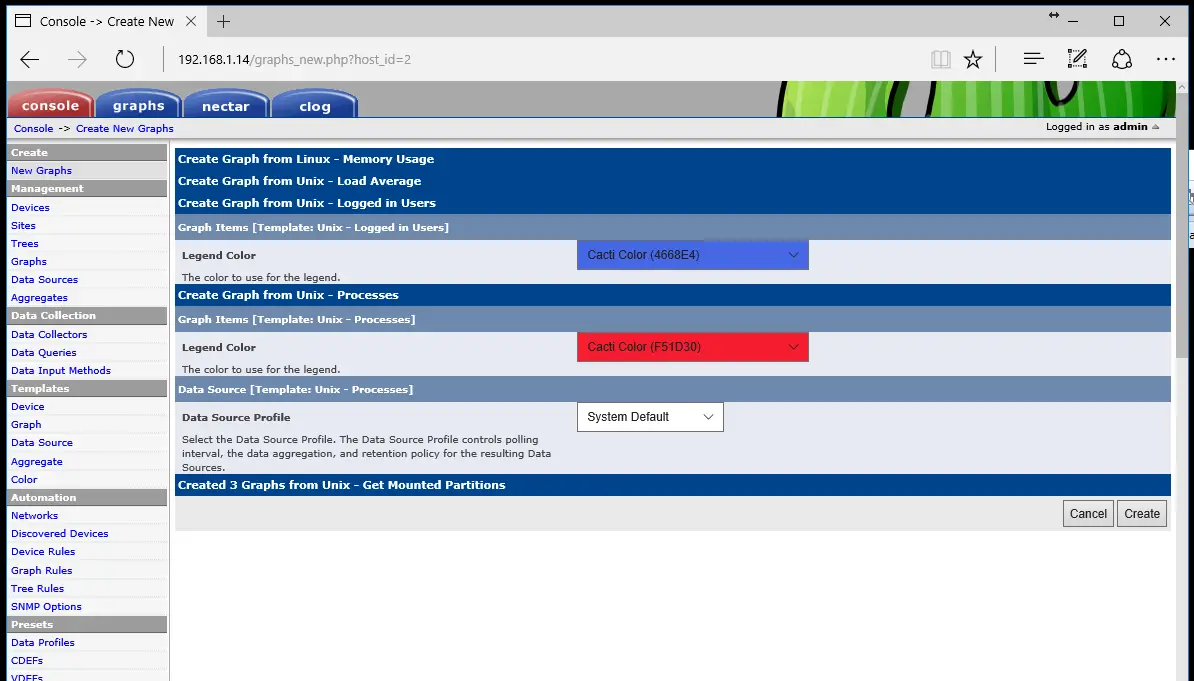
After the device has been added to Cacti database, an SNMP summary will be displayed on top of the device page in case the device was properly detected and queried. In order to create RRDTool SNMP graphs for this device, click on Create Graphs for this device link, check the graph templates you want to further examine and hit on Create button to move to the next screen, then, hit on Create button again to finish, as illustrated in the following images.
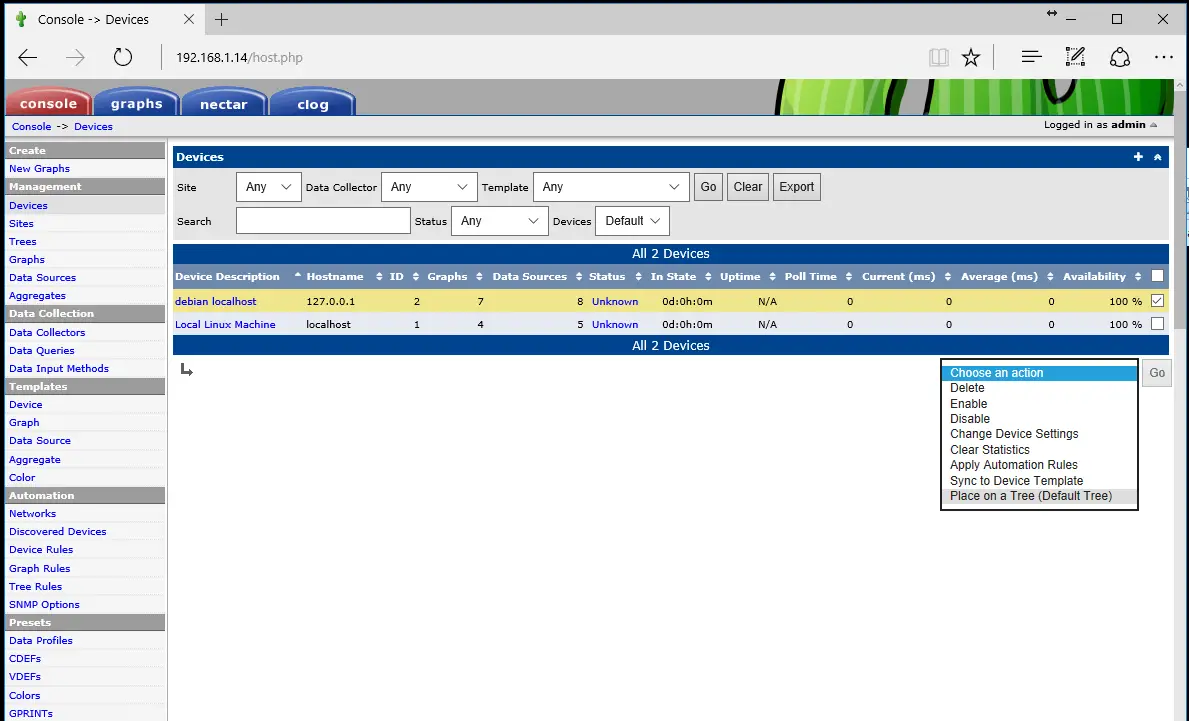
In order to visualize the graphs, navigate to Console -> Management -> Devices, check the device you want to further perform an action and select Place on a Tree (Default Tree) from action menu.
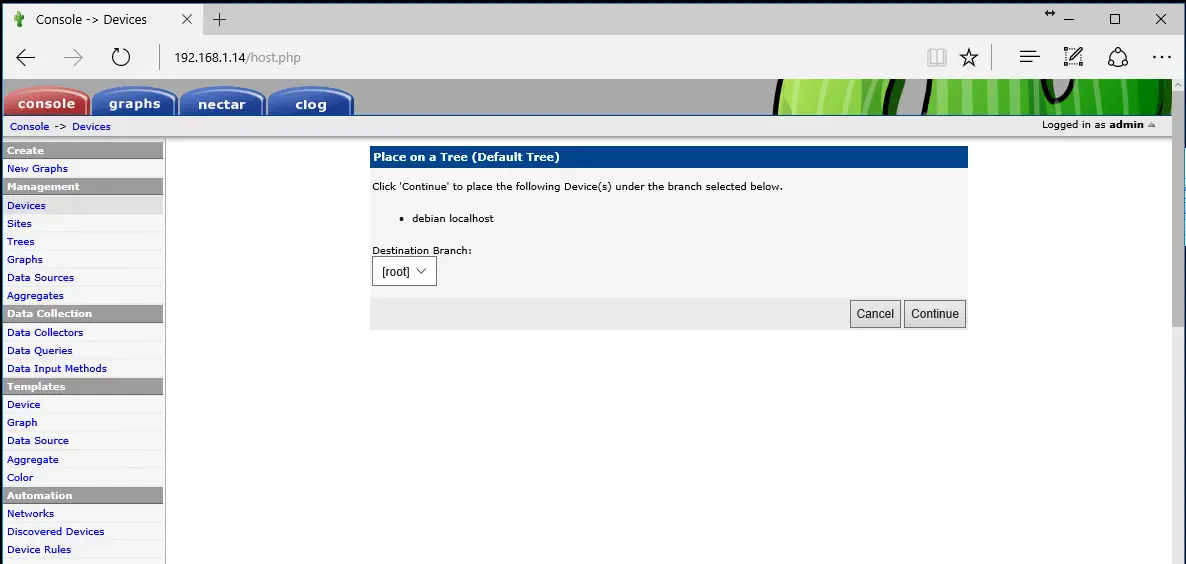
On the new screen, leave the Destination Branch as default and hit on Continue button to finish the process, as described in the below image.
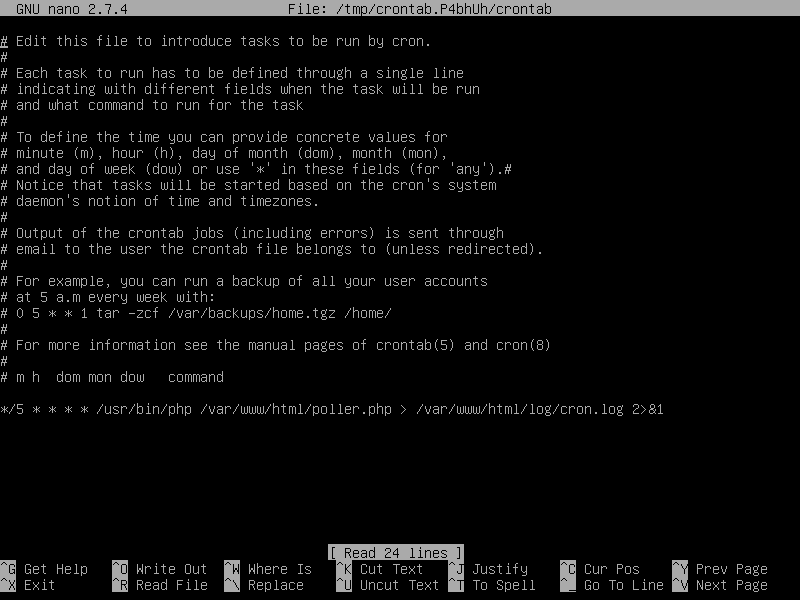
Finally, in order for Cacti poller to start collecting data about monitored devices, you need to add a new cron job that will query the devices via SNMP every 5 minutes. Add the scheduled job to be owned and executed by Apache runtime user by issuing the below command.
crontab –u www-data –e
Crontab job line:
*/5 * * * * /usr/bin/php /var/www/html/poller.php > /var/www/html/log/cron.log 2>&1
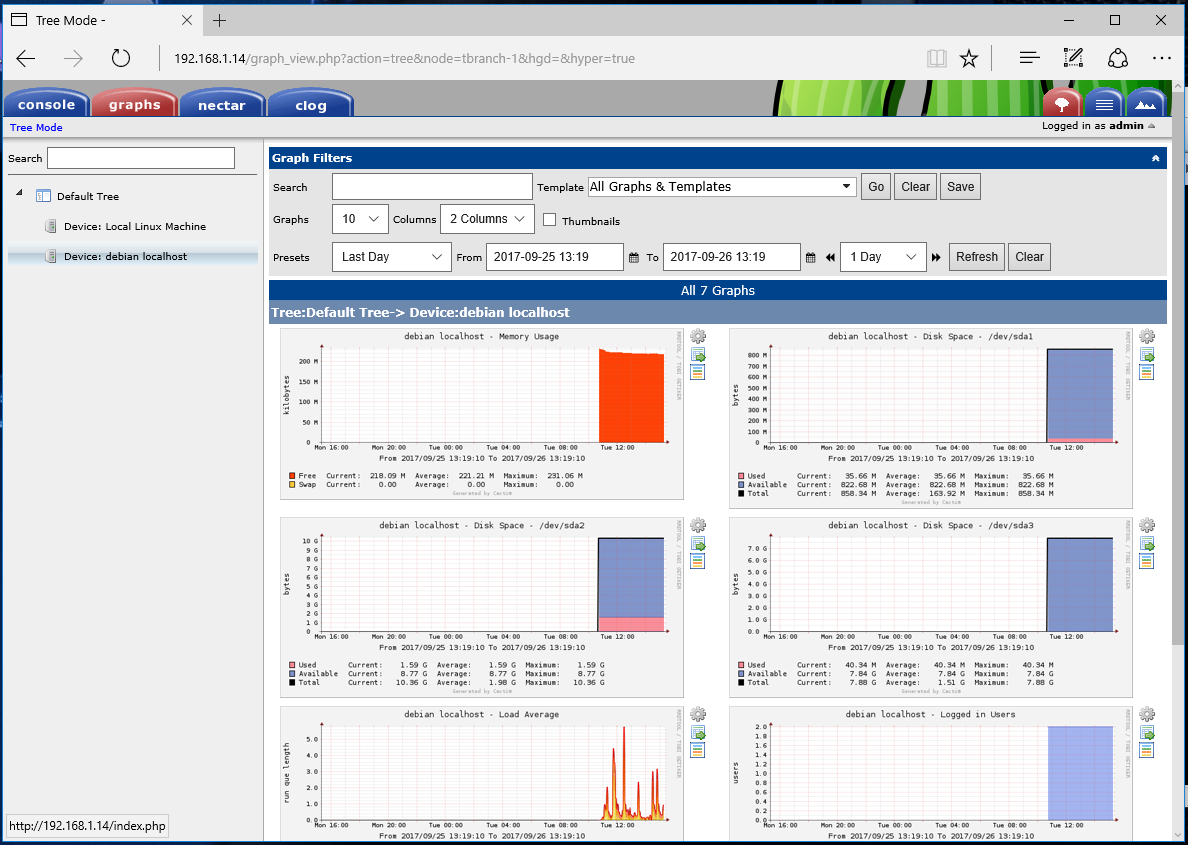
After you have added the pooler cronjob, wait about a half hour to give Cacti time to gather data and then navigate to the Graphs tab in the Cacti web interface. Expand the default tree and the graphs collected from your monitored machine should be displayed as illustrated in the below screenshot.
For now, Cacti interface can be accessed from client’s browsers in an unsecured way via HTTP protocol. All sensitive information about your devices, as well as cacti login credentials, are sent in plain text. In order to encrypt the traffic between client’s browsers and Cacti web interface, issue the following commands with root privileges in order to enable Apache SSL configuration.
a2enmod ssl
a2ensite default-ssl.conf
systemctl restart apache2
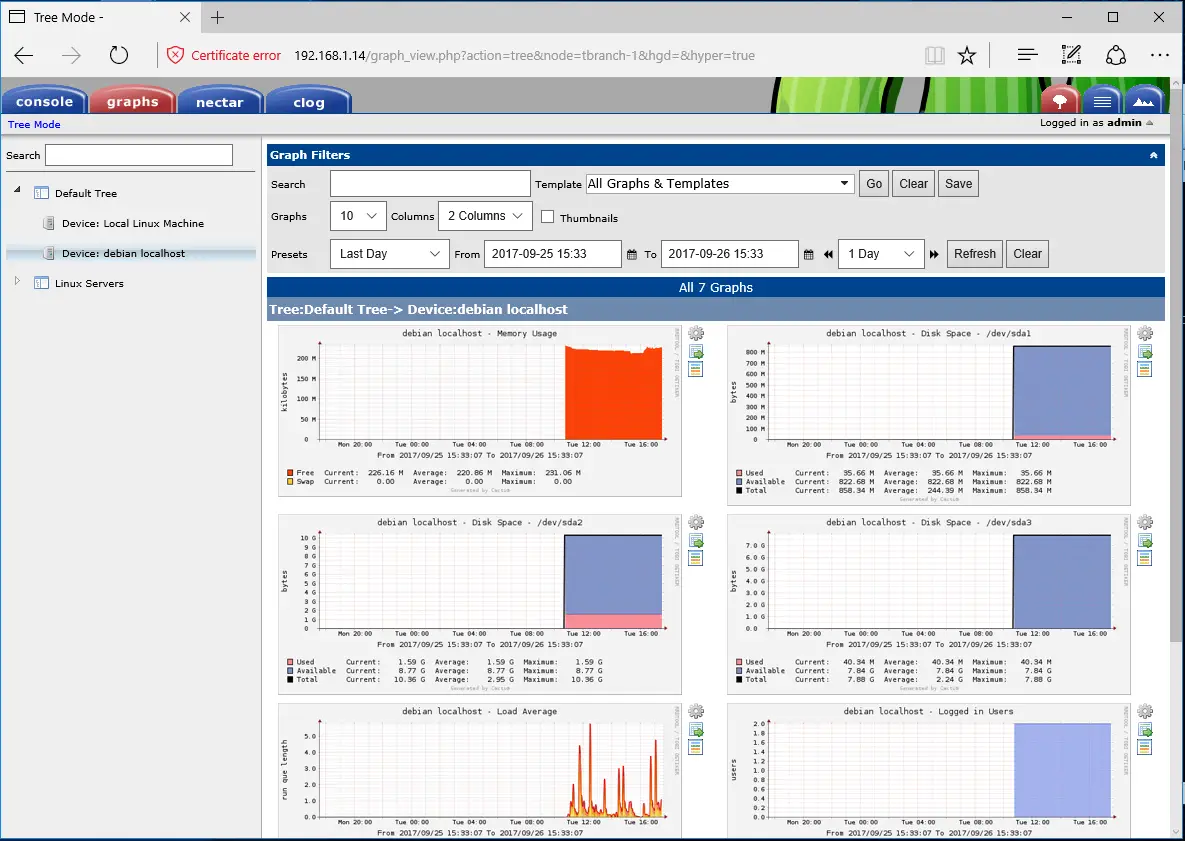
Afterwards, navigate to Cacti web interface via HTTPS protocol. Because Apache web server uses a self-signed certificate to encrypt the connection, an error message should be displayed in your browser. Accept the error and you can now securely access Cacti web interface as shown in the following screenshot.
That’s all! You have successfully installed and configured Cacti from sources in Debian 9. For other custom settings regarding Cacti, visit the documentation pages at the following link https://docs.cacti.net/manual:100

