How to Install SuiteCRM with Nginx on CentOS 7
SuiteCRM is an open source CRM (Customer Relationship Management) software based on PHP. It is fork of the popular CRM software SugarCRM, and has become more popular after the team behind the latter decided to stop the development of the free version. SuiteCRM was nominated as the best open source CRM software at BOSSIE 2015 and 2016.
In this tutorial, we will show you how to install and configure SuiteCRM using Nginx as the Web server. The CRM software will run under the LEMP stack with HTTPS enabled. And for this purpose, we'll be using CentOS 7 as the main OS.
What we will do
- Install Nginx Web server
- Install and configure PHP-FPM
- Install and configure MariaDB
- Download and configure SuiteCRM
- Install SuiteCRM through Web installer
- Final configuration
Prerequisites
- CentOS 7 Server
- Root privileges
Step 1 - Install Nginx Web server
The first step we must do to connect the server and install the basic stack for SuiteCRM. Connect to the server through SSH using the following command:
ssh [email protected]
After connecting as the root user, we need to install a third-party repository on our system. Specifically, we need to install the EPEL (Extra Package for Enterprise Linux) repository on the system before installing Nginx.
Install EPEL repository using the yum command in the following way:
yum -y install epel-release
Now we can install Nginx web server on the system.
yum -y install nginx
If the installation is complete, start the service and enable it to run automatically at the boot time using the systemctl command as shown below.
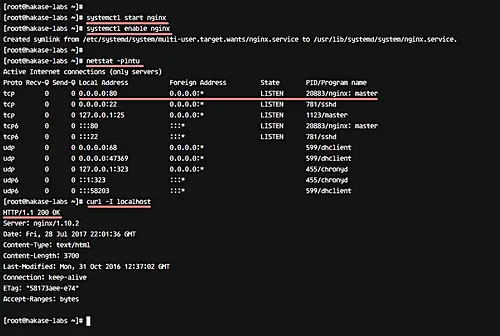
systemctl start nginx
systemctl enable nginx
Nginx web server is now installed, and by default, it's running on port 80. Check it using netstat or curl commands.
netstat -plntu
curl -I localhost
Make sure port 80 is on the 'LISTEN' status, and the curl command gives 200 HTTP status code in its output.
Step 2 - Install and configure PHP-FPM
In this step, we will install and configure PHP-FPM version 7 on the CentOS 7 server. By default, centOS doesn't provide repository for the new PHP version 7. So we need to add a different repository for PHP-FPM 7 installation.
Add new PHP 7 repository 'webtatic' to the system using the rpm command.
sudo rpm -Uvh https://mirror.webtatic.com/yum/el7/webtatic-release.rpm
Now install PHP 7 packages and extensions using yum command as shown below.
sudo yum install -y php71w-fpm php71w-cli php71w-common php71w-imap php71w-gd php71w-mbstring php71w-mcrypt php71w-mysql php71w-xml
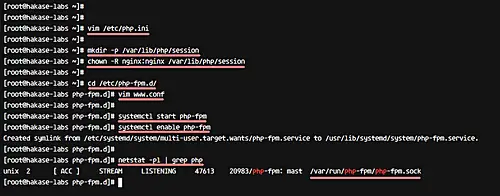
If the installation is complete, edit the default 'php.ini' configuration file using vim.
vim /etc/php.ini
Change the max upload file size for SuiteCRM installation to 100MB. At the very least, SuiteCRM needs more than 6MB.
upload_max_filesize = 100M
Uncomment the following CGI line and change the value to 0.
cgi.fix_pathinfo=0
For the session path configuration, uncomment the line and change the path to '/var/lib/session' as shown below.
session.save_path = "/var/lib/php/session"
That's it. Save the changes and exit vim.
Now create a new directory for the session path and change the ownership permissions of the directory to 'nginx' user and group.
mkdir -p /var/lib/php/session
chown -R nginx:nginx /var/lib/php/session
Next, we need to edit the php-fpm configuration. For this, go to the '/etc/php-fpm.d' directory and edit the configuration file www.conf.
cd /etc/php-fpm.d/
vim www.conf
Now change user and group line to 'nginx'.
user = nginx
group = nginx
Instead of using the system port, PHP-FPM will be running under the unix socket file.
Change the 'listen' line:
listen = /var/run/php-fpm/php-fpm.sock
Set the permission for Unix socket file and ownership of the socket file as shown below.
listen.owner = nginx
listen.group = nginx
listen.mode = 0660
That's it. Save the changes and exit the editor.
Now start PHP-FPM service and add it to start automatically at the boot time.
systemctl start php-fpm
systemctl enable php-fpm
With this, PHP-FPM is installed and running the socket file.
You can check this using the netstat command:
netstat -pl | grep php
Make sure you see the php-fpm.sock file.
Step 3 - Install and Configure MariaDB
In this step, we will install MariaDB, then start and enable it to launch everytime at system boot. And finally, we will create new database and user for SuiteCRM installation.
Install mariadb from the CentOS repository using the following yum command.
yum install -y mariadb mariadb-server
Start MariaDB service and the enable it to launch the boot time using the commands below.
systemctl start mariadb
systemctl enable mariadb
So MariaDB is now installed and running. Now, we need to configure the root password using 'mysql_secure_installation' command.
mysql_secure_installation
You will be asked about the configuration, type 'Y' and press 'Enter'.
Set root password? [Y/n] Y
 New password:
 Re-enter new password:

 Remove anonymous users? [Y/n] Y
 Disallow root login remotely? [Y/n] Y
 Remove test database and access to it? [Y/n] Y
 Reload privilege tables now? [Y/n] Y
So MariaDB root password has been configured.
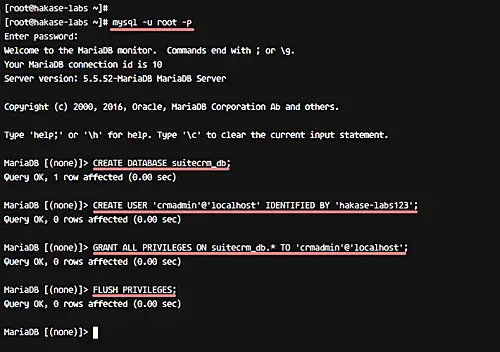
Next, we need to create a new database and a new user for SuiteCRM installation. For this, log in to the MySQL shell with user 'root' and your password.
mysql -u root -p
Create a new database named 'suitecrm_db' and a new user 'crmadmin' with password 'hakase-labs123'. All this can be done using the mysql queries below.
CREATE DATABASE suitecrm_db;
CREATE USER 'crmadmin'@'localhost' IDENTIFIED BY 'hakase-labs123';
GRANT ALL PRIVILEGES ON suitecrm_db.* TO 'crmadmin'@'localhost';
FLUSH PRIVILEGES;
So database configuration for SuiteCRM installation has been completed.
Step 4 - Download and Configure SuiteCRM
In this step, we will do some tasks for SuiteCRM installation. We will download the SuiteCRM source code, configure Firewalld, Generate new SSL Letsencrypt, and configure the nginx virtual host for SuiteCRM. So let's begin.
Download SuiteCRM
If not already, install git on your system using the yum command below.
yum -y install git
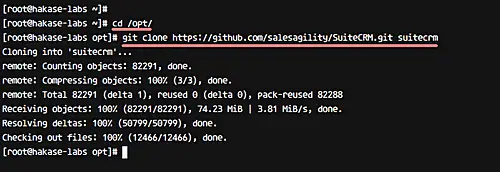
Now go to the '/opt' directory and download SuiteCRM code using git command as shown below.
cd /opt/
git clone https://github.com/salesagility/SuiteCRM.git suitecrm
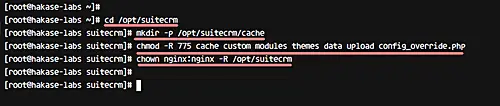
After that, create a cache directory, change permissions for some files and directories in the suitecrm directory, and then change the owner of all suitecrm code to 'nginx' user and group.
cd /opt/suitecrm
mkdir -p /opt/suitecrm/cache
chmod -R 775 cache custom modules themes data upload config_override.php
chown nginx:nginx -R /opt/suitecrm
So the suiteCRM code has been downloaded onto the server on '/opt/suitecrm/' directory.
Configure Firewalld
If you do not have Firewalld running on your server, install it using the following command.
yum -y install firewalld
Start the service and enable it to run at the boot time.
systemctl start firewalld
systemctl enable firewalld
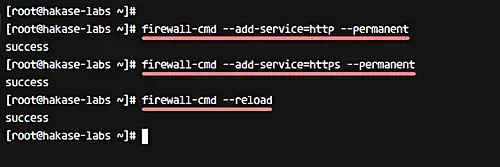
Next, we need to open new ports HTTP and HTTPS. It's used for SuiteCRM access. Run the following firewall-cmd commands for this.
firewall-cmd --add-service=http --permanent
firewall-cmd --add-service=https --permanent
Now reload firewalld rules using the following command.
firewall-cmd --reload
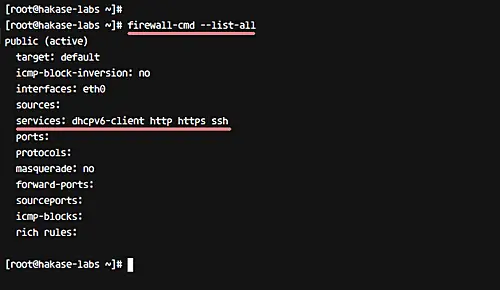
So now, new HTTP and HTTPS port have been added to the Firewalld. If you want to see detail configuration, run the command below.
firewall-cmd --list-all
Generate New SSL Letsencrypt
In this tutorial, we will be using SSL for SuiteCRM access. And we will be using free SSL certificates from letsencrypt for that purpose.
To generate new SSL letsencrypt certificates, we need to first install the letsencrypt command tool 'certbot' to our system. It's available in the CentOS repository. Install certbot using the following yum command.
yum -y install certbot
When the certbot installation is complete, generate SSL certificate file for suiteCRM domain name 'suitecrm.hakase-labs.co'.
Run the command below to generate SSL certificate files.
certbot certonly --standalone -d suitecrm.hakase-labs.co
You will be asked about the email address for renewing notification - type your email and press Enter to continue.
For the Letsencrypt TOS, type 'A' to agree and press Enter again. And for the share email address query, type 'N' and press Enter.
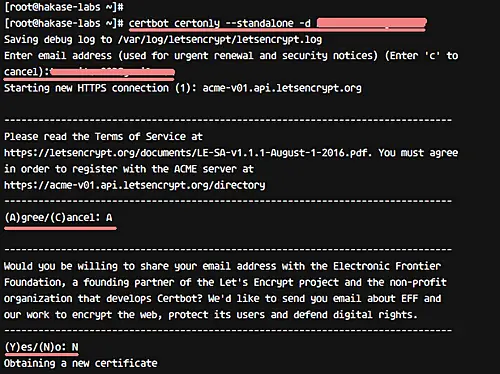
When the certificate generation is complete, you will get the result as below.
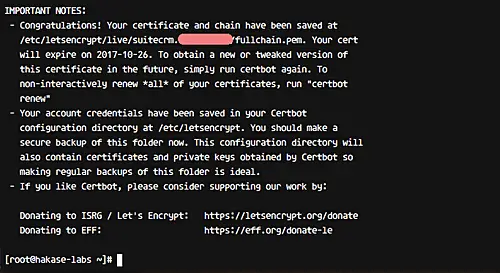
New certificate files are generated in the '/etc/letsencrypt/live/domain.com' directory.
Configure SuiteCRM Nginx Virtual host
Go to the Nginx configuration directory '/etc/nginx', and create a new file suitecrm.conf file in the conf.d directory using Vim editor.
cd /etc/nginx/
vim conf.d/suitecrm.conf
There, paste SuiteCRM Nginx virtual host below.
 # Server Config - hakase-labs
 server {
     listen 80;
     server_name suitecrm.hakase-labs.co;

     # Automatically redirect to HTTPS
     return 301 https://$host$request_uri;
 }

 # Nginx SSL for SuiteCRM
 server {

     server_name suitecrm.hakase-labs.co;

     # Enable http2
     listen 443 http2 ssl;

     # SSL Config
     ssl_certificate /etc/letsencrypt/live/suitecrm.hakase-labs.co/fullchain.pem;
     ssl_certificate_key /etc/letsencrypt/live/suitecrm.hakase-labs.co/privkey.pem;
     ssl_protocols TLSv1 TLSv1.1 TLSv1.2;
     ssl_ciphers "EECDH+AESGCM:EDH+AESGCM:ECDHE-RSA-AES128-GCM-SHA256:AES256+EECDH:DHE-RSA-AES128-GCM-SHA256:AES256+EDH:ECDHE-RSA-AES256-GCM-SHA384:DHE-RSA-AES256-GCM-SHA384:ECDHE-RSA-AES256-SHA384:ECDHE-RSA-AES128-SHA256:ECDHE-RSA-AES256-SHA:ECDHE-RSA-AES128-SHA:DHE-RSA-AES256-SHA256:DHE-RSA-AES128-SHA256:DHE-RSA-AES256-SHA:DHE-RSA-AES128-SHA:ECDHE-RSA-DES-CBC3-SHA:EDH-RSA-DES-CBC3-SHA:AES256-GCM-SHA384:AES128-GCM-SHA256:AES256-SHA256:AES128-SHA256:AES256-SHA:AES128-SHA:DES-CBC3-SHA:HIGH:!aNULL:!eNULL:!EXPORT:!DES:!MD5:!PSK:!RC4";

     client_max_body_size 50M;

     index index.php index.html index.htm;
     root /opt/suitecrm;

     location / {
         root /opt/suitecrm;
         index index.php index.html index.htm;
     }

     error_page 500 502 503 504 /50x.html;
     error_log /var/log/nginx/suitecrm.irsyadf.me.error.log;

     location = /50x.html {
         root /usr/share/nginx/html;
     }

     ## Images and static content is treated different
     location ~* ^.+\.(jpg|jpeg|gif|css|png|js|ico|xml|svg|wgoff2)$ {
         access_log off;
         expires max;
         root /opt/suitecrm;
     }

     location ~ \.php$ {
         try_files $uri =404;
         fastcgi_pass unix:/var/run/php-fpm/php-fpm.sock;
         fastcgi_index index.php;
         fastcgi_param SCRIPT_FILENAME $document_root$fastcgi_script_name;
         include fastcgi_params;
     }

     location ~ /\.ht {
         deny all;
     }

 }
That's it. Save the change and exit Vim.
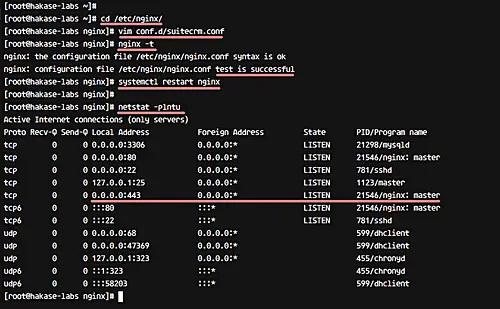
Now test nginx configuration and make sure there is no error. Once that is done, restart the service.
nginx -t
systemctl restart nginx
With this, the nginx configuration for SuiteCRM installation has been completed.
Step 5 - SuiteCRM Web Installer
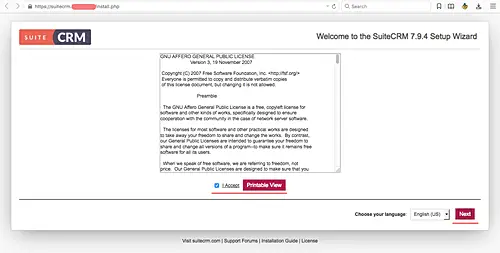
Open your Web browser and visit the SuiteCRM domain name: 'suitecrm.hakase-labs.co'.
You will be redirected to the HTTPS connection install.php, and you will get the page about GNU AFFERO License. Check the 'I Accept' box and click 'Next'.
On the system environment page, make sure all the results are 'OK'.
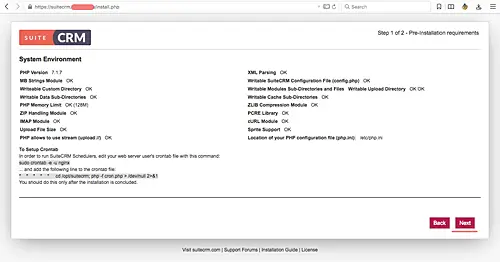
And click 'Next' to continue.
Next comes admin and database configuration. Type your database info, such as dbname, dbuser, and dbpassword. For the admin configuration, type your username, email, and password.
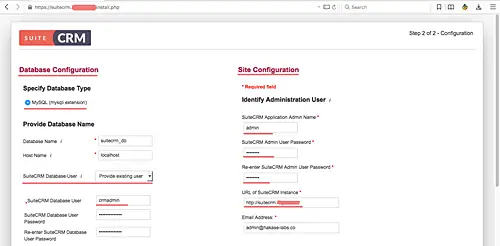
Scroll to the bottom and click 'Next' to continue installing SuiteCRM.
Wait for a moment, when the installation is complete, and you will be redirected to the login page as shown below.
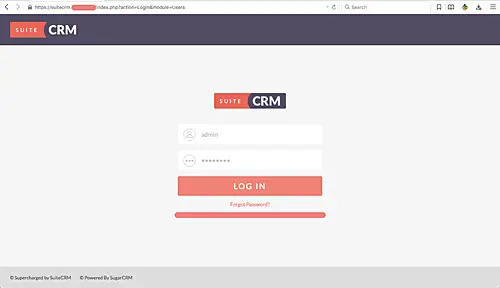
On this page, type the admin user and password, then press the 'Log in' button.
And you'll get the SuiteCRM Dashboard as shown below.
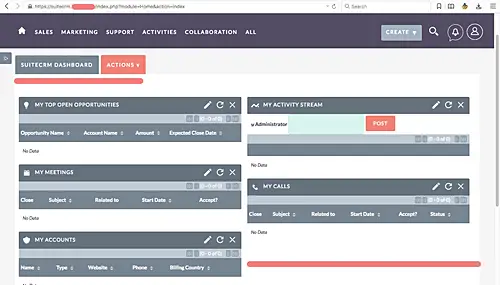
So SuiteCRM has been installed.
Step 6 - Final configuration
In this last step, we need to add configuration to the cronjob.
Basically, we need to create new cron as nginx user and group.
sudo crontab -e -u nginx
And paste the following configuration.
* * * * * cd /opt/suitecrm; php -f cron.php > /dev/null 2>&1
Save and exit.
That's it. The SuiteCRM installation with Nginx web server on CentOS 7 has been completed.

