Install Nginx, MariaDB and PHP (FEMP stack) on FreeBSD 11
In this tutorial, I will describe the process of installing and configuring the FEMP stack on FreeBSD 11.x. FEMP software stack is an acronym which stands for a group of programs that are usually installed in Unix/Linux operating systems and mainly used for deploying dynamic web applications. In this case, the FEMP acronym refers to the FreeBSD Unix-like operating system, on top of which are installed these applications:
- Nginx web server, which is a fast-growing popular web server mainly used for serving HTML content, but it can also provide load-balancing, high-availability or reverse-proxy for a web server or for other network services.
- PHP dynamic programming language interpreter, used in the backend to manipulate databases data and create dynamic web content which can be included into plain HTML. PHP scripts are executed only on the server side, never in client side (in browsers)
- Mariadb\MySQL RDBMS which is where the data is stored in backed, while the dynamic processing is handled by PHP. In this tutorial, we’ll install and use MariaDB relational database management system, a community fork of MySQL, in favor of MySQL database, which is now owned and developed by Oracle.
REQUIREMENTS:
- A minimal installation of FreeBSD 11.x.
- A static IP Address configured for a network interface.
- A regular account configured with root privileges or direct access to the system via root account.
- Preferably, a publicly registered domain name configured with the minimal DNS records (A and CNAME records).
Step 1 – Install MariaDB Database
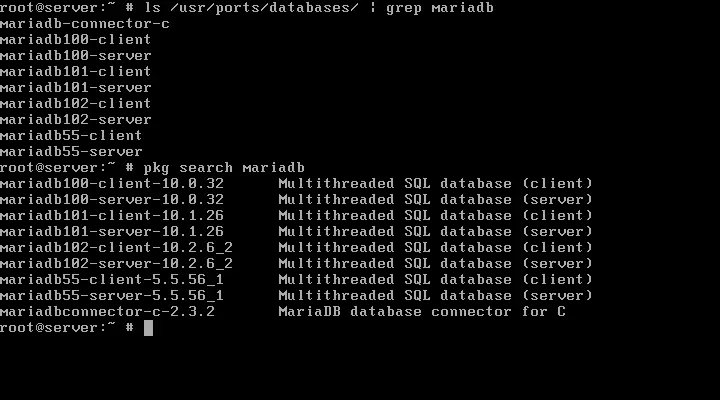
In the first step, we’ll install the MariaDB database system, which is the FEMP component that will be used for storing and managing the dynamic data of the website. MariaDB/MySQL is one of the most used open source relational databases in the world in conjunction with Nginx or Apache web server. Both servers are highly utilized for creating and developing complex web applications or dynamic websites. MariaDB can be installed in FreeBSD directly from the binaries provided by PORTS repositories. However, a simple search using ls command in FreeBSD Ports databases section reveals multiple versions of MariaDB, as shown in the following command output. Also, running Package Manager pkg command displays the same results.
ls -al /usr/ports/databases/ | grep mariadb
pkg search mariadb
In this guide, we’ll install the latest release of the MariaDB database and client by using the pkg command as illustrated in the below excerpt.
pkg install mariadb102-server mariadb102-client
After MariaDB has finish installing in the system, issue the following command in order to enable the MySQL server system-wide. Also, make sure you start MariaDB daemon as shown below.
sysrc mysql_enable=”YES”
service mysql-server start
Next, we’ll need to secure MariaDB database by running mysql_secure_installation script. While running the script, a series of questions we’ll be asked. These questions purpose is to provide a level of security for MySQL engine, such as set up a root password for MySQL root user, remove the anonymous user, disable remote login for root user and delete the test database. After choosing a strong password for the MySQL root user, answer with yes on all questions, as illustrated in the below sample of the script. Do not confuse the MariaDB database root user with the system root user. Although these accounts have the same name, root, they are not equivalent and are used for different purposes, one for system administration and the other for database administration.
/usr/local/bin/mysql_secure_installation
NOTE: RUNNING ALL PARTS OF THIS SCRIPT IS RECOMMENDED FOR ALL MariaDB
SERVERS IN PRODUCTION USE! PLEASE READ EACH STEP CAREFULLY!
In order to log into MariaDB to secure it, we'll need the current
password for the root user. If you've just installed MariaDB, and
you haven't set the root password yet, the password will be blank,
so you should just press enter here.
Enter current password for root (enter for none):
OK, successfully used password, moving on...
Setting the root password ensures that nobody can log into the MariaDB
root user without the proper authorisation.
Set root password? [Y/n] y
New password:
Re-enter new password:
Password updated successfully!
Reloading privilege tables..
... Success!
By default, a MariaDB installation has an anonymous user, allowing anyone
to log into MariaDB without having to have a user account created for
them. This is intended only for testing, and to make the installation
go a bit smoother. You should remove them before moving into a
production environment.
Remove anonymous users? [Y/n] y
... Success!
Normally, root should only be allowed to connect from 'localhost'. This
ensures that someone cannot guess at the root password from the network.
Disallow root login remotely? [Y/n] y
... Success!
By default, MariaDB comes with a database named 'test' that anyone can
access. This is also intended only for testing, and should be removed
before moving into a production environment.
Remove test database and access to it? [Y/n] y
- Dropping test database...
... Success!
- Removing privileges on test database...
... Success!
Reloading the privilege tables will ensure that all changes made so far
will take effect immediately.
Reload privilege tables now? [Y/n] y
... Success!
Cleaning up...
All done! If you've completed all of the above steps, your MariaDB
installation should now be secure.
Thanks for using MariaDB!
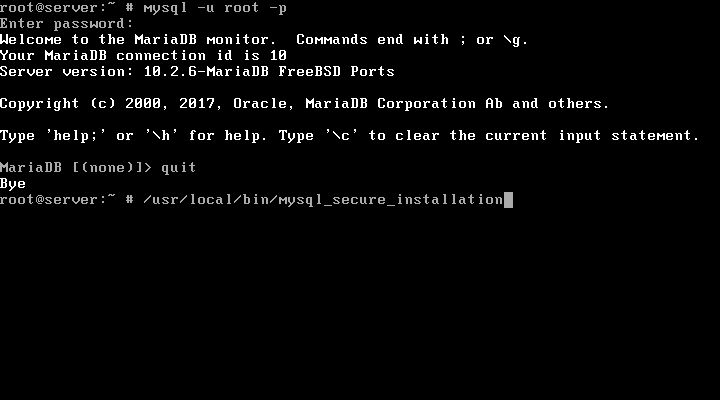
Finally, after you’ve finished securing MariaDB database, test if you are allowed to perform local login to the database from root account by running the following command. Once connected to the database prompt, just type quit or exit in order to leave the database console and return to system user console prompt as shown in the below screenshot.
mysql -u root -p
MariaDB> quit
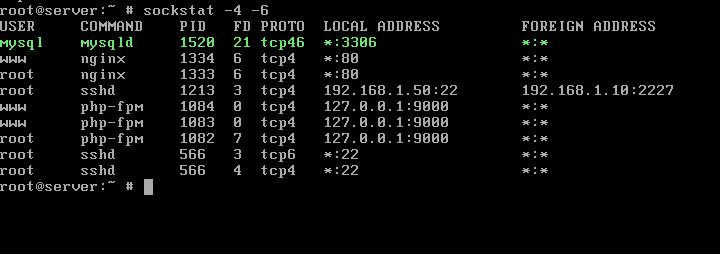
Running sockstat command in FreeBSD quickly reveals the fact that MariaDB is opened to external network connections and can be remotely accessed from any network via 3306/TCP port.
sockstat -4 -6
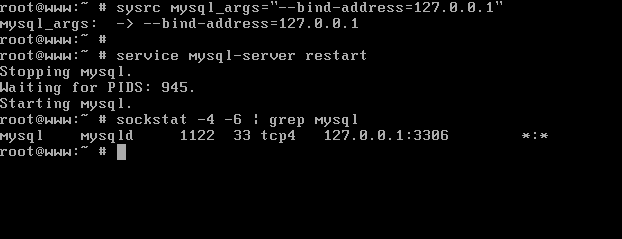
In order to completely disable remote network connections to MariaDB, you need to force mysql network socket to bind to the loopback interface only by adding the following line to /etc/rc.conf file with the below command.
sysrc mysql_args="--bind-address=127.0.0.1"
Afterwards, restart MariaDB daemon to apply the changes and execute sockstat command again to display the network socket for mysql service. This time, MariaDB service should listen for network connections on localhost:3306 socket only.
service mysql-server restart
sockstat -4 -6|grep mysql
If you are developing a remote web application that needs access to the database on this machine, revert MySQL socket changes made so far by removing or commenting the line mysql_args="--bind-address=127.0.0.1" from /etc/rc.conf file and restarting the database to reflect changes. In this case, you should take into consideration other alternatives to limit or disallow remote access to MySQL, such as running a firewall locally and filter the IP addresses of clients who need remote login or create MySQL users with the proper IP addresses grants to login to the server.
Step 2 – Install Nginx Web Server
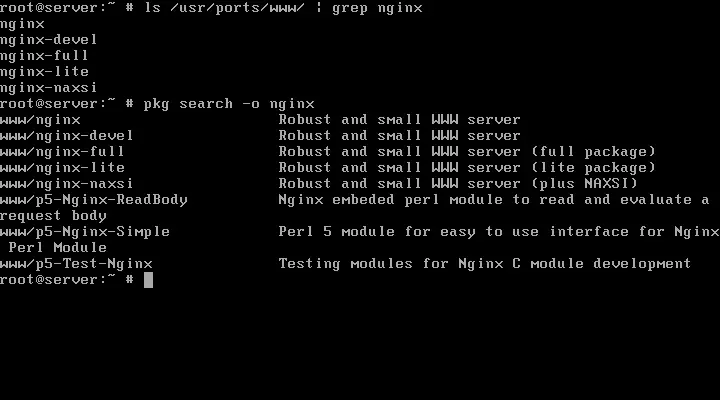
The next important daemon that we’ll install in FreeBSD for our FEMP stack is the web server, represented by Nginx service. The process of installing Nginx web server in FreeBSD is pretty straightforward. Nginx web server can be installed from the binaries provided by FreeBSD 11.x Ports. A simple search through Ports repositories in the www section can show a list of what pre-compiled versions are available for Nginx software, as shown in the below command excerpt.
ls /usr/ports/www/ | grep nginx
Issuing the package management command can display the same results as shown in the below image.
pkg search –o nginx
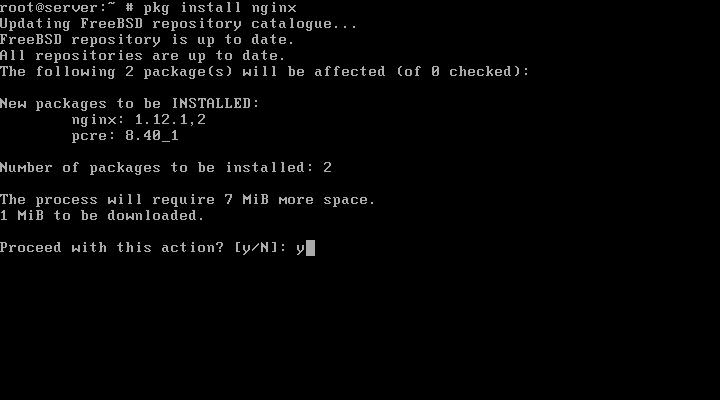
In order to install the most common version of Nginx in FreeBSD, run the below command. While installing the binary package, the package manager will ask you if you agree with downloading and installing Nginx package. Usually, you should type the word yes or y in the prompt in order to start the installation process. To avoid the prompt add the –y flag while issuing the command: pkg –y install nginx.
pkg install nginx
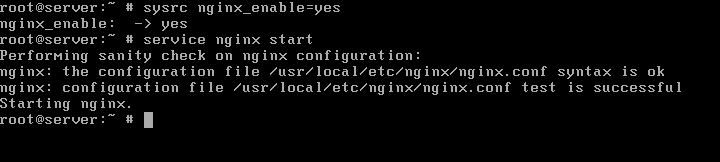
After Nginx web server software has been installed on your system, you should enable and run the service by issuing the below commands.
sysrc nginx_enable=”yes”
service nginx start
You can execute sockstat command in order to check if Nginx service is started on your system and on what network sockets it binds on. Normally, it should bind by default on *:80 TCP socket. You can use the grep command line filter to display only the sockets that match nginx server.
sockstat -4 -6 | grep nginx

In order to visit Nginx default web page, open a browser on a computer in your network and navigate to the IP address of your server via HTTP protocol. In case you’ve registered a domain name or you use a local DNS server at your premises, you can write the fully qualified domain name of your machine or the domain name in browser’s URI filed. A title message saying "Welcome to nginx!" alongside a few HTML lines should be displayed in your browser, as shown in the following screenshot.

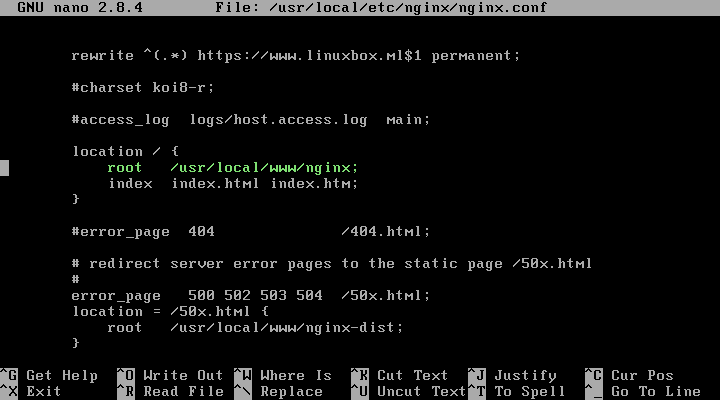
The location where web files are stored for Nginx in FreeBSD 11.x is /usr/local/www/nginx/ directory. This directory is a symbolic link to the nginx-dist directory. To deploy a website, copy the html or php script files into this directory. In order to change Nginx default webroot directory, open Nginx configuration file from /usr/local/etc/nginx/ directory and update root statement line as shown in the below example.
nano /usr/local/etc/nginx/nginx.conf
This will be the new webroot path for Nginx:
root /usr/local/www/new_html_directory;
Step 3 – Install PHP Programming Language
By default, Nginx web server cannot directly parse PHP scripts, Nginx needs to pass the PHP code trough the FastCGI gateway to the PHP-FPM daemon, which interprets and executes the PHP scripts. In order to install the PHP-FPM daemon in FreeBSD, search for available PHP pre-compiled binary packages by issuing the below commands.
ls /usr/ports/lang/ | grep php
pkg search –o php
From the multitude of PHP versions available in FreeBSD Ports repositories, choose to install the latest version of PHP interpreter, currently PHP 7.1 release, by issuing the following command.
pkg install php71
In order to install some extra PHP extensions, which might be needed for deploying complex web applications, issue the below command. A list of officially supported PHP extensions can be found by visiting the following link: http://php.net/manual/en/extensions.alphabetical.php
If you're planning to build a website based on a content management system, review the CMS documentation in order to find out the requirements for your system, especially what PHP modules or extensions are needed.
php71-mcrypt mod_php71 php71-mbstring php71-curl php71-zlib php71-gd php71-json
Because we are running a database server in our setup, we should also install the PHP database driver extension, which is used by PHP interpreter to connect to MariaDB database.
pkg install php71-mysqli
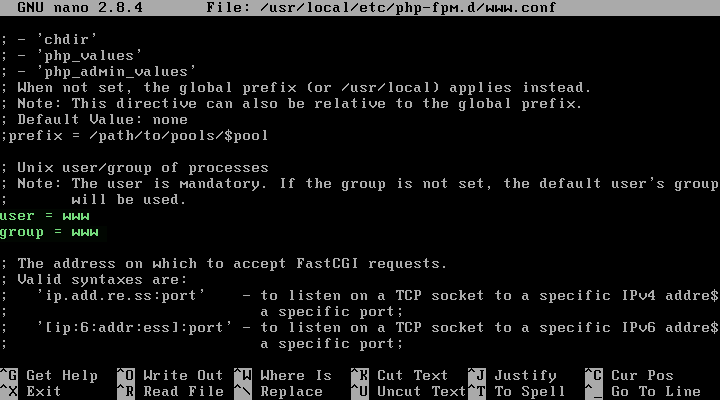
Next, update the PHP-FPM user and group to match the Nginx runtime user by editing PHP-FPM configuration file. Change the user and group lines variables to www as shown in the below excerpt.
cp /usr/local/etc/php-fpm.d/www.conf{,.backup}
nano /usr/local/etc/php-fpm.d/www.conf
Change the following lines to look as below.
user = www
group = www
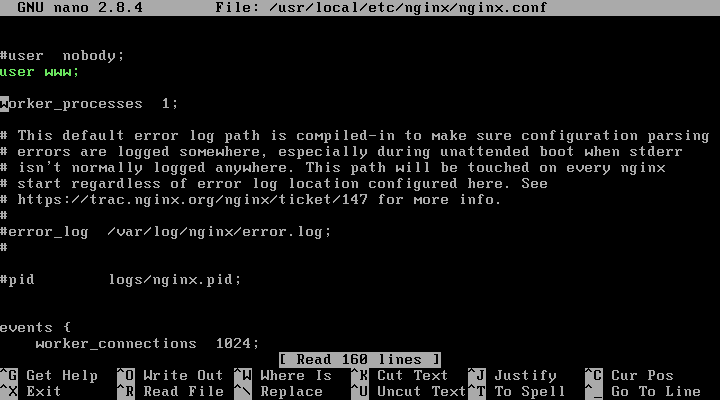
By default, Nginx daemon runs with privileges of the 'nobody' system user. Change Nginx runtime user to match PHP-FPM runtime user, by editing /usr/local/etc/nginx/nginx.conf file and update the following line:
user www;
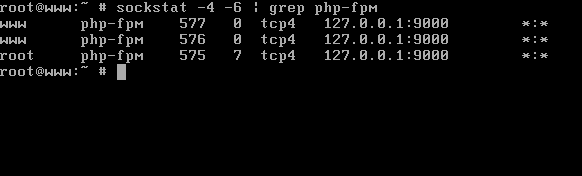
By default, PHP-FPM daemon in FreeBSD opens a network socket on localhost:9000 TCP port in listening state. To display this socket you can use sockstat command as shown in the below example.
sockstat -4 -6| grep php-fpm
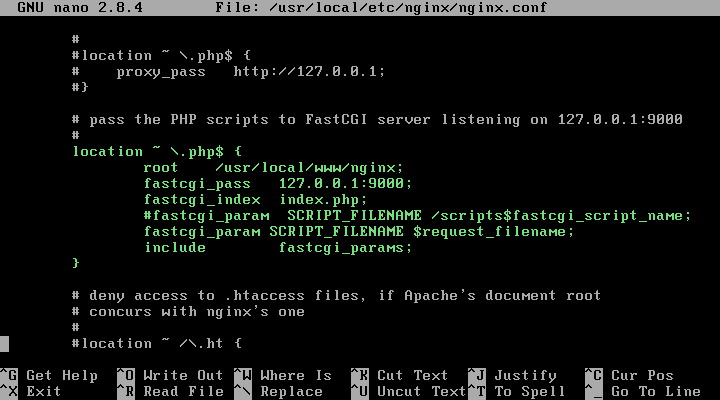
In order for Nginx web server to exchange PHP scripts with PHP FastCGI gateway on 127.0.0.1:9000 network socket, open Nginx configuration file and update the PHP-FPM block as shown in the below sample.
PHP FastCGI gateway example for Nginx:
        location ~ \.php$ {
        root               /usr/local/www/nginx;
        fastcgi_pass   127.0.0.1:9000;
        fastcgi_index  index.php;
        fastcgi_param SCRIPT_FILENAME $request_filename;
        include        fastcgi_params;
               }
After you’ve made all the above changes, create a configuration file for PHP based on the default production file by issuing the following command. You can change the PHP runtime settings by editing the variables present in php.ini file.
ln -s /usr/local/etc/php.ini-production /usr/local/etc/php.ini
Finally, in order to apply all changes made so far, enable the PHP-FPM daemon system-wide and restart PHP-FPM and Nginx services by issuing the below commands.
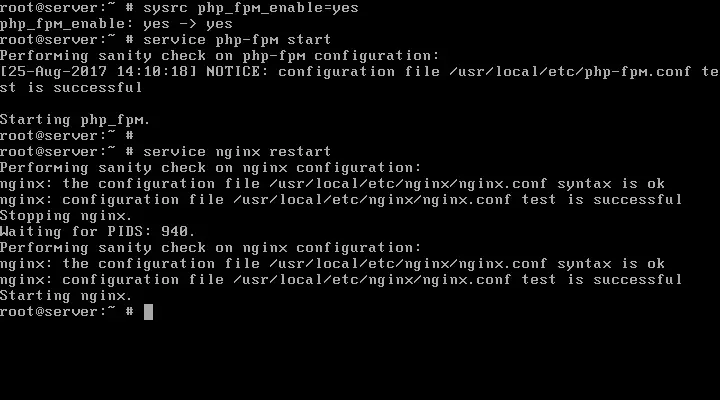
sysrc php_fpm_enable=yes
service php-fpm restart
Test nginx configurations for syntax errors:
nginx –t
service nginx restart
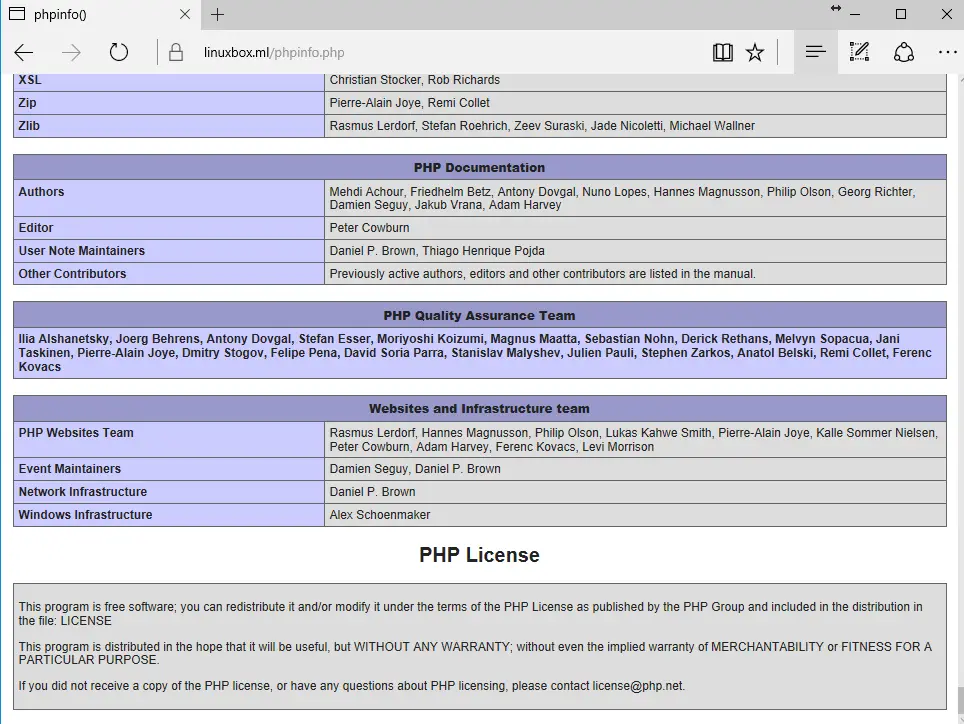
In order to get the current PHP information available for your FEMP stack in FreeBSD, create a phpinfo.php file in your server document root directory by issuing the following command.
echo "<?php phpinfo(); ?>" | tee /usr/local/www/nginx/phpinfo.php
Then, open a browser and navigate to the phpinfo.php page by visiting your server's domain name or public IP address followed /phpinfo.php file, as illustrated in the below screenshot.
That’s all! You’ve successfully installed and configured FEMP stack in FreeBSD 11. The environment is now ready and fully functional to start deploying dynamic web applications at your premises.

