How to Install MediaWiki with Nginx on CentOS 7
On this page
- What we will do
- Prerequisites
- Step 1 - Install Nginx on CentOS 7
- Step 2 - Install and configure PHP-FPM
- Step 3 - Install and configure MariaDB database
- Step 4 - Download and configure MediaWiki
- Step 5 - Generate SSL Letsencrypt on CentOS 7
- Step 6 - Configure Nginx virtual host for MediaWiki
- Step 7 - MediaWiki Web-based installation
- Step 8 - Download and configure MediaWiki default skin
- Reference
MediaWiki is a popular wiki software that was originally developed for use on Wikipedia. It's a free and open source wiki software written in the PHP programming language. Brought to life by Magnus Manske on 2002, the tool is now at version 1.30. MediaWiki has been used by many big companies, including Nginx, Intel, Novell etc.
In this tutorial, we will discuss how to step-by-step install MediaWiki with Nginx web server on CentOS 7. We will also guide you how to install and configure the LEMP stack for MediaWiki installation, including generating and configuring new free SSL Letsencrypt for MediaWiki security.
What we will do
- Install Nginx on CentOS 7
- Install and configure PHP-FPM
- Install and configure MariaDB database
- Download and configure MediaWiki
- Generate new SSL Letsencrypt on CentOS 7
- Configure Nginx virtual host for MediaWiki installation
- MediaWiki Web-based installation
- Configure MediaWiki default skin
Prerequisites
- CentOS 7 server
- Root privileges
Step 1 - Install Nginx on CentOS 7
For this tutorial, we will be using Nginx web server for the MediaWiki installation. On CentOS 7, the Nginx package does not exist. So we need to install it from the third-party EPEL (Extra Packages for Enterprise Linux) repository.
Update all packages and install EPEL repository in the CentOS 7 system using the yum command below.
yum -y update
yum -y install epel-release
Next, install the Nginx web server.
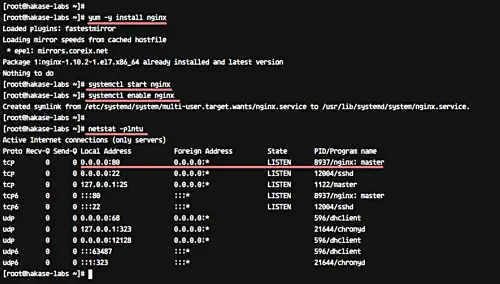
yum -y install nginx
After the Nginx installation is complete, start the server and enable it to run automatically at system boot.
systemctl start nginx
systemctl enable nginx
So the Nginx web server has been installed on CentOS 7 server. Check network stats using the netstat command, and in the result, you should get the HTTP port being used by Nginx service.
netstat -plntu
Step 2 - Install and configure PHP-FPM
In this tutorial, we will be using PHP 7.0. And here, in this step, we will install PHP 7.0 (including extensions) and configure PHP-FPM for MediaWiki installation.
We will be using PHP 7.0 packages from the third-party repository 'webtatic'. Add new 'webtatic' repository for PHP 7.0 installation using the command below.
rpm -Uvh https://mirror.webtatic.com/yum/el7/webtatic-release.rpm
Now we can install PHP 7.0 with all extensions needed using the yum command below.
yum -y install ImageMagick php70w-fpm php70w-intl php70w-xml php70w-curl php70w-gd php70w-mbstring php70w-mysql php70w-cli php70w-pear php70w-pecl-apcu
With this, PHP 7.0 installation on CentOS 7 has been completed.
Next, we will configure the PHP-FPM service. We will edit the php.ini file for configuring the CGI path info, and then edit the 'www.conf' configuration to configure PHP-FPM service. We will then configure PHP-FPM to execute under the sock file (with 'nginx' user and group).
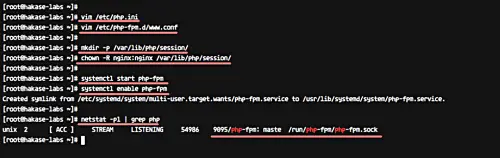
Edit the 'php.ini' file using the vim editor.
vim /etc/php.ini
Uncomment the line below and change the value to 0.
cgi.fix_pathinfo=0
Save the changes, and exit the editor.
Now edit the PHP-FPM configuration file 'www.conf'.
vim /etc/php-fpm.d/www.conf
Change user and group line value to 'nginx'.
user = nginx
group = nginx
Now change the value of the variable 'listen' to the 'php-fpm.sock' file, as shown below.
listen = /run/php-fpm/php-fpm.sock
We need to configure permissions of the sock-file, as well as the owner of the sock file directory. Uncomment the listen.owner and listen.group line, and change the corresponding values to 'nginx'.
listen.owner = nginx
listen.group =nginx
listen.mode = 0660
For additional configuration, uncomment lines below.
env[HOSTNAME] = $HOSTNAME
env[PATH] = /usr/local/bin:/usr/bin:/bin
env[TMP] = /tmp
env[TMPDIR] = /tmp
env[TEMP] = /tmp
That's it. Save and exit.
Next, create a new directory for the sessions-path configuration.
Run commands below for creating sessions directory.
mkdir -p /var/lib/php/session/
chown -R nginx:nginx /var/lib/php/session/
Once that is done, start the PHP-FPM service and enable it to run automatically at system boot.
systemctl start php-fpm
systemctl enable php-fpm
Check PHP-FPM using netstat command below.
netstat -pl | grep php
And make sure you get the php-fpm.sock file in result.
Step 3 - Install and configure MariaDB database
MediaWiki supports MySQL/MariaDB and SQLite databases. In this tutorial, however, we will be using the MariaDB database.
To begin with, install MariaDB using the yum command below.
yum -y install mariadb mariadb-server
After the installation is complete, start mariadb and enable it to launch at system boot.
systemctl start mariadb
systemctl enable mariadb
Now we need to configure the 'root' password for the MariaDB database. Run the following command to configure the MariaDB 'root' password.
mysql_secure_installation
Type 'Y' and press Enter.
Set root password? [Y/n] Y
TYPE ROOT PASSWORD HERE

Remove anonymous users? [Y/n] Y
Disallow root login remotely? [Y/n] Y
Remove test database and access to it? [Y/n] Y
Reload privilege tables now? [Y/n] Y
MariaDB has been installed on the CentOS 7 system, and the password for the 'root' user has been configured.
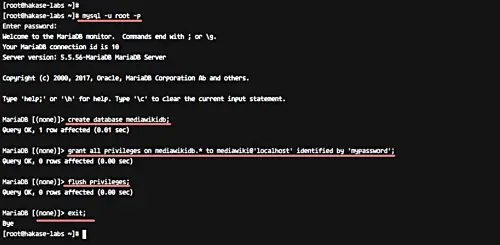
Next, we will create a new database for MediaWiki. Specifically, we will create a new database named 'mediawikidb', with new user/owner 'mediawiki' and password 'mypassword'.
Connect to the mysql shell using the mysql command.
mysql -u root -p
TYPE YOUR ROOT PASSWORD
Now run the following mysql queries for creating a new database for MediaWiki.
create database mediawikidb;
grant all privileges on mediawikidb.* to mediawiki@'localhost' identified by 'mypassword';
flush privileges;
exit;
New database and user for the MediaWiki installation has been created.
Step 4 - Download and configure MediaWiki
In this tutorial, we will be using the latest version (1.30) of MediaWiki, and we will download all MediaWiki source code from the repository. So we need git and some packages installed on the system.
Install git and other packages using the yum command below.
yum -y install git zip unzip composer
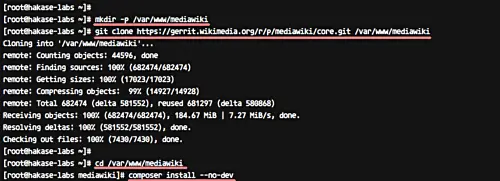
After the installation is complete, create new directory '/var/www/mediawiki' and clone the mediawiki source code to that directory.
mkdir -p /var/www/mediawiki
git clone https://gerrit.wikimedia.org/r/p/mediawiki/core.git /var/www/mediawiki
Next, go the '/var/www/mediawiki' directory and install some PHP dependencies needed for MediaWiki installation using composer command, as shown below.
cd /var/www/mediawiki
composer install --no-dev
Now change the ownership permissions of the mediawiki directory to the 'nginx' (both user and group).
chown -R nginx:nginx /var/www/mediawiki
MediaWiki source does have been downloaded to the '/var/www/mediawiki' directory, and all dependencies have been installed.
Step 5 - Generate SSL Letsencrypt on CentOS 7
For security reasons, MediaWiki will only run on the HTTPS connection. And all requests to HTTP will be redirected to HTTPS by the Nginx Web server.
To run the MediaWiki under the HTTPS secure connection, we need SSL certificates. So we will be using the free SSL certificate from Letsencrypt.
Install lets encrypt command-line tool using the yum command below.
yum -y install letsencrypt
After the installation is complete, stop the Nginx service using the systemctl command.
systemctl stop nginx
Next, we will generate new SSL certificate using the letsencrypt command. But before that, make sure the HTTP and HTTPS services have been added to Firewalld.
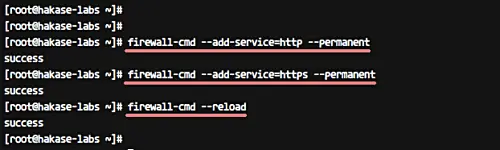
Here's how you add new HTTP and HTTPS services to Firewalld.
firewall-cmd --add-service=http --permanent
firewall-cmd --add-service=https --permanent
firewall-cmd --reload
Generate new free SSL lets encrypt certificate using the letsencrypt command below.
letsencrypt certonly
The command will ask you about the ACME authentication. Choose number '1' to spin temporary web server.
Next, type your email address for the renewing notification, then type 'A' to agree the Letsencrypt Terms Of Services (TOS), and finally type your wiki domain name.
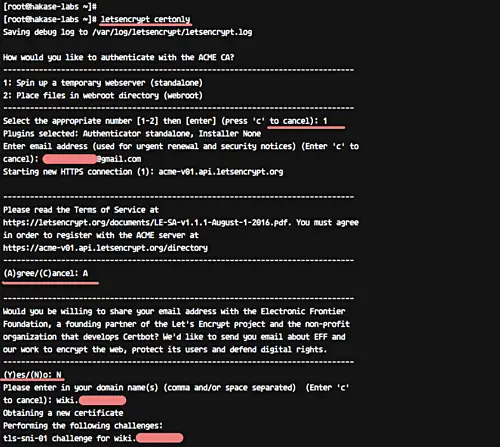
After all that is done, you will get a result similar to the one shown below.
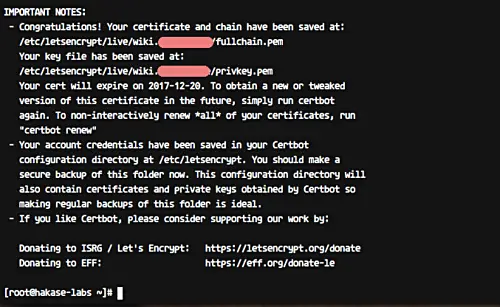
New SSL Certificate from Letsencrypt has been generated and stored in the '/etc/letsencrypt/live' directory.
Step 6 - Configure Nginx virtual host for MediaWiki
In this step, we will create new Nginx virtual host configuration for MediaWiki.
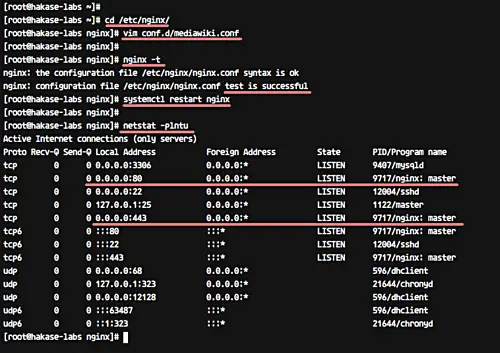
Go to the '/etc/nginx' directory and create new configuration file 'mediawiki.conf' using the vim editor.
cd /etc/nginx/
vim conf.d/mediawiki.conf
Paste configuration below.
# HTTP Request will be Redirected to the HTTPS
server {
    listen 80;
    listen [::]:80;
    server_name wiki.hakase-labs.co;
    return 301 https://$host$request_uri;
}

# HTTPS Configuration
server {

    listen 443 ssl;
    listen [::]:443;

    server_name wiki.hakase-labs.co;
    root /var/www/mediawiki;

    index index.php;
    autoindex off;

    # SSL Certificate Configuration
    ssl_certificate /etc/letsencrypt/live/wiki.hakase-labs.co/fullchain.pem;
    ssl_certificate_key /etc/letsencrypt/live/wiki.hakase-labs.co/privkey.pem;

    client_max_body_size 5m;
    client_body_timeout 60;

    location / {
        try_files $uri $uri/ @rewrite;
    }

    location @rewrite {
        rewrite ^/(.*)$ /index.php?title=$1&$args;
    }

    location ^~ /maintenance/ {
        return 403;
    }

    # PHP-FPM Configuration Nginx
    location ~ \.php$ {
        try_files $uri =404;
        fastcgi_split_path_info ^(.+\.php)(/.+)$;
        fastcgi_pass unix:/run/php-fpm/php-fpm.sock;
        fastcgi_index index.php;
        fastcgi_param SCRIPT_FILENAME $document_root$fastcgi_script_name;
        include fastcgi_params;
    }

    location ~* \.(js|css|png|jpg|jpeg|gif|ico)$ {
        try_files $uri /index.php;
        expires max;
        log_not_found off;
    }

    location = /_.gif {
        expires max;
        empty_gif;
    }

    location ^~ ^/(cache|includes|maintenance|languages|serialized|tests|images/deleted)/ {
        deny all;
    }

    location ^~ ^/(bin|docs|extensions|includes|maintenance|mw-config|resources|serialized|tests)/ {
        internal;
    }

    # Security for 'image' directory
    location ~* ^/images/.*.(html|htm|shtml|php)$ {
        types { }
        default_type text/plain;
    }

    # Security for 'image' directory
    location ^~ /images/ {
        try_files $uri /index.php;
    }

}
That's it. Save the changes and exit the editor.
Note:
- Change the domain name to your own domain.
- Change the path of SSL Certificate files
Now test Nginx configuration and make sure there is no error, then restart the Nginx service.
nginx -t
systemctl restart nginx
Nginx virtual host configuration for MediaWiki has been added, and we're ready to install MediaWiki from the web browser.
Step 7 - MediaWiki Web-based installation
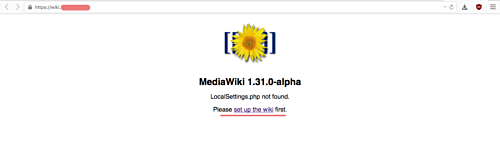
Open your web browser and type the MediaWiki URL.
http://wiki.hakase-labs.co/
You will be redirected to the HTTPS connection. On the web page, click the 'Set up the wiki' link.
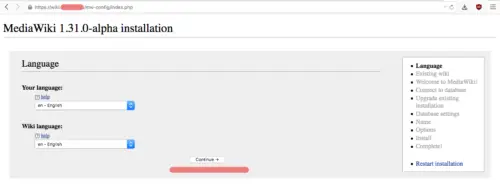
Language Configuration
Choose English 'en' language and click 'Continue'.
Environment Checking
Make sure all server configuration has passed the Environment checks.
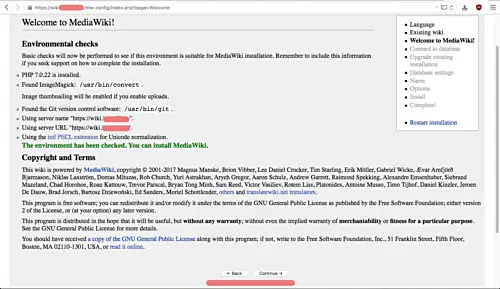
Then click 'Continue'.
Database Configuration
Type the database name as 'mediawikidb', and the username 'mediawiki' with password 'mypassword'.
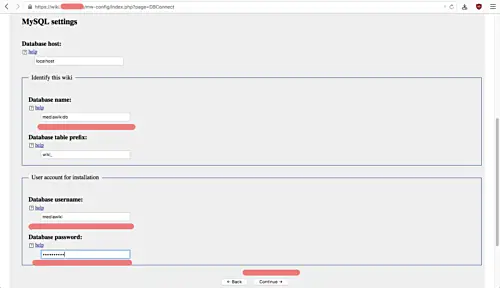
Now click 'Continue'.
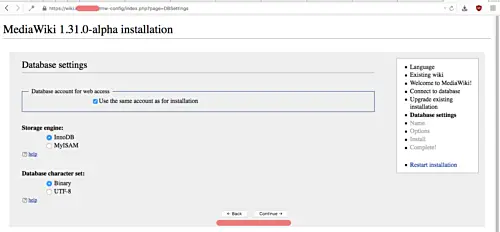
Database Settings
Leave it as default and click 'Continue'.
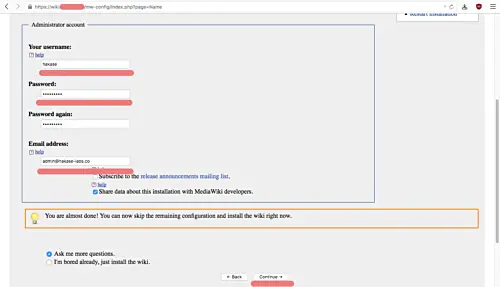
Create New Admin User
Type your own admin user, email, password, and then click 'Continue'.
MediaWiki Additional Configuration
Now we get to the page about 'MediaWiki Additional Configuration', as shown below.
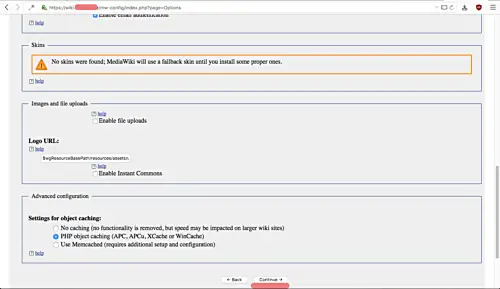
Leave all the fields with default values, and click 'Continue'.
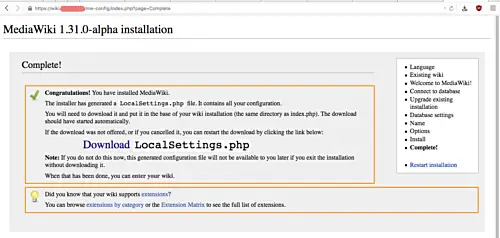
MediaWiki Installation
Click 'Continue' to install the MediaWiki.

And you will get to the page below.
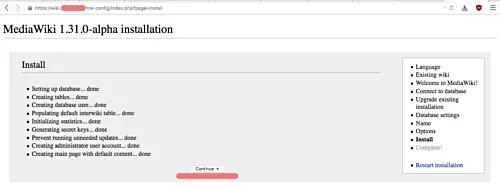
Click 'Continue' again.
And the MediaWiki installation is complete. We will be prompted for downloading new file 'LocalSettings.php' - download that file.
Next, we need to upload the newly-downloaded 'LocalSetting.php' file to the MediaWiki directory '/var/www/mediawiki' on the server. Also, do not forget to change the ownership permissions of the file to 'www-data' (both user and group).
scp LocalSettings.php [email protected]:/var/www/mediawiki/
chown -R www-data:www-data /var/www/mediawiki
Come back to your web browser MediaWiki installation page, and click the link 'enter your wiki'. You will see that MediaWiki has been installed with Nginx web server on CentOS 7 server.
Step 8 - Download and configure MediaWiki default skin
At this stage, MediaWiki installation has been completed. And in this step, we will configure the default skin/theme of our MediaWiki site.
Go to the '/var/www/mediawiki/skins' directory and clone the default skin named 'Vector' to that directory.
cd /var/www/mediawiki/skins/
sudo git clone https://gerrit.wikimedia.org/r/mediawiki/skins/Vector
Change owner of the Vector skin directory to 'nginx' user and group.
chown -R nginx:nginx /var/www/mediawiki/skins/
Now edit the 'LocalSettings.php' file using the vim editor.
vim /var/www/mediawiki/LocalSettings.php
And paste the following PHP code at the end of the file.
wfLoadSkin( 'Vector' );
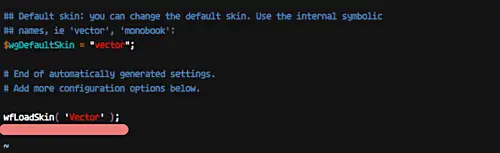
That's it. Save and exit.
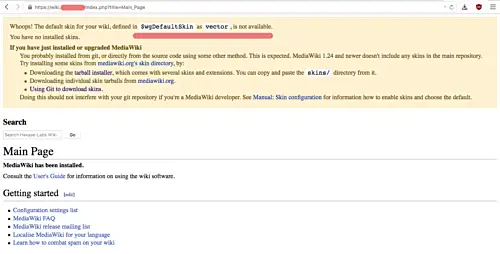
Come back to your web browser and refresh the MediaWiki page. Make sure you get to see MediaWiki with 'Vector' skin as below.
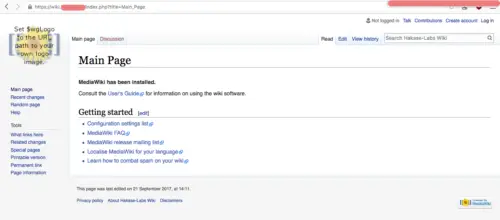
The MediaWiki installation and configuration with Nginx web server on CentOS 7 has been completed successfully.

