How to Install Discourse Forum with Nginx on Ubuntu 16.04
On this page
- What we will do
- Prerequisites
- Step 1 - Install Docker on Ubuntu 16.04
- Step 2 - Install and configure discourse forum
- Step 3 - Generate SSL Letsencrypt on Ubuntu 16.04
- Step 4 - Install and configure Nginx as a reverse proxy for Discourse container
- Step 5 - Discourse Web installer
- Step 6 - Discourse additional configuration
- References
Discourse is a free and open source software for creating Internet forum community and mailing list. It was created in 2013, and written in Ruby and Javascript programming languages. Discourse forum software has been used by many organizations, including Codeacademy, Udacity, Twitter Developers, and Docker Community Forum.
In this tutorial, we will show you step-by-step how to install and configure Discourse Forum with Nginx web server on Ubuntu 16.04. Specifically, we will show you how to install the Discourse Forum Software, configure Nginx as the reverse proxy for the Discourse app, and secure the Discourse forum software using free SSL from the Letsencrypt.
What we will do
- Install Docker on Ubuntu 16.04
- Install and configure Discourse Forum software
- Generate SSL Letsencrypt on Ubuntu 16.04
- Install and configure Nginx as a reverse proxy for Discourse
- Discourse Web installer
- Discourse additional configuration
Prerequisites
- Ubuntu 16.04
- Root Privileges
- SMTP Account - Mailgun, SendGrid, Mailjet etc.
Step 1 - Install Docker on Ubuntu 16.04
The Discourse software is written in Ruby and Javascript, using PostgreSQL as the main database, and Redis as a cache and for transient data. We will install Discourse under the Docker container.
The installation process will be carried out on Ubuntu 16.04. So to begin with, install Docker using the command below.
wget -qO- https://get.docker.com/ | sh
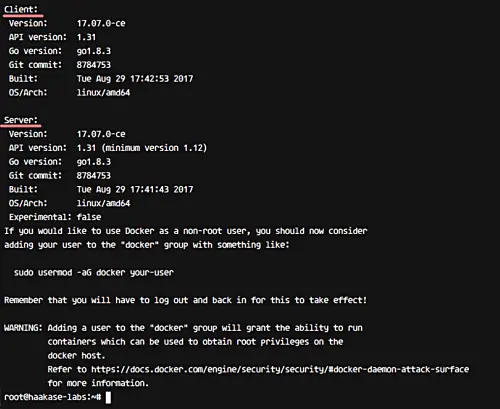
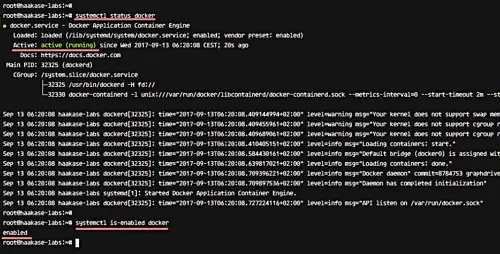
After the installation is complete, check the docker service and make sure it's already running on the system.
systemctl status docker
And also make sure that Docker is on the startup boot app.
systemctl is-enabled docker
Step 2 - Install and configure discourse forum
In this step, we will install and configure the Discourse software. We will download the discourse docker-compose script, configure according to our requirement, and then create new Docker container for discourse forum software.
Create new '/var/discourse' directory and clone the installer script.
mkdir -p /var/discourse
git clone https://github.com/discourse/discourse_docker.git /var/discourse
Now go to the 'discourse' directory and copy sample of the docker-compose file.
cd /var/discourse
cp samples/standalone.yml containers/app.yml
Edit the 'app.yml' file using vim editor.
vim containers/app.yml
Configure Docker port mapping
By default, all HTTP and HTTPS requests will be handled by the Docker proxy. And for this guide, we will use Nginx for this purpose - all HTTP and HTTPS will be handled by the Nginx web server.
So we need to change the docker port mapping configuration. The Discourse container will only have the HTTP connection, and the host will be opening new port '2045' and mapping to the container port 80.
Uncomment the HTTPS line and change the HTTP line with new port '2045'.
expose:
  - "2045:80"   # http
#  - "443:443" # https
Discourse domain name configuration
Type your own domain name for discourse installed on the 'DISCOURSE_HOSTNAME' line as below.
DISCOURSE_HOSTNAME: 'discourse.hakase-labs.me'
And type your email address in the 'DISCOURSE_DEVELOPER_EMAIL' line.
DISCOURSE_DEVELOPER_EMAILS: '[email protected]'
SMTP configuration
This is the most important configuration for Discourse Software. Make sure you have the SMTP account for Discourse installation - you can buy or try free-tier SMTP account from Mailgun, Mailjet or SendGrid.
In this tutorial, we will be using the free-tier SMTP account from Mailgun. Uncomment SMTP configuration and type your account as below.
  DISCOURSE_SMTP_ADDRESS: smtp.mailgun.org
  DISCOURSE_SMTP_PORT: 587
  DISCOURSE_SMTP_USER_NAME: [email protected]
  DISCOURSE_SMTP_PASSWORD: mypassword
Save and exit.
Next, build new Discourse Docker image based on app.yml template configuration.
sudo ./launcher bootstrap app

After that, start/initialize new Discourse container using the command below.
sudo ./launcher start app

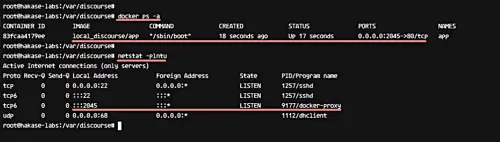
The Discourse container should be up and running - check it using docker command.
docker ps -a
Check the host open port using netstat, and make sure new docker-proxy port 2045 is on the list.
netstat -plntu
The Discourse Forum software has been installed under docker container on the host Ubuntu 16.04.
Step 3 - Generate SSL Letsencrypt on Ubuntu 16.04
The Discourse forum will run under the HTTP secure connection, and it will be handled by the Nginx Web server. We will use free SSL from Letsencrypt for this guide, and we need to install letsencrypt client on the server.
Install letsencrypt with the apt command below.
sudo apt install letsencrypt -y
Now generate new SSL certificates using the letsencrypt command.
letsencrypt certonly
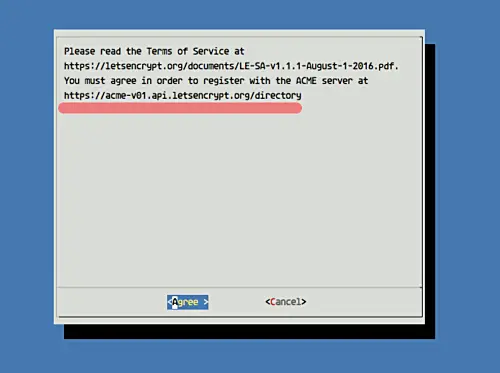
Type your email address for renewing notification and choose 'OK'.

For the Letsencrypt TOS (Terms Of Service), choose 'Agree'.
Now type your discourse domain name 'discourse.hakase-labs.me'.

And when it's complete, you will get the result as below

New SSL certificates from letsencrypt have been generated in the '/etc/letsencrypt/live' directory.
Step 4 - Install and configure Nginx as a reverse proxy for Discourse container
In this step, we will install Nginx web server and configure it as a reverse proxy for the Discourse container that is running on port 2045.
Install Nginx with the apt command below.
sudo apt install nginx -y
Now start Nginx and enable it to launch at boot time using the systemctl command.
systemctl start nginx
systemctl enable nginx
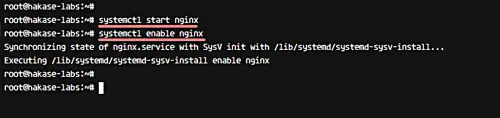
Nginx has been installed and is running on the HTTP port 80. You can check this using netstat.
netstat -plntu
Nginx web server has been installed to the Ubuntu 16.04 server.

Next, we need to create a new virtual host file for the Discourse container. Go to the nginx configuration directory and create new 'discourse' file using the vim editor.
cd /etc/nginx/
vim sites-available/discourse
Now, paste the following Discourse nginx virtual host configuration.
server {
    listen 80; listen [::]:80;
    server_name discourse.hakase-labs.me;

    return 301 https://$host$request_uri;
}

server {
    listen 443 ssl http2;
    server_name discourse.hakase-labs.me;

    ssl_certificate /etc/letsencrypt/live/discourse.hakase-labs.me/fullchain.pem;
    ssl_certificate_key /etc/letsencrypt/live/discourse.hakase-labs.me/privkey.pem;
    include /etc/nginx/snippets/ssl.conf;

    location / {
        proxy_pass http://discourse.hakase-labs.me:2045/;
        proxy_set_header Host $http_host;
        proxy_http_version 1.1;
        proxy_set_header X-Forwarded-Proto $scheme;
        proxy_set_header X-Forwarded-For $proxy_add_x_forwarded_for;
        proxy_redirect http://discourse.hakase-labs.me:2045/ https://discourse.hakase-labs.me;
    }
}
Save and exit.
Note:
- All HTTP requests will be redirected automatically to the HTTPS connection.
- Change the SSL configuration with your own path directory.
- There is an additional SSL configuration.
Now create new additional ssl configuration file 'ssl.conf'.
vim snippets/ssl.conf
Paste the following configuration in the file.
ssl_session_timeout 1d;
ssl_session_cache shared:SSL:50m;
ssl_session_tickets off;

ssl_protocols TLSv1.2;
ssl_ciphers EECDH+AESGCM:EECDH+AES;
ssl_ecdh_curve secp384r1;
ssl_prefer_server_ciphers on;

ssl_stapling on;
ssl_stapling_verify on;

add_header Strict-Transport-Security "max-age=15768000; includeSubdomains; preload";
add_header X-Frame-Options DENY;
add_header X-Content-Type-Options nosniff;
Save and exit.
And now activate the discourse virtual host using the 'ln -s' command, as shown below.
ln -s /etc/nginx/sites-available/discourse /etc/nginx/sites-enabled/
Tets the configuration and make sure there is no error, then restart the service.
nginx -t
systemctl restart nginx
Nginx installation and configuration as a reverse proxy for Discourse container has been completed.

Step 5 - Discourse Web installer
Open your web browser and visit the discourse URL.
http://discourse.hakase-labs.me
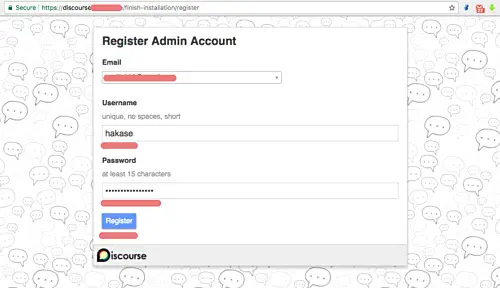
And you will be redirected to the HTTP secure connection. Click the 'Register' button to create a new admin user.

Now type your admin user and password, and then click 'Register'.
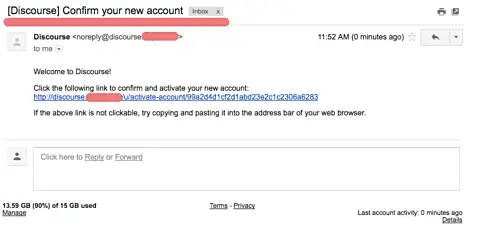
And you will get a new email confirmation about your admin user activation.

Below is a sample email message for the Discourse account confirmation. Click the link to confirm and activate the admin account.
And you should get the discourse page as shown below. Click on the 'Click here to activate your account' button.

Now you can configure your own Discourse forum. Click the 'Next' button and you need to configure Discourse Forum with 13 step. Or you can configure it later by clicking 'Maybe Later'.

Shown below is the Discourse Forum installed on Nginx web server and HTTPS on Ubuntu 16.04.

Following is my Discourse Admin Dashboard.
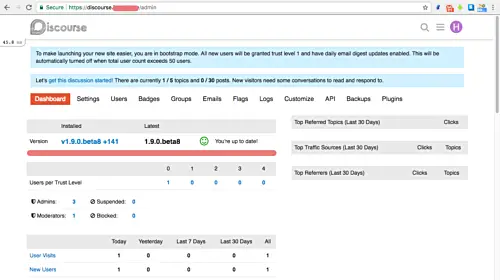
The Discourse Forum has been installed with Nginx as a reverse proxy on Ubuntu 16.04 server.
Step 6 - Discourse additional configuration
While installing Discourse, you may encounter a problem where-in you don't get an email confirmation for the admin user activation.
To sort the issue, make sure you have the right SMTP account on the configuration app.yml. Or you can activate the admin account manually from your server.
To activate your admin account manually, go to the '/var/discourse' directory.
cd /var/discourse
Now access the discourse container with the command below.
./launcher enter app
And activate the first admin user using rails command as below.
rails c
u = User.last
u.admin = true
u.activate
u.save
And now you can log into the Discourse forum with your username and password.

