How to Setup Zammad Ticketing System on Ubuntu 16.04
This tutorial exists for these OS versions
- Ubuntu 22.04 (Jammy Jellyfish)
- Ubuntu 16.04 (Xenial Xerus)
On this page
Zammad is an open source helpdesk/customer support system written in Ruby. It's a web based ticketing system with many features, including support to manage customer communication over several channels like Facebook, telegram, chat, and emails. Zammad is distributed under GNU AFFERO General Public License (AGPL) and can be installed on multiple platforms like Linux, AIX, FreeBSD, OpenBSD, and MacOSX. It's available on Github and free to install on your own server.
In this tutorial, we will show you how to install and configure Zammad Ticketing System using Nginx web server and PostgreSQL for the database system. OS will be Ubuntu 16.04 Xenial Xerus, and we'll be using SSL Letsencrypt to secure client-server connections.
What we will do
- Configure locales on Ubuntu 16.04
- Install Zammad Ticketing System
- Install and configure SSL Letsencrypt
- Configure Nginx HTTPS
- Zammad configuration
- Additional tips
Prerequisites
- Ubuntu 16.04
- RAM: 2GB or more
- Root privileges
Step 1 - Configure locales
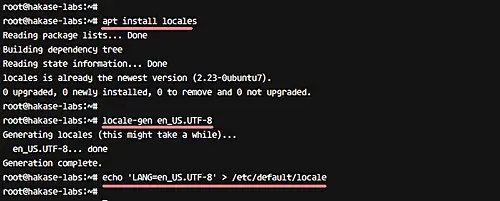
We need to setup our locale system to 'UTF-8' for the PostgreSQL database installation. Install locales in the system with the following apt command.
apt install locales
Generate new 'UTF-8' locale and make it as default locale on the system.
locale-gen en_US.UTF-8
echo 'LANG=en_US.UTF-8' > /etc/default/locale
Next, check the locale settings with the following command.
locale
And you should get currently used system locale as 'UTF-8'.

Step 2 - Install Zammad Ticketing System
Zammad can be installed in the following two ways: manual installation from sources or installing from the repository packages. In this tutorial, we will install Zammad from the repository.
Add new Zammad key and repository to the system.
wget -qO - https://deb.packager.io/key | sudo apt-key add -
echo "deb https://deb.packager.io/gh/zammad/zammad xenial stable" | sudo tee /etc/apt/sources.list.d/zammad.list
Update the repository and install Zammad with the apt command, as shown below.
sudo apt update
sudo apt install zammad

Note:
Zammad will automatically install other required packages, including Nginx web server and PostgreSQL database.
And when you're done with the installation, you will see a result simialr to the one shown in the following screenshot.
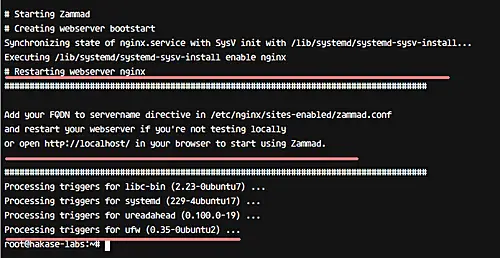
Zammad alongwith other required packages has been installed on the system.
Step 3 - Install and configure SSL Letsencrypt
In this tutorial, we will configure Zammad to use HTTPS for secure connections between client and server. We will be using free SSL from the Letsencrypt, and it's can be configured with the letsencrypt tool.
Install the letsencrypt tool from the official repository with the apt command.
apt install letsencrypt
Letsencrypt tool has been installed. Now go to the Nginx configuration directory '/etc/nginx/' and edit the default virtual host file.
cd /etc/nginx/sites-available/
vim default
Paste configuration below under 'server {..}' section.
        location ~ /.well-known {
                 allow all;
         }
That's it. Save the changes, and then restart nginx.
systemctl restart nginx
Next, generate a new SSL Certificate for your own domain name using the letsencrypt command below.
letsencrypt certonly --standalone -d zammad.hakase-labs.co
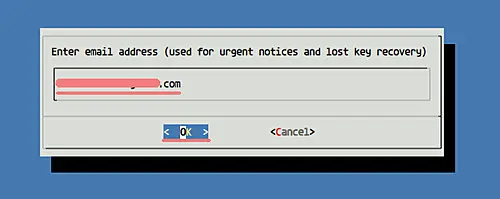
You will be asked about the Email renew notification, input your email.
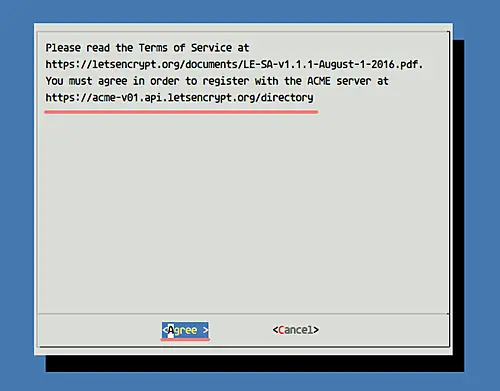
And will also be asked about the Letsencrypt Term of Service (TOS), choose 'Agree' and press Enter.
You will see a result similar to the one shown below after the SSL certificate is generated.
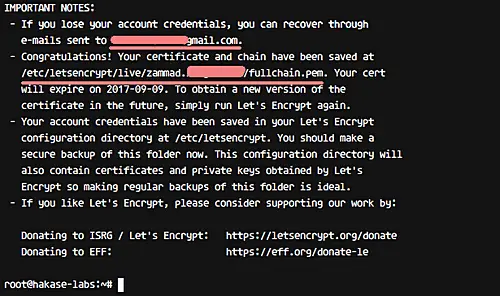
All certificate files are available inside the '/etc/letsencrypt/live/' directory, and new SSL Certificate files for Zammad has been generated.
Step 4 - Configure Nginx for Zammad
The Nginx web server is automatically installed during the Zammad installation process. There is a virtual host configuration for Zammad, available in the '/etc/nginx/sites-available' directory.
In this step, we need to edit the zammad virtual host file 'zammad.conf' to implement the SSL configuration.
Go to the 'sites-available' directory and edit 'zammad.conf' file with vim.
cd /etc/nginx/sites-available/
vim zammad.conf
Delete all lines and paste configuration below.
#
 # this is the nginx config for zammad
 #

 upstream zammad {
     server localhost:3000;
 }

 upstream zammad-websocket {
     server localhost:6042;
 }

 # Added - Automatically redirect HTTP to HTTPS Nginx
 server {
     listen 80;
     server_name zammad.irsyadf.me;
     return 301 https://$host$request_uri;
 }

 # Added - HTTPS configuration for Zammad
 server {
     listen 443 http2 ssl;

     ssl_certificate /etc/letsencrypt/live/zammad.irsyadf.me/fullchain.pem;
     ssl_certificate_key /etc/letsencrypt/live/zammad.irsyadf.me/privkey.pem;
     ssl_protocols TLSv1 TLSv1.1 TLSv1.2;
     ssl_prefer_server_ciphers on;
     ssl_ciphers "EECDH+AESGCM:EDH+AESGCM:AES256+EECDH:AES256+EDH";
     ssl_ecdh_curve secp384r1;
     ssl_session_cache shared:SSL:10m;
     ssl_session_tickets off;
     ssl_stapling on;
     ssl_stapling_verify on;
     resolver 8.8.8.8 8.8.4.4 valid=300s;
     resolver_timeout 5s;
     add_header Strict-Transport-Security "max-age=63072000; includeSubdomains";
     add_header X-Frame-Options DENY;
     add_header X-Content-Type-Options nosniff;

     # replace 'localhost' with your fqdn/domain name if you want to use zammad from remote
     server_name zammad.irsyadf.me;

     root /opt/zammad/public;

     access_log /var/log/nginx/zammad.access.log;
     error_log  /var/log/nginx/zammad.error.log;

     client_max_body_size 50M;

     location ~ ^/(assets/|robots.txt|humans.txt|favicon.ico) {
         expires max;
     }

     location /ws {
         proxy_http_version 1.1;
         proxy_set_header Upgrade $http_upgrade;
         proxy_set_header Connection "Upgrade";
         proxy_set_header CLIENT_IP $remote_addr;
         proxy_set_header X-Forwarded-For $proxy_add_x_forwarded_for;
         proxy_read_timeout 86400;
         proxy_pass http://zammad-websocket;
     }

     location / {
         proxy_set_header Host $http_host;
         proxy_set_header CLIENT_IP $remote_addr;
         proxy_set_header X-Forwarded-For $proxy_add_x_forwarded_for;
         proxy_read_timeout 180;
         proxy_pass http://zammad;

         gzip on;
         gzip_types text/plain text/xml text/css image/svg+xml application/javascript application/x-javascript application/json application/xml;
         gzip_proxied any;
     }
 }
Save the changes and exit the editor.
So, the Zammad virtual host is enabled with SSL. Now, test the configuration and make sure there is no error. Then restart the nginx web server.
nginx -t
systemctl restart nginx
The Zammad virtual host now is using SSL configuration.
Step 5 - Zammad configuration
Zammad and other packages including Nginx and PostgreSQL are installed, and the virtual host configuration has also been completed. Now we need to perform the Zammad installation and configuration through the Web browser.
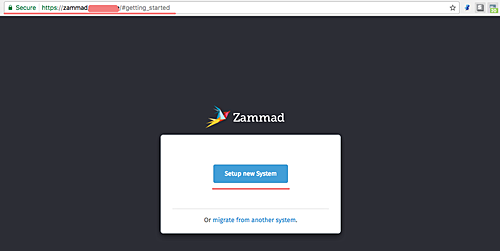
Open your web browser and type the zammad URL 'zammad.hakase-labs.co'. You will be redirected automatically to the HTTPS connection.
Click 'Setup new System'.
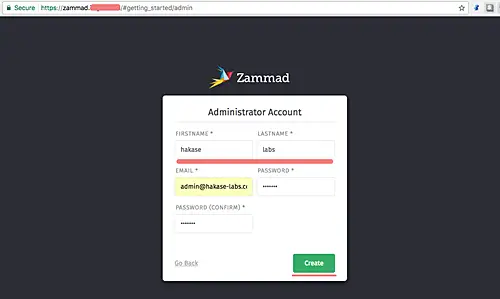
Next page is for admin configuration. Here, enter details like admin user, email, and password. Then click 'Create'
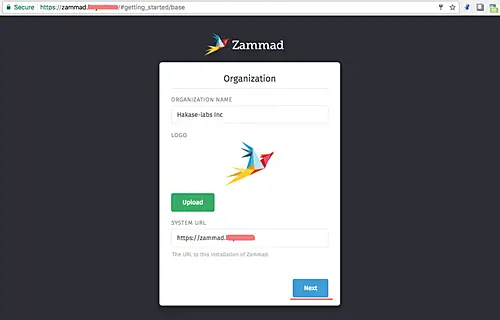
For the organization name, type your organization name 'Hakase-labs Inc' and click 'Next'.
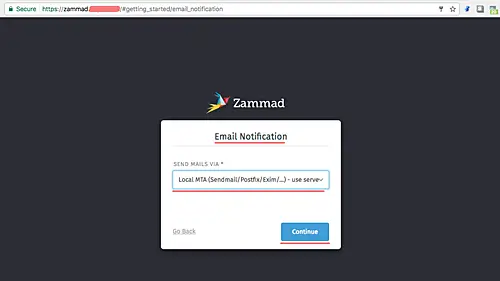
For email configuration, click 'Continue'. We can do the Email Notification configuration from the settings page.
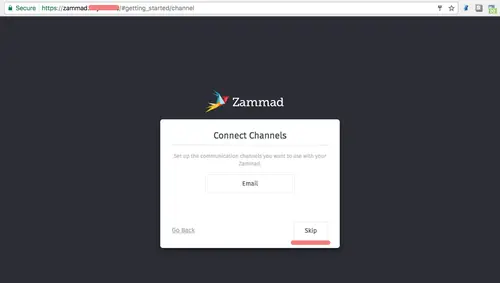
next, in Channel configuration window, click 'Skip'.
And now you see the Zammad admin dashboard with beautiful UI.
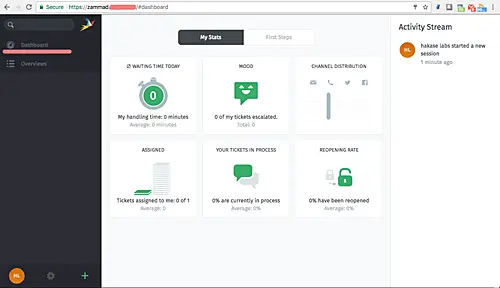
Zammad has been installed and HTTPS is enabled. It's Installed with Nginx as the web server and PostgreSQL as the database on Linux Ubuntu 16.04.
Step 6 - Additional tips
Zammad has three components, including a web application server, a worker process, and a websocket server. We can manage all the services with the systemcl command below.
systemctl start zammad
systemctl status zammad
systemctl restart zammad
If you want to configure individual services, you can use specific commands as shown below.
systemctl status zammad-web
systemctl status zammad-worker
systemctl status zammad-websocket
Zammad installation on Ubuntu 16.04 Xenial Xerus has been completed.

