How to Install and Configure Askbot on Ubuntu 16.04
Askbot is an open source software for creating Q&A forum based on Python Django Framework. It's similar to other Q&A systems like StackOverflow and Yahoo Answers. The tool has been used by large open source software projects like Fedora and LibreOffice. Askbot was created by Mike Chan and Sailing Cai in 2009, and it's easy to install and configure on Linux systems like Ubuntu and CentOS.
In this tutorial, we will show you how to step-by-step install Askbot Django App using uWSGI and Nginx Web server, and we will be using Ubuntu 16.04 Xenial Xerus as our main operating system.
What we will do:
- Install dependencies
- Install and configure PostgreSQL database
- Install and configure Askbot
- Install and configure uWSGI
- Install and configure Nginx
- Testing
Prerequisites
- Ubuntu 16.04
- Root privileges
Step 1 - Install dependencies
The first step we must do is to install packages that are needed for Askbot installation. So let's start. Connect to your Ubuntu server using SSH.
ssh root@AskbotServerIP
Next, install packages like python-dev, pip etc with the following apt command.
apt install -y build-essential python-pip python-dev python-flup libpng12-dev zlib1g-dev libpng-dev libjpeg-dev python-setuptools
All the required packages have been installed.
Step 2 - Install and configure PostgreSQL database
Askbot offers support for many database systems like MySQL, SQLite, and PostreSQL. In this tutorial, we will be using PostgreSQL as our database system.
We will install PostgreSQL, configure authentication for local user, and then create a new database and user for Askbot installation.
Install the PostgreSQL database using the following apt command.
apt install -y postgresql postgresql-contrib
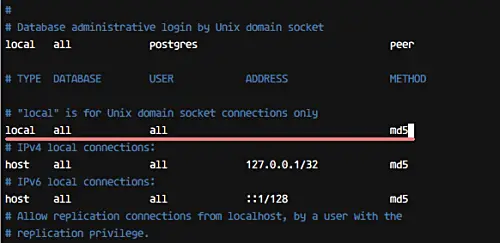
Now edit the pg_hba.conf file with vim to configure local user authentication.
vim /etc/postgresql/9.5/main/pg_hba.conf
Change all local user authentication using md5 as below.
local all all md5
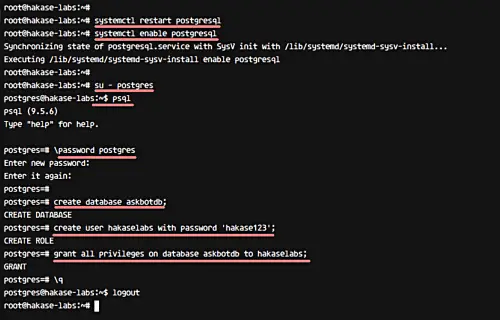
Save and exit. Now, restart PostgreSQL services and enable it to automatically start at system boot.
systemctl restart postgresql
systemctl enable postgresql
Next, we need to create a new database and user for Askbot installation. For our case, we will create a new database 'askbotdb' with username 'hakaselabs' and password 'hakase123'.
Login as the postgres user and access the PostgreSQL shell 'psql'.
su - postgres
psql
Change the postgres user password with your own password.
\password postgres
And create a new database 'askbotdb' and a new user 'hakaselabs' with password 'hakase123' using the following queries.
create database askbotdb;
create user hakaselabs with password 'hakase123';
grant all privileges on database askbotdb to hakaselabs;
\q
A new PostgreSQL database for Askbot installation has been created.
Step 3 - Install and Configure Askbot Django App
All packages needed for Askbot installation have been installed and the PostgreSQL database has been created. Now, the next step is to install and configure Askbot.
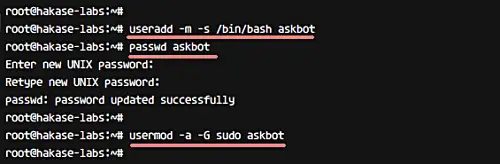
We need to create a new user for Askbot installation, as we will not be using root user for it. Create a new user named 'askbot' and give that user a new password.
useradd -m -s /bin/bash askbot
passwd askbot
Next, add the askbot user to the sudo group using the following usermod command.
usermod -a -G sudo askbot
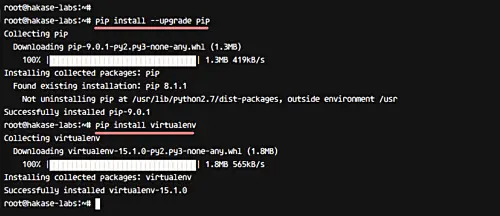
A new user has been created. Now we need to update python-pip and install virtualenv package. Install these packages using the following pip commands.
pip install --upgrade pip
pip install virtualenv
Now, log in as the 'askbot' user with the su command, and then install Askbot.
su - askbot
And we want to create a new virtual environment for our askbot installation. Create a new virtual environment with virtualenv command.
virtualenv hakase-labs
Go to the hakase-labs directory and activate the virtualenv.
cd hakase-labs/
source bin/activate
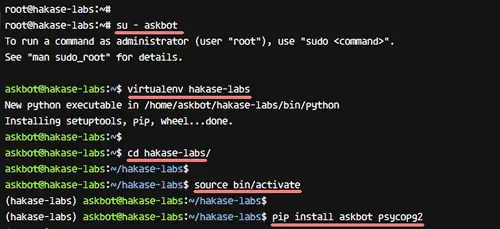
Install Askbot Django app with pip, including psycopg2 for PostgreSQL database connection.
pip install askbot psycopg2
After the installation is complete, you will see result as shown below.

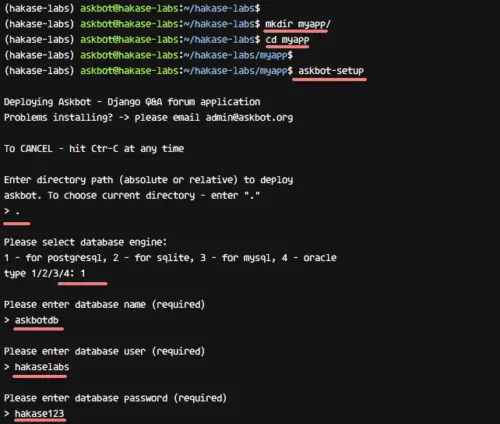
Next, create a new directory for Askbot Django app - we will use the name 'myapp'. Create the directory and install Askbot in it.
mkdir myapp/
cd myapp
Install Askbot with the command below.
askbot-setup
When you are asked about the Askbot installation directory, just give the single '.' and press 'Enter'. Similarly, for database config, choose PostgreSQL by choosing number '1'. Input the database name 'askbotdb', username 'hakaselabs' with password 'hakase123'.
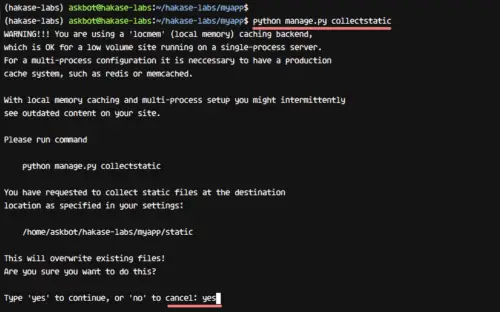
Now, generate static files directory with the following command.
python manage.py collectstatic
Type 'yes' and press Enter to continue.
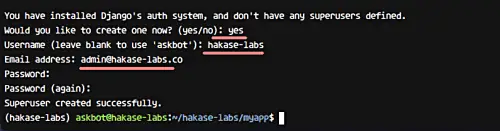
Generate the PostgreSQL database with the syncdb option.
python manage.py syncdb
And you will be asked about creating the admin user - type 'yes' and then type your admin user, email, and password.
Askbot is now installed on the system under the 'askbot' user virtual environment. You can test the Askbot installation by running the runserver command below.
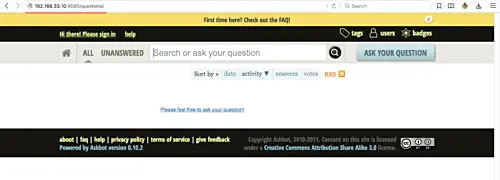
python manage.py runserver 0.0.0.0:8080
Open your web browser and type the server IP with port 8080, and you will see the 'Askbot' page, as shown below.
Step 4 - Install and Configure uWSGI
uWSGI supports Python, Perl, and Ruby based applications. In this tutorial, we will be using uWSGI with the Nginx web server for our Askbot installation. Install uWSGI with the following pip command.
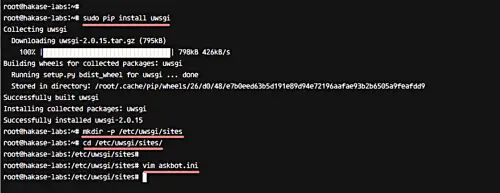
sudo pip install uwsgi
Now create a new directory for the uWSGI site configuration '/etc/uwsgi/sites'.
mkdir -p /etc/uwsgi/sites
/etc/uwsgi/sites
Add new uWSGI configuration file 'askbot.ini' to the 'sites' directory and edit it with vim.
vim askbot.ini
There, paste the following uWSGI configuration.
[uwsgi]

# Project directory, Python directory
chdir = /home/askbot/hakase-labs/myapp
home = /home/askbot/hakase-labs/
static-map = /m=/home/askbot/hakase-labs/myapp/static
wsgi-file = /home/askbot/hakase-labs/myapp/django.wsgi

master = true
processes = 5

# Askbot will running under the sock file
socket = /home/askbot/hakase-labs/myapp/askbot.sock
chmod-socket = 664
uid = askbot
gid = www-data
vacuum = true

# uWSGI Log file
logto = /var/log/uwsgi.log
That's it. Save and exit.
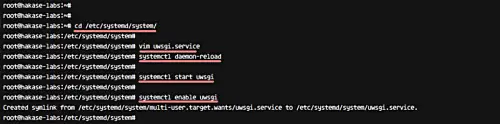
Next, we need to create a new service file for uWSGI. Go to the '/etc/systemd/system/' directory and create a new uwsgi.service file using vim.
cd /etc/systemd/system/
vim uwsgi.service
Paste the following uWSGI service configuration there.
[Unit]
Description=uWSGI Emperor service

[Service]
ExecStartPre=/bin/bash -c 'mkdir -p /run/uwsgi; chown askbot:www-data /run/uwsgi'
ExecStart=/usr/local/bin/uwsgi --emperor /etc/uwsgi/sites
Restart=always
KillSignal=SIGQUIT
Type=notify
NotifyAccess=all

[Install]
WantedBy=multi-user.target
Save and exit. Then, reload the systemd services.
systemctl daemon-reload
Now, start the uWSGI service and enable it to automatically launch at system boot.
systemctl start uwsgi
systemctl enable uwsgi
uWSGI has been installed and configured for our Askbot app, and it's running as a system service.
Step 5 - Install and configure Nginx
Askbot is now installed, and it's running under the uWSGI sock file 'askbot.sock'. In this step, we will be using Nginx web server as a reverse proxy for uWSGI application Askbot.
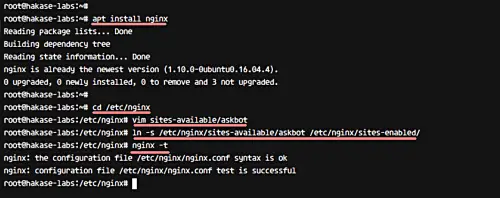
Install Nginx from the repository using the following apt command.
apt install nginx
After the installation is complete, please go to the nginx configuration directory '/etc/nginx/' and add new nginx virtual host file 'askbot'.
cd /etc/nginx
vim sites-available/askbot
Paste the following askbot nginx virtual host configuration.
server {
        listen 80;
        server_name askbot.me www.askbot.me;
        location / {
        include         uwsgi_params;
        uwsgi_pass      unix:/home/askbot/hakase-labs/myapp/askbot.sock;
   }
}
Save and exit.
Now enable the Askbot virtual host file by creating a symlink for 'askbot' file to 'sites-enabled' directory and test the nginx configuration.
ln -s /etc/nginx/sites-available/askbot /etc/nginx/sites-enabled/
nginx -t
The Askbot virtual host is enabled. Now restart nginx services and enable it to start automatically at system boot.
systemctl restart nginx
systemctl enable nginx
Nginx configuration has been completed, and it's running on port 80. Check it with the netstat command, as shown below.
netstat -plntu
Now check askbot by checking the uWSGI sock file using the following netstat command.
netstat -pl | grep askbot
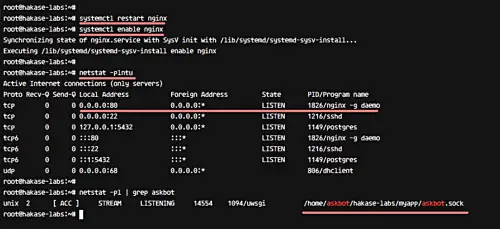
Nginx web server has been installed and configured for the Askbot Python Django app.
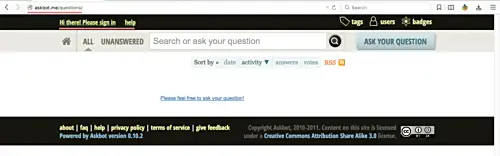
Step 6 - Testing
Open your web browser and visit the Askbot domain name: askbot.me, and you should get the home page as shown below.
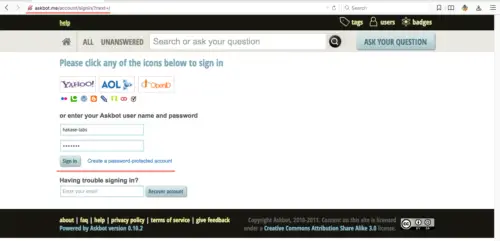
Askbot user login.
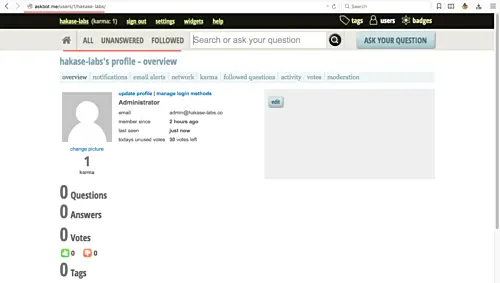
Askbot user Dashboard.
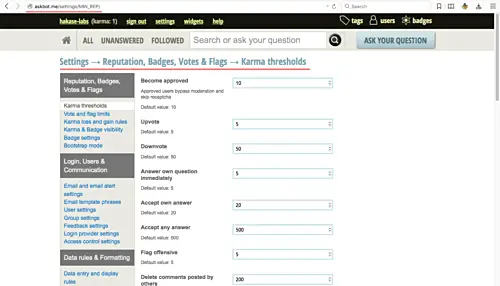
Askbot Settings.
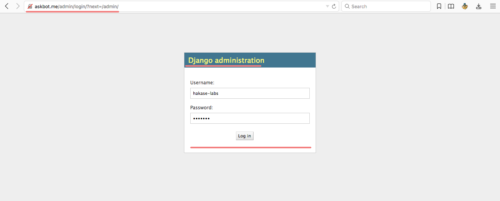
Askbot Django admin login.
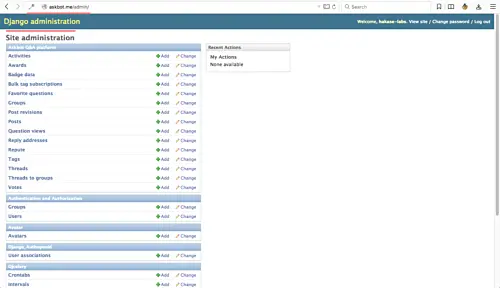
Askbot Django admin Dashboard.
The Q&A system app 'Askbot' has been installed with uWSGI and Nginx web server on Ubuntu 16.04 server.

