How to Install Laravel 5 PHP Framework with Nginx on Ubuntu 16.04 LTS
This tutorial exists for these OS versions
- Ubuntu 18.04 (Bionic Beaver)
- Ubuntu 16.04 (Xenial Xerus)
- Ubuntu 15.10 (Wily Werewolf)
On this page
Laravel is a free and open source PHP framework with MVC (Model-View-Controller) design pattern. Created by Taylor Otwell on 2011, it as an attempt to provide an advanced alternative to the CodeIgniter (CI) framework. In 2011, Laravel released version 1 and version 2, and the latest version 5.4 comes with more and improved features like Command-Line (CLI) support named 'artisan', support for different database systems, Route improvements etc.
In this tutorial, we will guide you step-by-step on how to install Laravel version 5.4 with Nginx as the web server, PHP-FPM 7.0 and MariaDB. Laravel 5.4 will run under LEMP stack with Ubuntu 16.04 as OS version.
There is a version of this tutorial for Laravel on CentOS 7 as well.
What we will do
- Update Ubuntu
- Install Nginx
- Install PHP-FPM 7.0
- Install MariaDB
- Install PHP Composer
- Configure Nginx Virtual Host for Laravel
- Install Laravel
- Testing
Prerequisites
- Ubuntu 16.04 server
- Root privileges
Step 1 - Update Ubuntu
Before we start with the installation, we need to update the repository and then update all packages to the latest version. So to do that, first login to the Ubuntu server using ssh.
ssh [email protected]
Now, update your Ubuntu repository and upgrade all packages on your system to the latest version.
sudo apt-get update
sudo apt-get upgrade
Reboot your server and then connect again using ssh.
Step 2 - Install Nginx
In this step, we will install Nginx 1.10 in the system. It's available in the repository, you just need to install it with the following apt command.
sudo apt-get install -y nginx
After the installation has been completed, start Nginx and enable it to start automatically at system boot, something which you can do using the following systemctl commands.
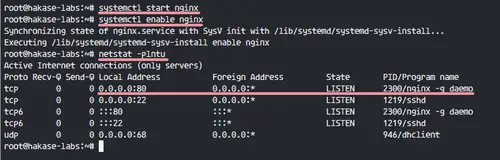
systemctl start nginx
systemctl enable nginx
Nginx is running on port 80, check related stats using the netstat command in the following way.
netstat -plntu
Or you can use the curl command as well.
curl localhost
Step 3 - Install PHP-FPM 7
Nginx is installed, and now we need to install PHP-FPM version on the system. We will install PHP 7.0 and some PHP extensions needed by Laravel.
Install PHP and PHP-FPM 7.0 with all extensions needed using the following command.
sudo apt-get install -y php7.0 php7.0-curl php7.0-common php7.0-cli php7.0-mysql php7.0-mbstring php7.0-fpm php7.0-xml php7.0-zip
Next, go to the PHP configuration directory and edit php.ini file present in the fpm directory.
cd /etc/php/7.0/
vim fpm/php.ini
Uncomment the following CGI line, and change the value to 0.
cgi.fix_pathinfo=0
That's it. Save and exit.
Now we can start PHP-FPM and enable it to launch automatically at system boot.
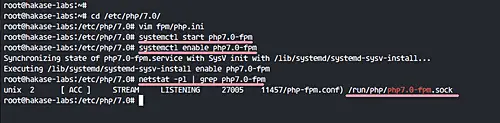
systemctl start php7.0-fpm
systemctl enable php7.0-fpm
By default on Ubuntu, PHP-FPM is running under the sock file. Check the PHP-FPM sock file with the netstat command in the following way:
netstat -pl | grep php7.0-fpm
PHP and PHP-FPM 7.0 installed.
Step 4 - Install MariaDB
This is optional, but when your Laravel project is based on MySQL, you need to do this for your project. We will install MariaDB latest version 10.0 on to the system.
Install MariaDB from the repository using the following command.
sudo apt-get install -y mariadb-server mariadb-client
After the installation is complete, run MariaDB and enable it to launch at system boot.
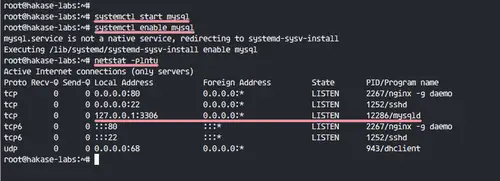
systemcl start mysql
systemctl enable mysql
MariaDB started on port 3306, check it using the netstat command.
netstat -plntu
Next, configure the MariaDB root password with the 'mysql_secure_installation' command below.
mysql_secure_installation
Input your root password, remove anonymous users, disallow root login remotely etc.
Set root password? [Y/n] Y
 Remove anonymous users? [Y/n] Y
 Disallow root login remotely? [Y/n] Y
 Remove test database and access to it? [Y/n] Y
 Reload privilege tables now? [Y/n] Y
MariaDB installation and configuration has been completed.
Step 5 - Install PHP Composer
The composer is a package manager for the PHP programming language. Created on 2011, it's inspired by Node.js 'npm' and Ruby's named 'bundler'. On ubuntu 16.04, composer is available in the repository, so we can install it using the apt command.
Install PHP Composer with the following command.
sudo apt-get install -y composer
After the installation has been completed, run 'composer' command and you will get the results as shown in the screenshot.
composer
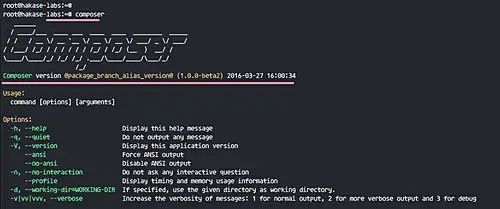
PHP Composer installed on Ubuntu 16.04.
Step 6 - Configure Nginx virtual host for Laravel
In this step, we will configure the nginx virtual host for Laravel. But before we do that, we must decide the directory for our Laravel project. In our case, we will use '/var/www/laravel' directory for the project. Just create it with mkdir.
mkdir -p /var/www/laravel
Next, go to the nginx configuration directory and create a new virtual host file 'laravel' under 'sites-available' directory.
cd /etc/nginx/
vim sites-available/laravel
Paste the following configuration there.
server {
         listen 80;
         listen [::]:80 ipv6only=on;

         # Log files for Debugging
         access_log /var/log/nginx/laravel-access.log;
         error_log /var/log/nginx/laravel-error.log;

         # Webroot Directory for Laravel project
         root /var/www/laravel/public;
         index index.php index.html index.htm;

         # Your Domain Name
         server_name laravel.hakase-labs.co;

         location / {
                 try_files $uri $uri/ /index.php?$query_string;
         }

         # PHP-FPM Configuration Nginx
         location ~ \.php$ {
                 try_files $uri =404;
                 fastcgi_split_path_info ^(.+\.php)(/.+)$;
                 fastcgi_pass unix:/var/run/php/php7.0-fpm.sock;
                 fastcgi_index index.php;
                 fastcgi_param SCRIPT_FILENAME $document_root$fastcgi_script_name;
                 include fastcgi_params;
         }
 }
That's it. Save and exit.
Now activate the virtual host by creating a symlink of the 'laravel' file to the 'sites-enabled' directory. Then test nginx configuration and make sure there is no error.
ln -s /etc/nginx/sites-available/laravel /etc/nginx/sites-enabled/
nginx -t
Virtual host for laravel has been created. Now restart nginx.
systemctl restart nginx

Step 7 - Install Laravel
Before we start with Laravel installation, make sure unzip utility is installed on your system. If you do not have the tool, install it using the following command.
sudo apt-get install unzip
We've already defined a directory for Laravel : '/var/www/laravel' directory. Go to that directory.
cd /var/www/laravel
Install Laravel with the composer command. There are two ways to install Laravel: Installing via the Laravel Installer and Installing via Composer create project. We will install latest Laravel version 5.4 via the composer create project.
Run the following composer command.
composer create-project laravel/laravel .
You need to wait for the Laravel installation.

And after the installation is complete.
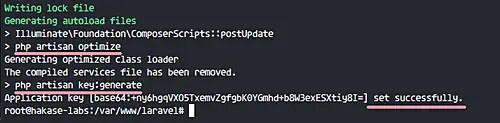
We need to change the ownership of the Laravel project directory to 'www-data' user, and change the permission of the storage directory to 755.
chown -R www-data:root /var/www/laravel
chmod 755 /var/www/laravel/storage
Laravel Installation has been completed without any error.
Step 8 - Testing
In the virtual host configuration file, we've already defined the domain name for Laravel 'laravel.hakase-labs.co'.
Open your web browser and visit the domain you installed Laravel on, mine here on the test server is http://laravel.hakase-labs.co/
And you should see the Laravel home page.
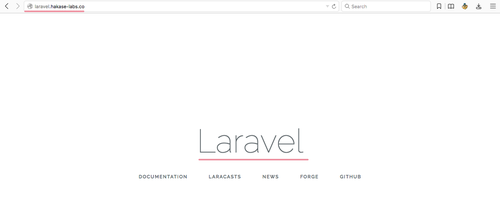
Laravel Installation with Nginx, PHP-FPM 7 and MariaDB on Ubuntu 16.04 is successful.

