How to integrate ONLYOFFICE 9.6 with WordPress
ONLYOFFICE is an open source solution that comprises powerful document editing features and multiple productivity tools, such as CRM, projects, mail, chat and more distributed under AGPL v3.
WordPress is a free and open-source content management system distributed under GNU GPL v2.
Recently, ONLYOFFICE developers have updated Community Server to version 9.6 with lots of improvements released, two new plugins among them - for creating bibliographic lists via EasyBib, and for publishing content created in the editors directly to your WordPress blog. So, in this tutorial, we'll learn how to easily integrate ONLYOFFICE with your WordPress website.
Step 1: Update to the latest version
Update ONLYOFFICE Community Server to the latest version using Docker following the instructions are given in this tutorial. If you're new to ONLYOFFICE, download the latest version from GitHub.
Step 2: Create a WordPress application
At first, log in to your WordPress account. In case you're not a registered user of WordPress yet, open its sign up page and create a new website (it's created along with registering a new account).
Once signed in, go to the WordPress Developers page.
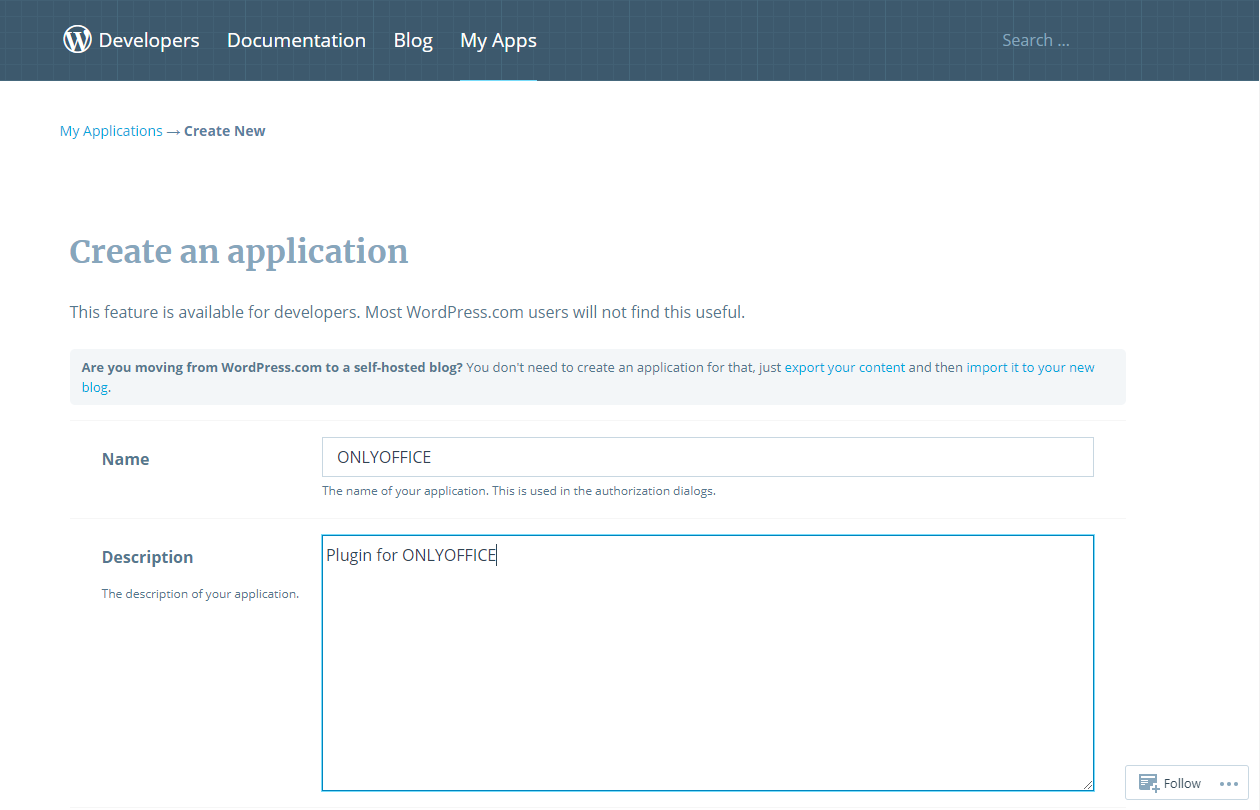
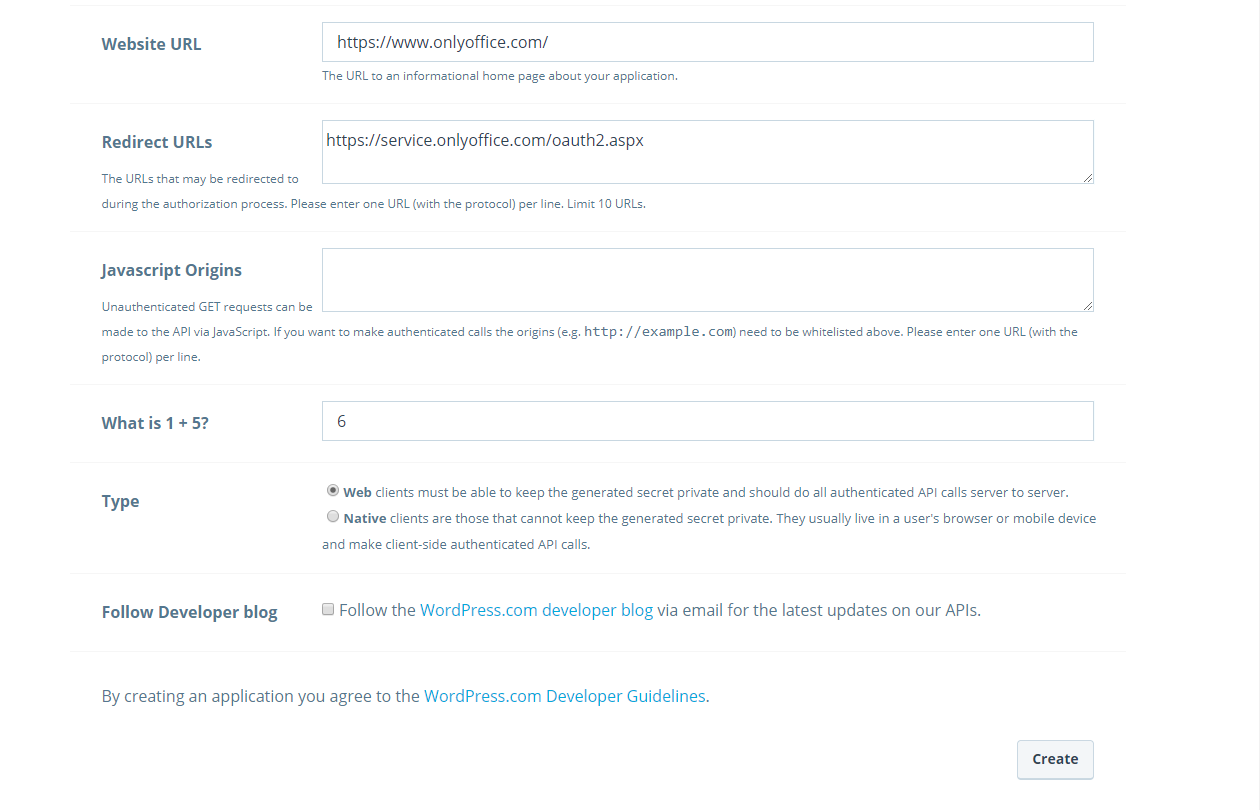
Fill in the required fields, including Name, Description, and Website URL. In the Redirect URL field type in the following link:
https://service.onlyoffice.com/oauth2.aspx
Then, answer the verification question, and click Create.
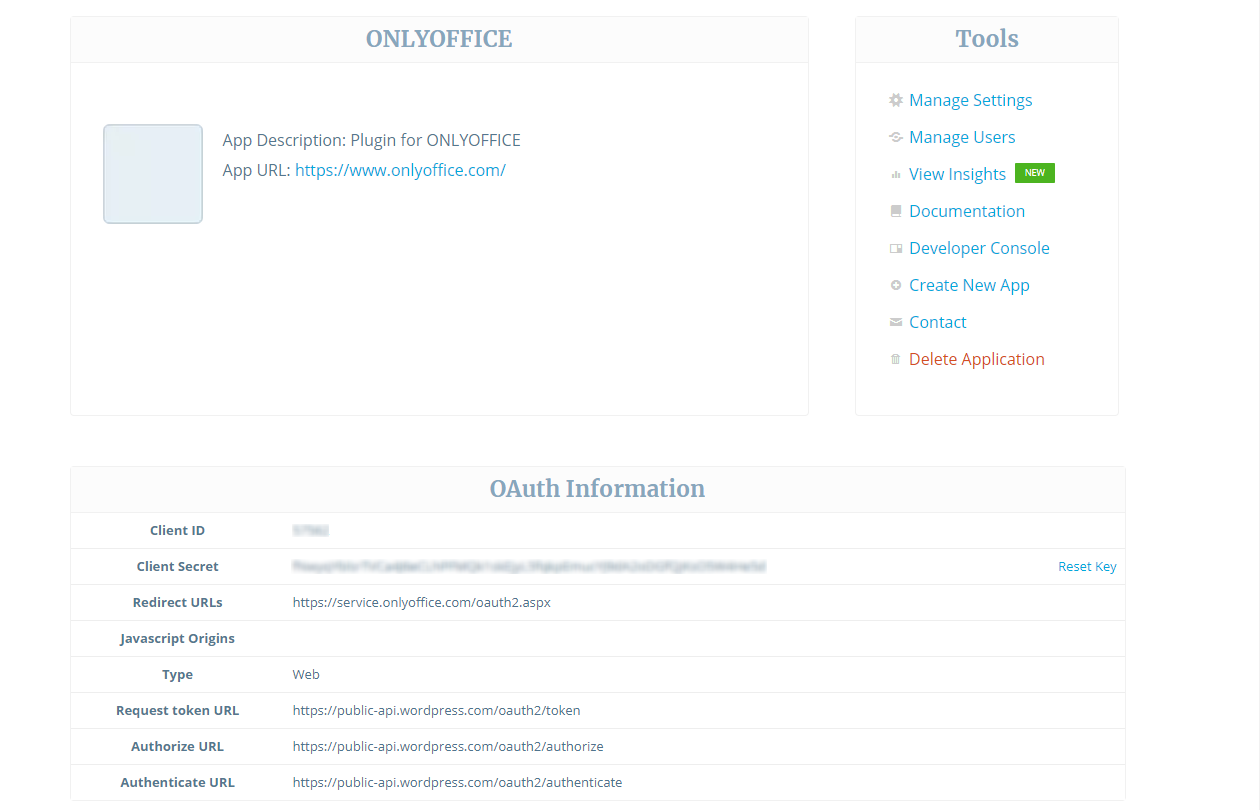
Step 3: Get OAuth information
After creating an application you're redirected to the Manage Settings page. Click the title of the created application, and copy Client ID and Client Secret from the OAuth Information section.
Step 4: Connect WordPress to ONLYOFFICE
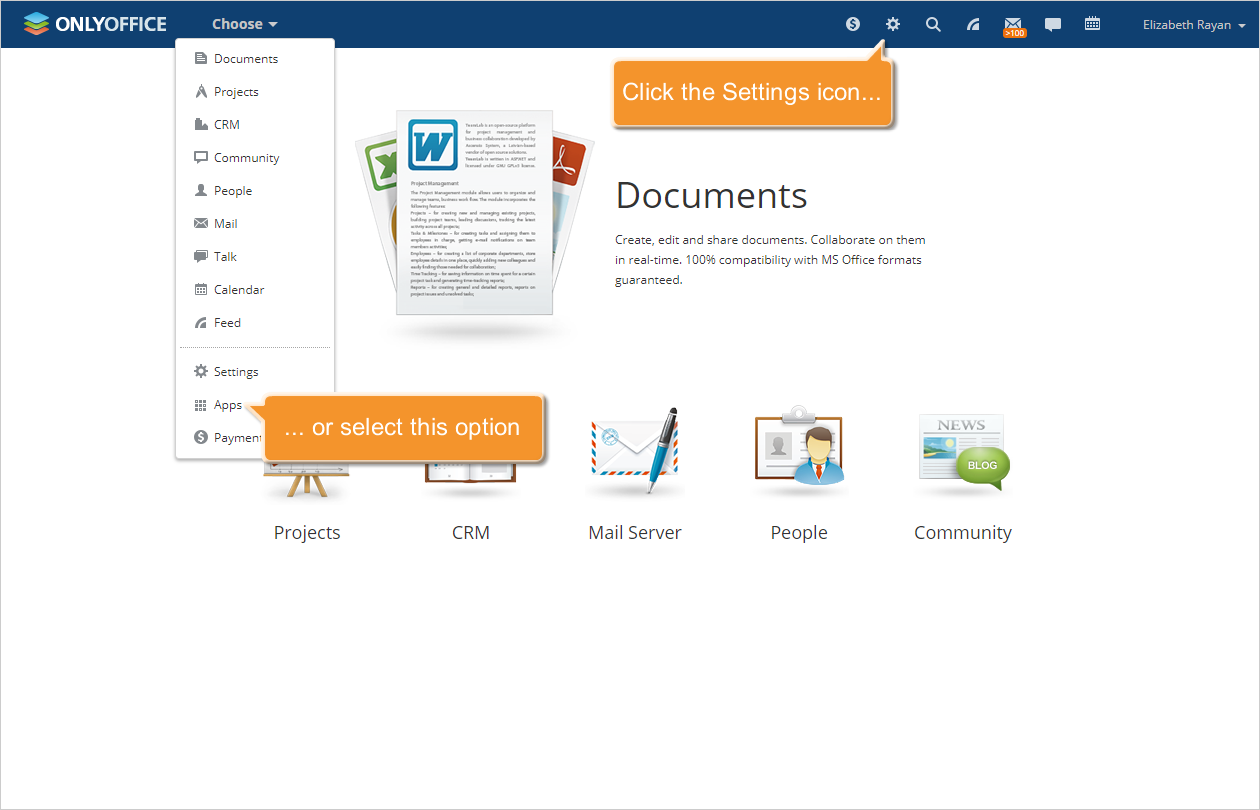
Enter your ONLYOFFICE portal and go to the Settings section by clicking its icon at the top of the page, or select the appropriate option from the navigation menu.
Then, go to the Integration section and open the Third Party Services page.

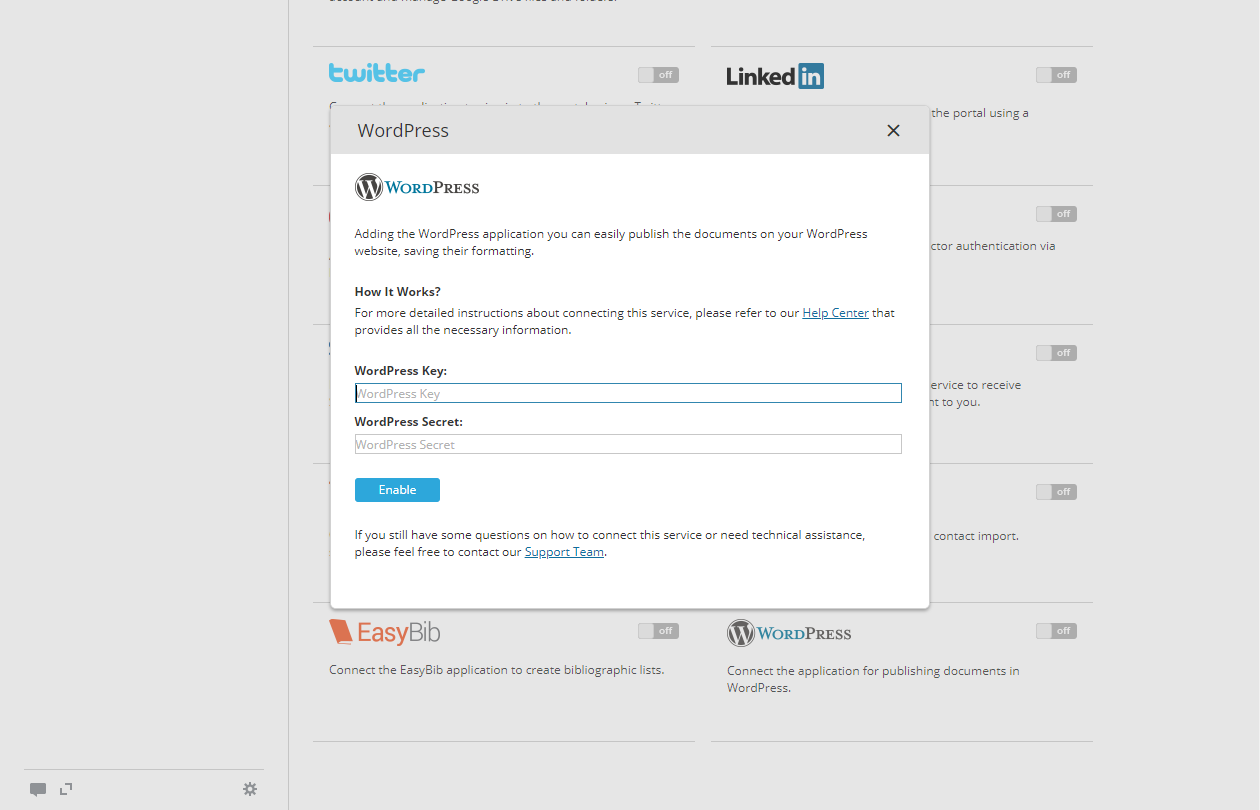
Find WordPress in the list and click the switcher next to its icon.
Paste Client ID (WordPress Key) and Client Secret (WordPress Secret) of your WordPress application to the corresponding fields, and click Enable to save settings.
Step 5: Sign in to WordPress
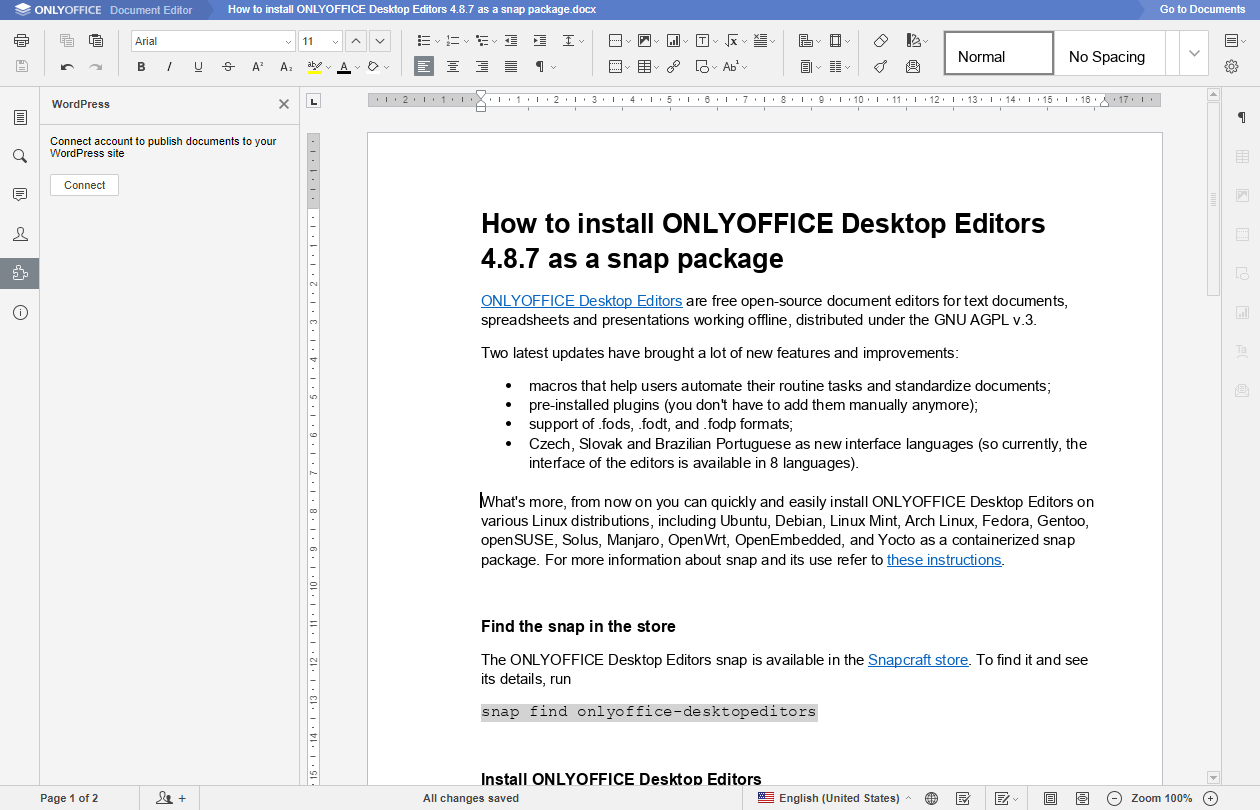
Open any document you would like to publish, click the Plugins icon on the left sidebar, find WordPress plugin and click the Connect button.
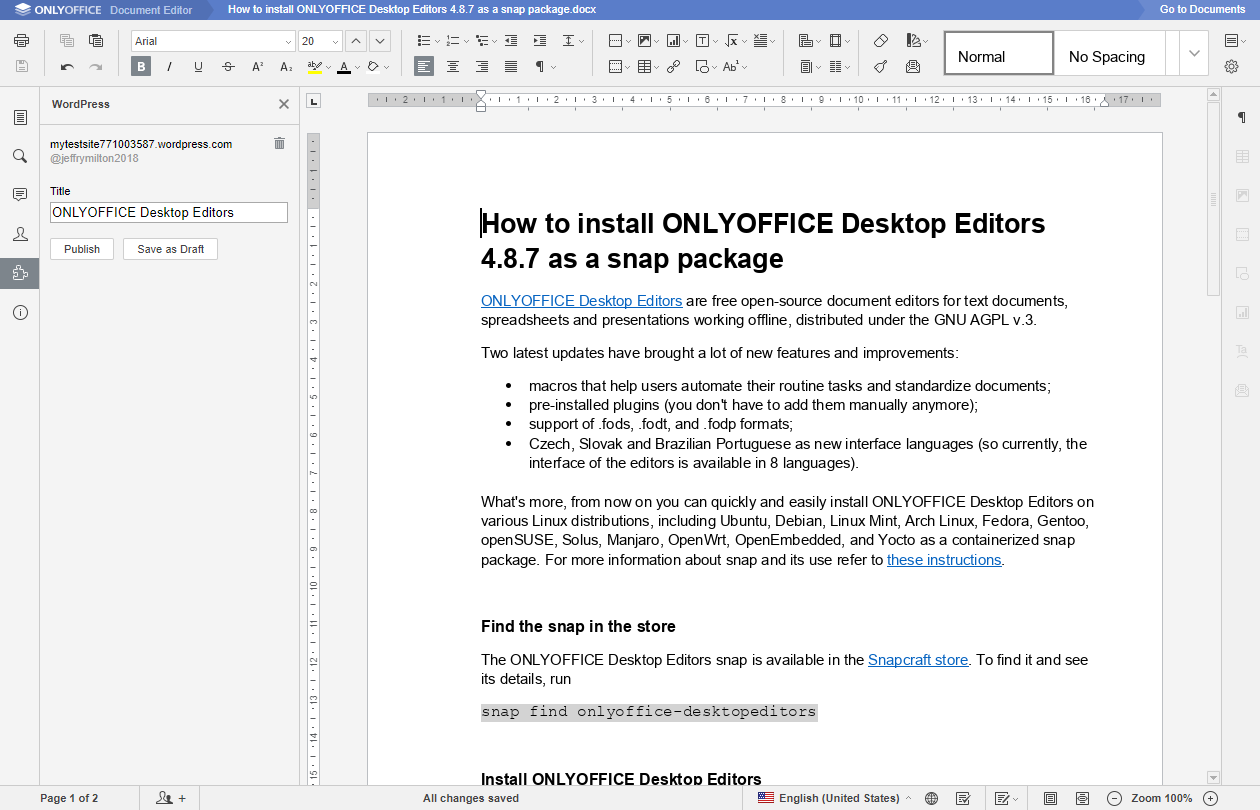
Once done, give any title to your article and click Publish.
If you'd like to publish the created content later, click Save as Draft. In this case, your article will be available in the Drafts tab of the Blog Posts section on your WordPress website.
Note, that some objects including images, auto shapes, and tables aren't transferred to WordPress due to inner specifics.
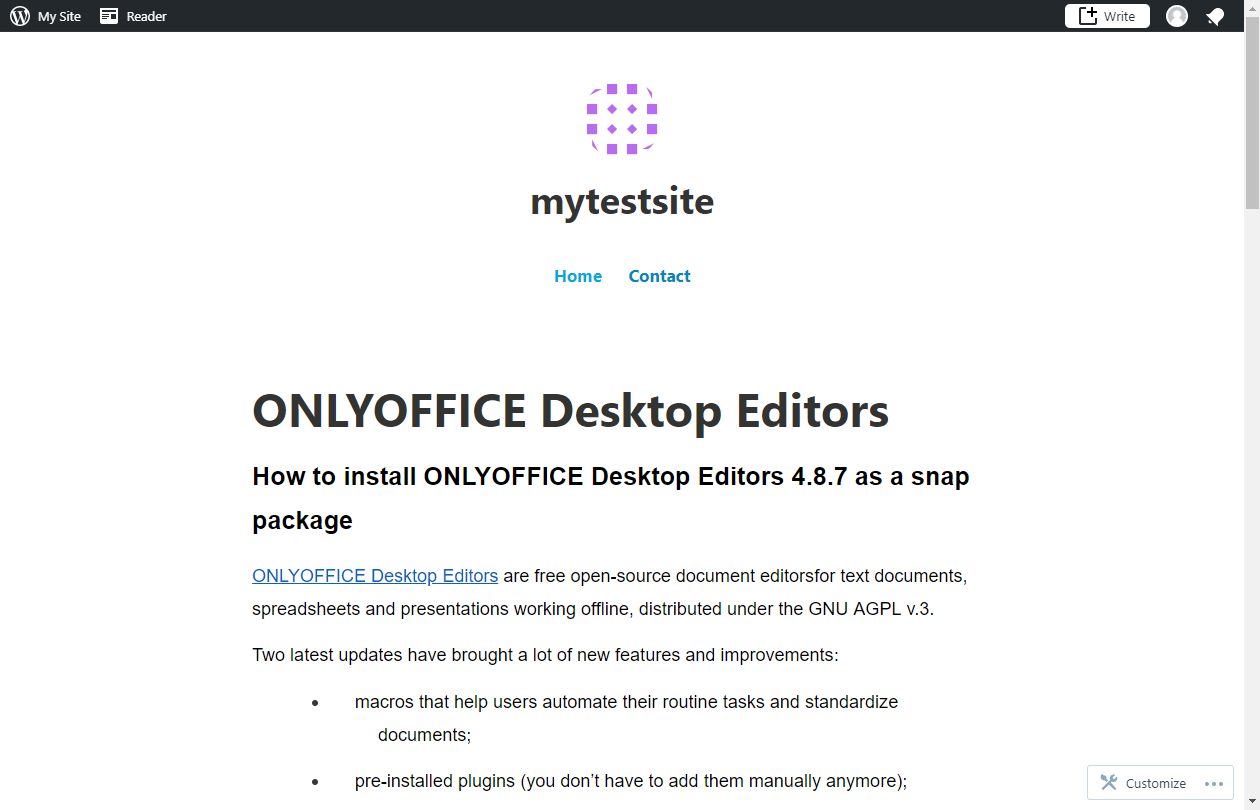
That's all. Open your WordPress website and you'll see the published article.
Links
- Official ONLYOFFICE website
- Official documentation on ONLYOFFICE Community Server
- ONLYOFFICE on GitHub
- Support forum for any questions
- Guide on how to install WordPress with Docker on Ubuntu

