

Jenkins is a well-known automation server often used for automating tasks involving building, testing, and deploying applications in a continuous integration/continuous development (CI/CD) format. In this tutorial, I will explain how to install and configure Jenkins and create a job that installs PackStack (a proof of concept OpenStack cloud).
For this how-to, I created a CentOS VM in GNOME Boxes that will be used to run Jenkins as a master and also deploy the job on the same machine. Jenkins uses port 8080 as default, so make sure that port is not in use. Jenkins can also be installed as a Docker container.
1. Download the Generic Java WAR file.
2. In a terminal, change to the Download directory and execute the following command:
java -jar jenkins.war
opensource.com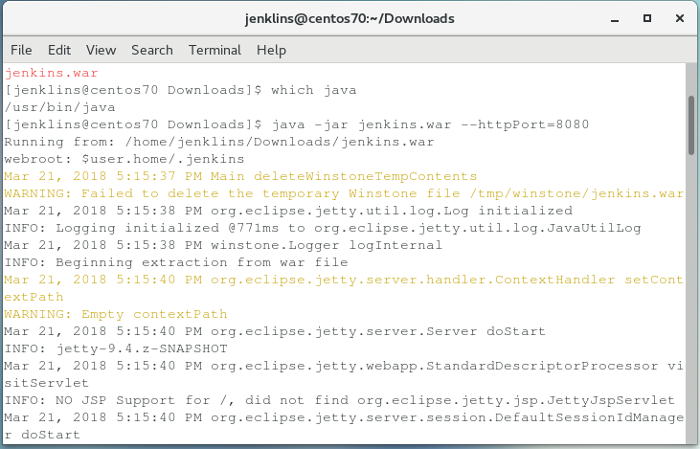
3. Go to http://localhost:8080 and copy the password from the given path:
cat /home/jenkins/.jenkins/secrets/initialAdminPassword
opensource.com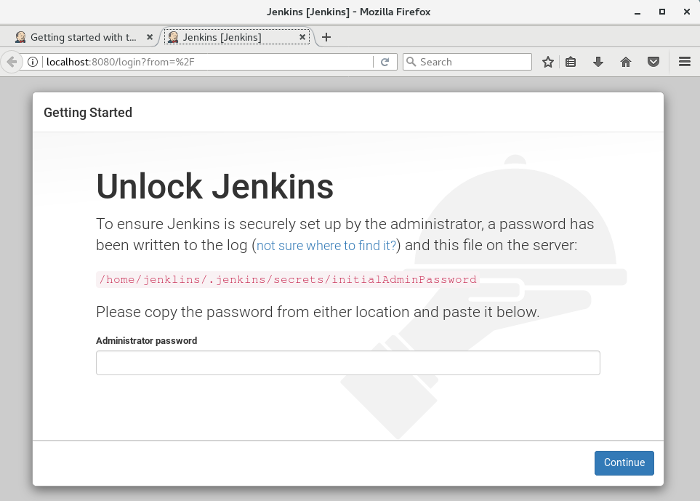
4. Create the first Admin user.
opensource.com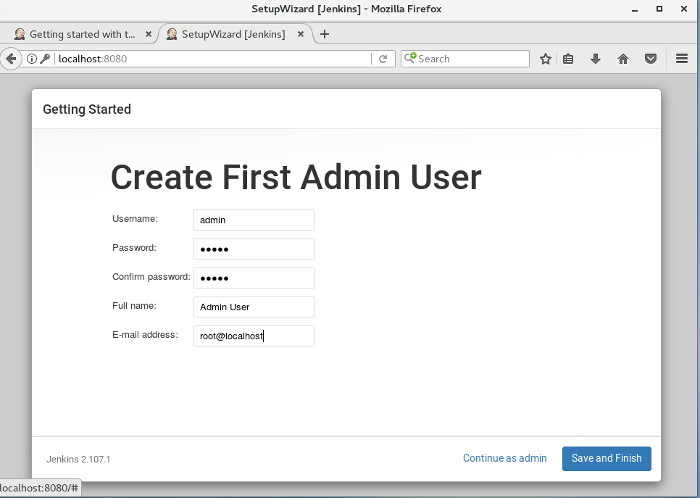
5. Add your SSH key found under ~/.ssh/id_rsa.pub to User-name (top-right)→Configure→SSH Public Keys. This will be used to SSH into hosts without providing a password. If you don't have an id_rsa.pub, you can create a key by using the ssh-keygen command. Initially, you must execute ssh-copy-id user@host-ip to set up passwordless authentication.
opensource.com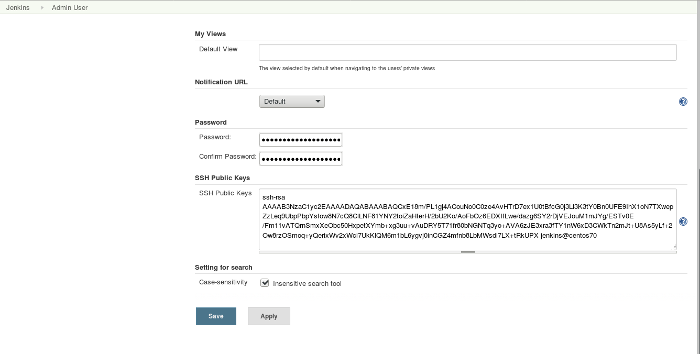
Also, your Jenkins user should be added to the wheel group and should have passwordless sudo permissions as shown.
opensource.com
6. Configure matrix-based security for your Admin user and other users. By default, Jenkins provides all permissions to any user, which is NOT at all recommended. I've given all permissions to the Admin user.
opensource.com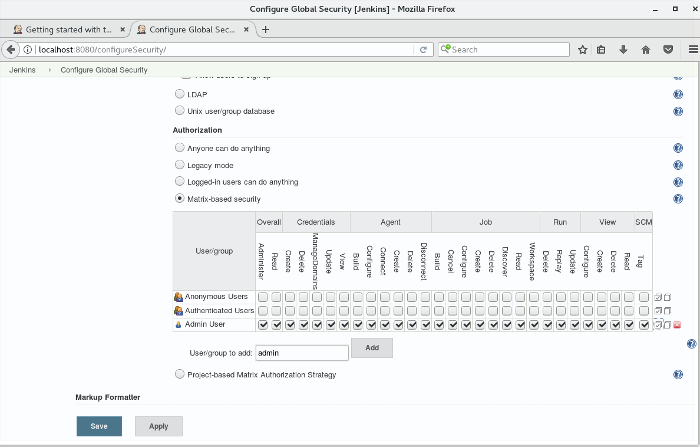
7. Now to the fun part! Click on New Item, enter the project name PackStack, and select Freestyle Project. There are many different types of projects, but the others are out of scope for this article.
opensource.com
8. Add a description to the job (optional).
opensource.com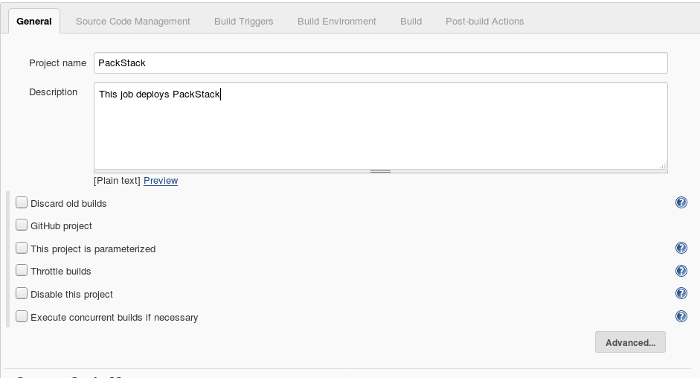
Go to Build→Add build step→Execute shell. Anything written inside this will be executed as a Shell script.
opensource.com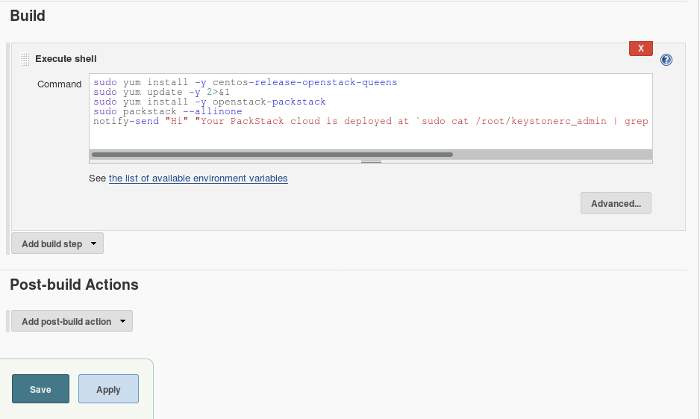
I have written the following PackStack deployment shell script, which you can use:
sudo yum install -y centos-release-openstack-queens
sudo yum update -y 2>&1
sudo yum install -y openstack-packstack
sudo packstack –allinone
notify-send "Hi" "Your PackStack cloud is deployed at `sudo cat /root/keystonerc_admin | grep OS_AUTH_URL | awk -F "=" '{print $2}'`"
9. Once you have saved your job, click on Build Now to execute your project. Because I included a notify-send command in my script, I see a notification (in the upper-right corner of the screenshot below) that indicates my PackStack cloud was deployed. You can configure an SMTP server and add email notifications after each build.
opensource.com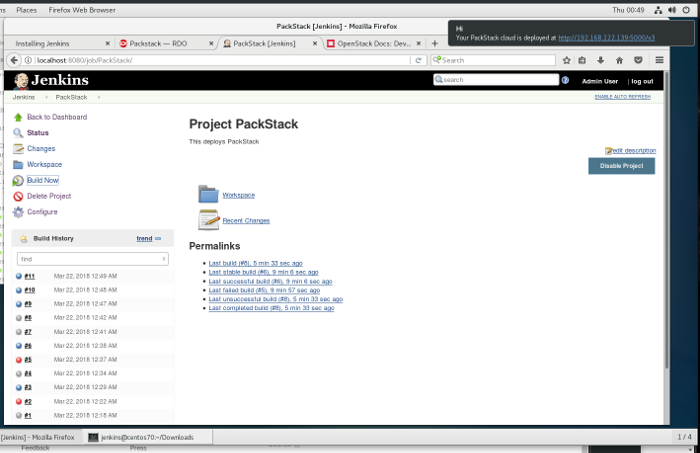
The Build History shows the history and status of all the past builds. By default, Jenkins uses the following color codes:
- BLUE: Build was successful
- RED: Build failed
- GREY: Build was aborted or not built
- YELLOW: Build is unstable
If you prefer a green indicator for successful builds, you can install the Green Balls plugin.
Note: Here Jenkins is being installed while logged in as "jenkins" user for Proof-of-Concept purpose.
That's all for this tutorial; please stay tuned for more to come.


Comments are closed.