How to Install SuiteCRM on Debian 12
This tutorial exists for these OS versions
- Debian 12 (Bookworm)
- Debian 11 (Bullseye)
- Debian 9 (Stretch)
On this page
SuiteCRM is free and open-source CRM (Customer Relationship Management) software written in PHP. It helps you organize and manage your business's marketing, sales, and customer service departments. SuiteCRM is suitable for almost every industry, such as manufacturing, public sectors, technology, finance, education, etc.
In this guide, we'll walk you step-by-step through the installation of SuiteCRM on the Debian 12 server. You will install and run SuiteCRM with the LAMP Stack (Apache2, MariaDB, and PHP) on your Debian machine. You will also secure SuiteCRM with SSL/TLS certificates from Letsencrypt.
Prerequistes
The following requirements are necessary to continue with this guide:
- A Debian 12 Server.
A non-root user with administrator privileges.
A domain name pointed to a server IP address.
Installing Dependencies
SuiteCRM is a CRM software written in PHP with MySQL/MariaDB as the database. In this guide, you will be running SuiteCRM with the LAMP Stack (Apache2, MariaDB, and PHP), and now you will install LAMP Stack packages with additional PHP extensions.
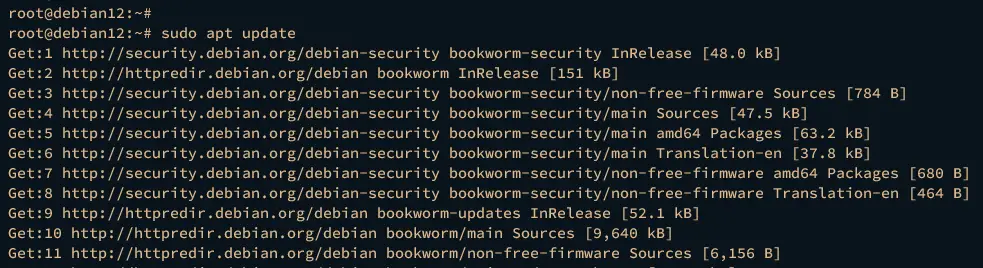
First, update your Debian package index via the apt update command below.
sudo apt update
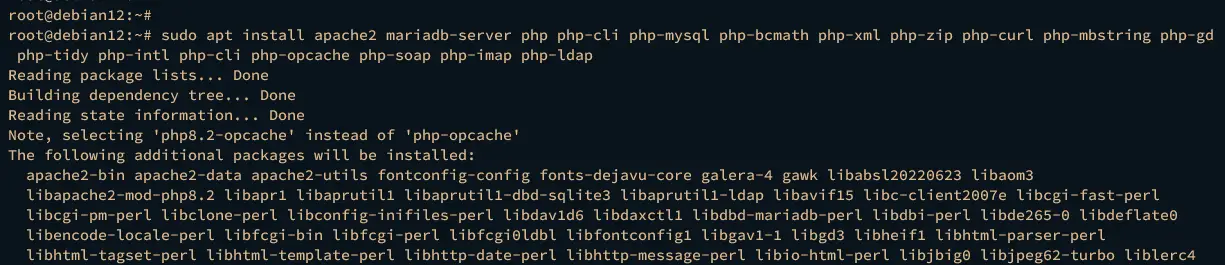
Now install LAMP Stack (Apache2, MariaDB, and PHP) packages with some PHP extensions using the following command.
sudo apt install apache2 mariadb-server php php-cli php-mysql php-bcmath php-xml php-zip php-curl php-mbstring php-gd php-tidy php-intl php-cli php-opcache php-soap php-imap php-ldap unzip
Type y to proceed with the installation.
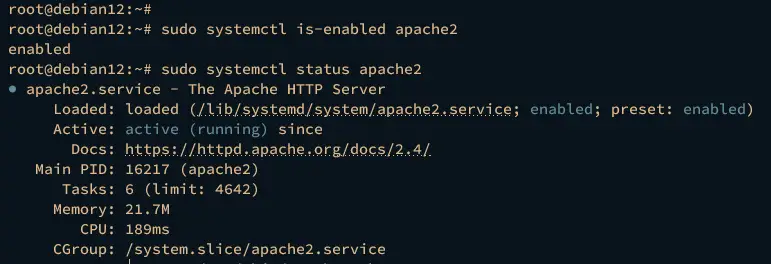
Next, run the following systemctl command to verify the apache2 service. This will ensure that the apache2 service is enabled and running.
sudo systemctl is-enabled apache2
sudo systemctl status apache2
The output enabled confirms that apache2 is enabled, and the output active (running) confirms that apache2 is running.
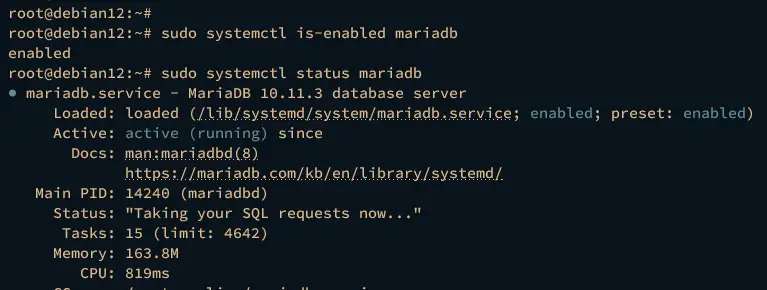
Verify the mariadb service using the following command.
sudo systemctl is-enabled mariadb
sudo systemctl status mariadb
Similar to the apache2 service output, you should see the mariadb service is enabled and running.
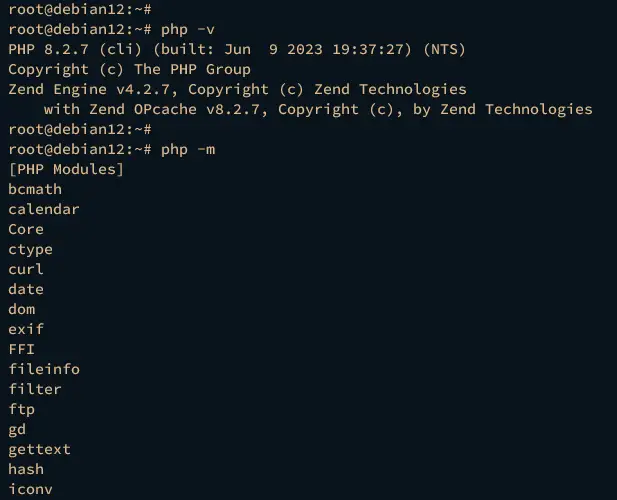
Lastly, verify the PHP version and some enabled extensions by executing the following command.
php -v
php -m
The following output shows you that PHP 8.2 is installed with some enabled modules such as curl, exif, fileinfo, and gd.
Configuring MariaDB Server
After installing dependencies, you will secure your MariaDB server installation and create a new database and user that will be used for SuiteCRM.
Execute the mariadb-secure-installation command below to secure your MariaDB server.
sudo mariadb-secure-installation
During the process, input Y to confirm the configuration or n for No and deny the changes.
- Switch to unix_socket authentication?. Input n and press ENTER. The default MariaDB root user is already protected. optionally, you can also enable it by typing y for yes.
- Change the root password?. Input y to confirm and set up your new MariaDB root password.
- Remove anonymous user?. Input y to confirm.
- Disallow root login remotely? Input y to confirm. Only local connection will be allowed if you are using the MariaDB root user.
- Remove test database and access to it?. Input y to confirm and remove the default database 'test'.
- Lastly, input y again to reload all tables privileges on your MariaDB server and apply new changes.
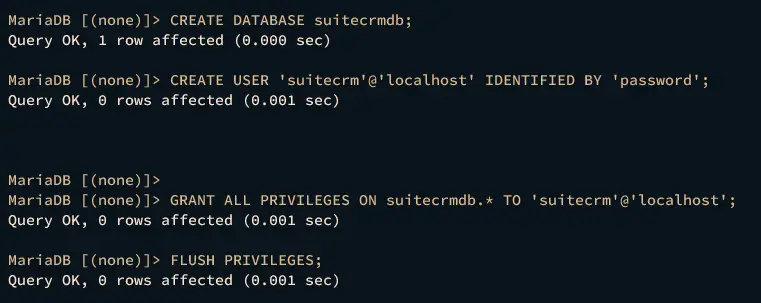
Now that MariaDB is secured, you will create a new database and user for SuiteCRM.
Log in to the MariaDB server via the mariadb client command below. Input your MariaDB root password when prompted.
sudo mariadb -u root -p
Next, run the following queries to create a new database suitecrmdb and the user suitecrm with password password. Be sure to change the password with your own password.
CREATE DATABASE suitecrmdb;
CREATE USER 'suitecrm'@'localhost' IDENTIFIED BY 'password';
GRANT ALL PRIVILEGES ON suitecrmdb.* TO 'suitecrm'@'localhost';
FLUSH PRIVILEGES;
Now run the following query to verify the user suitecrm.
SHOW GRANTS FOR 'suitecrm'@'localhost';
In the following output, you should see the user suitecrm has access to the database suitecrmdb.

Type quit to exit from the MariaDB server.
Configuring PHP
Now that the MariaDB server is configured, the next step is to configure your PHP installation. The SuiteCRM required some changes on PHP configurations, such as custom error_reporting, enabling the OPCache module, and also custom upload_max_filesize and post_max_size.
Open the default PHP configuration /etc/php/8.2/apache2/php.ini and /etc/php/8.2/cli/php.ini using the following nano editor command.
sudo nano /etc/php/8.2/apache2/php.ini
sudo nano /etc/php/8.2/cli/php.ini
Change the default parameters of some configurations using the following lines. Be sure to adjust the date.timezone with your server timezone, and the memory_limit with the server memory.
date.timezone = Europe/Amsterdam

max_execution_time = 60
memory_limit = 256M

upload_max_filesize = 25M
post_max_size = 25M
Change the default error_reporting parameter like this:
error_reporting = E_ALL & ~E_DEPRECATED & ~E_STRICT & ~E_NOTICE & ~E_WARNING
Uncomment the session.save_path parameter to configure the default session path to /var/lib/php/sessions.
session.save_path = "/var/lib/php/sessions"
Now enable the OPCache extension and adjust some settings like the following:
opcache.enable=1

; The OPcache shared memory storage size.
opcache.memory_consumption=256

; The maximum number of keys (scripts) in the OPcache hash table.
; Only numbers between 200 and 100000 are allowed.
opcache.max_accelerated_files=20000

; When disabled, you must reset the OPcache manually or restart the
; webserver for changes to the filesystem to take effect.
opcache.validate_timestamps=0
Save and close the file when you're done.
Now run the following systemctl command to restart the apache2 service and apply the changes that you've made.
sudo systemctl restart apache2
Downloading and Installing SuiteCRM
At this point, the LAMP Stack is now configured for SuiteCRM. Now you will download the SuiteCRM source code and install it via the command line.
Create a new directory /var/www/suitecrm that will be used as the target installation for SuiteCRM.
mkdir -p /var/www/suitecrm
Move to /var/www/suitecrm directory and download the SuiteCRM source code using the wget command below. Be sure to check the SuiteCRM Download page to get the latest version of the source code. At this time, SuiteCRM 8.4 is the latest version.
cd /var/www/suitecrm
wget https://suitecrm.com/download/142/suite84/562972/suitecrm-8-4-0.zip
Once downloaded, extract the suitecrm-8-4-0.zip file using the unzip command below.
unzip suitecrm-8-4-0.zip
Then run the following command to set up proper permission and ownership of the SuiteCRM source code.
find . -type d -not -perm 2755 -exec chmod 2755 {} \;
find . -type f -not -perm 0644 -exec chmod 0644 {} \;
find . ! -user www-data -exec chown www-data:www-data {} \;
chmod +x bin/console
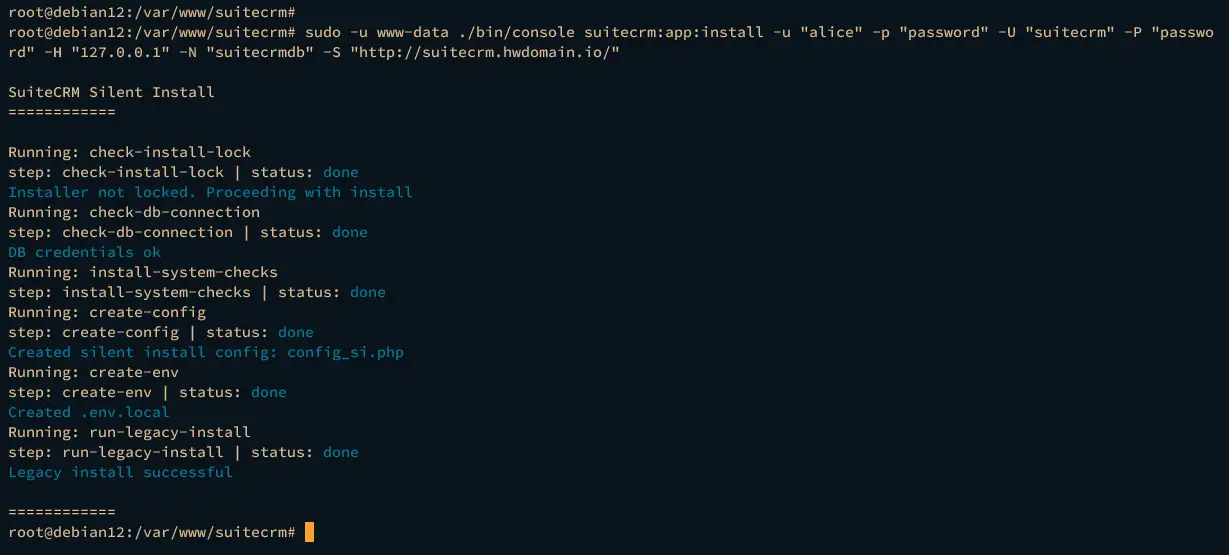
Lastly, execute the binary file /var/www/suitecrm/bin/console to install SuiteCRM via the command line. Be sure to change the details of the database name, user, host, target domain name, admin user, and password that will be used for your SuiteCRM installation.
sudo -u www-data ./bin/console suitecrm:app:install -u "alice" -p "password" -U "suitecrm" -P "password" -H "127.0.0.1" -N "suitecrmdb" -S "http://suitecrm.hwdomain.io/"
Once the installation is finished, the following output will be shown to your terminal:
Configuring Apache2 Virtual Host for Suite
In the following step, you will create a new Apache2 virtual host configuration that will be used to run SuiteCRM. Before proceeding, ensure that you have a domain name pointed to your server IP address.
Run the a2enmod command below to enable Apache2 modules that are required by SuiteCRM.
sudo a2enmod rewrite ssl header
Then, create a new Apache2 virtual host configuration /etc/apache2/sites-available/suitecrm.conf using the following nano editor command.
sudo nano /etc/apache2/sites-available/suitecrm.conf
Insert the following configuration and be sure to change the ServerName option with your domain name.
<VirtualHost *:80>

 DocumentRoot /var/www/suitecrm/public
 ServerName suitecrm.hwdomain.io

 <Directory /var/www/suitecrm/public>
    Options FollowSymLinks
    AllowOverride All
 </Directory>

 ErrorLog /var/log/apache2/suitecrm-error.log
 CustomLog /var/log/apache2/suitecrm-access.log common

</VirtualHost>
Save and close the file when you're done.
Now run the following command to activate the virtual host file suitecrm.conf and verify your Apache2 configurations.
sudo a2ensite suitecrm.conf
sudo apachectl configtest
If you've proper syntax, you should get the output Syntax OK.
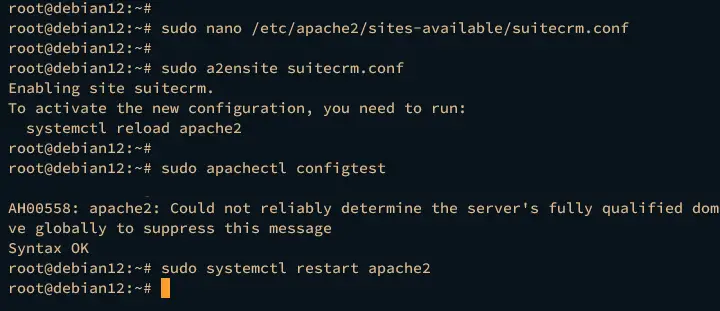
Next, run the systemctl command below to restart the apache2 service and apply the changes.
sudo systemctl restart apache2
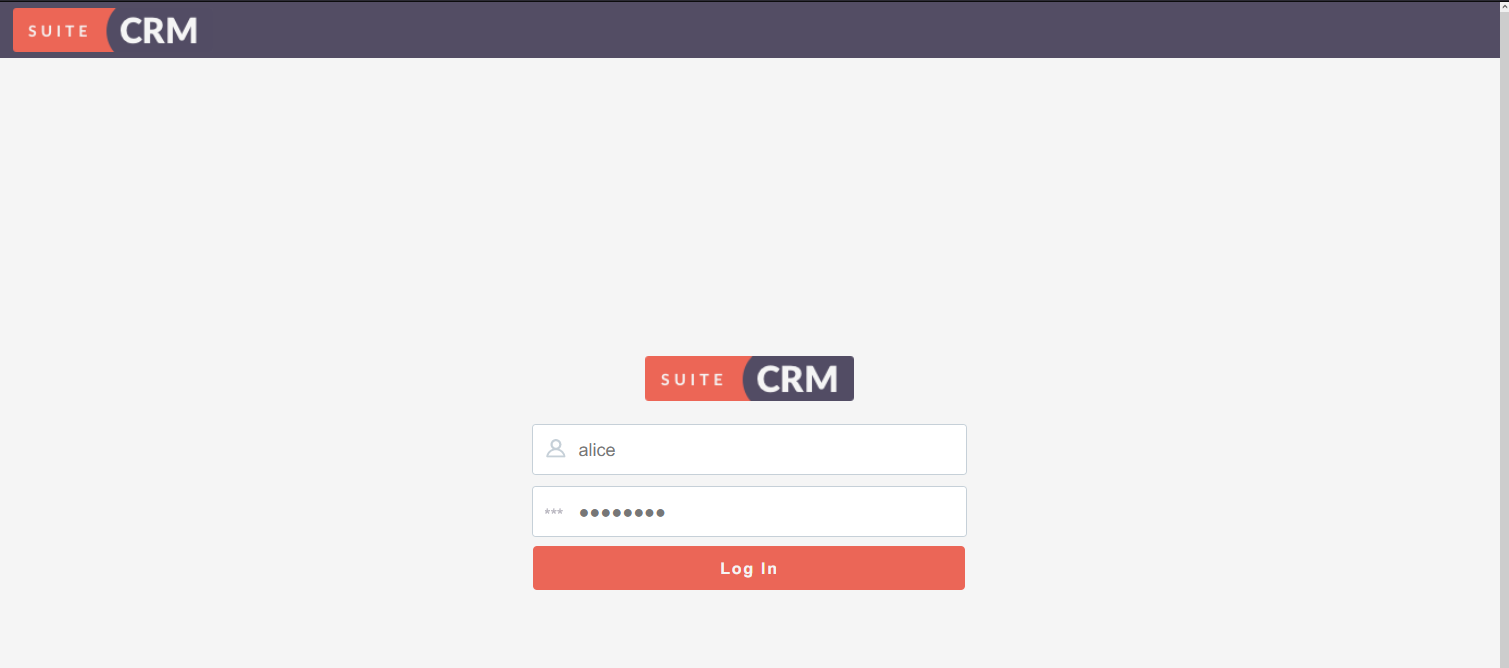
Lastly, open your web browser and visit the domain name of your SuiteCRM installation, such as http://suitecrm.hwdomain.io/. If everything goes well, you should see the login page of SuiteCRM.
Securing SuiteCRM with SSL/TLS from Letsencrypt
With everything configured, you will now secure SuiteCRM with SSL/TLS certificates from Letsencrypt.
Install Certbot and Certbot Apache plugin using the following apt install command. Type y to proceed with the installation.
sudo apt install certbot python3-certbot-apache
Now execute the certbot command below to generate SSL/TLS certificates. Be sure to change the domain name and email address within the following command.
sudo certbot --apache --agree-tos --no-eff-email --redirect --hsts --staple-ocsp --email [email protected] -d suitecrm.hwdomain.io
Once the process is finished, your SSL certificates will be generated at /etc/letsencrypt/live/suitecrm.hwdomain.io directory. Also, the SuiteCRM virtual host file suitecrm.conf will automatically configured with HTTPS.
Back to your web browser and visit your SuiteCRM domain name, you should be redirected to the SuiteCRM login page for secure HTTPS connections. Input your admin user and password, then click Login.
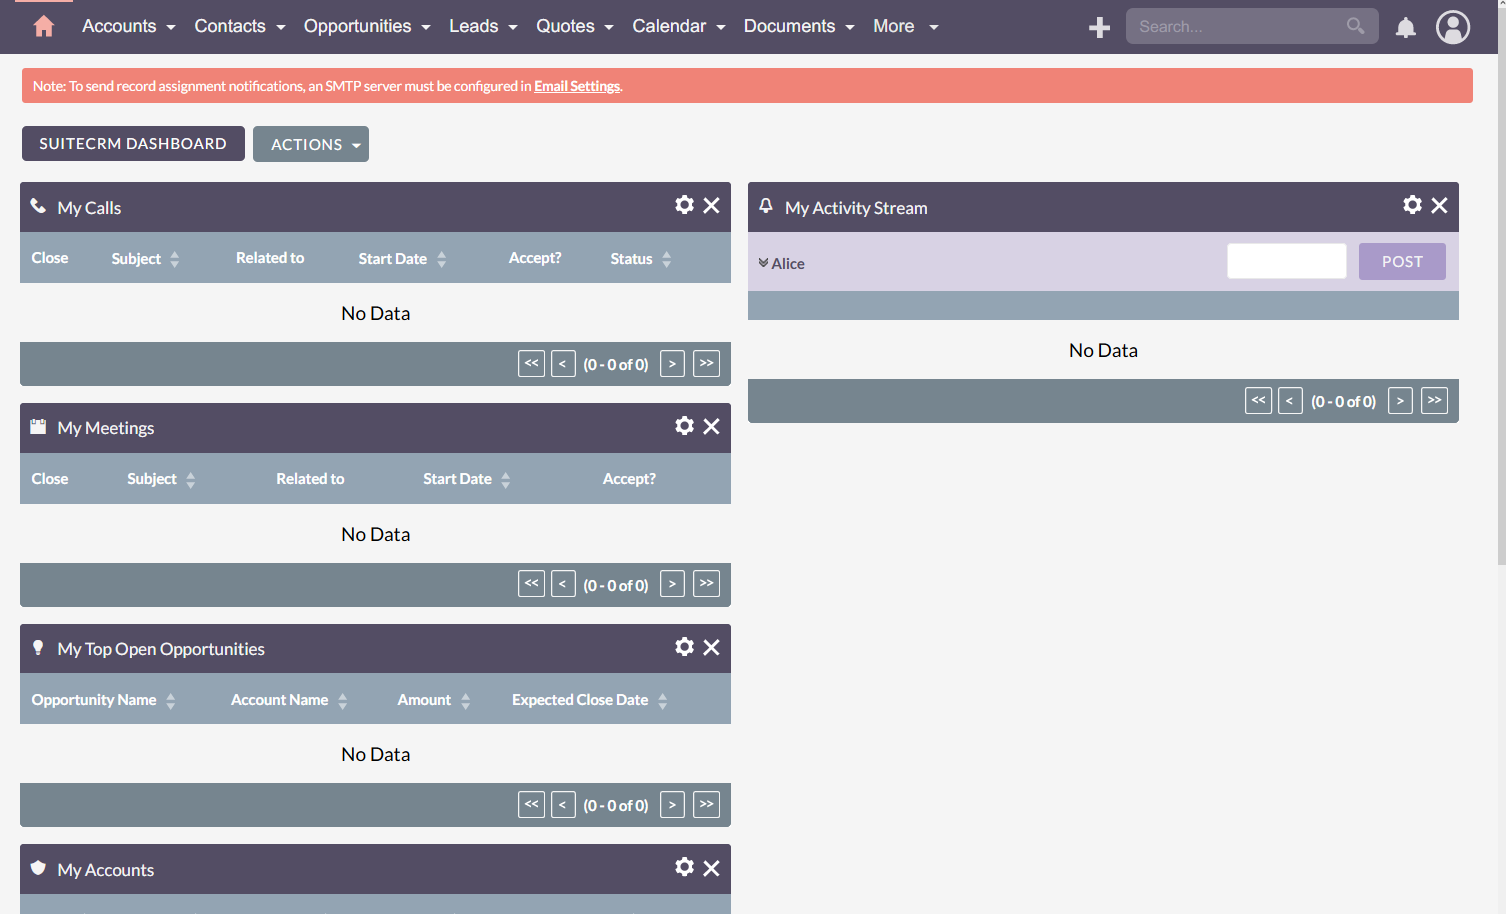
If everything goes well, you should see the SuiteCRM administration dashboard like the following:
Conclusion
To wrap up, you have now successfully installed SuiteCRM on Debian 12 server with LAMP Stack (Apache2, MariaDB, and PHP). You've also secured the SuiteCRM with SSL/TLS Letsencrypt, which is generated via Certbot. Now you can use SuiteCRM as the main CRM (Customer Relationship Management) application for your business, and you can start by adding the SMTP server to your SuiteCRM installation.

