How to Install Ariadne CMS on Ubuntu 18.04 LTS
Ariadne is a free, open source, feature rich cross-platform and security-focused Content Management System written in PHP language. It is tested with more than one million objects on desktop hardware. Ariadne is stable and fully backward compatible for at least the last ten years. It comes with lot's of features including, SVN support, DTAP support, supports multiple language sites, user and group management, import/export of projects, builtin inline WYSIWYG editor, mobile friendly and much more.
In this tutorial, we will learn how to install Ariadne in Ubuntu 18.04 server.
Requirements
- A server running Ubuntu 18.04.
- A root password is setup to your server.
Install LAMP Server
Before starting, you will need to install Apache, MariaDB and PHP to your system. First, install Apache and MariaDB server by running the following command:
apt-get install apache2 mariadb-server -y
By default, the latest version of the PHP is not available in Ubuntu 18.04, so you will need to add the repository for that. You can add it with the following command:<?p>
apt-get install python-software-properties -y
add-apt-repository -y ppa:ondrej/php
Once the repository is updated, you can install PHP and other libraries with the following command:
apt-get install libapache2-mod-php7.1 php7.1-common php7.1-mbstring php7.1-xmlrpc php7.1-soap php7.1-gd php7.1-xml php7.1-intl php7.1-mysql php7.1-cli php7.1-mcrypt php7.1-zip php7.1-curl imagemagick subversion php7.1-tidy tidy libtidy-dev -y
Next, start Apache and MariaDB service and enable them to start on boot time using the following command:
systemctl start apache2
systemctl start mysql
systemctl enable apache2
systemctl enable mysql
Configure MariaDB
By default, MariaDB installation is not secured. So you will need to secure it first. You can do this by running the mysql_secure_installation script.
mysql_secure_installation
Answer all the questions as shown below:
Enter current password for root (enter for none): Enter Set root password? [Y/n]: Y New password:Re-enter new password: Remove anonymous users? [Y/n]: Y Disallow root login remotely? [Y/n]: Y Remove test database and access to it? [Y/n]: Y Reload privilege tables now? [Y/n]: Y
Next, log into MariaDB shell with the following command:
mysql -u root -p
Enter your root password, then create a database and user for Ariadne:
MariaDB [(none)]> CREATE DATABASE ariadnedb;
MariaDB [(none)]> GRANT ALL PRIVILEGES ON ariadnedb.* TO 'ariadne'@'localhost' IDENTIFIED BY 'password';
Next, flush the privileges with the following command:
MariaDB [(none)]> FLUSH PRIVILEGES;
Finally, exit from the MariaDB shell:
MariaDB [(none)]> exit;
Install Ariadne
Next, download the latest version of the ariadne from their official website:
wget https://codeload.github.com/Ariadne-CMS/ariadne/zip/9.7
Once the download is completed, unzip the downloaded file with the following command:
unzip 9.7
Next, copy ariadne to the apache root directory and lib directory with the following command:
cp -r ariadne-9.7/www /var/www/html/ariadne
cp -r ariadne-9.7 /usr/local/lib/ariadne
Next, give proper permissions to the ariadne directory:
chown -R www-data:www-data /var/www/html/ariadne
chmod -R 777 /var/www/html/ariadne
chmod -R 777 /usr/local/lib/ariadne
Next, change the directory to the ariadne and rename the ariadne configuration file:
cd /var/www/html/ariadne/
cp ariadne.inc-unix ariadne.inc
Next, you will need to create an apache virtual host directive for ariadne. You can do this with the following command:
nano /etc/apache2/sites-available/ariadne.conf
Add the following lines:
<VirtualHost *:80>
 ServerAdmin [email protected]
 DocumentRoot /var/www/html/ariadne
 ServerName yourdomain.com
 <Directory /var/www/html/ariadne/>
Options +FollowSymLinks
AllowOverride All
Order allow,deny
allow from all
 </Directory>
 ErrorLog /var/log/apache2/ariadne-error_log
 CustomLog /var/log/apache2/ariadne-access_log common
</VirtualHost>
Save and close the file, then enable virtual host file with the following command:
a2ensite ariadne
Finally, restart apache service to apply all the changes:
systemctl restart apache2
Access Ariadne
Now, open your web browser and type the URL http://yourdomain.com, you will be redirected to the following page:
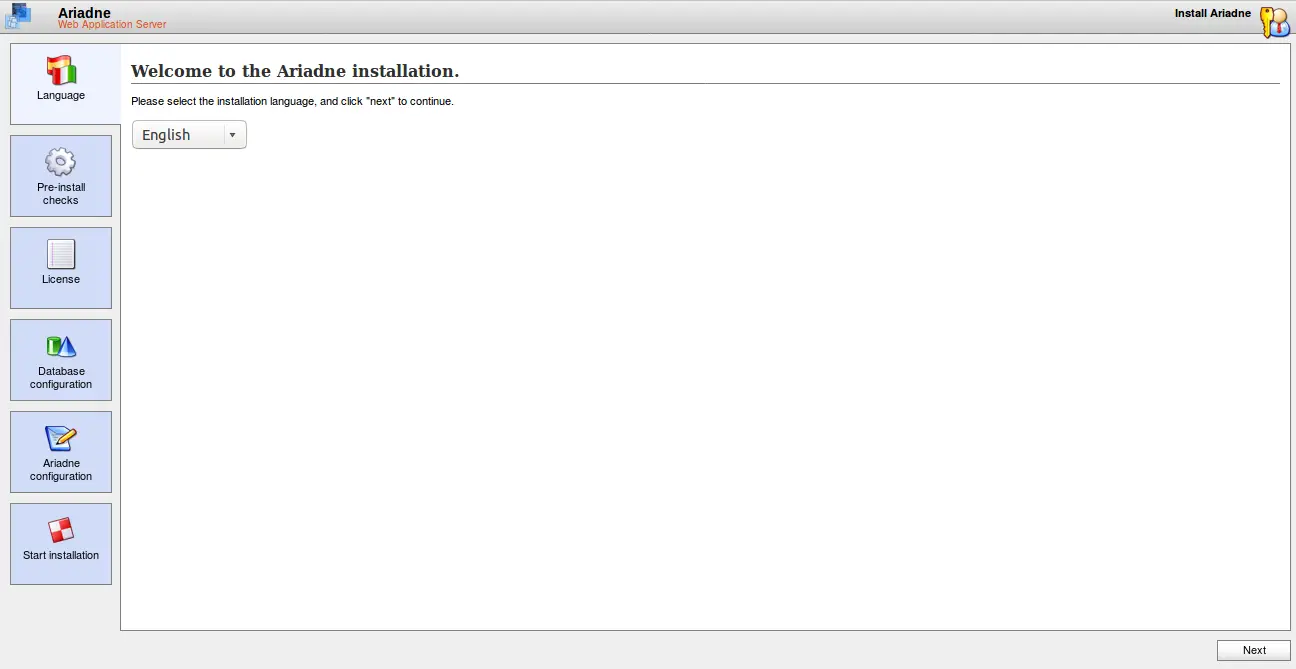
Select language as per your need and click on the Next button, you should see the following page:
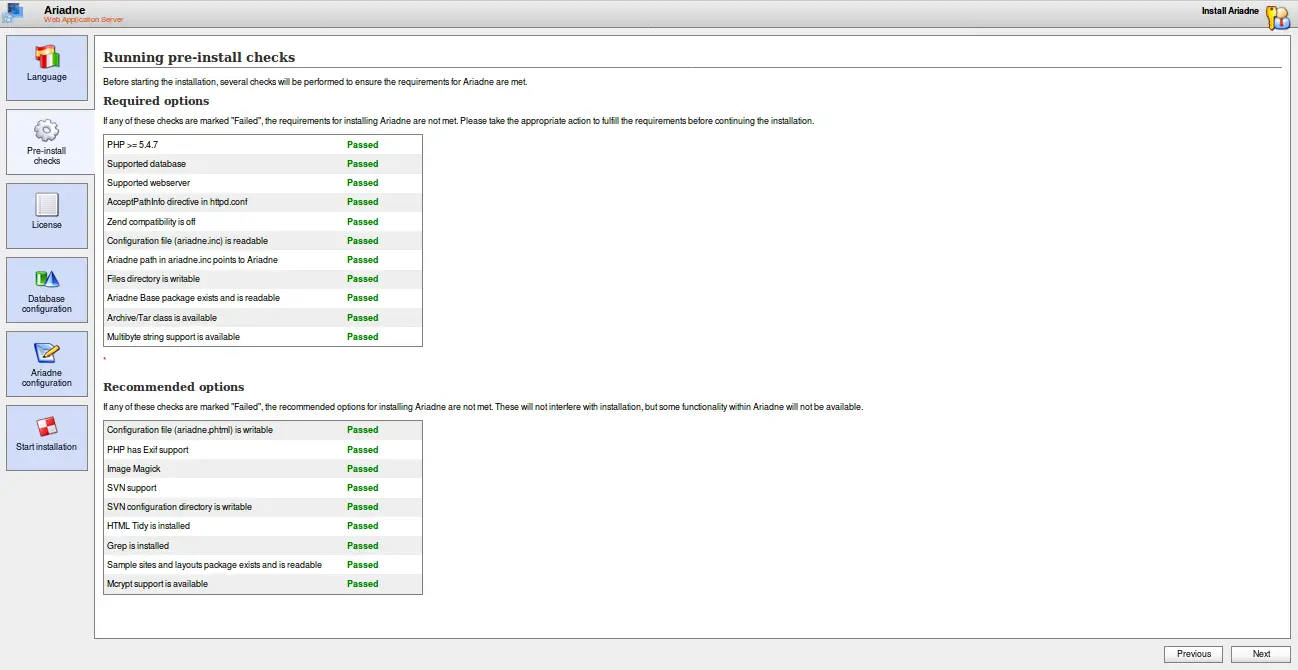
Make sure all the requirements of Ariadne are met, then click on the Next button, you should see the following page:
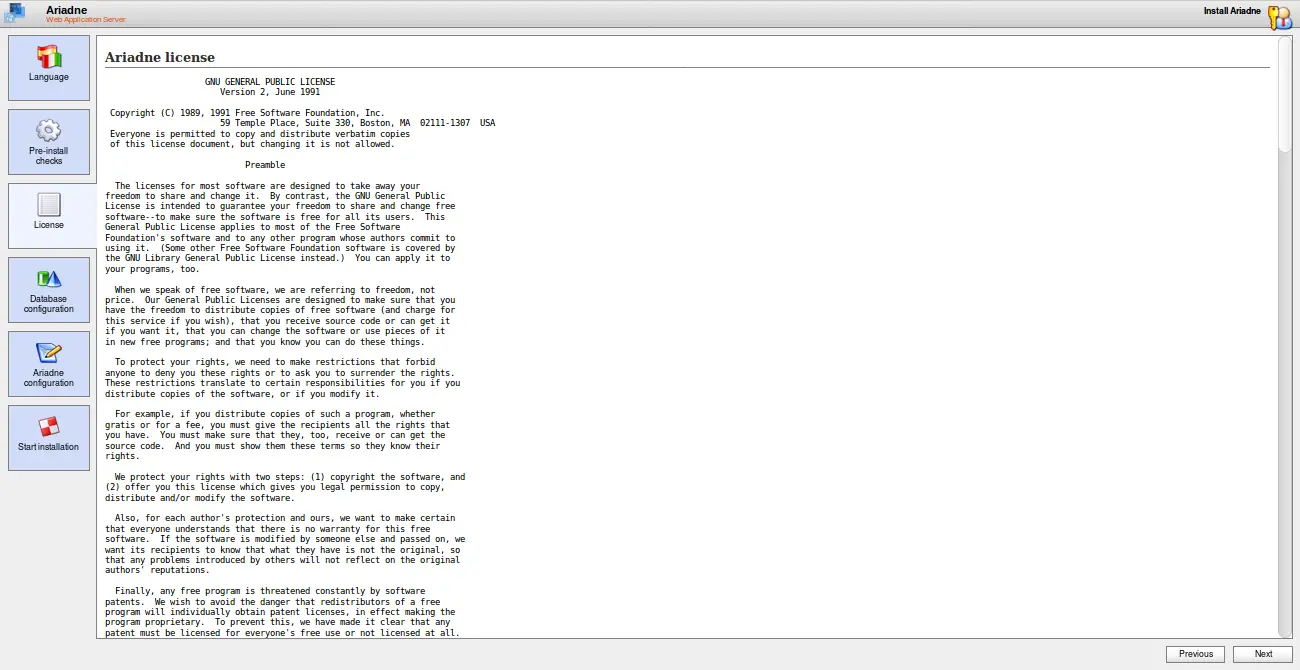
Now, accept the license agreement and click on the Next button, you should see the following page:
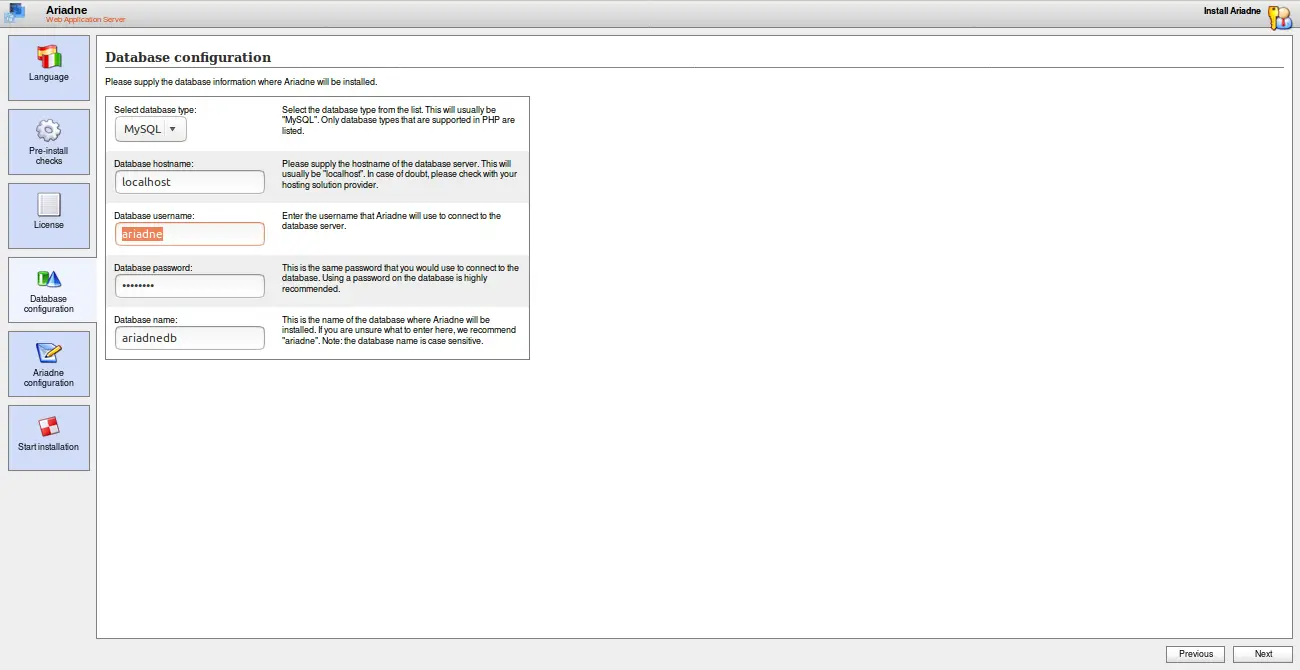
Here, provide your database details and click on the Next button, you should see the following page:
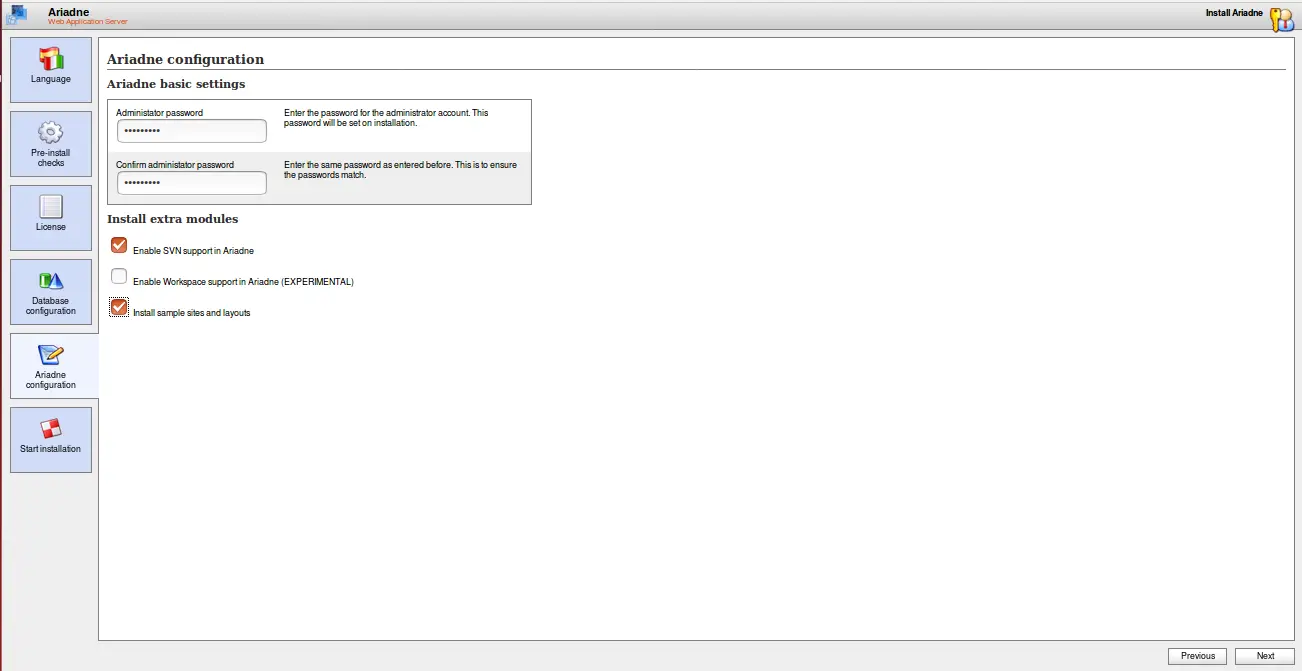
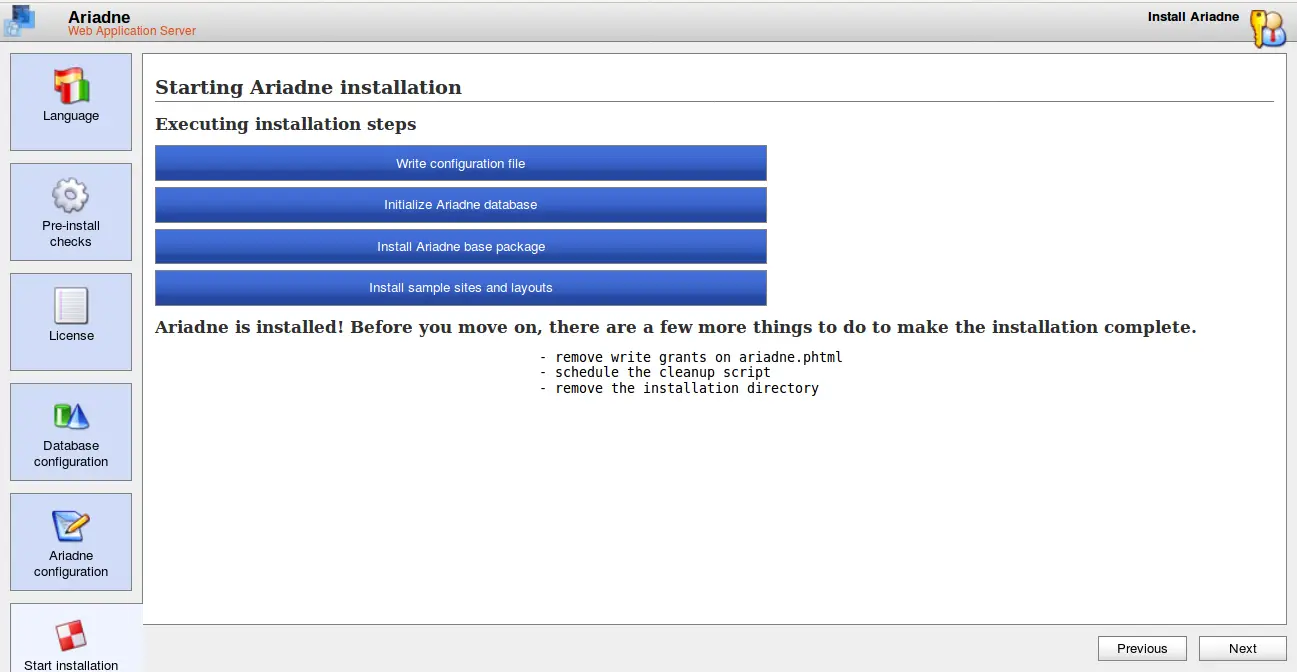
Here, set your administrator password and click on the Next button to start the installation. Once the installation is completed, you should see the following page:
Now, click on the Next button, you will be redirected to the Ariadne login page as shown below:
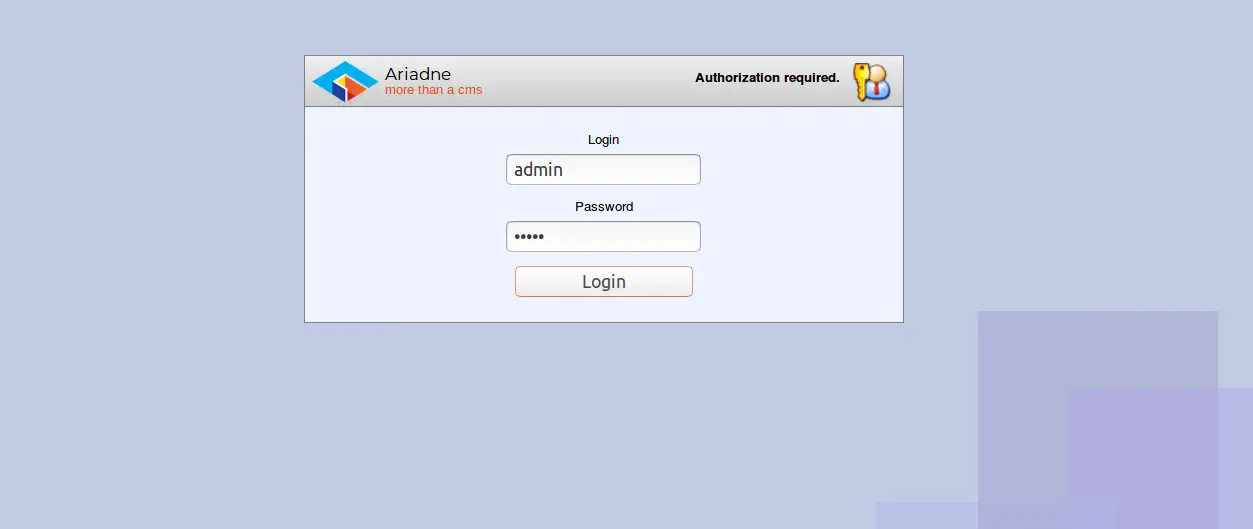
Provide your administrator username as admin and password which you have set earlier, then click on the Login button, you should see the following page:
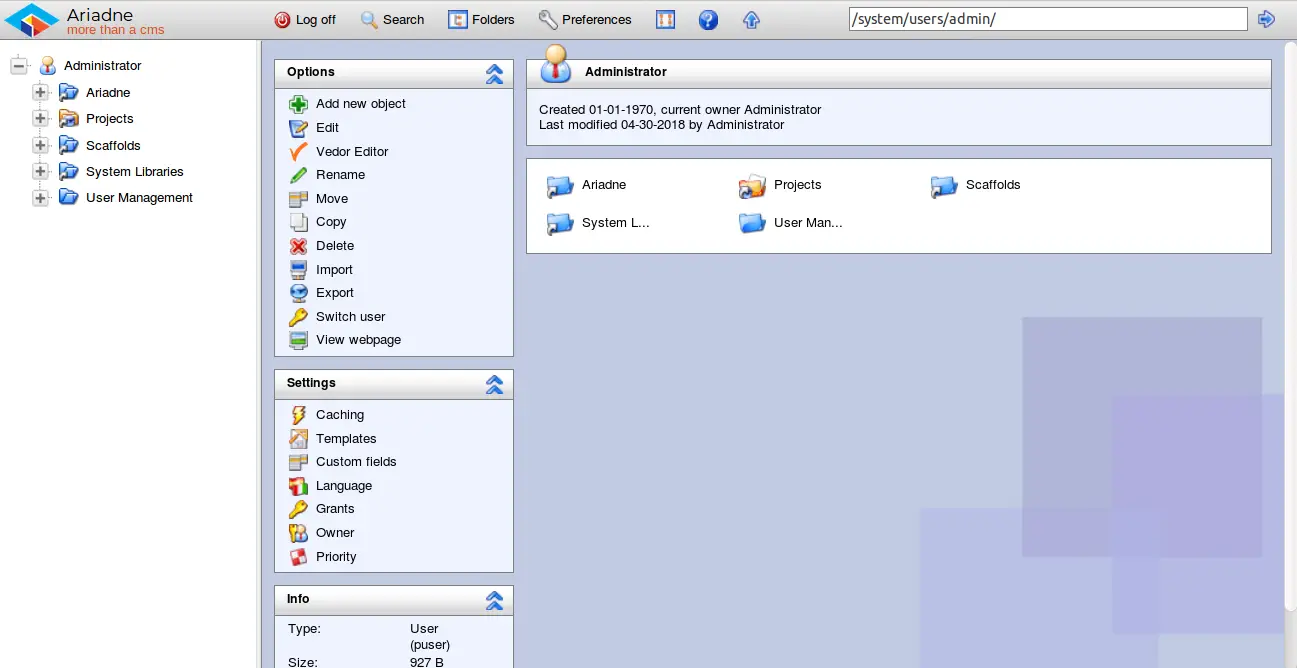
That's it. You have successfully installed Ariadne CMS on Ubuntu 18.04 LTS server.

