How to Install Nginx with Brotli Compression on Ubuntu 18.04 LTS
This tutorial exists for these OS versions
- Ubuntu 20.04 (Focal Fossa)
- Ubuntu 18.04 (Bionic Beaver)
On this page
Nginx (engine-x) is an open source high-performance HTTP server, reverse proxy and IMAP/POP3 proxy server. The outstanding features of Nginx are stability, a rich feature set, simple configuration and low memory consumption.
Brotli is an open source compression algorithm created by Google. Brotli provides better and lossless compression than gzip, and it's now supported by major browsers and web servers.
More about Brotli performance:
In this tutorial, I will show you step-by-step how to add support for Brotli compression algorithm in Nginx web server. We will build a custom nginx package that supports brotli compression algorithm. We will be using the latest Ubuntu version, plus we will build a nginx package for the Debian operating system.
Prerequisites
- Ubuntu 18.04
- Root privileges
What we will do?
- Install Build Dependencies
- Install Nginx with ngx_brotli
- Add Nginx Repository
- Download Nginx and ngx_brotli
- Build Nginx with ngx_brotli Support
- Install Nginx and Enable ngx_brotli Support
- Configure Nginx Virtual Host
- Testing
Step 1 - Install Build Dependencies
The first thing we need to for this guide is to install the build dependencies on to the system.
Update the Ubuntu repository and then install all packages build dependencies using an apt command below.
sudo apt update
sudo apt install dpkg-dev build-essential zlib1g-dev libpcre3 libpcre3-dev unzip
Wait for all packages installed.
Step 2 - Install Nginx with ngx_brotli
In this step, we will install the custom nginx package that supports brotli compression algorithm on the Ubuntu system. And we will be using the latest stable version of the nginx package that can be downloaded from the official nginx repository.
Add Nginx Repository
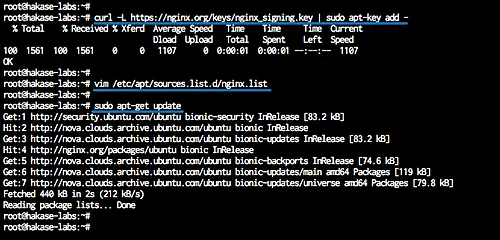
Before adding the nginx repository, add the nginx key sign using the command below.
curl -L https://nginx.org/keys/nginx_signing.key | sudo apt-key add -
Now create new nginx repository file 'nginx.list' on the '/etc/apt/sources.list.d' directory using vim editor.
vim /etc/apt/sources.list.d/nginx.list
Paste configuration below.
deb http://nginx.org/packages/ubuntu/ bionic nginx
deb-src http://nginx.org/packages/ubuntu/ bionic nginx
Save and exit.
Now update ubuntu repositories.
sudo apt-get update
The Nginx repository has been added.
Download Nginx and ngx_brotli source files
Now we will download the Nginx packages from the nginx repository using the apt command.
Go to the '/usr/local/src' directory and download the Nginx source using the apt command below.
cd /usr/local/src
sudo apt source nginx
Now install all needed package dependencies for nginx.
sudo apt build-dep nginx -y
And after all installation is complete, clone the 'ngx_brotli' source code from GitHub.
git clone --recursive https://github.com/google/ngx_brotli.git
Nginx and ngx_brotli have been downloaded.
Build Nginx with ngx_brotli Support
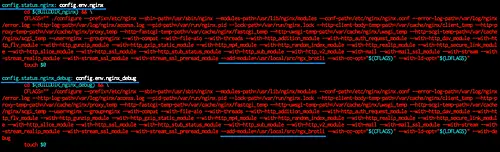
Now we need to edit the default Nginx build rule, we need to add the ngx_brotli to the build rule of the packages.
Go to the '/usr/local/src/nginx-*' directory and edit the debian 'rules' configuration.
cd /usr/local/src/nginx-*/
vim debian/rules
Now you will get two build environments for 'config.env.nginx' and 'config.env.nginx_debug'. Add the '--add-module=' option for ngx_brotli to both built environments.
--add-module=/usr/local/src/ngx_brotli
Save and exit.
And we're ready to compile and build the nginx package with ngx_brotli support.
Run the dpkg command below.
sudo dpkg-buildpackage -b -uc -us
Note:
- -b: Build binary-only, no source files.
- -uc : Unsigned .buildinfo and .changes file.
- -us: unsigned source package.
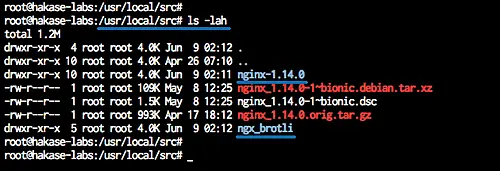
When the build is complete, you will get the nginx-*.deb packages on the '/usr/local/src' directory as shown below.
ls -lah
Install Nginx and Enable Brotli Support
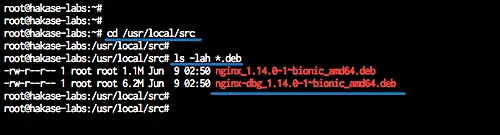
The nginx build with ngx_brotli has been completed, install the nginx-*.deb packages using the dpkg command below.
cd /usr/local/src/
sudo dpkg -i *.deb

Nginx with the ngx_brotli support has been installed.
Now go to the '/etc/nginx' configuration directory and edit the configuration file 'nginx.conf'.
cd /etc/nginx/
vim nginx.conf
Enable the ngx_brotli on nginx by adding the configuration below inside the 'http {...}' section.
    brotli on;
    brotli_comp_level 6;
    brotli_static on;
    brotli_types text/plain text/css application/javascript application/x-javascript text/xml application/xml application/xml+rss text/javascript image/x-icon image/vnd.microsoft.icon image/bmp image/svg+xml;
Save and exit.

Test nginx configuration and make sure there is no error.
nginx -t
The brotli compression support has been enabled.
Step 3 - Configure Nginx Virtual Host
In this step, we will try to create a new virtual host for the domain name nginx.hakase-labs.io.
Note:
- Brotli compression only supports the HTTPS site, so make sure you have the certificate files for your domain name, or you can generate free Letsencrypt SSL certificates.
Go to the '/etc/nginx' configuration directory and create new virtual host configuration 'brotli.conf'.
cd /etc/nginx/
vim conf.d/brotli.conf
Paste the following nginx virtual host configuration there.
# Redirect HTTP to HTTPS Nginx
server {
   listen 80;
    server_name nginx.hakase-labs.io;
    return 301 https://$host$request_uri;
}

# SSL configuration
server {
    listen 443 ssl http2;
    server_name nginx.hakase-labs.io;

    ssl_certificate /etc/letsencrypt/live/nginx.hakase-labs.io/fullchain.pem;
    ssl_certificate_key /etc/letsencrypt/live/nginx.hakase-labs.io/privkey.pem;

    # Improve HTTPS performance with session resumption
    ssl_session_cache shared:SSL:10m;
    ssl_session_timeout 5m;

    # Enable server-side protection against BEAST attacks
    ssl_prefer_server_ciphers on;
    ssl_ciphers ECDH+AESGCM:ECDH+AES256:ECDH+AES128:DH+3DES:!ADH:!AECDH:!MD5;

    # Disable SSLv3
    ssl_protocols TLSv1 TLSv1.1 TLSv1.2;

    # web root directory
    location / {
    root /usr/share/nginx/html;
    }

}
Save and exit.
Note:
- Change the domain name with your own own domain.
- Change the SSL certificates path.
Now test nginx configuration and make sure there is no error, then restart the service.
nginx -t
systemctl restart nginx
The new nginx virtual host has been added.
Step 4 - Testing
Open your web browser and type the domain name, mine is:
http://nginx.hakase-labs.io
Now you will be redirected to the https connection. Right click on the page and click 'Inspect Element'. Click the 'Network' tab and reload the page.
Click on the requests detail and you will get all request and response header from the web server as shown below.
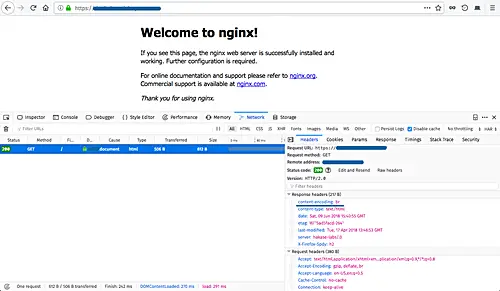
On the 'Response headers' section, you will see the 'content-encoding: br' for brotli support.
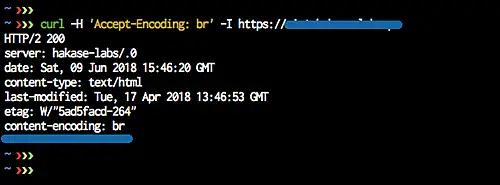
Now if you want another test, you can use the curl command as shown below.
curl -H 'Accept-Encoding: br' -I https://nginx.hakase-labs.io
And you will see the result 'content-encoding: br' for brotli support.
The Nginx installation with Brotli Compression Support on Ubuntu 18.04 has been completed successfully.

