
In this tutorial we will show you how to install Nagios on CentOS 7. Nagios is a powerful open source enterprise-class software that monitors network infrastructures, servers and applications. It can be used to monitor Linux and Windows servers as well as web applications, Linux and Unix applications and Windows applications. Some of the features include: parallelized service checks, plugin system, notifications via email, pager or user defined service, web interface for viewing status, log files, problem history and notifications and much more. This guide should work on other Linux VPS systems as well but was tested and written for CentOS 7 VPS.
Update your CentOS 7 server and install the necessary packages
Log in to your VPS via SSH as a sudo user:
ssh userame@IP_Address
Once you are logged in, issue the following commands to make sure all installed packages are up to date:
sudo yum update
Next, install the install the pre-requisite packages necessary for building Nagios with the following command:
sudo yum install gcc glibc glibc-common wget unzip httpd php gd gd-devel perl postfix
Install Apache, MariaDB and PHP 7
To install Nginx, MariaDB PHP 7 and all the necessary PHP modules on your CentOS server run the following command:
sudo yum install httpd mariadb-server php php-mysql
When the MariaDB installation is complete, run the following command to secure your MariaDB installation:
sudo mysql_secure_installation
Enable MariaDB and Apache to start on boot with:
sudo systemctl enable httpd.service
sudo systemctl enable mariadb.service
Download and Install Nagios
Download the latest stable version of the Nagios tar archive in the /tmp directory on your server with:
wget https://github.com/NagiosEnterprises/nagioscore/archive/nagios-4.4.1.tar.gz -O /tmp/nagioscore.tar.gz
When the download is completed change to the tmp directory extract the archive with the following commands:
cd /tmp
sudo tar xf nagioscore.tar.gz
Once the Nagios Plugins archive is extracted, change to the nagioscore-nagios-4.4.1 directory:
cd /tmp/nagioscore-nagios-4.4.1
Next step is to run the ./configure script which will check your system for missing libraries and binaries and prepare the Nagios source code for the build process:
./configure
Now that the configuration is completed start the compilation process using the make all command:
make all
Run the following command to create the nagios user and group and add apache to the nagios group:
sudo make install-groups-users
sudo usermod -a -G nagios apache
The next step is to install Nagios using the make install command:
sudo make install
Run the following command to install the Nagios sample configuration files:
sudo make install-config
Install the initialization script so that you can manage your Nagios service using the systemctl command :
sudo make install-daemoninit
Next, install the Apache web server configuration files with:
sudo make install-webconf
Restart apache service:
sudo systemctl restart httpd
Use the htpasswd command to create a user account called nagiosadmin
sudo htpasswd -c /usr/local/nagios/etc/htpasswd.users nagiosadmin
Run the following command to install and configure the external command file:
sudo make install-commandmode
Install Nagios Plugins
Before downloading and compiling Nagios plugins install the following dependencies:
sudo yum install gcc glibc glibc-common make gettext automake autoconf wget openssl-devel net-snmp net-snmp-utils epel-release perl-Net-SNMP
Download the latest stable version of the Nagios tar archive in the /tmp directory on your server with:
wget --no-check-certificate -O /tmp/nagios-plugins.tar.gz https://github.com/nagios-plugins/nagios-plugins/archive/release-2.2.1.tar.gz
When the download is completed change to the tmp directory extract the archive with the following commands:
cd /tmp
sudo tar xf nagios-plugins.tar.gz
Once the Nagios Plugins archive is extracted, change to the nagioscore-nagios-4.4.1 directory:
cd /tmp/nagios-plugins-release-2.2.1/
The following commands will check your system for missing libraries and binaries and prepare the Nagios Plugins source code for the build process:
./tools/setup
./configure
Once the configuration is completed start the compilation process using the make command:
make
Finally install the Nagios Plugins using the make install command:
sudo make install
Access Nagios
Now that you have both Nagios and Nagios Plugins installed on your CentOS system, start the Nagios service with the following command:
systemctl start nagios
Open your browser and navigate to http://your-domain-or-ip/nagios and you will be presented with the login pop-up.
Enter the login credentials that you created earlier with the htpasswd command and you will be redirected to the Nagios home page as shown on the image below:
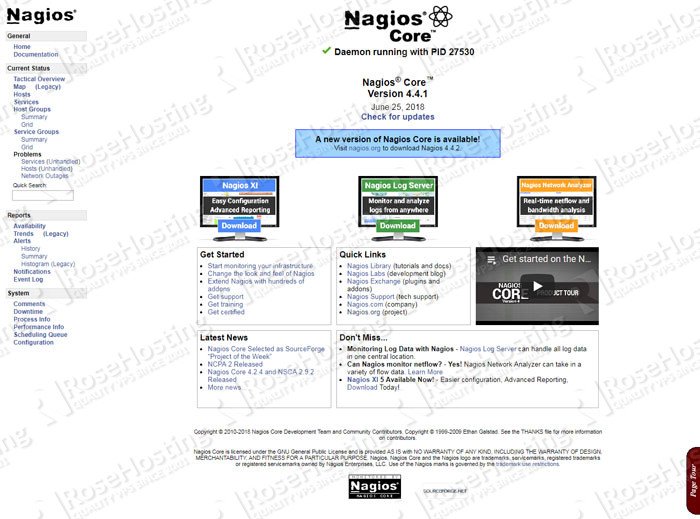
That’s it. You have successfully installed Nagios on CentOS 7. For more information about how to manage your Nagios installation, please refer to the official Nagios documentation.
![]() Of course, you don’t have to install Nagios on CentOS 7, if you use one of our Managed Hosting services, in which case you can simply ask our expert system administrators to install Nagios on CentOS 7 for you, using the LEMP stack or any other web hosting stack of your choice. They are available 24×7 and will take care of your request immediately.
Of course, you don’t have to install Nagios on CentOS 7, if you use one of our Managed Hosting services, in which case you can simply ask our expert system administrators to install Nagios on CentOS 7 for you, using the LEMP stack or any other web hosting stack of your choice. They are available 24×7 and will take care of your request immediately.
PS. If you liked this post, on how to install Nagios on CentOS 7, please share it with your friends on the social networks using the buttons below or simply leave a comment in the comments section. Thanks.