How to Install Pluck CMS on Ubuntu 18.04 LTS
Pluck is a free, open source, small and simple content management system that can be used to manage your own website without knowledge of programming languages. It is written in PHP language and does not use a database to store its data. It comes with lots of modules that allow us to integrate custom functionality into the system.
In this tutorial, we will learn to install Pluck CMS on Ubuntu 18.04 LTS (Bionic Beaver).
Requirements
- A server running Ubuntu 18.04.
- A non-root user with sudo privileges.
Install Apache and PHP
First, install Apache web server with the following command:
sudo apt-get install apache2 -y
Next, you will need to add Ondrej repository to your system. You can add it with the following command:
sudo add-apt-repository --yes ppa:ondrej/php
Next, update the system and install PHP with all the required libraries with the following command:
sudo apt-get update -y
sudo apt-get install php7.2 libapache2-mod-php7.2 php7.2-common php7.2-mysql php7.2-curl php7.2-opcache -y
Once all the packages are installed, start Apache service and enable it to start on boot time with the following command:
sudo systemctl start apache2
sudo systemctl enable apache2
Install Pluck CMS
First, download the latest version of Pluck CMS with the following command:
wget https://codeload.github.com/pluck-cms/pluck/zip/master
Once the download is completed, unzip the downloaded file with the following command:
mv master master.zip
unzip master.zip
Next, copy the extracted directory to the Apache root directory with the following command:
sudo cp -r pluck-master /var/www/html/pluck
Next, give proper permissions to the pluck directory:
sudo chown -R www-data:www-data /var/www/html/pluck/
sudo chmod -R 755 /var/www/html/pluck/
Configure Apache for Pluck CMS
First, you will need to create an Apache virtual host file for Pluck CMS. You can create it with the following command:
sudo nano /etc/apache2/sites-available/pluck.conf
Add the following lines:
<VirtualHost *:80>
     ServerAdmin [email protected]
     DocumentRoot /var/www/html/pluck
     ServerName example.com

     <Directory /var/www/html/pluck/>
          Options FollowSymlinks
          AllowOverride All
	  Order allow,deny
	  allow from all
     </Directory>

     ErrorLog ${APACHE_LOG_DIR}/pluck_error.log
     CustomLog ${APACHE_LOG_DIR}/pluck_access.log combined

</VirtualHost>
Save the file, then enable apache virtual host file with the following command:
sudo a2ensite pluck
Finally, restart Apache service to apply the changes:
sudo systemctl restart apache2
Access Pluck CMS
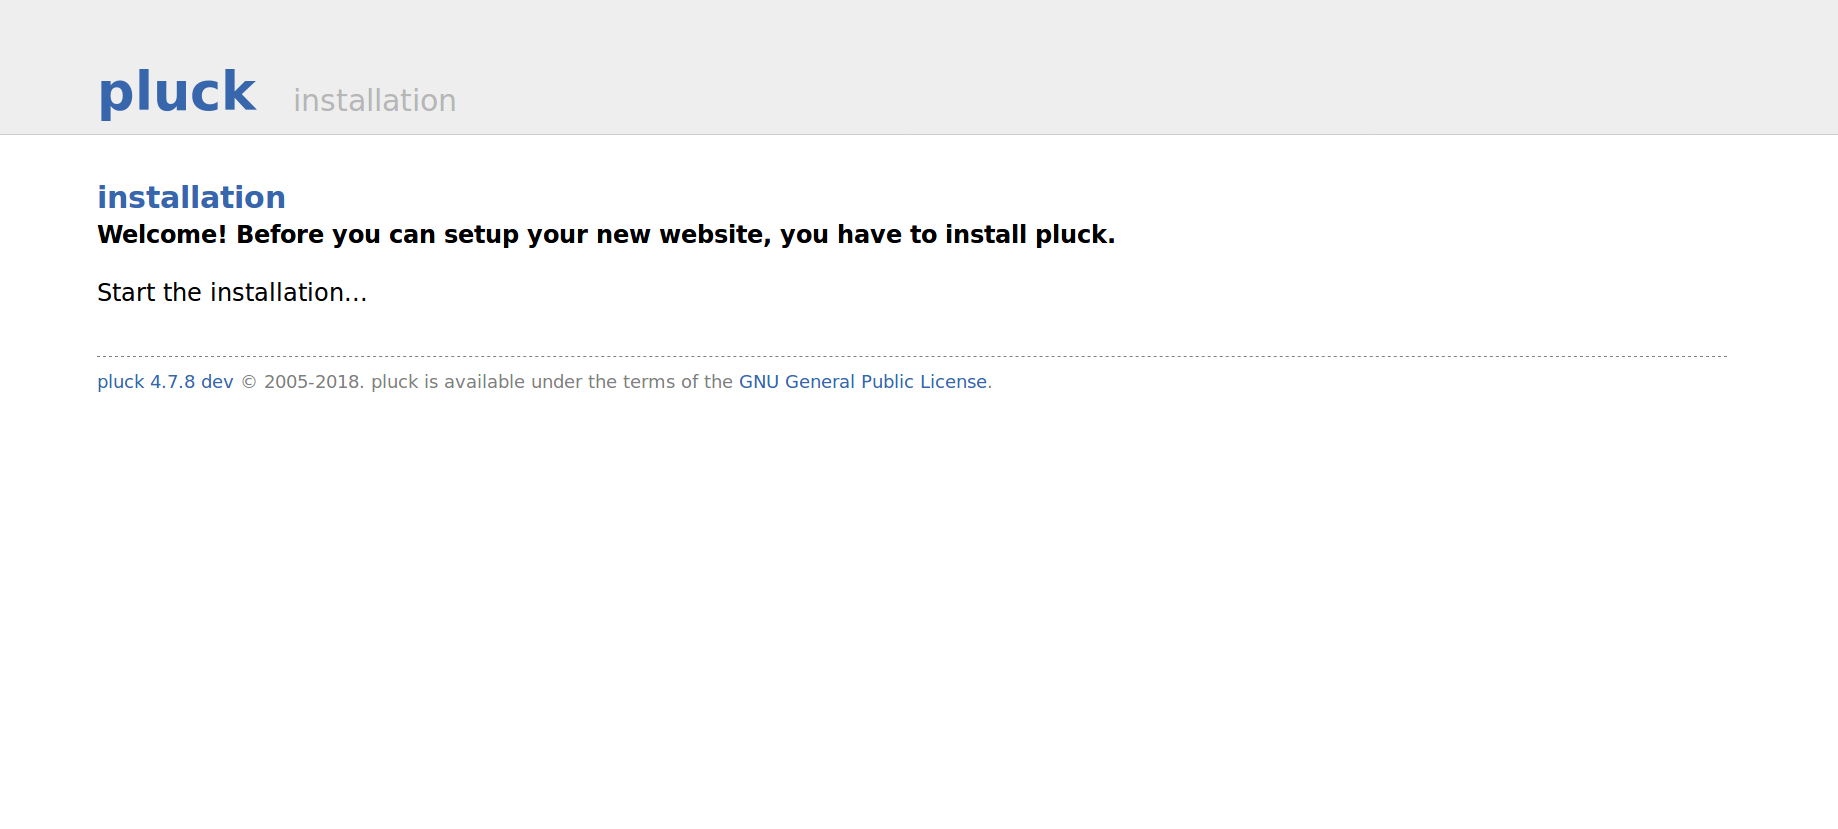
Open your web browser and type the URL http://example.com. You will be redirected to the following page:
Now, click on the start the installation button. You should see the following page:
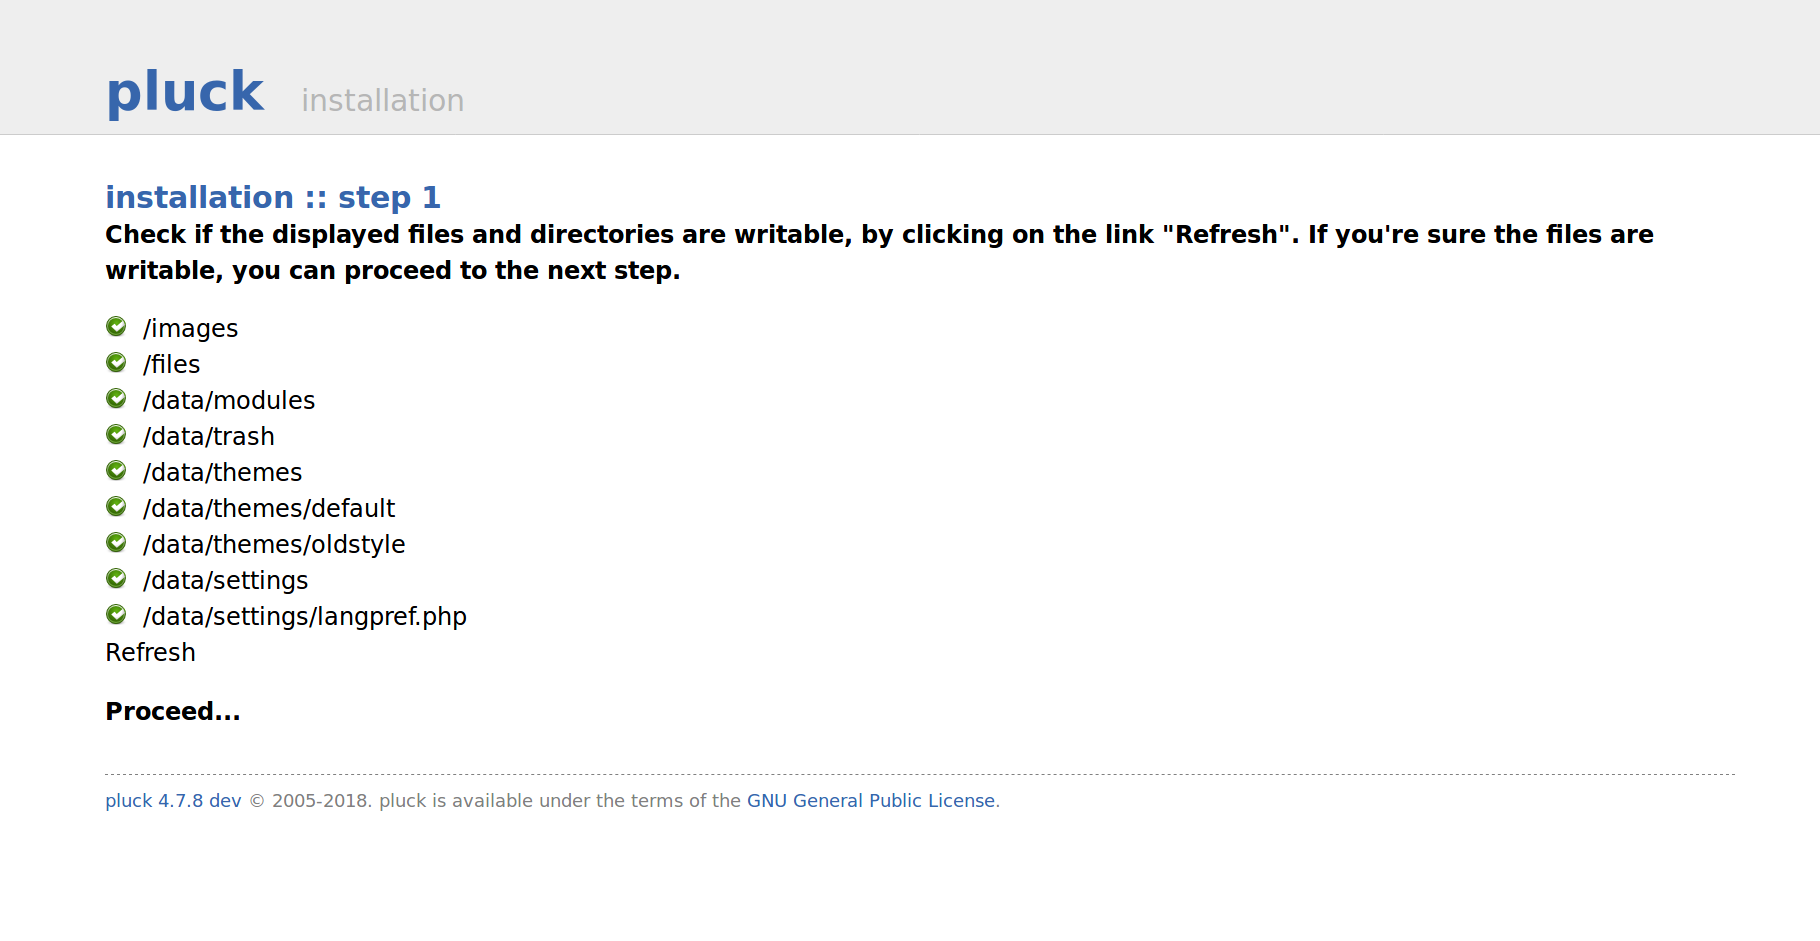
Now, check if the displayed files and directories are writable, then click on the Proceed button. You should see the following page:
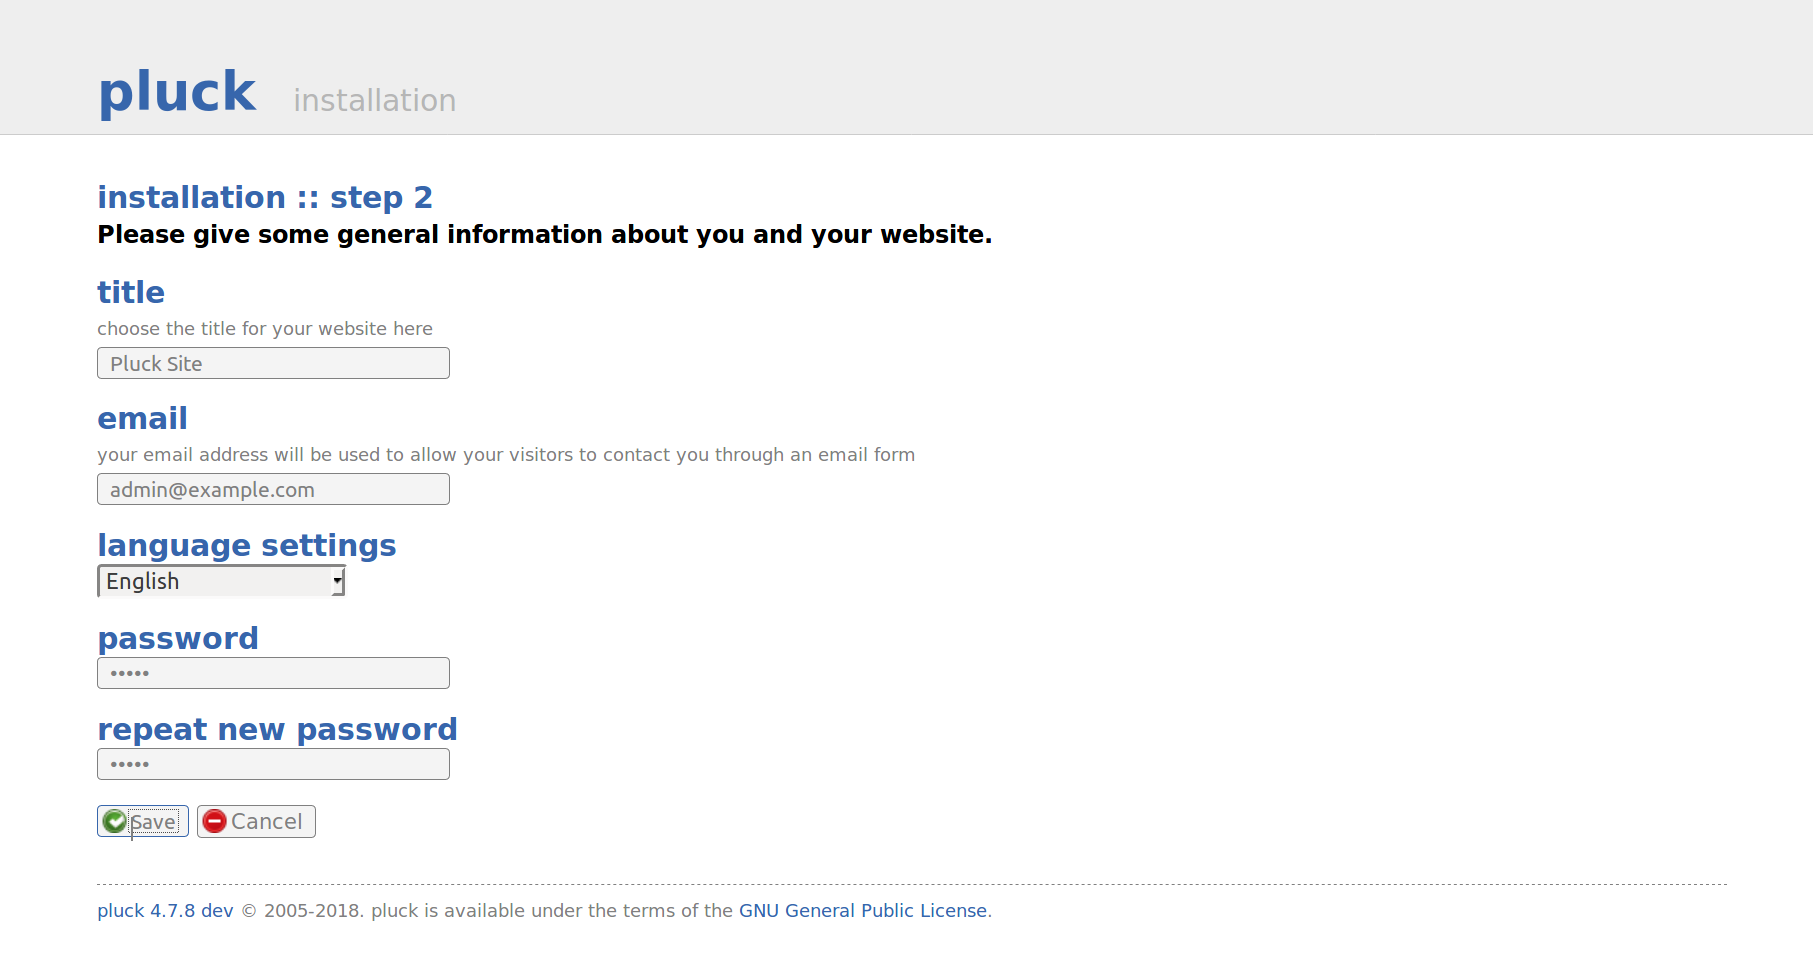
Now, provide your site title, email, and password, then click on the Save button. You should see the following page:
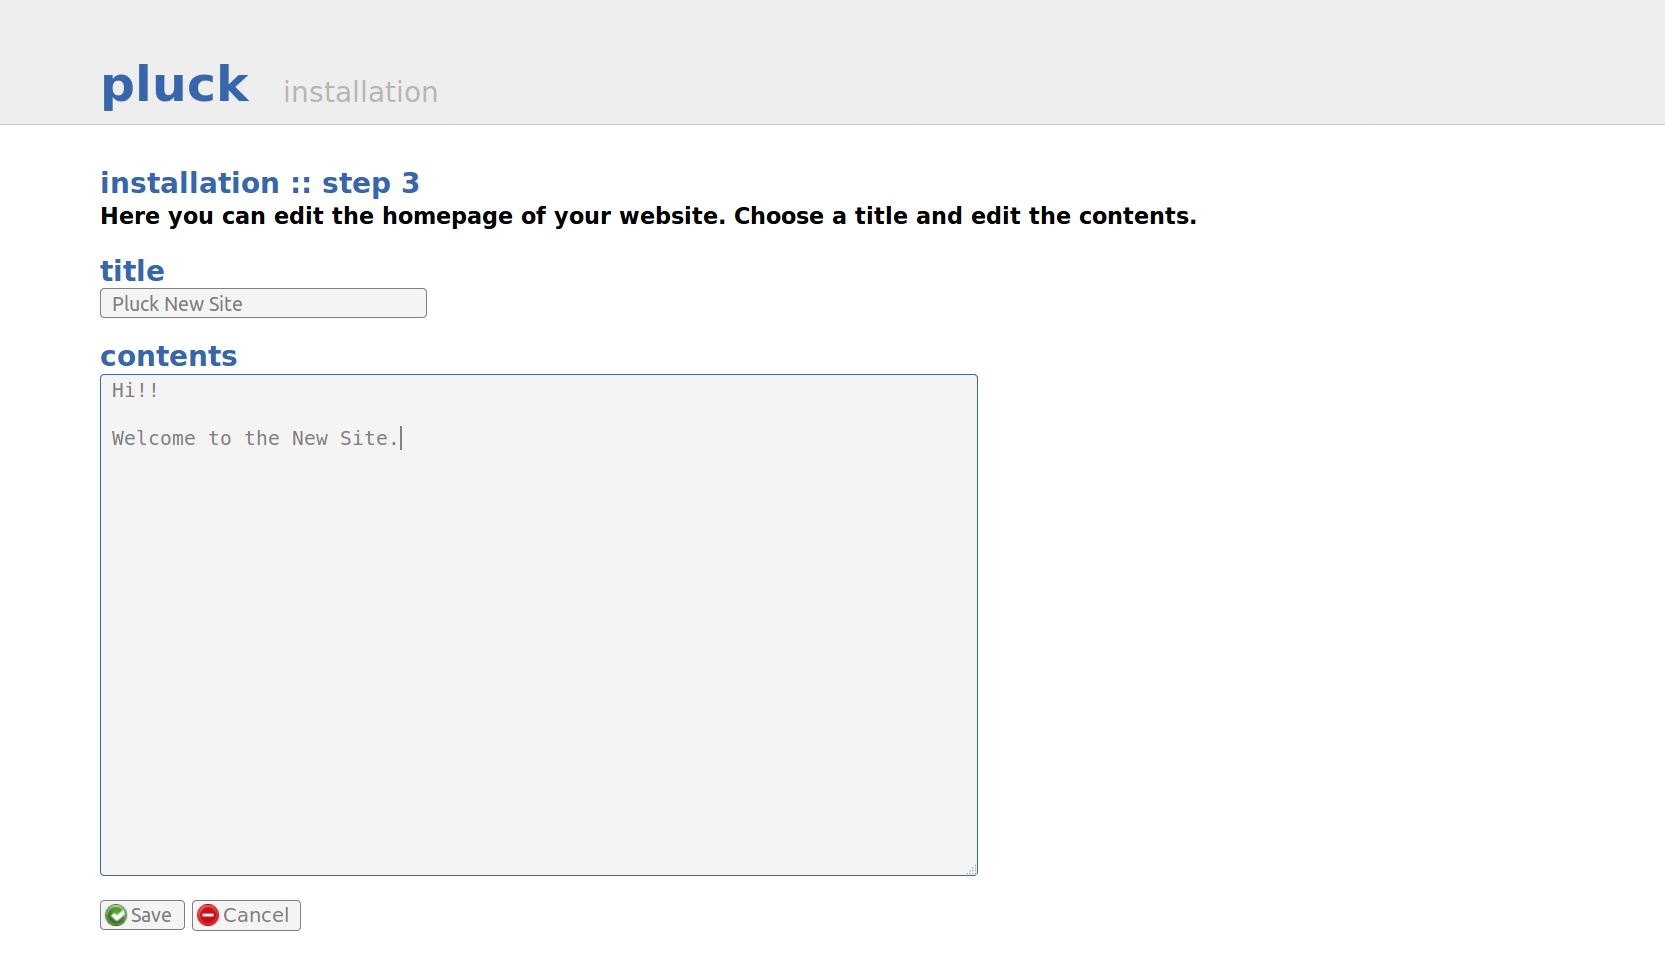
Now, provide your homepage title and description, then click on the Save button. You should see the following page:
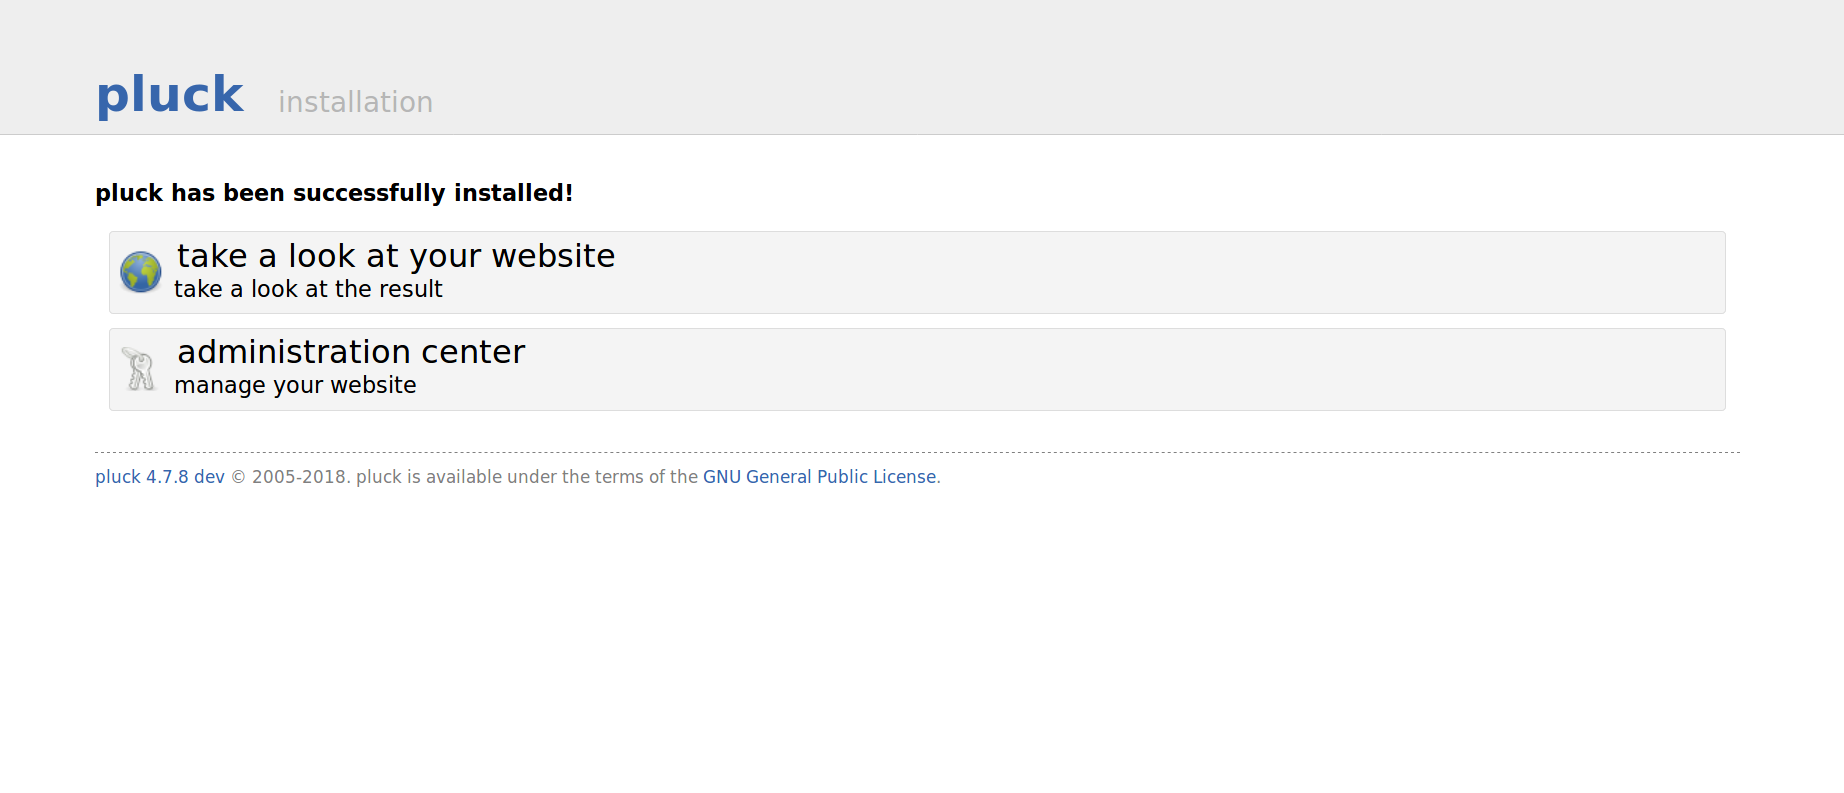
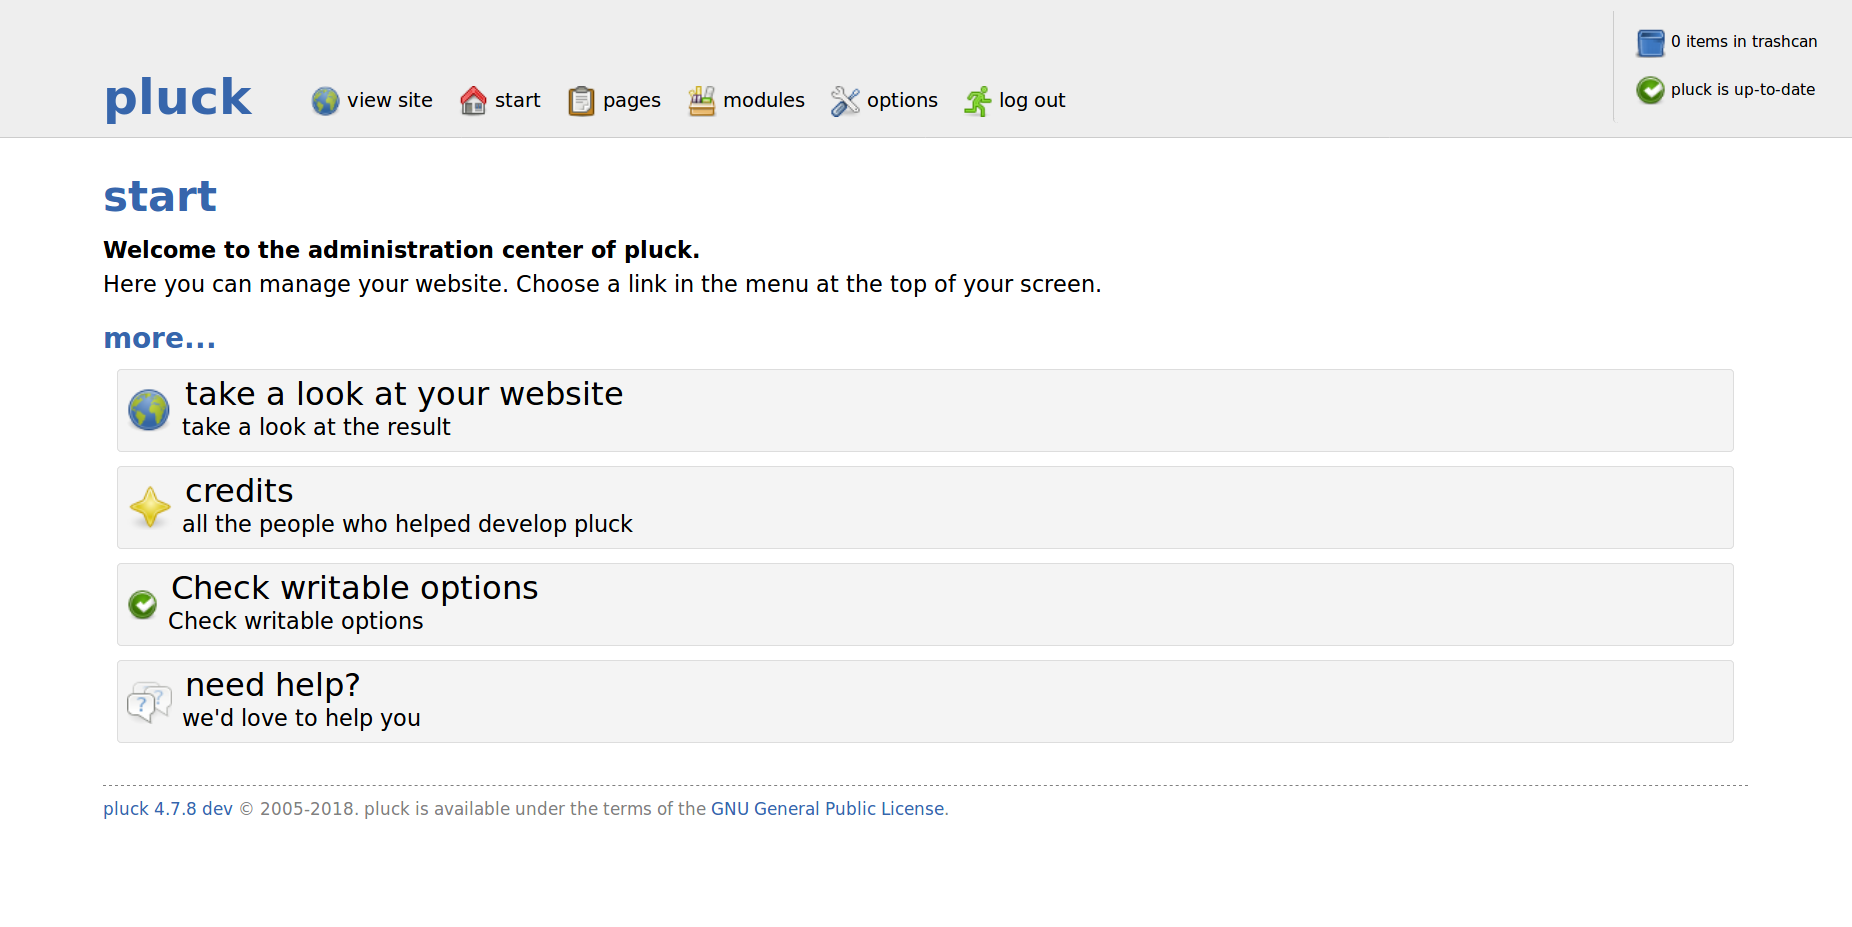
Now, click on manage your website button. You should see the following page:
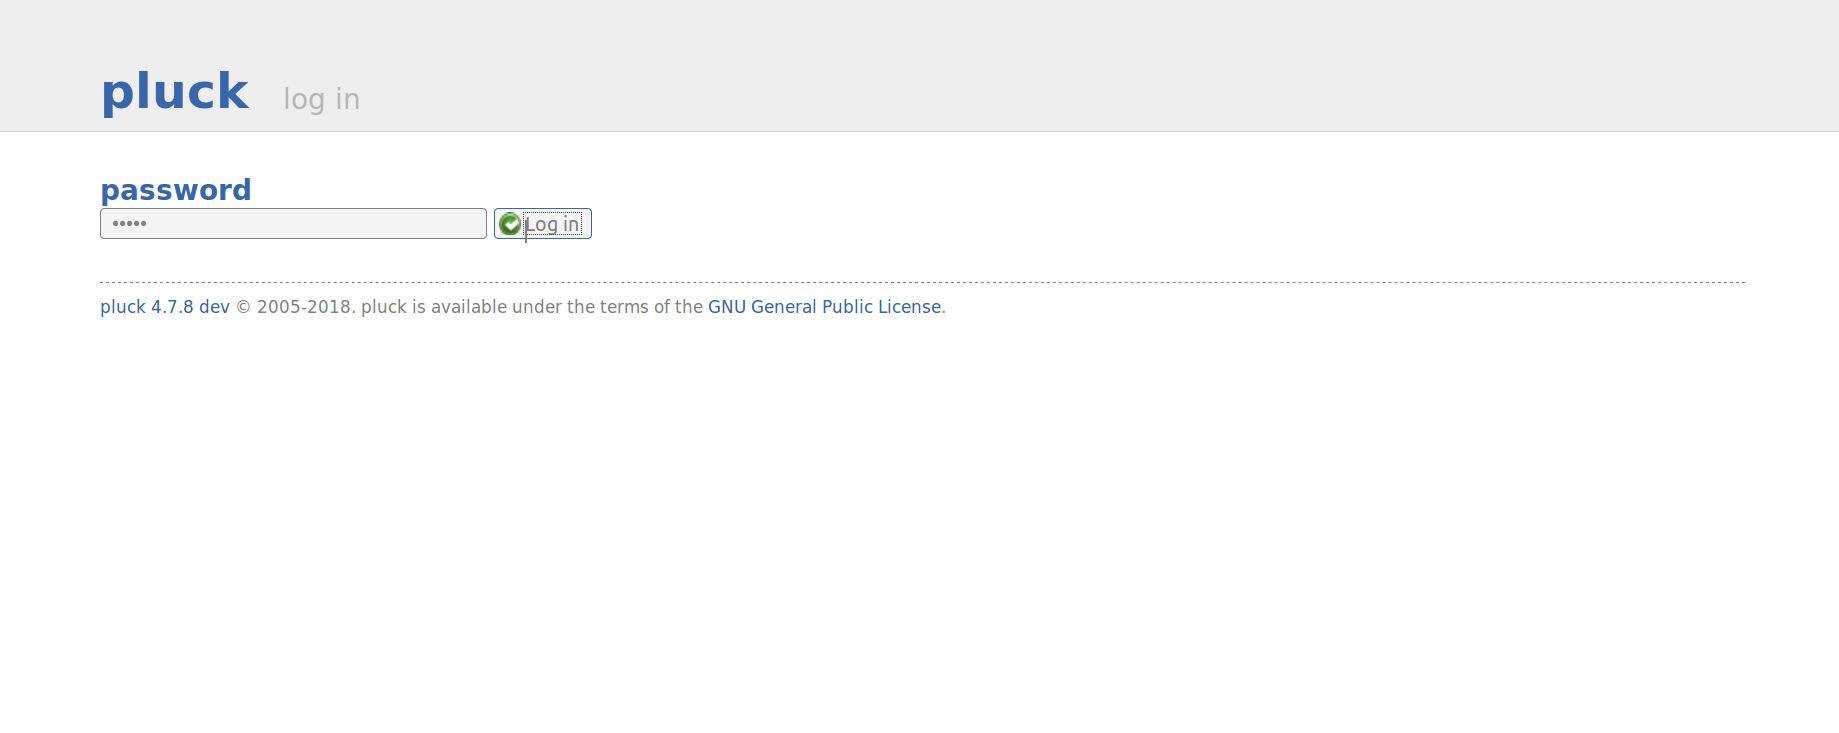
Now, provide your site password, then click on the Log In button. You should see the following page: